What I ate in Dominican Republic

I’m back from an amazing week in Dominican Republic with my family and my sister’s family. We stayed at Dreams Royal Beach, an all-inclusive resort in Punta Cana, and when I was posting stories from my trip on Instagram the most common question I had was “did you manage to find decent plant-based food?”

For context, as trained chef and someone who LOVES food, I don’t go to an all-inclusive resort with high-hopes or any expectation of a Michelin star culinary experience. These resorts prepare massive quantities of food for hundreds (if not thousands) of people on a daily basis, it’s simply not realistic to expect the BEST food when it’s being prepared in this way. When planning our family trips, our goal is to spend time together in a warm climate, with pools and beaches, away from our busy lives, and we don’t want worry about cooking, cleaning or laundry for a few days. If the food is decent, that’s a big bonus!

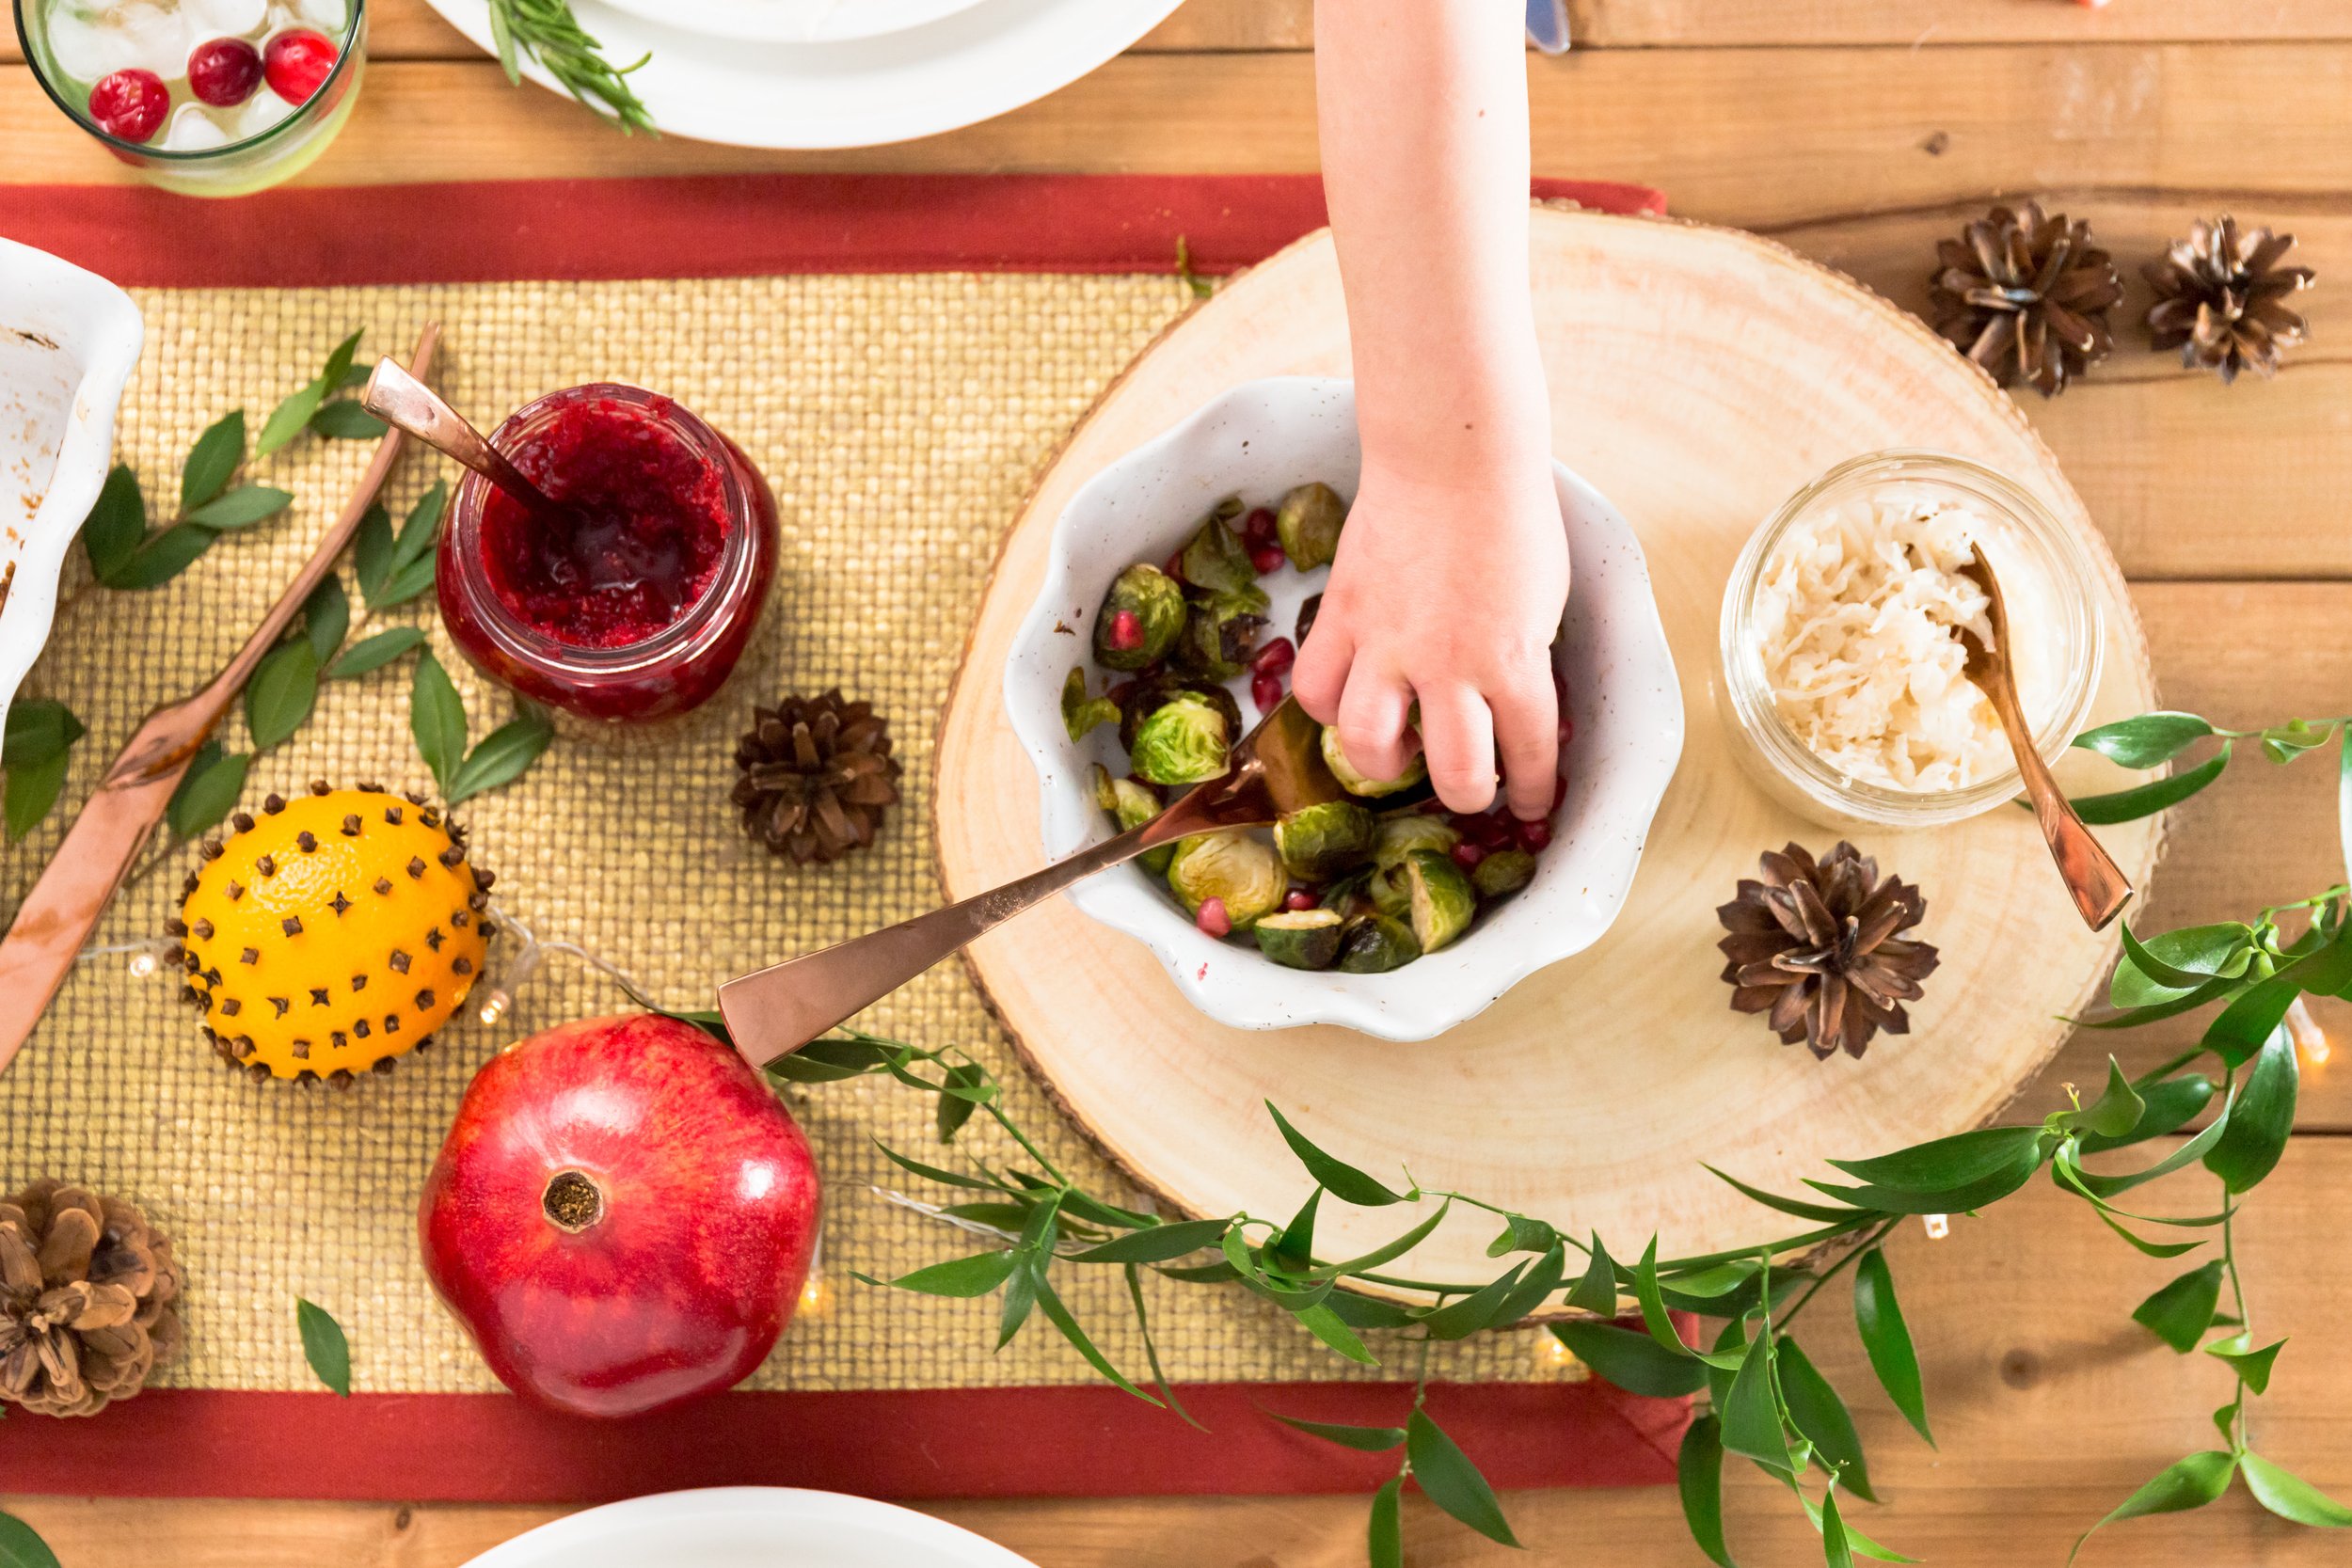
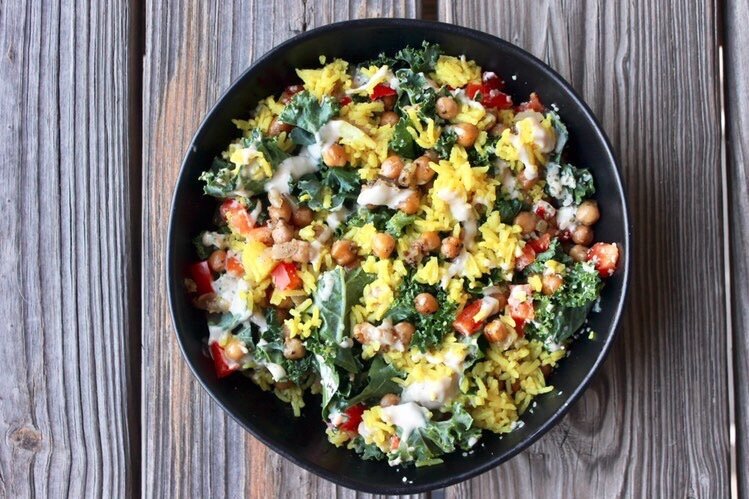
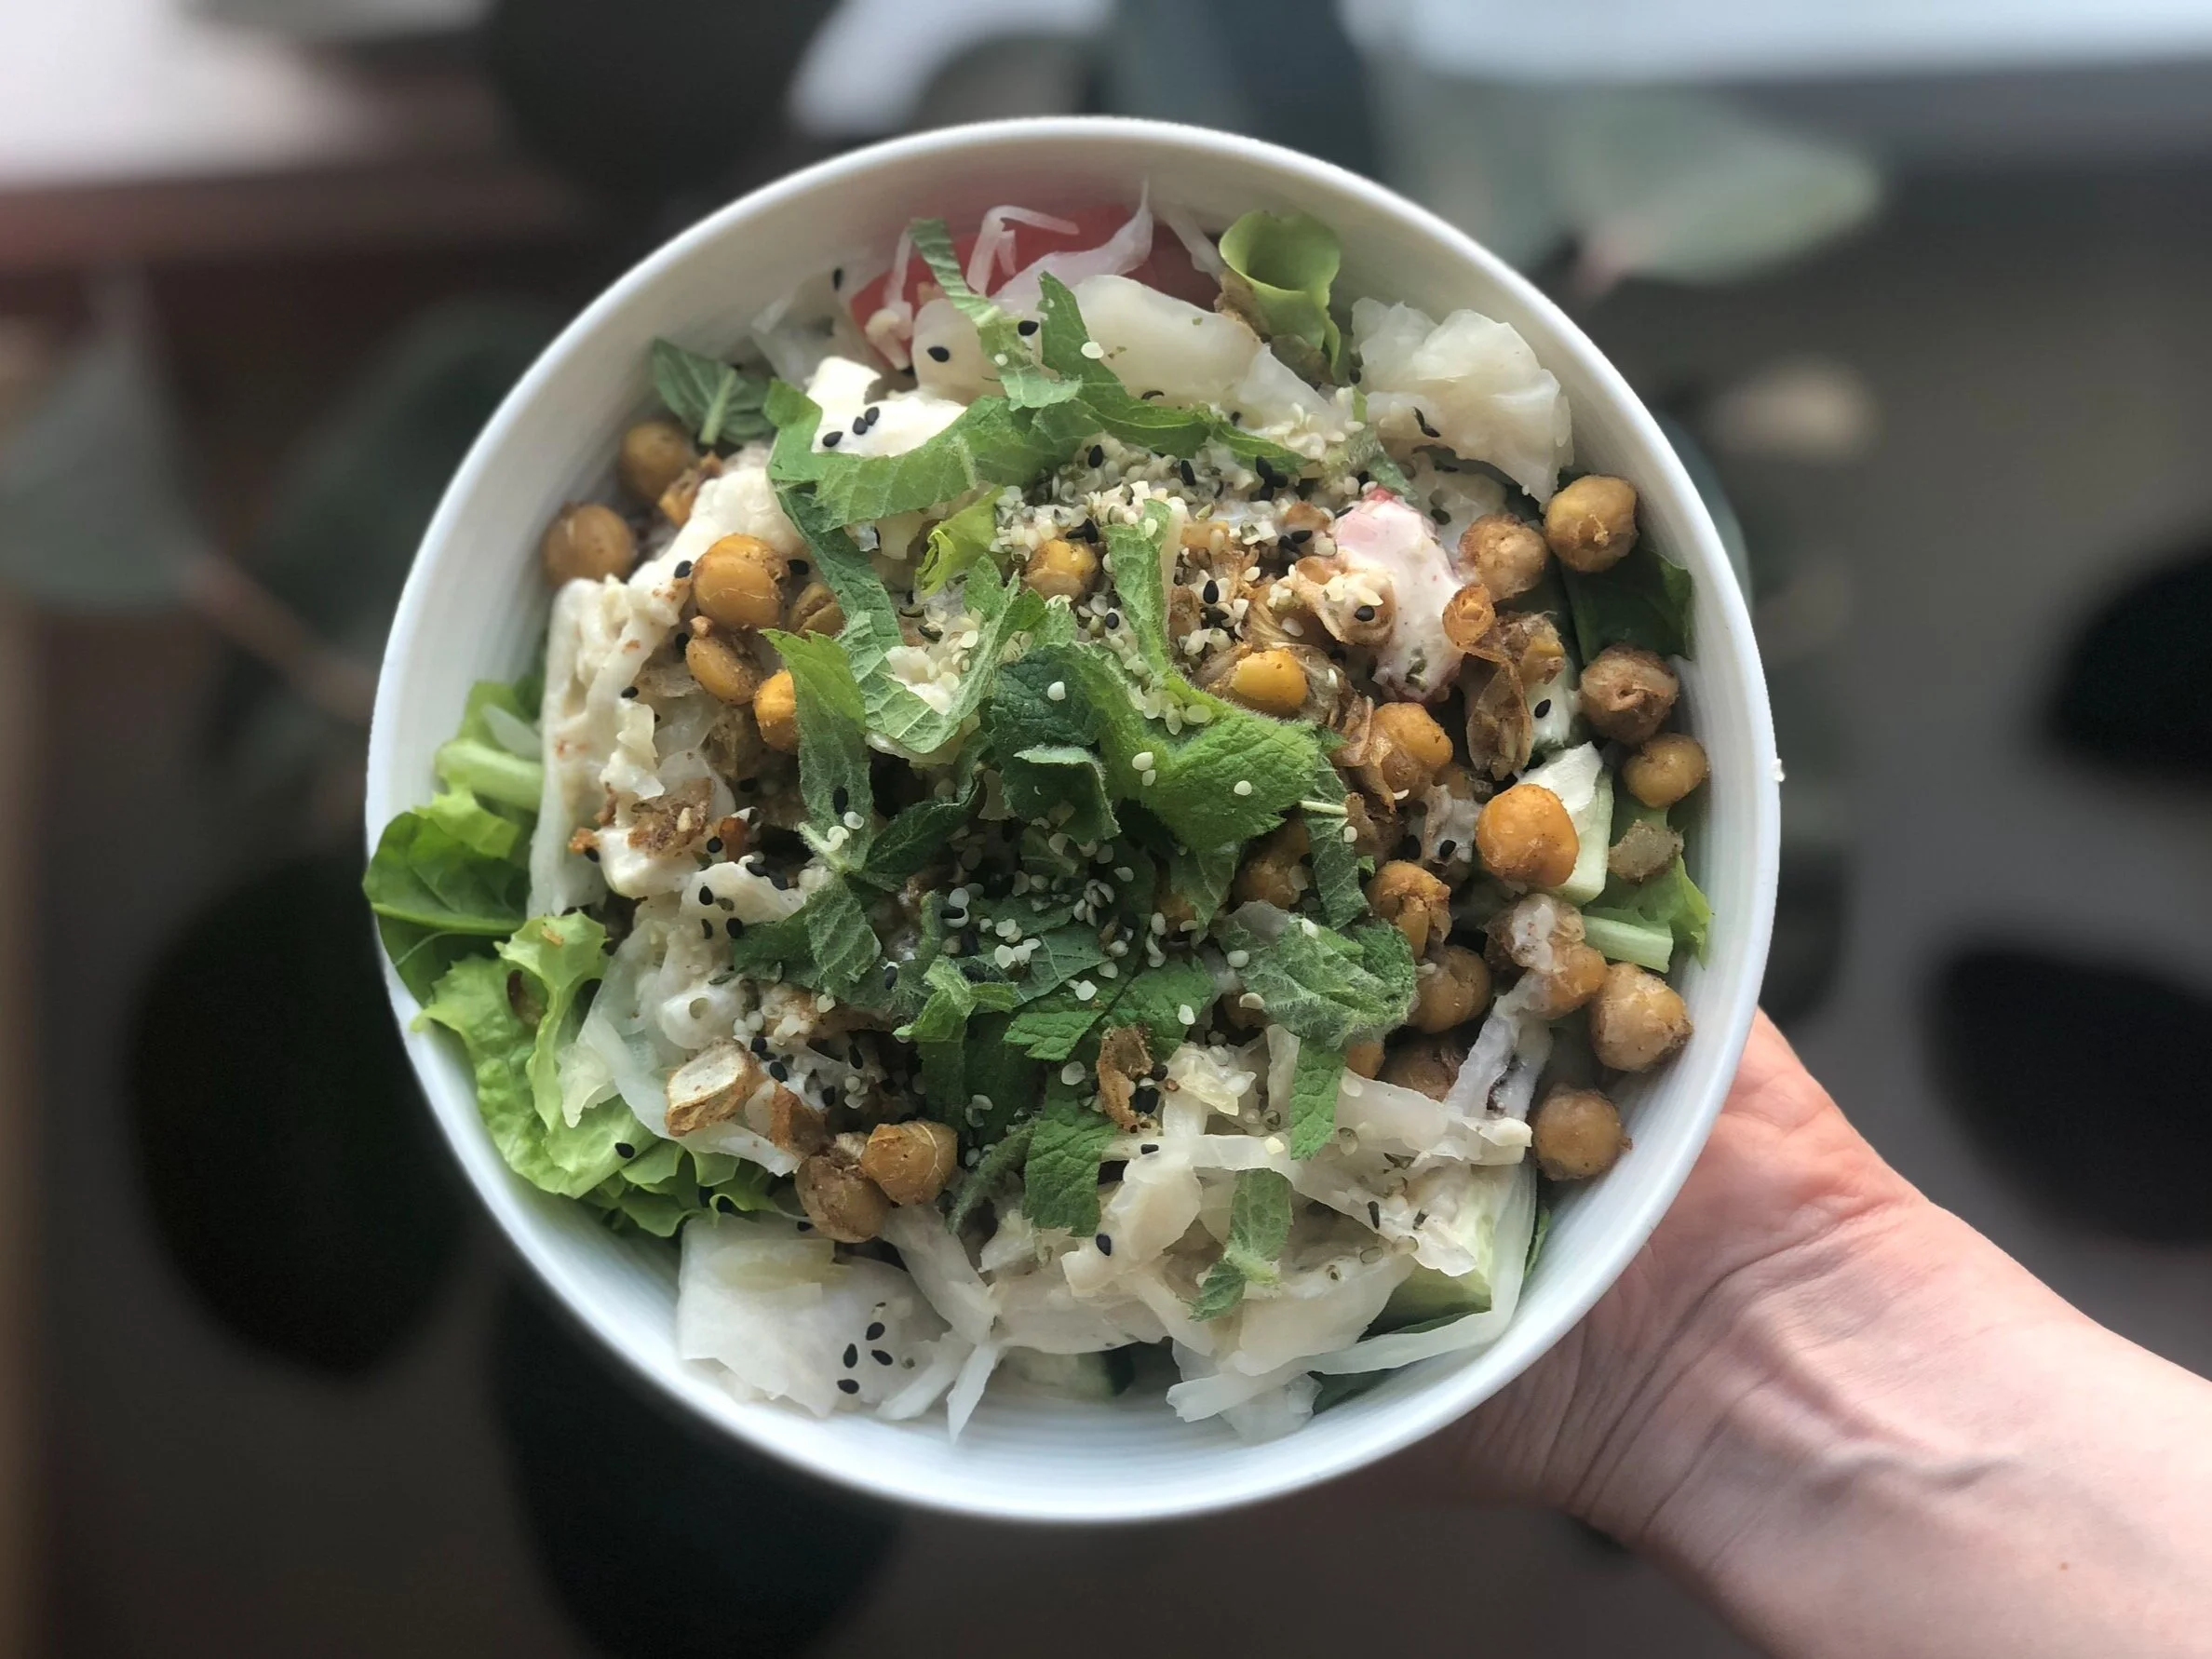
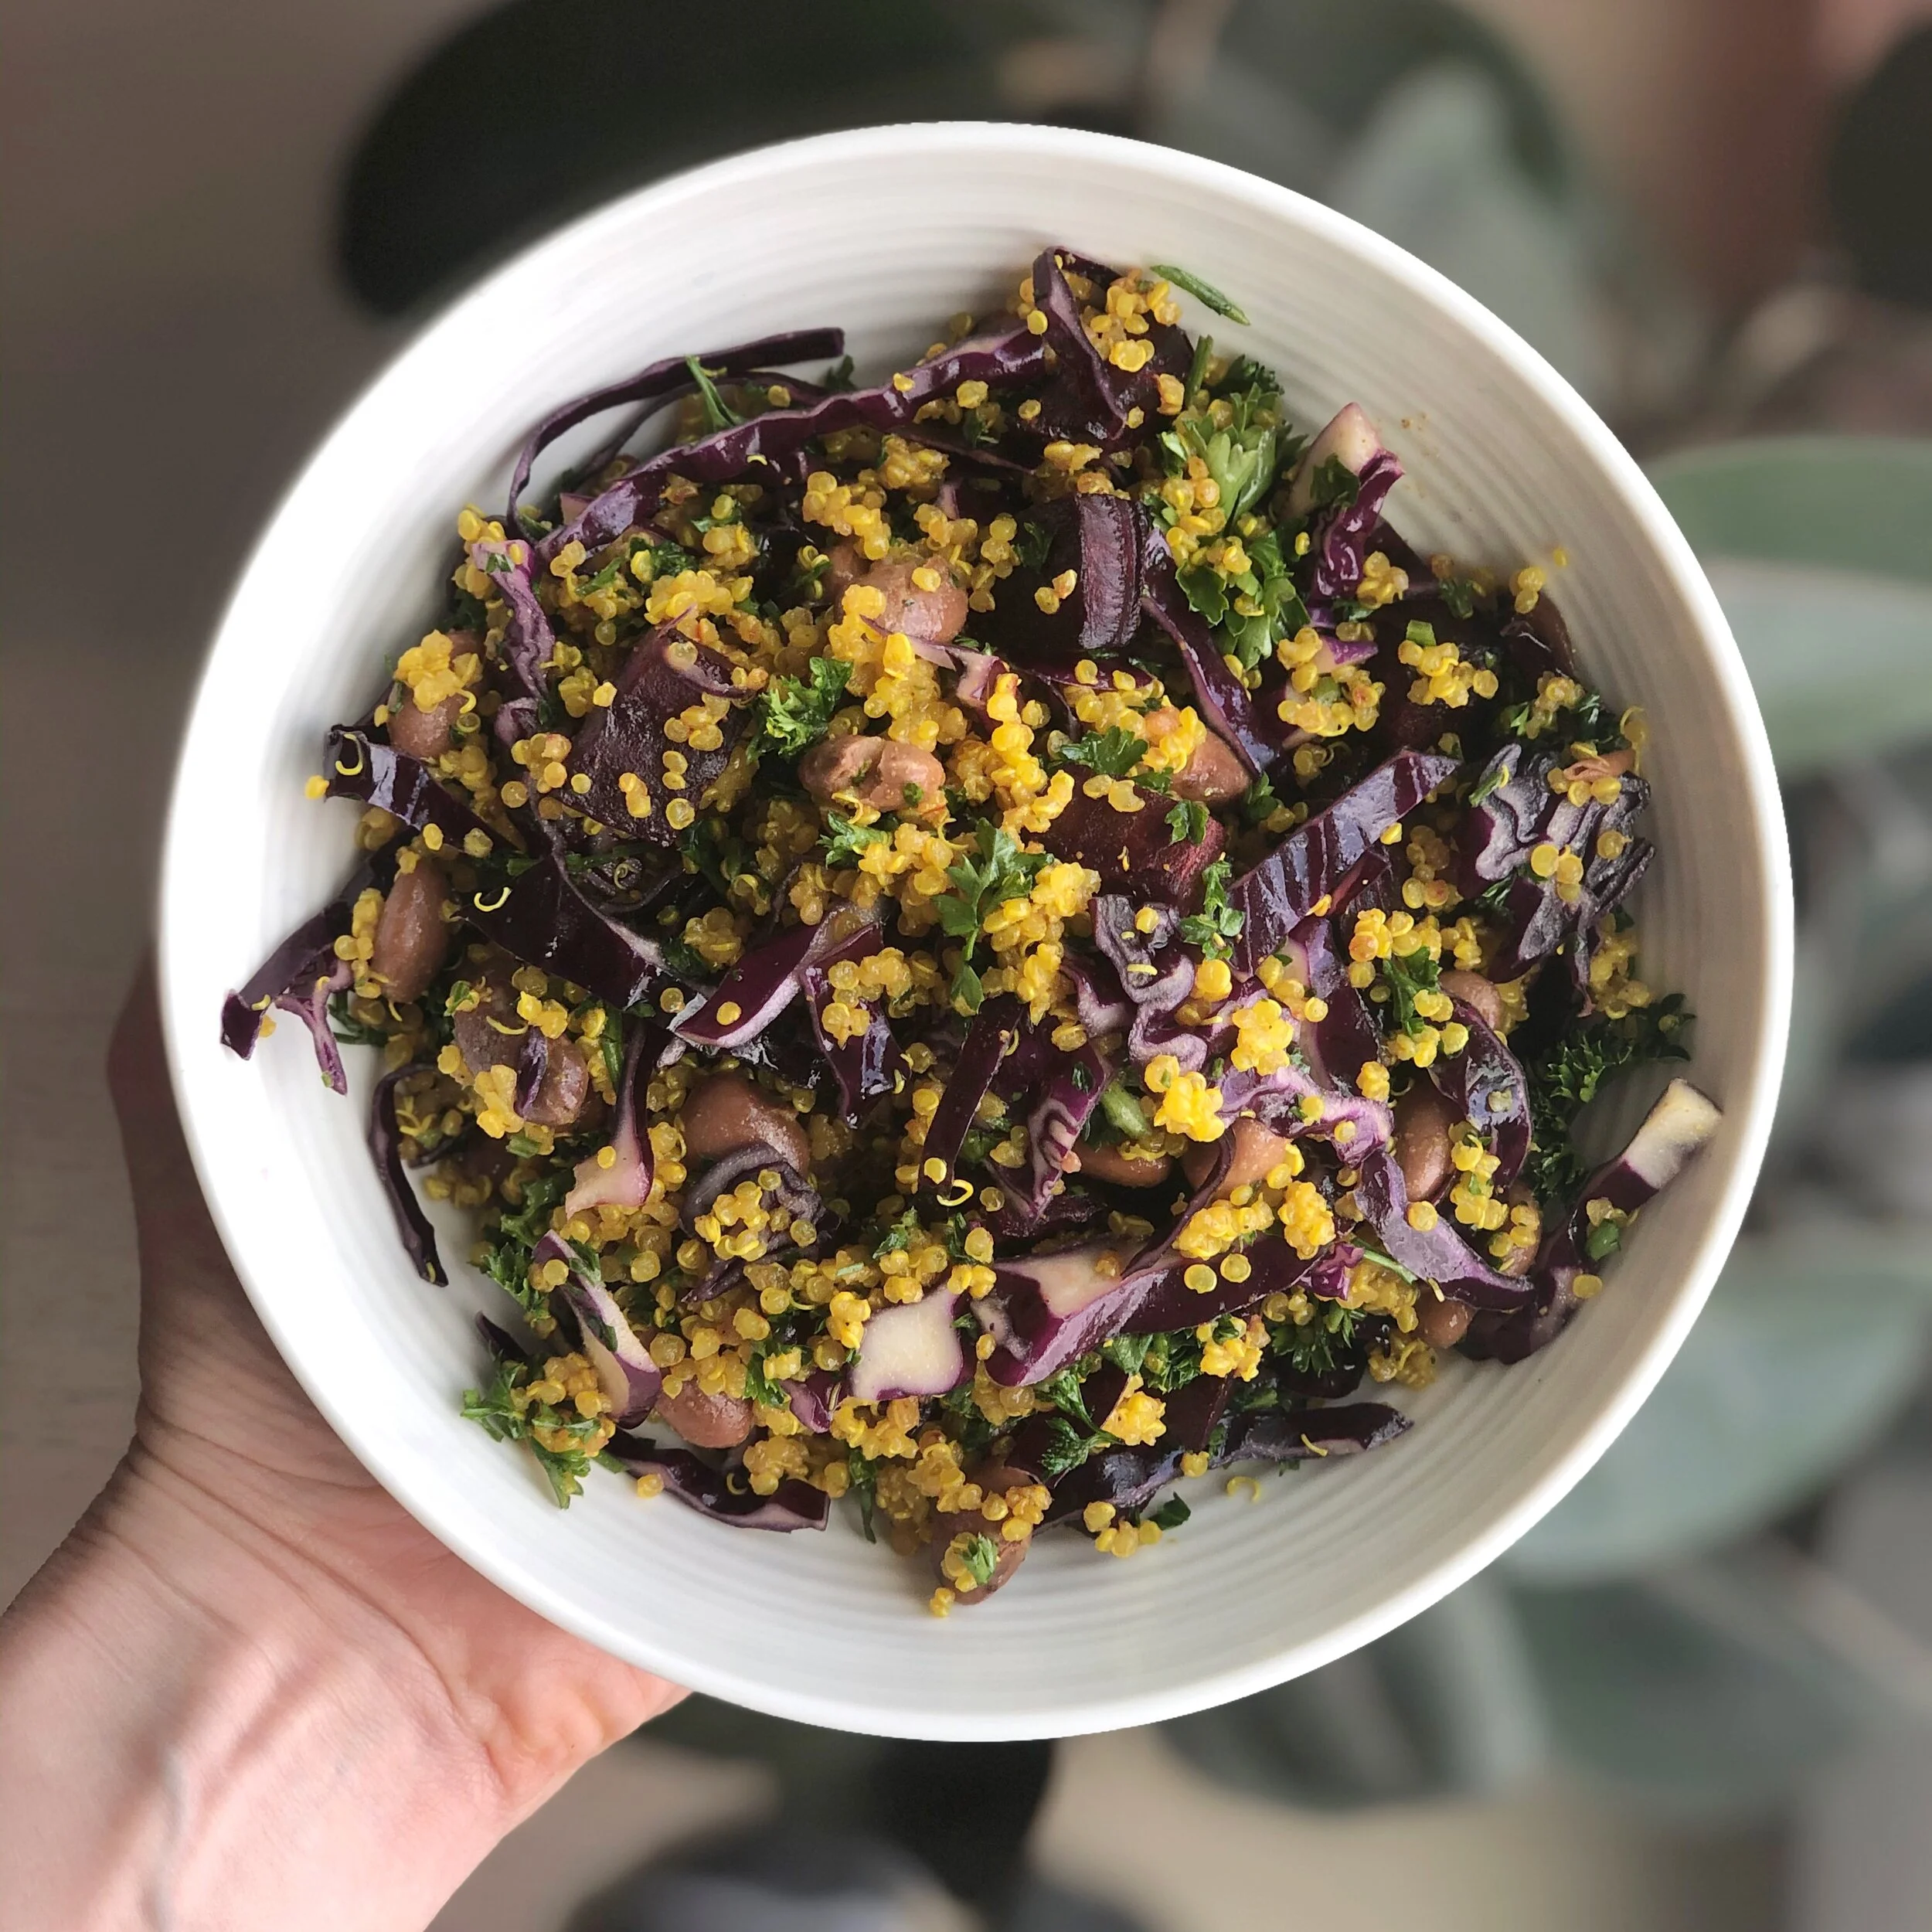
While in DR we didn't starve by any means, in fact we were able to fill our plates at practically every meal with plant-based fare. Typically, we’d have breakfast at the buffet, then lunch at the buffet again or at the little restaurant on the beach, and for dinner we’d try out one of the many restaurants. Below are a few examples of what I’d typically eat in a day:

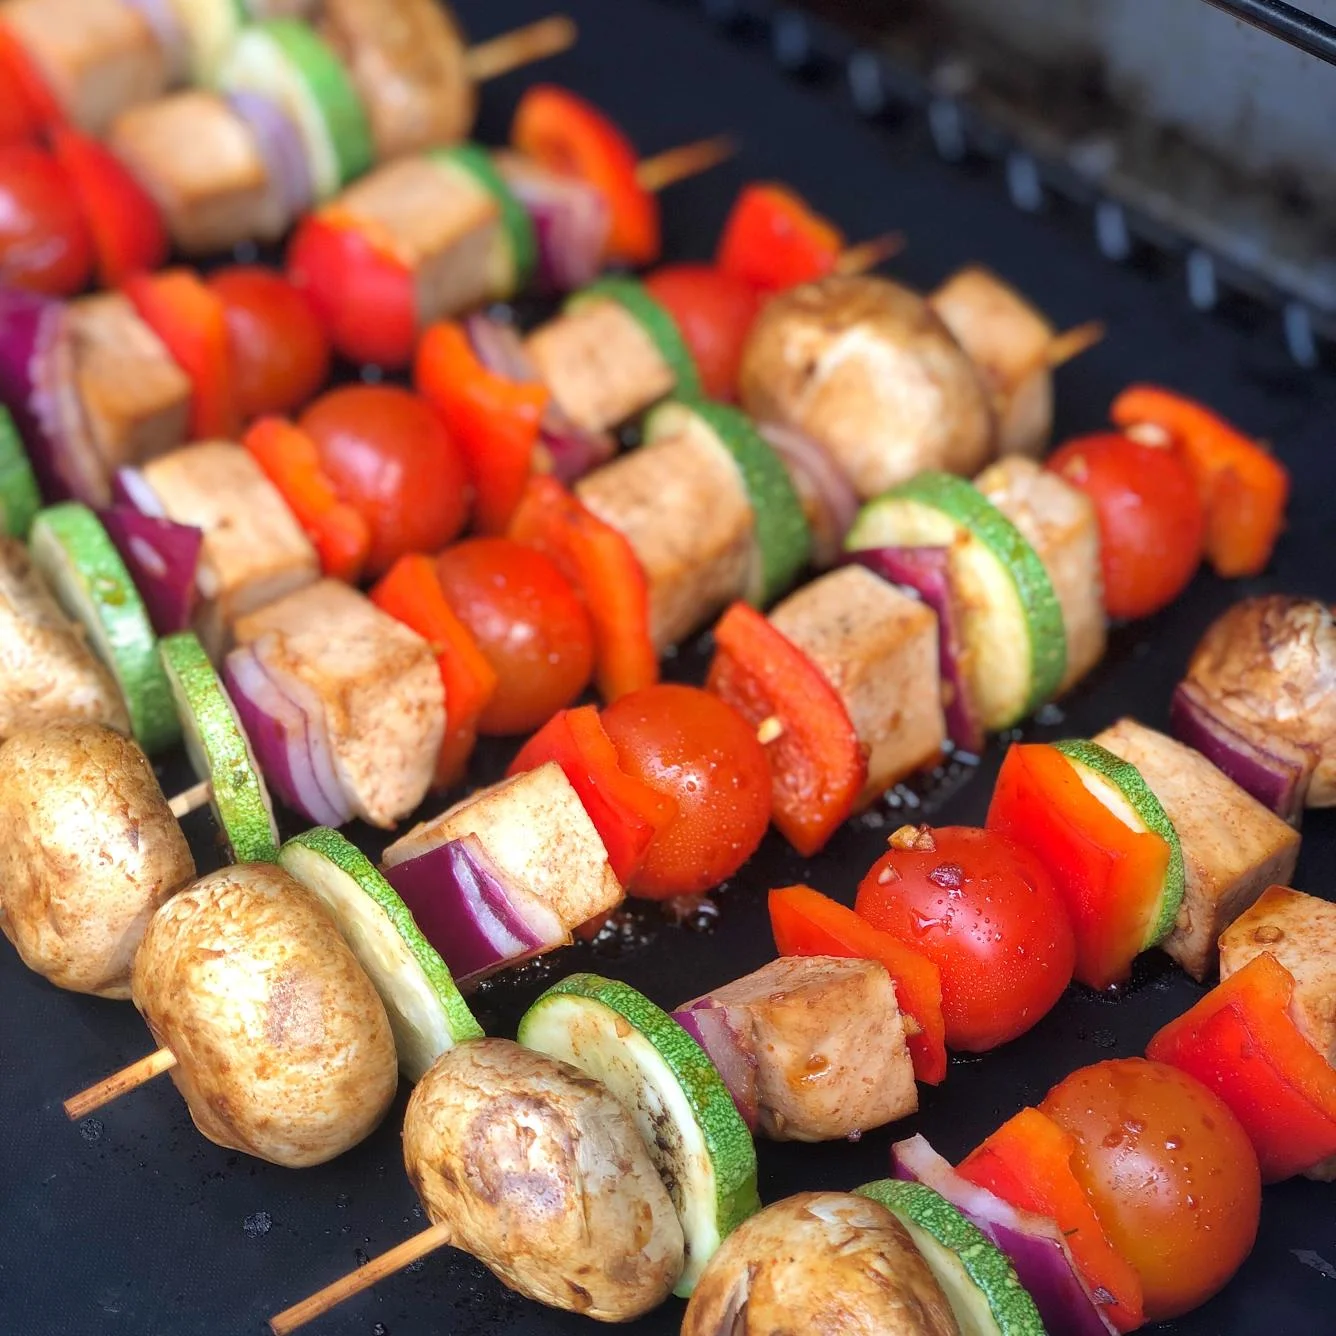
In the first photo you’ll see one of my favourite light breakfasts: muesli with soy milk and fresh fruit. I ate this many times over the course of the week, usually with a fresh fruit juice or green juice. Then in the next few photos you’ll see examples of what I might eat for breakfast, lunch, or dinner depending on the day. As you can see rice and beans are a staple. I was really into papaya and passion fruit this trip so I’d eat them at almost every meal.  We also found lots of stewed, roasted and sautéed vegetables to enjoy; particularly eggplant, peppers, mushrooms and potatoes (roasted potatoes and hash browns). Corn on the cob, plantains and yuca were common at the buffets as well. We’d fill up on fresh veggies from the salad bar, pickled jalapeños, and olives. The buffet sometimes had little stations with all the fixings for nachos or tacos with pickled onions, guacamole, salsa (pico and salsa verde), etc. One night we had veggie sushi and spring rolls at the buffet. We ate french fries a few times as they were available at the beach.  There was also a variety of non-dairy milks (soy, oat, almond and rice) at the buffet, coffee shop and restaurants, and most vegetarian/vegan items were labeled as such.

All in all, the food was okay. I really loved the fresh fruit and Dominican coffee — those were truly the highlights for me! After a week away, I was definitely ready to come back to my own home cooking.

If you plan to go to an all-inclusive resort in the near future, here are my tips to optimize plant-based eating:

  • Research Vegan-Friendly Resorts: I did a lot of research on TripAdvisor and in Facebook groups to find out what was available at the resort prior to booking. I knew that the resort was a bit smaller and that the food options would be somewhat limited, so my expectations were realistic going into it.

  • Explore Local Cuisine: While Dominican cuisine is known for its emphasis on meat and seafood, there are still vegan-friendly options available. If you plan to visit the DR, look for dishes like rice and beans (without lard or meat), tostones (fried plantains), yuca, salads, and sautéed and stewed veggies. No matter where you travel, you’ll find certain elements of the local cuisine that is, or can be easily modified to be, plant-based.

  • Communicate Dietary Restrictions: When dining out, communicate your dietary restrictions clearly to the restaurant staff. They may be able to accommodate your needs or suggest suitable dishes. We did find that there was a language barrier at times so I’m glad I knew how to say “sin carne" (no meat) and “sin queso" (no cheese) in Spanish.  That helped a lot! However, saying "vegano" or "vegana"  (meaning vegan in Spanish) doesn’t always fly as people have different interpretations of what that means.

  • Check Menus in Advance: Before visiting a restaurant, check their menu online or call ahead to inquire about vegan options.  For the buffet at our resort the menu changed daily so we couldn’t really plan ahead. However, we went to several of the resort restaurants and we used the resort’s app to check the menus in advance. Luckily all the restaurants had one or more decent vegan options!

By being proactive and resourceful can go a long way in helping you enjoy plant-based eating when you travel. In my research I’ve come across quite a few vegan friendly friendly resorts and accommodations in all corners of the globe.

We’re thinking of doing something different next year. Perhaps a small family friendly resort or accommodation in Mexico or Costa Rica. I’d love stay close to a beach, have access to a pool, and be able to enjoy delicious, healthy plant-based meals either onsite or at nearby restaurants or grocery stores. If you know of anything that fits my requirements, please share below in the comments.

Deep dive into meal planning with the Shorkey sisters [Podcast interview]

I was recently a guest on the Jacked on the Beanstalk podcast. I’ve been on the show in the past to speak about meal planning and it was a very popular episode, so I was invited back to have an even more in-depth conversation with hosts/sister duo Samantha and Sarah Shorkey. Sarah took to the mic the most during this episode as she is - in her own words - “completely clueless” and “overwhelmed” when it comes to cooking and meal planning for her family. During our conversation she asked me the hard-hitting questions about what I eat, recipe ideas for busy moms,  snack suggestions, and much more. 

I’m happy to say Sarah seemed visibly less stressed and more optimistic about meal planning after our chat. If you’re feeling stuck in a rut or overwhelmed about choosing recipes and meal planning, I hope this podcast can help you too! 

Listen to the episode HERE.  

Vermicelli Noodle Bowls 

If you’ve been a regular follower of my Instagram stories over the past few years you might’ve see that Dr. Kwadwo Kyeremanteng (aka @kwadcast), an ICU doctor at the Ottawa Hospital, invited me to be on his podcast Solving Healthcare back in 2020 to speak about the benefits of plant-based diets. While we have different views on food and nutrition, we had a wonderful discussion. You can listen to the podcast here.

Following our chat Dr. K asked me to host a 30 minute virtual class for his community. I taught the participants how to make a simple vermicelli noodle bowl with homemade peanut sauce. It's a cold dish and is great for showcasing fresh produce and herbs, plus it's vegan and gluten free! His community loved it so much that I shared the recipe on my Instagram in the summer of 2021, now I’m happy to finally be sharing it here on my blog (better late than never, right?). If you try it out, please let me know by sharing your photos and tagging me on social media. Enjoy!

Vermicelli Noodle Bowls

Yields 6 servings 

Ingredients: 

Salad base:
1 lb of vermicelli noodles, cooked according to package directions & rinsed under cold water
1 block of extra firm tofu, chopped into small dice sized pieces
1 medium sized cucumber, chopped into bite sized pieces 1 - 2 tomatoes, diced 2 - 3 green onion, thinly sliced 
3 - 4 cups of chopped greens of your choice (lettuce, spinach, mixed greens, etc are great) 
1 - 2 handfuls of cilantro, roughly chopped 
1 handful of mint, thinly sliced 1 - 2 limes, cut in wedges for garnish 
Hot sauce of your choice (Sriracha is my favourite, but any will do) 
Chopped roasted peanuts for garnish 

Peanut butter sauce:
1/3 cup soy sauce or tamari
3 tablespoons smooth natural peanut butter
2 tablespoon maple syrup
1 tablespoon rice vinegar or apple cider vinegar
2 teaspoons miso paste
2 teaspoons sesame oil, optional 
1 - 2 cloves garlic, grated or finely minced 
Black pepper to taste

Directions:

To make the salad: combine the salad ingredients from the vermicelli noodles to the mint in a large bowl. 

To make the peanut butter sauce: combine all of the sauce ingredients in a bowl or jar and mix rigorously until combined. It's a thick sauce. Store in an airtight container in the fridge for up to 10 days. Note: I usually make double of the sauce because it’s so good! 

To assemble the salad: serve portions of the salad into large soup bowls and top with 2 - 3 tablespoons of the sauce per serving. Add hot sauce and squeeze over fresh lime and a sprinkling of peanuts. Mix everything together in your bowl, taste and add more sauce and toppings if needed. Enjoy immediately!

If you enjoyed this recipe, my friend Samantha Shorkey and I have opened registration to our fitness and nutrition program called “Fit & Healthy Over 40”. Because life is hectic and we know it’s hard to get (and stay) on track when it comes to fitness and food goals, we put our heads together to come up with a plan for you. During our 4 week program that starts on April, we’ll help you instil solid routines through weekly guided workouts, coaching, community, and cooking classes — all plant-based, of course. Do you need structure and accountability to actually make changes in your life? We are here to support you! To learn more visit our program page or send me an email.

Plant-Based Sources of Iron

If you’re an athlete, woman, vegan or vegetarian, you’re at higher risk of iron deficiency. As you probably know, low iron can lead to anemia, fatigue, weakness, poor circulation, headaches, and lots of other not-so-fun side effects.

As a vegan for over a decade, I have my iron tested every year or so, and luckily I haven’t struggled with this issue (except for slightly low iron during pregnancy). That said, I have taken measures to ensure that I incorporate iron daily in some way, shape or form. Below I’m going to share a few of my favourite plant-based ways to increase iron consumption. 

Legumes:
Beans, lentils, and chickpeas are not only high in protein and fiber but also rich in iron. These versatile legumes can be included in a variety of dishes, such as soups, stews, and salads. By incorporating legumes into your diet, you not only increase your iron intake but also benefit from other essential nutrients like folate and magnesium. One of my favourite lentil recipes is called Mujadara (Mujaddara) which is a Middle Eastern dish featuring lentils, rice, and caramelized onions. You can find this recipe and many others on my recipe index.

Quinoa:
This nutrient-dense, gluten-free pseudo-cereal (aka a seed that are similar to grains) that contains a significant amount of iron. It stands out as a complete protein source, making it an ideal choice for those looking to maintain a balanced plant-based diet. Replace traditional grains with quinoa in salads, bowls, or as a side dish to add a nutritional punch to your meals. This is my favourite way to cook quinoa.

Nuts and Seeds:
Almonds, pistachios, pumpkin seeds, and sunflower seeds, are not only delicious but also packed with iron. These make for convenient snacks or can be sprinkled on top of yogurt, oatmeal or salads. Of course, don’t forget about nut butters, such as almond or sunflower seed butter, which make a nice alternative to peanut butter.

Tofu, Tempeh & Edamame:
Soy-based products like tofu, tempeh and edamame are rich in iron and provide a versatile base for various dishes. Tofu can be used in scrambles, stir-fries, soups, or on skewers, while tempeh can be grilled, sautéed, or transformed into meaty pasta sauces. I make a delicious Green Power Bowl featuring edamame, but I also like eating them lightly steamed with a bit of salt.

Leafy Greens:
Spinach, kale, collard greens, swiss chard, and beet greens are good sources of iron. I often speak with clients about incorporating greens into soups, smoothies and stews, but to be honest, I also truly enjoy a big ol' bowl of sautéed garlicky greens.

Fortified Foods: 
Many plant-based products, such as certain breakfast cereals, plant-based milk (like fortified almond or soy milk), and nutritional yeast, are often fortified with iron. Incorporating these fortified foods into your diet can be an easy way to ensure you meet your daily iron requirements. Look for the “Nutrition Facts” label on cans, cartons, or boxes to find % Daily Value (DV) of iron. Ten to 15% is generally considered a good source of iron.

Cast Iron Cookware:
Cooking with cast iron cookware can contribute to your iron intake. When you cook acidic or moisture-rich foods in cast iron, a small amount of iron leaches into the food. 

Lucky Iron Fish:
The Lucky Iron Fish is a small block of iron shaped like a fish that is used as a cooking tool to add iron to food and water. Simmer the fish along with soups or stews to up the iron content. I got my Iron Fish at Kardish Health Food Center here in Ottawa, but you can also buy them online.

A couple things to note: 

Vitamin C can enhance the absorption of non-heme iron (the type of iron found in plant-based foods) when consumed together in the same meal. Include fruits high in vitamin C, such as oranges, strawberries, or bell peppers, in meals containing iron-rich plant foods like beans, lentils, and spinach.

Some substances can hinder iron absorption. For example, calcium and tannins found in tea and coffee can reduce iron absorption. Try to avoid consuming these inhibitors with iron-rich meals.

If you’re looking to learn more about plant-based nutrition and wellness, I think you’d be a great candidate for the “Fit & Healthy Over 40” program that I’m hosting with vegan fitness pro, Sam Shorkey in April. Over the course of 4 weeks, we’ll help you instil solid routines through weekly guided workouts, coaching, community, and cooking classes — all plant-based, of course. If you need structure and accountability to actually make changes in your life, we are here to support you! To learn more visit our program page or send me an email.

Chickpeas are a good source of iron and can be made into a delicious filling for wraps or sandwiches. Check out my super popular Chickpea Salad Wraps.


Plant-Based Protein: Q & A with vegan fitness pro Sam Shorkey

If you’ve been following my career in the past decade or so, you’ve likely heard of my friend Samantha Shorkey. She’s personal trainer and bodybuilding coach. She is the first-ever vegan World Naturals bikini pro and creator of the blog and podcast “Jacked on the Beanstalk.” In 2020, we published the "Vegan Bodybuilder's Cookbook" which includes 100 high-protein and low carb vegan recipes and meal plans for plant-based bodybuilding. Like me, Sam is a mom, runs her own business, and is a huge advocate for health and wellness. I’m really excited to share this Q&A as I know protein intake is something that baffles plant-based eaters and omnivores alike. Grab a tea (or a protein shake) and enjoy our little chat.

Amy: You're a personal trainer and award winning vegan bodybuilder. So let's address the elephant in the room, where do you get your protein?
Sam:
Well I know a lot of vegan bodybuilders LOVE seitan (or wheat gluten flour) because it’s sooooo high in protein and basically no fat or carbs.  And I do make a protein pancake recipe with it sometimes.  But my go-to protein sources that I eat pretty much every single day are: extra firm tofu (highest in protein of all the tofu varieties), tempeh, my beloved Jacked on the Beanstalk protein powder.  And then also quinoa and good ol’ beans – usually roasted chickpeas although both of these are pretty high in carbs too.

A: How much protein do you strive to eat in a day and how do you track it?
S:
I usually strive for about 100g of protein daily.  Definitely no less than 75g.  If I’m getting ready for a photoshoot or vacation and I’m trying to tighten up a bit, I will track my calories and macronutrients via the MyFitnessPal app.  But for the most part, I don’t need to track because I know what a portion size is and roughly how much food I should be consuming in order to maintain my current physique.  But I do absolutely believe tracking is helpful for people with a particular goal of gaining muscle or lowering body fat.  And I think for anyone, no matter your goals, tracking your food intake even for just a couple of days can be very beneficial because it teaches you a LOT about the foods you’re eating and how quickly those calories can add up!

A: Any tips or tricks for increasing protein on a plant-based diet?
S:
What I usually say to my clients is to simply make sure there is some protein in every meal they consume.  I am always asking myself “where’s the protein in this?”  I basically eat small meals throughout the day (usually 5 or 6) and I make sure that at least five of those six meals have a serving of protein.  And it doesn’t mean eating tofu or tempeh or having a protein shake five or six times a day.  Sometimes a “meal” means just having a protein bar (Simply Protein is my go-to bar) or a piece of Quinoa Toast with jam (recipe on my blog).  Or I’ll snack on a bag of Clean Beans (flavourful fava beans – LOVE the salt & vinegar ones.)  It’s also important that you genuinely LIKE the foods you’re eating.  Yes I eat a high protein vegan diet.  But I love the foods I fuel myself with.  And I love experimenting with recipes to make them higher in protein like adding protein powder to desserts or throwing edamame beans into a rice dish or tempeh croutons onto a salad.  But really, just always ask yourself “where is the protein in this meal” and keep that in the forefront of your mind.

A: Other than helping build muscle, what role does dietary protein play in respect to health and wellness?
S:
Protein is one of the most essential macronutrients for muscle growth yes.  But also for building lean body mass and repairing muscle because it’s packed with amino acids.  And did you know that if your body doesn’t get enough protein from your diet to sustain itself, it will actually take it from your muscles?  That means if you don’t give your body enough dietary protein, it will actually cannibalize its own tissue to get what it needs.  Protein also helps to keep us feeling full and in doing so, lessen the cravings we have for carbs and fat. And let’s not forget that we lose muscle as we age.  In fact, from ages 30 – 70, we can lose more than 25% of our type 2 muscle fibers. It’s called “sarcopenia” and this loss of muscle tissue is a natural part of aging.  But through resistance training paired with a high protein diet, we can actually build muscle mass and strength and literally slow down the aging process!   So lift heavy weights people!  And make sure you’re eating enough protein to fuel that muscle growth and repair.

 And that’s a wrap on my interview with Sam. To learn more about her, listen to her podcast and read her blog visit her website Jacked on the Beanstalk. Sam and I have also opened registration to our fitness and nutrition program called “Fit & Healthy Over 40”. Because life is hectic and we know it’s hard to get (and stay) on track when it comes to fitness and food goals, we put our heads together to come up with a plan for you. Over the course of 4 weeks we’ll help you instil solid routines through weekly guided workouts, coaching, community, and cooking classes — all plant-based, of course. Do you need structure and accountability to actually make changes in your life? We are here to support you! To learn more visit our program page or send me an email.

What's stopping you from cooking?

I wasn't a natural born chef. Far from it. In fact, cooking is something that came to me later in life and I think this is an important part of my story.

Growing up in Halifax I always had healthy, homemade meals with lots of variety (thanks mom!). Looking back, I'm so grateful for this, but truth be told cooking wasn't a requirement for much of my life because it was done for me.

When I was 24 I landed a job at the UN in Paris. I met people from all over the world and especially loved learning about food. Whether it was the French food culture, trying homemade empanadas from my Mexican colleague, or eating at a Lebanese restaurant for the first time. I was immersed in food culture yet my cooking skills consisted of opening boxed potage (veggie soup) or making sandwiches. However, like most people who spend any time in France I returned to Canada with a fascination with food.

Flash forward a bit, I moved to Ottawa to work for the Canadian Broadcasting Corporation. Since it was clear I couldn't depend on my mom to feed me anymore I learned to cook. I started by trying to replicate the potage-style soups I ate in France. Over time I gained a little bit of confidence and began experimenting with more varied soups and stews and tried making smoothies with my Magic Bullet. I just continued to learn & expand my repertoire in an attempt to eat healthy and feel good. To be clear, I was 26 (!!!) when I started cooking & making food from scratch.

Now, well over a decade later I'm running a cooking and nutrition business! I'm formally trained as a chef, but truthfully I prefer simple, nutritious meals with lots of veggies. I learned so much in culinary school, but my greatest learnings have come from spending time in the kitchen, cooking regularly and teaching others how to cook.

Knowing how to make your own food is a life skill and it is one of the most impactful things you can do to transform and maintain your health and well-being. Some folks (like me) are late bloomers and that's okay. There's no right time to start cooking. Just make it a priority and get started.

If you need guidance or inspiration to start cooking more plant-based meals, visit my recipe index, check out my events page for upcoming events, or contact me to see how we can work together.

Cheezy Noodles

You’ve probably seen many Instragram stories showing my daughter eating her favourite meal: “cheezy noodles”. I’ve had countless requests for the recipe, so I apologize for taking so long to share this with you!

This recipe is my healthified, dairy-free take on Kraft Dinner using sweet potato or squash, cashews (or other nuts or seeds) and turmeric to create a noodle dish that looks and tastes cheesy, without cheese. I hope you enjoy it!

Cheezy Noodles 

Yields 6 servings

Ingredients:

3 cups sweet potato or squash, cubed 
1 onion diced
2 whole cloves of garlic, optional
1 - 2 tablespoons of olive oil
½ cup raw cashews, soaked in boiling water
2 tablespoons nutritional yeast, optional
1 teaspoon turmeric
1 teaspoon onion powder 
1 ½ cups of water 
½ teaspoon salt 
Black pepper to taste
Lemon juice
400 - 500 g of you favourite spiral noodles
Optional: 1 cup of frozen or fresh peas

Directions:

Preheat your oven to 400 F. Line a baking sheet with parchment paper or a silicone baking mat. 

Add the sweet potato, onion and garlic (if using) to the baking tray and drizzle over a little bit of olive oil and add a few pinches of salt. Use your hands to stir the veggies around a bit to cover them with the oil and salt. Transfer the tray to the oven and bake for 25-30 minutes until the sweet potatoes are easily pieced by a fork and the onions are soft. 

While the veggies are in the oven cover, the cashews in boiling water to soften them. 

Cook the noodles according to package directions and, if you’d like, add frozen peas when you have about 3 mins cooking time left for the noodles. Drain and rinse the noodles (and peas, if using) and return them to the pot.

Once the veggies are cooked, drain and rinse the cashews. Then add the cashews and roasted veggies to a blender or food processor. Add the water, spices, salt and pepper, a little squeeze of lemon juice (I use about half a lemon), and process until you have a smooth, creamy sauce. If you find the sauce is too thick add more water 1/4 cup at a time. You might have to scrape down the sides a bit along the way. If you have a small blender (like a Magic Bullet) you may need to do a few batches. 

Add the sauce to your cooked noodles and mix well! Taste and season with additional salt and pepper if desired. Serve warm and enjoy. I like to add hot sauce or chili flakes. You could also stir frozen or fresh spinach into the noodles when they’re hot for some extra greens! 

Store in an airtight container for up to five days. You can also freeze the sauce for several months. 

To make school safe: use hemp hearts (no need to soak) or sunflower seeds (soaked like the cashews) in equal quantities.  

If you enjoyed the recipe I shared above be sure to check out my Plant-Based Breakthrough program, which is a crash course in plant-based health, nutrition, and meal planning. For details about the program click here. You can also join the Plant-Based Breakthrough Community on Facebook where I share recipes, inspiration, and information on plant-based nutrition.

My tips for eating more plant-based foods in 2024

Happy new year! I'm back in Ottawa after a nice family holiday. I was hoping to ease back into work, but it seems I'm hitting the ground running. I was home no less than 24 hours and I received an email from the producer from a local TV news program asking if I would be interviewed for a segment on eating more plant-based meals in 2024.   Of course I agreed, but it wasn't without some nervousness as it's been a while since my last TV appearance.

You can watch the full interview here.  Or if you'd prefer a quick synopsis, here are the speaking points sent to the producer before the show...

Amy's tips for incorporating more plant-based meals in 2024:

1) Go at your own pace. For some people, all or nothing works, but for most people it takes time to make diet and lifestyle changes that last. Start by cooking one plant-based recipe or doing one vegan meal per day, and slowly building up your repertoire and confidence.

2) Swap the beef in your chilli with beans, use chickpeas instead of chicken in your curry, or try making tofu scramble instead of scrambled eggs. Use the internet to help you find vegan versions of your favourite recipes. You'll see that almost anything you can make with animal products can also be transformed into a plant-based version.

3) Try out dairy-free milks, cheeses, ice cream and yogurts. There are so many delicious and innovative products these days using things like cashews and coconut milk to replace things that would traditionally have cow's milks.

4) Attend a plant-based cooking class. This will provide the opportunity to gain new skills, learn culinary techniques specific to vegan cooking, and the chance to work directly with a chef who can provide tips and advice to get you started. 

5) If you're not super confident in your cooking, meal delivery services are a great option.  These services are very popular lately as they help save time and reduce food waste.  Fortunately most of them offer plant-based meal options too!  The food that was featured in the segment was prepared by Naturally Vero, an Ottawa-area meal delivery service.  I sampled the "props" after the recording and everything was so good. If you'd like to try it out visit naturallyvero.com and use promo code VEGANLOVE for 15% off.

As for the on-air cooking demo, I made my chickpea salad. If you haven't tried it yet, what are you waiting for?

I hope 2024 has been good to you so far!

Plant-Based Holiday Meal Planning & Prep Tips

I know it can be intimidating planning for holiday dinners and gatherings, especially if you’re new to plant-based eating or if you’re making food for a vegan family member.

I’ve been doing this plant-based thing for a while and I can tell you, I too was intimidated about my first family holiday meal over a decade ago. Especially because I was the only vegan person in attendance. In most cases, I’m still the only vegan person at holiday gatherings, but now I know how to navigate it a bit better.

Here are my tips for your plant-based holiday meal:

Plan ahead! If you’re trying to adhere to plant-based eating over the holidays, one of the best things you can do is bring a dish to your holiday gathering that you know you can eat, but also make enough so that it can be shared with others. I usually bring a hearty salad, delicious dip, or I’ll even put together a grazing board, which is always a crowd pleaser. If you’re hosting someone who’s vegan and you’re a bit worried about it, don’t hesitate to reach out to that person to ask what you can make for them. They'll undoubtedly be happy to help with the vegan portion of the meal planning.

Remember that side dishes are usually plant-based by default. Yes, holiday dinners tend to include a turkey, ham or some other animal protein as the main. However, many classic sides are actually vegetarian, if not, vegan by default.  Mashed potatoes, roasted carrots, brussels sprouts, peas, salads, dinner rolls, cranberries, gravy, and even stuffing, can easily be prepared without animal fat or cow’s milk using non-dairy alternatives or even swapping in olive oil for butter.  

For your main dish try out Tofurkey (or other meat alternatives). Some of them are pretty darn good! Or, if you’re into cooking, you could make a lentil loaf, stuffed squash, mushroom wellington, veggie pot pie, or vegan tourtiere, just to give you a few ideas. Recipes for all of these are just a quick google search away. 

Finally, do a little research.  If you have a favourite non-vegan recipe that you’ve always made for your holiday meals, the very first step is to type in the name of the dish + “vegan” into the search bar in your web browser (for example: “green bean casserole vegan”) and you’re sure to find veganized versions to try out. Alternatively, head to your local library and borrow a couple vegan cookbooks.  You may have to source out a few new ingredients and do a practice run of the recipes to make sure they're up to par, but in my experience almost anything that you can make with meat or dairy can be made comparably in a vegan format.

If you’re looking for inspiration or guided instruction for your holiday meal, check out my Healthy Holidays eBook or join me on December 10 for a live cooking lesson where we’ll make an entire holiday meal together including a main protein, side dishes and a dessert. Visit my shop page for class details and registration information.

Do you know how to cook tofu & tempeh?

I wrote about soy last week and I had such great response from my newsletter subscribers that I figured I’d continue the conversation by sharing the best ways to use tofu and tempeh and pass on a few recipes. Hopefully you’ll learn to appreciate these nutritious and delicious foods – if you don’t already!

Let’s start with tofu. It’s a very versatile food. You can buy it in textures ranging from soft/silken to extra firm, and depending on the firmness you can use it in a variety of ways.

Soft or silken tofu is great for baked goods (in the place of yogurt in recipes) and making puddings, dips or sauces. It can also be used to add creaminess (and extra protein) to smoothies or milkshakes. I don't use this often, but wanted to tell you about it anyway!

Medium tofu is on the softer side and it doesn’t hold its shape as well as firm or extra firm tofu.  Because of this it’s fantastic in soups or curries where it’s okay for it to crumble a bit.

Firm/extra tofu is my fave! It has more protein than soft or medium tofu and is the best for achieving crispy or crunchy tofu cubes for stir fry or noodle dishes. Try pan frying, baking, and air frying it when you’re looking to get that crispy-on-the-outside-chewy-on-the-inside texture. However, to achieve that crisp exterior, it does help to press the tofu first. You can do this by wrapping the block of tofu in a cloth or paper towel and putting it under something heavy (like a cast iron skillet) for about half an hour.

As for tempeh, it's a fantastic fermented whole food and I love to use it in place of ground meats. When crumbled or cubed it has meaty consistency and because of that I tend to use it in plant-based versions of my favourite stews or meaty sauces. I also use tempeh to make a veganized version of “bacon”. I’ll preface by saying it’s not the same as real bacon, but if you slice it thin and pan fry it with a bit of tamari, smoked paprika, garlic powder and maple syrup, it’s delicious in a sandwich with tomatoes, lettuce, dijon or whatever fixings you normally like.

If you’d like to start experimenting with tofu and tempeh, check out my Recipe Index. There you’ll find recipes like My Go-To Tofu Scramble, Marinated Tofu & Veggie Skewer, Tempeh Bolognese, Tofu Feta Salad, Tofu Pad Thai and Green Curry Soup.

The spooky side of soy!

I’m often asked about soy. And while I’m a fan, there are sinister aspects of this plant-based superstar. Given that it’s Halloween, I can’t think of a better time to delve into the spooky side of soy.  

Spooky fact #1: soy is highly processed

In general I try to focus on whole foods. The same goes for soy. Soybeans are legumes (just like chickpeas, beans, peanuts, and lentils) and are very nutritious. They are a good source of protein, fibre, iron, calcium, and other minerals and vitamins. My faves are whole (or less processed) products like tempeh, edamame, tofu, soy milk (unsweetened is best) and soybean sprouts.  I also use soy sauce, tamari and miso – but I should mention that they are saltier condiments so I use them sparingly.

However, the truth is that if you’re eating packaged or processed foods regularly you’re likely eating more highly processed soy than you'd think (along with a range of other not-so-nutritious ingredients). I suggest avoiding or limiting margarine, shortening, vegetable oil, and processed meat and cheese alternatives. Even some less obvious things – like store-bought breads, cookies, granola bars and cereals, and even many commercially prepared meats – likely contain some form of highly processed soy. Read the ingredients list on labels and you’ll become very aware of this.

Spooky fact #2: most soy products are genetically modified (GM)

In 2020 an upwards of 78% of soybean crops were GM.

That being said, most of the GM soy grown in Canada is not for human consumption and is intended for commodities such as livestock feed and biofuel.

If you’re looking to avoid GM soy, I have a couple simple solutions for you. Since a majority of GM soy production is used as feed for farm animals (including chickens, pigs, dairy and beef cows) try to avoid consuming factory farmed meat. Factory farmed meat is ubiquitous these days and seeking out alternatives takes extra effort and is likely more expensive. For me personally it's been easier to switch to plant-based proteins as they are more affordable and arguably better for you and the planet.

And when it comes to purchasing soy foods, focus on buying organic or non-GMO verified products. I always buy organic tofu, tempeh, soy milk, miso, edamame, etc, and if that's not available, I’ll look for non-GMO verified (it's the little butterfly symbol). These products are readily available at larger grocery stores and health food stores.

With all that being said, I hope to convey to you that while no food is perfect, in general soy foods can be good for you and are not very spooky at all.

Can soup be a meal?

I want to tell you a little story from my past.

Back in the pre-pandemic days I used to do a lot of in-person cooking lessons throughout Ottawa. I met many wonderful people and had so much fun doing cooking demonstrations, hands-on lessons, and sitting down to eat delicious food with the participants at the end of each class.

I’d say 99.9% of my interactions during those classes were positive. However, about 4 years ago, I was doing a cooking demonstration and I was making a hearty quinoa, kale and white bean soup for a group of people. Just before class started I heard a bit of commotion, but I didn’t know why as I was busily getting ready. Turns out one of the women who signed up for this class was quite upset. She told the cooking school coordinator that soup is NOT a meal. She felt that it should be served as an appetizer or side because “soup is not substantial”. The class was practically free, so she decided to stay until the end; albeit with a scowl on her face. She even ate the soup and admitted it was good.

Looking back, I wish I had heard her complaint because I could’ve said to her what I’m about to share with you now. 

Soup can be a meal – but there are a few things that you should consider if you want to make a soup that can stand on its own. 

To create a hearty, meal-worthy soup, here’s what you’ll need: 

Protein: Almost all of my soups will include one or more protein rich ingredients like lentils, beans, peas, chickpeas, tofu, and tempeh. I also enjoy trying higher protein bean, chickpea or lentil noodles from time to time. Adding protein not only creates a more substantial soup, but it helps stabilize blood sugar too. 

Healthy fat: Most of my soups contain some form of healthy fat. Fats add richness and caloric density, which will make you feel full. I like to include coconut milk (especially in soups using aromatic spices), homemade cashew milk (look it up- it’s super simple to make) and a drizzle of nut/seed butter for creaminess. I’ve also topped my soups with avocado (it’s delicious on black bean or tortilla soups) and crushed or toasted nuts/seeds for crunch.  Since whole plant-based foods are inherently low in fat, I don’t worry about including the healthy fats I mentioned above.

Carbohydrates: Try addings squashes, potatoes, sweet potatoes, turnips, corn and noodles to your soups. I also love a rustic sourdough for dipping. These ingredients will provide energy, fiber, and a sense of fullness. 

Visit my Recipe Index for soup recipes and other plant-based meal inspiration.

Want to improve your gut health? I have tips for you!

When people talk about gut health usually it’s in reference to the digestive system. Poor gut health is generally linked to digestive problems, lack of regularity (aka 💩 problems), bloating, gas, etc. However, researchers are gaining clarity on how connected and important our gut health is to our overall health, and it goes beyond our digestive functions. Gut health also plays an important role in mental health and the immune system.

So, what can you do to improve your gut health?

Here are a few ideas for you:

Fill your plate with plants: eating a wide array of whole plant-based foods supports the gut by providing soluble fiber aka “prebiotics”, which is a food source for the gamut of good bacteria that live in your gut. This bacteria helps with digestion, supports the immune system, and more! While all plant foods contain fiber, you can level up with prebiotic rich foods including beans, lentils, whole grains, artichokes, broccoli, apples and pears (with skin) & berries! Browse my Recipe Index for fiber rich, plant-based recipe inspo!

Eat fermented foods: Fermenting is a process used to preserve food, but it also heightens the nutritional value and provides probiotics, which are live microorganisms that support digestion.  If you’re looking to start adding more fermented foods to your diet, my favourites are sauerkraut, kimchi, miso and kombucha.

Drink plenty of water: The fiber rich foods we eat need water to move through the digestive tract. Meaning a lack of water will lead to constipation, bloating and other tummy troubles. Be sure to stay hydrated. 


Plant-Based Pregnancy: Q&A with Dietician Maya Bach

While I was pregnant and even now as a new mom, I get questions all of the time about my vegan pregnancy and raising a vegan baby. Although my pregnancy and birth were both very smooth and now my baby is thriving, I wouldn’t really consider myself an authority on the topic. I’ve been vegan nearly 10 years now, but for most of it I didn’t really think about or study nutrition related to pregnancy. Instead, my focus was mostly on maintaining a healthy lifestyle by way of a whole foods and plant-based diet. That seems to have served me well, but I still didn’t feel confident in tackling the topic of vegan pregnancies on my blog without some expert guidance.

Enter Maya Bach. I met Maya, a vegan prenatal dietician, in the manner most new friendships are forming these days… online! While I was pregnant, I came across her Instagram account which focuses exclusively on vegan prenatal nutrition and of course I immediately began following her. On her account, Maya shares simple, helpful information regarding healthy food choices, snack ideas and even food options to help relieve nausea during pregnancy. As one of her loyal followers, I knew she would be amazing at contributing helpful information for you about vegan pregnancies. I couldn’t be more excited to have had the opportunity to interview her for my blog. Here is what we talked about:

Amy: What is your background and how did you become interested in plant-based/vegan pregnancies?

maya bach RD.jpg

Maya: My mom, who has been vegetarian since she was 18 years old, raised me and my sister in a predominantly vegetarian household. It wasn't until after college, when I was living in Australia, that I decided to stop eating all meat. I saw a news story about the live export of cattle from Australia to Southeast Asia and it shook me to my core. I have always been interested in nutrition, but I didn't consider fully pursuing it until I realized that what we eat impacts our health and the well-being of others. I left my job, moved back to California and pursued a Master of Public Health at Loma Linda University with an emphasis on dietetics. Fast forward to 2020, my sister announced that she was expecting her first baby. And while she doesn't identify as vegan, I was amazed to discover that all prenatal nutrition recommendations were anchored in consuming animal-based products. As a vegan who is passionate about women's health, it made sense to shift my private practice from general nutrition to prenatal nutrition, specifically towards supporting women who don't want to eat animal products feel confident having a healthy pregnancy. And here we are!

A: I've been vegan for nearly 10 years and remained fully vegan throughout my pregnancy, but when I was pregnant a few people asked me if I consumed eggs to avoid choline deficiency. Although at no point in time did I crave or even think of adding eggs to my diet, that question did get me thinking. What purpose does choline serve in pregnancy and how can we get it on a vegan diet?

M:
This is a great question and something many of my clients are concerned about. While choline supports fetal brain development, we don't have enough information to know with a high degree of certainty the amount of choline found in plant foods. From the obstetricians I've spoken to, choline is not routinely supplemented and there isn't a blood test offered to reveal its levels in the body. Per the National Institute of Health (NIH), true choline deficiency in the United States is actually very rare. While there are a lot of unknowns around choline, we do know that your body produces some choline and certain plant foods are higher in choline including edamame, kidney beans, quinoa, some fortified dairy-free milks, and peanut butter. My recommendation? Focus on plant foods that are naturally high in choline, take a prenatal that includes choline in their formulation, and talk to your OB if you have concerns.

A: It can be beneficial to increase dietary protein during pregnancy, whether or not somebody is vegan. Do you have any tips on how vegan mamas-to-be can increase their protein intake? And do you think it could be beneficial to top it up by adding protein powders into the mix?

M:
Yes! Protein can feel like a struggle. To help ease the "am I getting enough protein?" concerns, one of the things I encourage my clients to do is to track what they're eating for a few days. It doesn't have to be forever, but it offers an insight into nutrients like protein that we can address together through food and/or supplementation.

Tips for boosting your protein include:

  • Switching from a wheat-based pasta to a lentil or chickpea pasta

  • Sprinkling nutritional yeast onto veggies or tofu scrambles

  • Using quinoa instead of rice

  • Choosing soy, flax or pea milk instead of almond or oat milk

  • Swapping from firm to extra firm tofu

  • Snacking on roasted edamame and almonds

  • Adding chia seeds to your toast, oatmeal or baked goods - this is my personal favorite!

Protein powders can be a great way to help you meet your protein goal for pregnancy, especially for my clients who are struggling with nausea and find it challenging to hold much of anything down. They can also be handy if you're travelling and want to make sure you have an easy protein option on-hand.

A: When I was pregnant I supplemented with a good quality prenatal, vitamin D (as I live in Canada) and a vegan omega-3 supplement. Does that sound adequate to you? Are there any other supplements you recommend to your clients?

M:
Before starting any supplement, I always recommend talking to your healthcare provider first and getting a blood test. This will help you develop a "supplement roadmap" for what nutrients you need to focus on during your pregnancy. A good quality prenatal is a must!

A: If people are interested in learning more from you where can they find you?

M:
You can find me on Instagram @vegan.prenatal.nutrition - Feel free to send me a DM and say hi! Right now, I offer a small group coaching program for vegan women who are planning for pregnancy or who are currently expecting. It's a great way for you to connect, get support, and boost confidence about your decision to have a vegan pregnancy. You're not alone!


And that wraps up my interview with Maya! I hope you found this information helpful and that you take some time to connect with her in the online world because her information is incredibly valuable for the education and conversation around vegan pregnancies. If you have any questions of your own for Maya, please leave them in the comments below or contact Maya directly.

Flourless Choose-Your-Own-Adventure Chocolate Chip Cookies

I’ve been a huge slacker on blogging lately, but if you’ve been following on social media or if you’re on my mailing list you’d know that I’ve had some big changes in the past few months. In November I had a baby and l’m currently on maternity leave. So far baby Gwenyth is healthy and happy and, although I’m a bit more tired than before, I can’t complain too much as she’s a decent sleeper too! I plan on coming back to work sometime in the springtime or summer to host my online classes again and I’ll be sure to keep you posted about my return via my newsletter.

In the meantime, I’ll be hanging out with Gweny, getting to know her better, and also cooking and baking a lot. Since she was born I’ve made a lot of muffins, loaves and cookies. I like to make something sweet each week. The recipes change, but they always tend to be made with more nutritious ingredients and I try to keep them lower sugar as I’m not a huge fan of super sweet sweets.

The recipe I’ve shared below is one of my go-to’s. I’ve made these cookies a lot! When I shared the recipe on social media I received so much positive feedback that I felt they were worthy of the blog. Please use the recipe below as a guideline and add or subtract whatever you’d like as this recipe can easily handle substitutions.

Snapseed 2.jpg

Ingredients:

3 mashed bananas
2 cups of oats (I used rolled oats, but quick oats would work)
1 cup of natural smooth or crunchy peanut butter (1/2 cup PB and 1/2 cup tahini or 1 cup other nut or seed butter of your choice)
1 teaspoon vanilla
1/2 cup shredded coconut
3 tablespoons maple syrup
Dairy-free dark chocolate chips (as much or as little as you’d like)
Sea salt (just a couple pinches to add into the recipe or to sprinkle on top)

Directions:

Preheat your oven to 350 F and line a baking sheet with parchment paper or a silicone liner.

Mix all of the ingredients together. You may choose to add or omit ingredients and/or swap the peanut butter for other nut or seed butters, or any mix of your favourite nut/seed butter (please note that if you use alternate butters - like tahini - you may need to adjust the sweetness a bit with extra maple syrup or extra chocolate chips). In the photo above you can see that I added pumpkin seeds. I also included chia seeds and some cinnamon. Other times I’ve made this recipe I’ve added ground flax, hemp, walnuts, and/or raisins. Be creative! Add your favourite ingredients as this is not your traditional cookie recipe and is very forgiving.

Once you’ve thoroughly mixed your ingredients taste the batter to make sure it’s to your liking, then create evenly sized balls (I usually get about 20 - 24 cookies as I keep mine on the smaller side) and place them on your baking sheet. Flatten them a bit with a fork or your hand. Transfer the sheet to the oven. Bake for 16 - 18 minutes. These cookies don’t really expand or become fluffy, but they will crisp up a bit on the bottom.

Once cooled you can store them at room temperature in an airtight container for a week or the freezer for a few months. Enjoy!

Falafel Roasted Chickpea Bowls

Summer is finally here and I’m very excited to be making lighter meals with more fresh local produce. I also started the summer series of my online cooking classes last weekend and we kicked off the lessons by making one of my personal favourite warm weather recipes: Falafel Roasted Chickpea Bowls!

This recipe is very flavour, colourful and, as you’ll see in the photos below, very versatile. You can use my recipes as guidelines or follow them to a tee, but because this recipe is so forgiving you can easily add your own twists or tweaks to satisfy your tastebuds.

Before we get to the recipe I wanted to show you a few photos that my cooking lessons participants shared with me on Instagram and in my private Facebook community page following last weekend’s lesson (you can click on the photos to enlarge them). It’s amazing how one recipe can yield such varied, yet delicious results. If you make this recipe be sure to take a photo and tag me on Instagram or in my Facebook group as I love seeing your creations.

Falafel Roasted Chickpea Bowls

Yields 4 - 6 servings

Ingredients:

Salad components:
Falafel Roasted Chickpeas (see recipe below)
1 - 2 cups grain of your choice, cooked
4 - 6 cups of mixed leafy greens
1 cucumber, chopped
1 pint grape tomatoes, sliced in half
Pickled beets, pickles or other pickled or fermented veggies, for garnish
Chopped mint or parsley, for garnish
Sesame seeds or hemp hearts, for garnish

Tahini dressing: 
1/3 cup tahini
Juice of half a lemon
1-2 cloves garlic minced
1/4 cup water or more 
1 tablespoon olive oil
1/4 teaspoon salt
Pinch of cayenne

Directions: 

To make the tahini dressing: Either Blend all ingredients in a blender until smooth or vigorously whisk all the ingredients together in a bowl or measuring cup. Add more water to make the dressing looser. Give it a taste and adjust the salt if needed. Transfer to a jar and store in the refrigerator until ready to serve.

To assemble your salad: Start by adding 1/4 cup grain of your choice and 1/4 cup Falafel Roasted Chickpeas to a large soup bowl (these ingredients may be eaten warm or cold). Then add approximately 1 cup of leafy greens and a handful of cucumber and tomatoes. Drizzle a generous portion of dressing overtop, and garnish your bowl with as many pickled beets and parsley as you see fit. A top with a sprinkling of sesame seeds.

****

Falafel Roasted Chickpeas

Ingredients:

2 (14 ounce/400 mL) cans of chickpeas or 3 cups cooked chickpeas
2 tablespoons olive oil
Juice of half a lemon
1/2 cup red onion, chopped
3 cloves garlic, minced
1 1/2 teaspoons cumin
1 teaspoon coriander
1 teaspoon salt
1/4 teaspoon black pepper
Pinch of cayenne

Directions: 

Preheat oven to 375 F and line a baking sheet with parchment paper or a silicon liner. If using canned chickpeas, rinse and drain the chickpeas.

Add the chickpeas, olive oil, lemon juice, onion, garlic, cumin, coriander, salt, pepper, and cayenne to a medium to large sized bowl and toss until all the chickpeas have been evenly coated.

Transfer the chickpeas to the prepared baking sheet and spread them out in to one even layer.

Bake for 35 to 40 minutes, stirring once halfway.  You may need to bake the chickpeas even longer depending on how dry and crunchy you want them to be. This depends on personal preference as well as the heat of your oven. Generally 40 minutes is sufficient, but I’ve also roasted them even longer to get a nice crunch!

Enjoy these chickpeas as part of the Falafel Bowl or on their own as a snack.  Store them in an airtight container for up to a week in the fridge.

If you enjoyed the recipe I shared above be sure to check out my Plant-Based Breakthrough program, which is a crash course in plant-based health, nutrition, and meal planning. For details about the program click here. You can also join the Plant-Based Breakthrough Community on Facebook where I share recipes, inspiration, and information on plant-based nutrition.

IMG_4240.jpg

Turmeric Quinoa Salad with Roasted Beets, Cabbage & Beans

It’s been a while since my last post and so much has changed since then. As I write this we’re currently into the third month of the COVID-19 pandemic and still very much practicing social distancing. This huge shift in our way of living was the push I needed to take the plunge into teaching online classes and workshop. While normally I teach in person here in Ottawa the last few months I’ve moved fully online and have been hosting virtual classes and corporate wellness workshop in my kitchen every week with folks from across Canada, the US and overseas. It’s been an amazing way to stay connected despite the fact that we’re physically distancing.

Since the weather’s warming up and we’re making the transition into lighter spring and summer dishes I figured it was time I shared a new recipe. This time of year I’m a big fan of hearty salads that can stand alone as a meal. In this week’s online cooking class we made a turmeric quinoa salad with roasted beets, red cabbage and beans. One of the participants, Alisha, said “It's the best quinoa salad I've ever had!” and others have been raving about it as well. I personally love that this salad contains anti-inflammatory turmeric and anti-oxidant rich beets and red cabbage. It’s full of colour and flavour, rich in protein and high in fibre so you can eat it as a meal, or serve it in small portions as a side dish. Scroll down for the full recipe and if you try it out, please let me know what you think!

Turmeric Quinoa with Roasted Beets, Cabbage, & Beans

Yields 6 - 8 servings

Ingredients:

1 large beet or 2-3 small beets (approximately 1 pound)
Olive oil
1 cup quinoa, rinsed and drained
1 1/2 cup water or low sodium vegetable broth
1/2 teaspoon turmeric
1/4 cup extra virgin olive oil
3 tablespoons apple cider vinegar
2 tablespoons maple syrup
1 - 2 tablespoons dijon mustard
1 teaspoon salt
1 can (398ml/14 oz) beans of your choice or chickpeas, drained and rinsed
1 cup loosely packed chopped parley
2 cups thinly sliced cabbage
Black pepper

Directions:

Preheat oven to 400 F and line a baking tray with parchment paper or a silicone liner. Peel and chop the beets into dice sizes pieces and add them to a medium sized bowl. Drizzle over about 1 teaspoon of olive and add a pinch of salt. Toss the beets to ensure they are evenly coated with oil. Lay the beets out on the baking tray and roast for 35 - 40 minutes (turning once half way) or until they are easily pierced with a fork.

Add the quinoa, water or broth, and turmeric to a small to medium sized sized pot. Bring the liquid to a boil, then cover and reduce to a simmer. Simmer for about 12 - 15 minutes or until quinoa is cooked, and then remove from the heat to cool for a few minutes. Then fluff the cooled quinoa with a fork.

To make the dressing, combine the olive oil, apple cider vinegar, maple syrup, dijon and 1 teaspoon of salt in a bowl, whisking well to combine.

To assemble the salad, add the cooked beets, quinoa, beans, parsley, cabbage and mix well. Pour over the dressing and mix until everything is evenly combined. Taste and season with additional salt (if needed) and a generous amount of black pepper. Enjoy this salad on its own either hot or cold as a main dish, or enjoy in smaller portions as a side dish to whatever you’re eating.

This will keep in the fridge in an airtight container for 5 days.

If you enjoyed the recipe I shared above be sure to check out my Plant-Based Breakthrough program, which is a crash course in plant-based health, nutrition, and meal planning. For details about the program click here. You can also join the Plant-Based Breakthrough Community on Facebook where I share recipes, inspiration, and information on plant-based nutrition.

FullSizeRender.jpg

Curried Pumpkin & White Bean Stew

I was invited in to the CBC Radio Ottawa studio to chat with Carmen Classen, host of All in a Day, about cooking Halloween pumpkins.  If you weren’t able to tune in live, you can catch the recording here

Snapseed.jpg

While I was in studio I gave Carmen a bowl of my Curried Pumpkin & White Bean Stew. She really liked it! I think you will too. Scroll down to get the full recipe. 

What I love about this stew is that it’s a great way to showcase a food that is often overlooked. In doing my research for the interview I learned that most pumpkins grown in Canada and the US are purchased for Halloween, only to end up in the landfill creating methane, a greenhouse gas that is much more potent than carbon dioxide. It’s a shame because pumpkins are very nutritious and can provide the base for so many different meals.

For example, I cut up my entire pumpkin, mostly into cubes. I discarded the skin, guts and stem in the compost. The cubed pumpkin yielded over 20 cups! I also kept few large slices with the skin on. (In case you’re wondering, I used combination of a large serrated bread knife and a chef’s knife to chop up my pumpkin.) With the cubed pumpkin I made red lentil and pumpkin soup, cinnamon roasted pumpkin, and the stew. I placed the large slices onto a parchment lined baking tray and roasted for an hour or so at 425 F. Roasting the pumpkin resulted in a rich, slightly sweet flavour. Very tasty! I mashed it up a bit (puree consistency) and added some to a smoothie and gave some to my dog (he is addicted!). I also roasted the seeds! I still have several cups of cubed pumpkin left and I plan on steaming or roasting these in the next day or so. I see pumpkin hummus in my future!

Here’s my challenge to those of you who are into pumpkin carving: if not this year, maybe next year make a plan to cook your pumpkin.  A carved pumpkin will only be good for a couple days, so carve it no earlier than the day before Halloween and be prepared to chop and process it as soon as possible. If you don’t have time to process it on Halloween night, pop the entire pumpkin in your fridge and store it there until the next day. Chop it up and cook your pumpkin within a couple days. Pumpkin puree, pumpkin soup and my stew freeze really well, so you can make big batches and freeze them for another time.  These are just a few of the countless ways you can cook with pumpkin. If you have any tips, ideas or suggestions for pumpkin, please share them with me in the comment section below.

unnamed-2.jpg

Curried Pumpkin & White Bean Stew 

Yields 6 - 8 servings

Ingredients:

1 tablespoon olive oil or coconut oil 
1 onion, diced 
2 carrots, chopped 
1 cayenne pepper including seeds (or other hot pepper of your choice), minced (optional)
2 cloves of garlic, minced 
1 tablespoon minced fresh ginger 
1 - 2 tablespoons of your favourite curry powder (I like Cha’s Organics Curry Masala)
6 cups of pumpkin, cubed 
540ml (19 oz) can of white beans of your choice (I used white kidney), drained and rinsed 
2 cups of vegetable broth
1 tablespoon tomato paste 
1 teaspoon of salt 
400 ml (14 oz) coconut milk (full fat or lite both work) 
3 - 4 tightly packed cups of chopped fresh spinach 
Chopped cilantro, for garnish
Lime wedges, for garnish 
Salt & Pepper 

Directions: 

Warm the oil in a large pot over medium-high heat. Add the onion and carrots and a big pinch of salt. Give it a stir and sauté for about 5 minutes or until the onions become slightly translucent.  Then add the cayenne (if using), garlic, ginger and curry spice. Give it a good stir and cook for another minute.

Add the pumpkin, white beans, vegetable broth, tomato paste and salt, give it a stir, cover and bring to a boil. Once boiling, reduce to low and simmer, stirring every so often, for about 15 minutes or until the pumpkin is easily pierced by a fork. 

Stir in the coconut milk and simmer for a few more minutes.  Then add the spinach and give it another stir.  Simmer for about 2 minutes or until the spinach has wilted.  Taste and season with extra salt and pepper as needed. If you’d like a sweeter stew, stir in a drizzle of maple syrup. 

Serve with grain of your choice or a slice of crusty bread. Top with chopped cilantro and a squeeze of fresh lime juice.

Will keep in the fridge for 5 days or frozen for 2 months. 

If you enjoyed the recipe I shared above be sure to check out my Plant-Based Breakthrough program, which is a crash course in plant-based health, nutrition, and meal planning. For details about the program click here. You can also join the Plant-Based Breakthrough Community on Facebook where I share recipes, inspiration, and information on plant-based nutrition.

Five Ways To Up Your Veggie Burger Game

It seems as though we’re in the heyday of veggie burgers. Whether you like a classic hippie veggie burger with whole grains and legumes or if you’re looking for a meaty vegan burger, there are so many options!

While I personally love a homemade black bean burger, I have to say the surge of meat-like alternatives such as Beyond Meat have really expanded the foodie horizons and provide alternatives for plant-based eaters at pubs, fast food establishments, and restaurants that historically weren’t very veggie friendly. Not to mention that most grocery stores carry a variety of options that are suited to just about all palates (vegans, vegetarians and meat eaters alike!).

When I’m putting together fixings for my burgers I usually like to go all out. I love loading up my burg with nutritious toppings and a variety of flavours and textures. Below I’ve shared some of my tips for upping your veggie burger game!

lefteris-kallergis-_TLKIVSW6Do-unsplash.jpg

Load up your burger with veggies & fruits!
If you’ve been to any of my talks or workshops, you’d know I’m always looking for ways to add more vegetables and fruits to my meals. Veggie burgers are no exception! Of course, there are the tried and true toppings like thinly sliced onions, tomatoes and lettuce. However, I’m a huge fan of adding arugula, spinach or baby kale, micro greens or sprouts, pickled red onions, sautéed mushrooms, avocado, or grilled peaches, pears or pineapples. I don’t necessarily add all of these at the same time, but the point is, there’s tons of variety and the options are endless. If you have any favourite veggie or fruit toppings that I didn’t mention, please tell me in the comments below.

Fermented fixings.
Fermented foods lend a nice crunch, a hit of sourness, and the benefit of gut friendly bacteria to whatever you’re eating. I enjoy adding sauerkraut and kimchi to veggie burgers, but my personal favourite is fermented dill pickles and mustards. When shopping for these products look for words like “raw”, “unpasteurized” or “lacto-fermented” on the label. They will likely be in the natural food section of well stocked grocery stores or health food stores in the refrigerator, and at your local farmers’ market.

Carefully curated condiments.
Confession: I have a thing for condiments! Some of my favourite plant-based veggie burger toppings include soft cashew cheeses, tapenade, salsa, pesto, chutney, vegan mayo or even homemade or naturally sweetened ketchups (I really like the Good Food For Good brand which uses dates instead of sugar). Oh and hummus, the catch-all condiment that can be added to just about anything. It truly deserves its own food group.

Better buns.
Most commercial or store bought breads taste pretty good, but many fall short nutritionally. Generally when I’m seeking out the perfect bun to my burg, I’ll look for sprouted whole grain burger buns as they tend to contain higher quality, more nutritious ingredients. They can be harder to come by, so try the natural food section in your grocery store or your local health food store. I also suggest connecting with artisanal bakers or bakeries in your area for freshly baked buns free of preservatives and additives.

Super tasty sides.
At most restaurants you’ll be offered a side salad or fries with your veggie burger, but the great thing about serving veggie burgers at home or bringing them to a BBQ party is that you can step it up a notch with super tasty and nutritious sides. I usually serve my veggie burgers with my Power Pasta Salad, Summer Slaw or my Superfood Kale Salad. Fries make a great side, but have you tried my Chili Roasted Sweet Potatoes? These are baked (not fried!) and pair perfectly with any veggie burger.

I hope my suggestions will take your summer barbecues to the next level. I was inspired to write this post after filming a veggie burger taste test with some friends for my YouTube channel. You can check out the video below!

Marinated Tofu & Veggie Skewers

During the springtime I taught a lot of cooking classes. The most popular class leading into the summer months was my “Veggie Grilling” class. If you follow me on social media you likely saw a few photos or videos from my classes and you definitely would’ve seen a few shots of the tofu & veggie skewers. I had a lot requests for this recipe and I’m happy to finally be sharing it with you while we’re still in the height of summer.

If you’re new to using tofu this is a great recipe to get you started. Tofu is a very neutral tasting plant-based protein which makes it perfect for marinating. Not to mention that extra firm tofu holds up very well on the grill. If you don't have a barbecue - don’t worry - you can still make this recipe. Follow the recipe exactly, but instead of using a grill, simply bake your skewers on a parchment lined baking sheet at 375 F for 30 - 40 minutes or until the tofu has firmed up and all the veggies are cooked through.

For a long time there was a misconception that if you don’t eat meat, there’s really not much worth grilling. I think these skewers will put that idea to rest. Try out this recipe and let me know if you agree!

MARINATED TOFU & VEGGIE SKEWERS

Yields anywhere from 8 - 12 skewers or 4 servings.

Ingredients:

350 g block of extra firm tofu, diced (big enough to fit on your skewers)
1/3 cup soy sauce or tamari
1/4 cup maple syrup
1/2 teaspoon smoked paprika or a few drops of liquid smoke
1/4 teaspoon chili flakes, optional 
2 garlic cloves, minced
1/2 red onion chopped into big chunks
1 bell pepper cut into large dice
1 zucchini cut into 1/2 inch thick rounds
1 pint cherry or grape tomatoes
1 pint mushrooms of your choice, cleaned off, stems removed

Directions:

Mix the soy sauce or tamari, maple syrup, smoked paprika or liquid smoke, chili flakes and garlic in a measuring cup to create the marinade. In a wide flat container or casserole dish, add the tofu and pour over the marinade. Cover and transfer the dish to the refrigerator for 1 hour to overnight, mixing occasionally to allow the tofu to absorb the marinade.

Drain the marinade into a saucepan, bring to boil and reduce to a simmer until it thickens, stirring occasionally. This could take about 20 minutes.

While you are reducing the marinade, thread the cubes of tofu and mixed veggies onto skewers.  Once the the marinade has thickened up nicely, brush it over the skewers so all the veggies have a light coating.

Preheat the grill to medium-high. Option to lightly brush the grill with some oil (unless it's nonstick).  Transfer your skewers to the grill and cook the skewers for 5 minutes on each side or until you have nice grill marks.  

Notes from the kitchen:
-For best results, be sure to drain off the excess water from the tofu when you take it out of the package. Then pat the tofu dry with a paper towel or dish cloth. This will allow the tofu to fully absorb the marinade. In case you’re wondering, you do not need to press the tofu, but if you’d like to, go ahead.
-If you’re using wooden skewers and grilling on a barbecue, make sure to soak your skewers in water for at least 30 minutes so that they don’t catch on fire.

This recipe is inspired by the Buddhist Chef’s tofu skewers.

If you enjoyed the recipe I shared above be sure to check out my Plant-Based Breakthrough program, which is a crash course in plant-based health, nutrition, and meal planning. For details about the program click here. You can also join the Plant-Based Breakthrough Community on Facebook where I share recipes, inspiration, and information on plant-based nutrition.