Flourless Choose-Your-Own-Adventure Chocolate Chip Cookies

I’ve been a huge slacker on blogging lately, but if you’ve been following on social media or if you’re on my mailing list you’d know that I’ve had some big changes in the past few months. In November I had a baby and l’m currently on maternity leave. So far baby Gwenyth is healthy and happy and, although I’m a bit more tired than before, I can’t complain too much as she’s a decent sleeper too! I plan on coming back to work sometime in the springtime or summer to host my online classes again and I’ll be sure to keep you posted about my return via my newsletter.

In the meantime, I’ll be hanging out with Gweny, getting to know her better, and also cooking and baking a lot. Since she was born I’ve made a lot of muffins, loaves and cookies. I like to make something sweet each week. The recipes change, but they always tend to be made with more nutritious ingredients and I try to keep them lower sugar as I’m not a huge fan of super sweet sweets.

The recipe I’ve shared below is one of my go-to’s. I’ve made these cookies a lot! When I shared the recipe on social media I received so much positive feedback that I felt they were worthy of the blog. Please use the recipe below as a guideline and add or subtract whatever you’d like as this recipe can easily handle substitutions.

Snapseed 2.jpg

Ingredients:

3 mashed bananas
2 cups of oats (I used rolled oats, but quick oats would work)
1 cup of natural smooth or crunchy peanut butter (1/2 cup PB and 1/2 cup tahini or 1 cup other nut or seed butter of your choice)
1 teaspoon vanilla
1/2 cup shredded coconut
3 tablespoons maple syrup
Dairy-free dark chocolate chips (as much or as little as you’d like)
Sea salt (just a couple pinches to add into the recipe or to sprinkle on top)

Directions:

Preheat your oven to 350 F and line a baking sheet with parchment paper or a silicone liner.

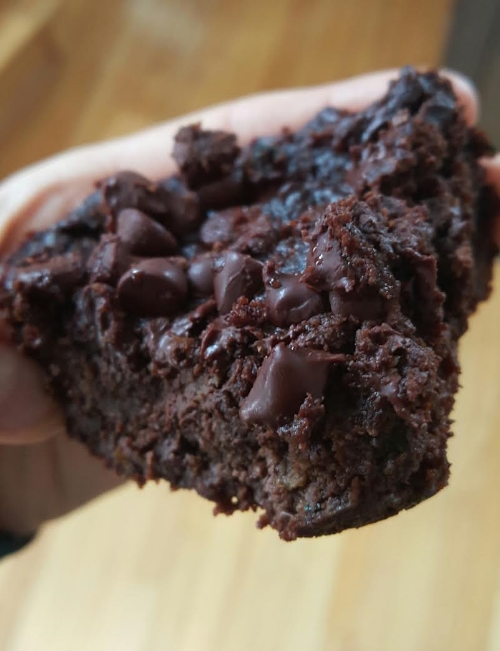
Mix all of the ingredients together. You may choose to add or omit ingredients and/or swap the peanut butter for other nut or seed butters, or any mix of your favourite nut/seed butter (please note that if you use alternate butters - like tahini - you may need to adjust the sweetness a bit with extra maple syrup or extra chocolate chips). In the photo above you can see that I added pumpkin seeds. I also included chia seeds and some cinnamon. Other times I’ve made this recipe I’ve added ground flax, hemp, walnuts, and/or raisins. Be creative! Add your favourite ingredients as this is not your traditional cookie recipe and is very forgiving.

Once you’ve thoroughly mixed your ingredients taste the batter to make sure it’s to your liking, then create evenly sized balls (I usually get about 20 - 24 cookies as I keep mine on the smaller side) and place them on your baking sheet. Flatten them a bit with a fork or your hand. Transfer the sheet to the oven. Bake for 16 - 18 minutes. These cookies don’t really expand or become fluffy, but they will crisp up a bit on the bottom.

Once cooled you can store them at room temperature in an airtight container for a week or the freezer for a few months. Enjoy!

Magic Cookie Bars

If you live in Ottawa you’ve undoubtedly heard of Strawberry Blonde Bakery. Known primarily for delicious desserts, savoury snacks, and breads, behind the scenes Strawberry Blonde has been blazing the trails in plant-based and allergy free baking. A designated nut free, dairy free, gluten free bakery, Strawberry Blonde has become a fixture for those with food allergies or dietary restrictions, but since they also produce delicious baked goods, they are a unanimous favourite throughout the city.

Jacqui Okum, outside of her bakery, Strawberry Blonde, in Ottawa.

Jacqui Okum, outside of her bakery, Strawberry Blonde, in Ottawa.

Jacqui Okum is the mastermind behind this award winning bakery. She has years of experience with baking and is a pro when it comes to swapping and substituting ingredients. She has been successful in “veganizing” pretty much every classic recipe. Since the holidays are synonymous with baking (baking, and more baking!) and many of you are likely planning to adapt classic recipes to make them plant-based, I hope to ease this process by learning from one of the best bakers around. Below Jacqui shares her story about starting a vegan bakery, gives us insider tips, tricks and swaps for plant-based baking, and also shares her recipe for Magic Cookie Bars. Yum! Scroll down to learn more.

Amy: Strawberry Blonde is one of Ottawa's most beloved bakeries. Were you always into baking?
Jacqui:
I was definitely always into eating baked goods! Haha! I originally went to University for Film Production and worked in the TV industry for a number of years. I eventually decided it wasn't the right work environment for me and around the same time I went vegan. The transition to being vegan was easy, but boy oh boy did I miss pastries and sweets. Vegan pastries were hard to find then (about 12 years ago now) so I just ended up baking all the time for myself. I found I really liked it. And although I knew I didn't want to work in Film/TV, I didn't know what else I wanted to do. I did know that I wanted to be my own boss. One day my boyfriend made an offhand comment about how I should open up my own vegan bakery since I was just baking all the time anyway, and when he said that, it was like a lightbulb went off in my head. I decided that if I was going to do it, I wanted to do it right so I enrolled in George Brown College's Baking & Pastry Arts Program, where I learned all the tips and tricks of the trade and applied them at home to vegan baking.

Amy: When did you open the bakery?  And what inspired you to offer vegan, gluten free, & nut free baked goods? 
Jacqui:
The storefront on Grange Ave opened just over 5 years ago now. But we were baking for wholesale customers (Rainbow Foods on Richmond Road and Herb & Spice on Bank street) for a number of months before that. And before that even I was selling my baked goods at the Lansdowne Farmer's Market. My treats were always vegan, but it was my experience at the market that made me decide to switch to doing everything gluten free and nut free. I really listened to my customers and the majority of them were asking for gluten free or nut free on top of it being from from dairy and eggs. For allergy concerns, I thought it would be best to just eliminate these ingredients completely, to avoid risk of cross contamination. But also, being vegan, I really sympathized with them, knowing how disappointing it can be to not be able to enjoy a pastry or a treat. I quickly became determined to create a space where vegans, or those with allergies, could go and feel normal and have the ability to get excited the way most people do when treating themselves. 

Amy: Many of my readers are interested in transitioning to a plant-based diet and looking for tips, swaps and alternatives for baked goods. Can you share a list of swaps/alternatives that you use in creating your famous desserts?
Jacqui:
Okay, here are some of the most common swaps…
Butter:
-I find Earth Balance to be the best and most consistent brand for replacing butter. It can easily be used as a 1:1 ratio when subbing in any recipe.
-There is a soy-free brand of butter replacement called Melt that is good for some things, but it is more expensive than Earth Balance and the ratio needs to be played with a little bit. But if you're looking for soy free, this is a good alternative, especially for making icings.
-Coconut oil can sometimes work, but be careful as it melts quickly so it won't cream as well as traditional butter would (especially important when making cookies!)

Milk:
-There are so many milk alternatives out there and they all work fairly well with a 1:1 ratio. I find soy milk to be the creamiest and works best in most situations. Coconut milk is also good, but the fat content is higher so it sometimes separates or makes products a little greasier.
-For butter milk, simply add 1 tsp of vinegar or lemon juice per cup of milk and whisk. Let it sit for a couple minutes then it's turned into buttermilk.

Eggs:
This really depends on what it is you're baking. There are lots of options! These are the ones we use at the bakery:
-Flax seeds
-Chia seeds
-Apple sauce
-Silken tofu
-Ener-g brand egg replacer

Cream Cheese:
-The tofutti brand is by far the best for baking!

Amy: Finally, we're getting into the holiday season. Would you mind sharing one of your favourite seasonal recipes? 
Jacqui:
Sure thing! The Strawberry Blonde Magic Cookie Bars are a serious Christmas favourite for both our customers and staff alike!

magic cookie bars2.jpg

MAGIC COOKIE BARS

Ingredients:

Base:
3 cups vegan graham cracker crumbs
3/4 cup Earth Balance Buttery Spread
3 tablespoons brown or cane sugar

Filling:
For the condensed coconut milk:
400 ml/14 0z can of full fat coconut milk
1 cup brown sugar
(See below for notes about the condensed milk)

Topping:
2 cups non-dairy chocolate chips
3 cups shredded, unsweetened coconut
3/4 cup pumpkin seeds

Directions:

Preheat oven to 350 F degrees. Line a 9"x 13" pan with parchment paper.

Base:

Melt the Earth Balance in a small saucepan over low-medium heat and combine with graham cracker crumbs and sugar.

Press this mixutre firmly and evenly into the parchment lined pan.

Filling:

To make condensed coconut milk: Combine canned coconut milk and brown sugar in a pot. Bring to a boil and then reduce to a simmer. Let simmer for 8-10 minutes, ensuring all the sugar has dissolved and mixture has thickened slightly.

Pour chocolate chips evenly over the base, making sure to cover the corners.

Pour hot coconut milk/sugar mixture evenly over the top of chocolate chips, followed by an even layer of coconut and pumpkin seeds. Press ingredients down with your hands or a spatula.

Bake for 25-30 minutes or until set and top browns slightly.

Let cool completely, then put in fridge for at least 1 hour to make cutting easier. This recipe can yield an upward of 24 cookie bars depending on how big or small you cut them. Keep them stored in an airtight container at room temperature or in the fridge or freezer. Enjoy!

Notes from the kitchen:
-To save time, you can also purchase condensed coconut milk in many well stocked grocery stores or health food stores. The last few times I’ve made this recipe I replaced the homemade condensed coconut milk with a can of Let’s Do Organic’s sweetened condensed coconut milk (7.4 oz/210 g can). Nature’s Charm makes a 11.25 oz/320 g can of sweetened condensed coconut milk, and if you’re able to find it, that would actually be the ideal size as the 7.4 oz/210 g can is not quite enough for the recipe and I ended up adding a bit of non-dairy milk to ensure I had enough liquid to cover the graham cracker base and chocolate chips. If using store-bought condensed coconut milk, you will still want to warm it on the stovetop so that it’ll melt the chocolate chips nicely.
-I have also swapped in Miyoko’s European Style Cultured Vegan Butter instead of Earth Balance in equal measure with great success. Miyoko’s is a less processed option and it’s a great butter substitute in general.

For more information about Strawberry Blonde Bakery, visit their website,  Facebook page, or Instagram account.

Cherry Chocolate Nice-Cream

It's turning out to be a hot, hot, hot summer, and if you're looking to beat the heat, I’ve got just the recipe to cool you down.  Cherry Chocolate Nice-Cream. Need I say more? Well, perhaps I should clarify for those of you who are new to the term "nice-cream", which is a quick DIY dairy-free banana-based ice-cream.  It's essentially the easiest, tastiest and possibly healthiest way to make ice-cream at home. 

I’m super excited to share this recipe for a couple reasons. Firstly, I’ve been making this one a lot at my cooking lessons and sharing photos on my Instagram stories. Needless to say, I had lots of requests and it's about time I share this with those of you who haven't been able to attend the lessons. 

Secondly,  this is the first of many upcoming projects that I'll be doing with my friend Ana Tavares. You might remember seeing her as a guest blogger, or perhaps you’ve stumbled upon her Instagram where she posts stunning food photography. If you speak Portuguese you may have discovered her vegetarian food blog or cookbook (which has been hugely successful in Brazil).  Ana took the photos for this post and we plan to collaborate in the coming months to create more great culinary content in both English and Portuguese.

Scroll down to learn how to make Cherry Chocolate Nice-Cream and stay tuned as we’ll be sharing another recipe collab next week.

CHERRY CHOCOLATE NICE-CREAM

Makes 3 - 4 servings

Ingredients: 

4 overripe bananas
1/3 cup cocoa powder or raw cocao powder
1/4 teaspoon vanilla extract
Non-dairy milk of your choice, optional
1/4 - 1/3 cup frozen dark sweet cherries or sour cherries depending on your taste
Optional topping: unsweetened coconut flakes

Directions: 

Chop the bananas into small rounds and freeze them overnight on parchment lined baking tray.

Add all ingredients - except cherries and coconut flakes - to a food processor or high-speed blender.   Process until completely smooth (similar to a soft serve consistency). If you find your blender isn’t strong enough to handle the frozen banana you may need to let them thaw a bit and/or add a bit of non-dairy milk to get things going. 

Once you've reached a nice, smooth texture, add the cherries, then pulse for a minute or so or until the cherries are evenly distributed, but still a bit chunky. 

For the best texture you’ll want to enjoy your nice-cream immediately, but you can  freeze leftovers and thaw again before serving.  When serving, top your nice-cream with whole frozen cherries and unsweetened coconut flakes. 

If you enjoyed the recipe I shared above be sure to check out my Plant-Based Breakthrough program, which is a 4 week online crash course in health, nutrition, and meal planning.  For details on when the next program starts click here. You can also join my Plant-Based Breakthrough Community on Facebook where I share recipes, inspiration, and information on plant-based nutrition.

Chocolate Cherry Nice Cream-3.jpg

Gingerbread Cookie Dough Bites

unnamed-4.jpg

Just over a year ago I stumbled upon the eye-catching Instagram account of an Ottawa-based blogger called "Pequena Vegetariana". The Instagram account and blog focusses on colourful, vibrant vegetarian recipes in Portuguese and English. A few months later, I had the chance to meet the blogger behind the blog when Ana Tavares attended one of my cooking classes.   Ana has been such a positive influence and has always been so supportive. I've gotten to know her better over the last year as she has since attended many of my cooking lessons and even participated in my group nutrition program.

Ana was born in Brazil and now lives and works here in Ottawa.  Although she works full time as a public servant, she also has several exciting endeavours underway that she showcases on her new website.  While Ana has lived in Canada since her teens, she still has strong ties to Brazil.  This past summer she worked with Brazilian publishing houses Belas Letras and Imaginarium to create her first cookbook, "Comidinhas do bem", which launched in November 2017 in 235 stores across the country.  It features 45 exclusive recipes created by Ana, daily positive living tips, beautiful photographs and graphics. I also played a very small role in the creation of this cookbook as I provided nutritional content for foods based on their colour.  It was truly a full circle moment to be able to offer my support to Ana in creating this gorgeous cookbook.  The cookbook is only available in Portuguese at the moment, but it has opened the door for some fun future collaborations between Ana and me. Stay tuned! 

Recently Ana shared one of her new recipe with me and I'm thrilled to be able to pass it along to all of you. She's come up with simple and delicious Gingerbread Cookie Dough Bites that are sure to satisfy your sweet tooth this holiday season.  

I’ve made this recipe a few times myself. I’ve followed the instructions exactly with great success and also made a few changes including swapping out the coconut oil and omitting the almond flour. See the notes below for details.

If you try them out, let us know what you think in the comments section below! 

GINGERBREAD COOKIE DOUGH BITES

Ingredients: 

1 1/2 cup rolled oats
1 teaspoon ground ginger or finely grated fresh ginger
1 teaspoon cinnamon
Pinch of ground cloves
2 tablespoons coconut oil
2 tablespoons almond butter
2 tablespoons maple syrup
2 tablespoons molasses
1 tablespoon vanilla extract
1/2 cup almond flour

Directions: 

Line a baking pan with parchment paper.

In a blender mix together the oats, ginger, cinnamon and ground cloves until it resembles a flour like texture.

In a large bowl, whisk together the coconut oil, almond butter, maple syrup, molasses and vanilla extract until well combined. 

Slowly add in the blender mixture and finally, add in the almond flour. By the end, you may need to use your hands cause it’ll get a little sticky.

Generously fill a tablespoon sized measuring spoon with the cookie dough mixture, roll into balls and place in the freezer. You should be able to make between 18 to 24 balls.

Freeze for about an hour, and serve cold directly from the freezer. Once frozen, you can also move them over into an enclosed container and keep them in the fridge for all your holiday cookie cravings!

Notes from the kitchen:
-If you don't want to use coconut oil, simply add extra almond butter. Rather than 2 tablespoons of coconut oil and 2 tablespoons of almond butter, go with 1/4 cup of almond butter. In making this swap, I found the recipe was dry enough that I didn’t need to add the almond flour at the end.
-Depending on the moisture or dryness of the recipe (it can vary depending on the oiliness of the almond butter, whether or not you use coconut oil, or the dryness of the oat flour), I haven’t always needed to add the almond flour. Generally near the end of the recipe I found that the mixture was dry enough that I could easily roll it into balls without the almond flour. If you find it is too moist but don't have almond flour, you could simply make a bit more oat flour and add it as needed. Oat flour is much cheaper than almond flour so this is a great cost cutting swap!

unnamed-6.jpg

Chocolate Chia Pudding & Raw Brownie Bites

If you follow me on Facebook, Twitter, or Instagram, you may have noticed that I've been partnering up with Kardish Health Food Centre quite a bit lately.  Kardish is an Ottawa-based, family-run health food and natural products store with 9 locations across the city. I know many of the staff, the owners, and I've been to almost all of their stores and I couldn't have been more excited when Kardish's Director of Communications approached me to be its first nutrition ambassador. I'm so pleased to take on this role with such a fantastic local company.  This means I'll be doing lots of events and nutrition talks with Kardish in the coming year! Be sure to visit my events page regularly or sign-up for my newsletter to stay in the loop!

Recently Kardish created a Chocolate Guide (right on time for Valentine's Day!) and included a couple of my recipes. Both recipes are chocolate based, super easy to make and healthy too. The Guide also includes interesting chocolate facts, the health benefits of chocolate and also the best brands to buy.  CLICK HERE to access the guide. You can also scroll down to see the two recipe I provided. Please comment below or send me a message if you try any of the recipes. I always love getting feedback!

Kardish Chocolate Guide - Amy .png

The Best Zucchini Brownies

I've been making these brownies for a while now. I think I originally came across this recipe on Ambitious Kitchen, but modified it a bit to suit my liking. This recipe produces brownies that are chocolatey, ooey, gooey, chewy, and oh so good! They are also vegan, gluten free, nut free, low sugar, and high in fibre. They've been tried and tested on picky eaters and kids, only to receive rave reviews all round. Plus, many of the ingredients in this recipe can easily be swapped or modified. Scroll to the very bottom to see my suggestions.

These are the kind of brownies that don't need much introduction. Rather I'll just post a gratuitous close up photo of one that I ate yesterday afternoon. Scroll down for the recipes. I hope you'll enjoy these brownies as much as I do.

ZUCCHINI BROWNIES

Ingredients:

1/2 cup tahini
1/4 cup maple syrup
1/2 cup unsweetened natural applesauce or 1/2 cup mashed ripe bananas
2 teaspoons of vanilla
1/2 cup unsweetened cocoa powder
3/4 cup, oat flour (store bought or make your own, see instructions below)
1 teaspoon baking soda
1/4 teaspoon sea salt
1 1/2 cups grated/shredded zucchini (approximately 2 zucchinis) 
3/4 cup dark chocolate chips (dairy free - I use Camino brand)

Instructions:

Preheat oven to 350 degrees F.  Grease a loaf pan or 8 x 8 baking pan with coconut oil.

In a large bowl whip together tahini, apple sauce,  maple syrup and vanilla until smooth. Add in zucchini, cocoa powder, oat flour, baking soda, and sea salt. Mix until well combined. Gently fold in 1/2 cup of chocolate chips. Pour batter into prepared baking pan or loaf ban and sprinkle remaining chocolate chips over the top. Bake for approximately 40 minutes.  Enjoy!

Notes from the Kitchen:
-
To make your own oat flour, place rolled oats in blender or food processor and process until they are finely ground (flour consistency).
-I’ve used spelt and whole wheat flour in the place of oat flour with great results.
-I’ve swapped zucchini with grated summer squash in equal measure and that worked perfectly.
-If you prefer very low sugar recipes, you can even swap in unsweetened chocolate chips. I’ve used Camino brand’s unsweetened chocolate chips and really enjoyed the brownies even with less sweetness.
-Finally, I’ve swapped tahini with peanut butter and that worked fantastically as well. You could really use any natural nut or seed butter for this recipe.


Cocao Energy Bites

Last week, I joined Andrea Robertson of Body and Balance and lululemon for a fantastic community event that combined so many of my favourite things: great people, Gatineau Park, snowshoeing, yoga and food! The event, Snowshoe, Soulfood, & Savasana, was something that Andrea had been dreaming up for a while and she was finally able to bring it together with a little help from lululemon and some of my hearty, healthy cooking. 

About 30 of us met at the entrance to Gatineau Park in Old Chelsea just as the sun was setting. We strapped on our snowshoes and, as a group, we hiked about 4 km through the snowy paths to Heritage cabin. In the cabin, we warmed up by the fire and enjoyed a candlelit dinner of veggie chili with avocado, cashew & cilantro cream and cocao bites (made by me!). After dinner, I spoke to the group about food and immunity and shared some tips on how to maintain a strong immune system during the winter months. Andrea also led the group through a fantastic yoga class, which was much needed as we prepared to make the trek back to the parking lot. This was such a fun and memorable evening, I look forward to similar events in the near future. Stay tuned!

Since the cocoa bites were such a hit, I’ve decided to share the recipe. As you’ll see, this is a “choose your own adventure” style recipe. Play around with it to create your favourite version. Lately I’ve been using sunflower butter and omitting the chocolate chips altogether, sticking with cocao nibs for a lower sugar option and they taste fantastic. The full recipe is below.

COCAO ENERGY BITES

Makes approximately 40 balls.

Ingredients :

  • 3 cups nut butter (sunflower, cashew, smooth almond or peanut butter)

  • 2/3 cup maple syrup

  • ¼ cup cocao powder

  • 1 cup dried cranberries (Amy’s tip: choose juice sweetened cranberries for a healthier, lower sugar option)

  • 1 ½ cup desiccated unsweetened coconut

  • 1 cup mini dairy free chocolate chips (reduced sugar options: 1/2 cup cocao nibs & 1/2 cup chocolate chips OR 1 cup cocao nibs)

  • 2 tablespoons chia seeds

  • 1 teaspoon cinnamon

  • 1 or 2 big pinches of sea salt

Directions:

Stir together the nut butter and maple syrup. Once well combined,  mix the rest of the ingredients together (reserving ¾ cup coconut) until it is sticky and you can form balls. I use a heaping tablespoon of the nut butter mixture and roll it into balls in the reserved coconut to create a nice even coating (see the photo below). Place the balls in an airtight container and transfer to the refrigerator where they can be stored for up to 2 weeks.  You can also store the balls in the freezer for up to 2 months.  Enjoy!

Chili Chocolate Truffles

Since my last few recipe posts have been savoury soups, today I decided to switch things up by sharing something sweet. Although I don't have much of a sweet tooth myself, I really, really enjoy chocolate truffles. These truffles in particular are rich, creamy, and bitter (but not too bitter), with a pop of spice. I've made them on many occasions and they've always been very well received. They are dairy free, gluten free, and the perfect dessert for you upcoming holiday parties.

See below for a few beautiful photos (courtesy of my friend Caroline of CY-iwander) and the full recipe.

CHILI CHOCOLATE TRUFFLES

Vegan - Gluten Free - Makes about 20 - 25 truffles

Ingredients:

1/2 cup, full fat coconut milk
1 tablespoon, vanilla extract
1 cup, organic dairy-free semi-sweet chocolate chips (I like Camino brand)
2 - 3 tablespoons, cocoa powder
1 teaspoon, cinnamon
1/2 teaspoon, ground ginger
1/8 teaspoon, cayenne
A big pinch of sea salt

Directions:

In a saucepan combine coconut milk and vanilla extract and bring to a boil over medium heat. Reduce heat to a low. Simmer for about 5 minutes to allow the liquid to evaporate.

Remove the saucepan from the heat and add chocolate, spices and salt, stirring with a fork or whisking until the chocolate has melted and the mixture is evenly combined.

Transfer the mixture to a bowl and chill in the freezer for about 1 hour, or until the mixture is firm enough to shape into balls.  At this point, you'll want to add the cocoa powder to another bowl. Then scoop out about a tablespoon of the mixture and roll it into a truffle ball. Transfer the truffle in to the cocoa powder and roll it around to coat the exterior. Repeat this process until you have used up all of the mixture. Transfer the truffles to a baking sheet lined with parchment paper and refrigerate to set completely.

Storage: place the truffles in an airtight container in the refrigerator, where they will keep about 3 weeks, or in the freezer, where they will keep for about two months.

This recipe is inspired by Ottawa chef Caroline Ishii's trademark truffles from her restaurant Zen Kitchen, which is sadly now closed. 

Pumpkin Spice Muffins

Last week, I was working as the chef at Jackie Beaudoin's cottage yoga retreat. I love these kind of cooking gigs. They are a great opportunity for me to showcase some of my favourite healthy foods to very receptive and open-minded groups of people. Typically everything I make is vegan, gluten free, super healthy, but also loaded with flavour. I also make a concerted effort to feature as many seasonal and local vegetables as possible.  During the weekend, we ate lots of  root vegetables and squash. I also conjured up a great new recipe featuring one of my fall favourites: pumpkin!

Below, you'll find the recipe for my oat & hemp pumpkin spice muffins. The base for these is oat flour.  Lately, it's been my go-to for baking. I like that it has a bit more fibre than most flours and that I can easily make it myself. If you have a high powered blender or a good food processor at home, you can too!  Simply place rolled oats in a blender or food processor and process until they are finely ground (flour consistency).  I'm also a big fan of hemp hearts. Most people don't realize this, but hemp hearts are grown exclusively in Canada. They are also great source of protein, vitamins, minerals and fibre. They add a nice nutty flavour to the muffins. 

As for the pumpkin purée,  the canned version works, but it's very easy to make your own. Use one small pie pumpkin, cut it in half and remove the seeds (put them aside and you can roast them later for a healthy snack). Rub a little bit of oil on to the inner pieces before placing the halves (skin side up) on a parchment-lined cookie sheet, then bake for 30 minutes at 400 F. Honestly, there's nothing quite like the taste of roasted pumpkin. It's so good! If you have the time, and a pie pumpkin, I recommend this method.

Given that it's Halloween weekend, this recipe is very timely. If you're trying to stay away from candy, but still hoping to satisfy your sweet tooth, I've got you covered! 

OAT & HEMP PUMPKIN SPICE MUFFINS

Vegan ~ Gluten Free ~ Makes 12 large muffins

Ingredients: 

2 1/2 cups oat flour or spelt flour
2/3 – 3/4 cup hemp hearts
2 teaspoon baking powder
1⁄4 teaspoon, sea salt
1 tablespoon pumpkin spice
1 cup pumpkin purée (canned or homemade)
1⁄2 cup, pure maple syrup
3⁄4 cup unsweetened plant-based milk
1 1/2 teaspoon pure vanilla extract
1/3 cup medjool or cooking dates, chopped into small pieces, optional
1/4 cup raw pumpkin seeds or hemp hearts for topping

Directions: 

Preheat oven to 350°F. In a large bowl, combine the dry ingredients, sifting or whisking in the baking powder. Stir through until well combined.

In another bowl, combine pumpkin purée, maple syrup, milk, vanilla, and dates and mix together. Add the wet mixture to the dry mixture, and gently fold and mix through, until well combined (but do not overmix).

Spoon the mixture into a muffin pan lined with cupcake liners (this will fill 12 muffins quite full).  Top with pumpkin seeds. Bake for 21-23 minutes, or until a toothpick inserted in the center comes out clean. Allow them cool completely before trying to remove them from the muffin tray, or they may fall apart.  

Store in an airtight container for up to a week. 

Simple Strawberry Basil Granita

I'm a complete urbanite. I love living downtown and I love being in the heart of the city. That said, in the summer, there's nothing I enjoy more than retreating from the city and spending the weekend in the country. Like the good Canadian that I am, I can't resist a few days in nature, close to a body of water, surrounded by trees and wildlife.  Luckily, I'm able to spend lots of time at my boyfriend's family home on Upper Rideau Lake, near Westport, when I need a little getaway from city life. 

This weekend, en route to the Lake, I picked up a pint of strawberries at a roadside stand in Smith Falls with hopes of making one of my favourite cold summer desserts. As you may have seen in my last blog post, I shared a recipe featuring Ontario strawberries. Because they are so plentiful these days, I've decided to feature them yet again.  Yes, strawberries are delicious, but they also offer an array of health benefits. They are an excellent source of vitamin C and antioxidants. They are also anti-inflammatory and may help regulate blood sugar. 

Below, you'll find the recipe for my strawberry basil granita. It's sweet (but not too sweet), refreshing, and the perfect way to use up your extra strawberries and basil, both of which are incredibly bountiful this time of year. This popular Italian dessert is normally sweetened with sugar, but I swapped in a couple tablespoons of maple syrup to reduce the sweetness and to give it a Canadian touch.  It's a great dairy free alternative to ice cream, plus it's really easy to make and will impress even the pickiest eater! 

STRAWBERRY BASIL GRANITA 

unnamed-4.jpg

Makes approximately 4 servings. 

Ingredients: 

1 pints strawberries, washed, hulled and halved 
1/4 cup, fresh basil, roughly chopped  
2 tablespoons, fresh lemon juice 
2 tablespoons, maple syrup


Directions:  

Place strawberries in a food processor and process until nearly smooth. Add the basil, lemon juice and maple syrup. Pulse until evenly mixed. 

Transfer the mixture to an 8x8 baking dishes and freeze until it becomes icy around the edges, about 30 minutes. Use a fork to scrape the icy portion into the middle of the pan. 

Freeze for 1 ½ to 2 hours more, scraping the frozen edges towards the centre every 30 minutes, until the mixture is no longer liquid and has the consistency of flaky crystals.

Serve immediately in bowls or parfait glasses. The granita can keep for a few days in the freezer and will stay scoopable if frozen. You may have to defrost it for a bit, before serving, if it's been in the fridge for several hours. 

Strawberry Rhubarb Chia Seed Jam

Have you tried chia seeds yet? I love love love them. In my nutrition practice I almost always encourage my clients to incorporate chia seeds into their diets.  Although they are tiny, chia seeds offer a huge punch of nutritional density. They are a highly concentrated source of the anti-inflammatory omega-3 fatty acid, alpha-linolenic acid (ALA). Chia seeds are also an outstanding source of dietary fibre and contain calcium, magnesium, iron, and zinc. Eating chia seeds regularly is great way to manage weight and may even help reduce your risk of cardiovascular disease and stroke.

Recently, one of my clients asked for ideas on how he could use chia seeds. I  gave him a bunch of suggestions, such as chocolate chia pudding (google it, make it, you'll love it), adding a tablespoon of chia seeds to his morning smoothies, and I also mentioned that I had been interested in making a strawberry chia jam. We googled a few recipes and came across one that he could easily make at home.  Flash forward three weeks, he shows up at my office for our next appointment and tells me that he made chia seed jam. However, he modified the recipe slightly. Because he had so much rhubarb growing in his garden he decided to incorporate some into his jam. He said the results were phenomenal and that his entire family really enjoyed it. At that moment,  I made a mental note: "must try chia jam". 

This week, the stars aligned and I was given a bunch local strawberries and rhubarb. I did a quick google search for "strawberry rhubarb chia seed jam" and, lo and behold, one of the top search results was Ottawa local Kathy Smart's recipe. For those of you who don't know her, Kathy is the gluten free guru. She's also a nutritionist and cookbook author. From meeting her in person, and following her adventures on social media, I know that she is all about health education, healthy living, and she's extremely well versed at "healthifying" recipes. I knew she wouldn't let me down. 

So, I made the jam, and it's pretty darn tasty.  Plus, it's a great use of strawberries and rhubarb, both of which are currently in season here in Ontario and readily available at farmers' markets, grocery stores, and in backyards and garden plots near you!  In case you were wondering, chia seeds can be found at health food stores, Bulk Barn and most larger grocery stores in the natural food or health food section.  

Fresh Ottawa strawberries and rhubarb make this jam extra tasty and provide vitamin C and K.

Fresh Ottawa strawberries and rhubarb make this jam extra tasty and provide vitamin C and K.

STRAWBERRY RHUBARB CHIA SEED JAM 

Makes 3 cups 

Ingredients: 

2 cups, strawberries, cleaned and sliced
3/4 cup, fresh rhubarb, rough chopped
4 Tablespoons, pure maple syrup 
4 Tablespoons, chia seeds 
3 Tablespoons, fresh lemon juice

Directions: 

Add all of the above ingredients to a food processor or blender and pulse for 30 seconds. At this point, you should taste your jam for sweetness and, if it's not quite sweet enough for you, mix in a bit more maple syrup. If you are happy with the taste and texture, stop here. If you prefer a smoother jam, continue blending/processing until you've reached your desired consistency. 

Add your jam to a jar and store in your refrigerator for a few hours or overnight. Once the jam has solidified you can enjoy it on toast or rice cakes, with oatmeal or yogurt, on pancakes, or you might even want to eat it right out of the jar!   You can store your jam for up to two weeks in the refrigerator. 

Kathy's recipe was originally posted on her website, Live The Smart Way.