A Plant-Based Guide to Patio Season

Patio season is a sought after time of year even when trying to stay plant-based. Not all plant-based options are automatically healthy but whether you’re trying to make healthier choices or looking to treat yourself, check out my pro tips on how to stay in the plant-based lane. 

Drinks

First of all, I’d like to mention that you don’t need to drink alcohol to fully embrace the patio experience. Kombucha has changed the game for many looking to curb their drinking habits. The fermented taste combined with effervescence can make for an excellent beer or cider substitute. Some of the trendier restaurants have even started carrying it on tap. It comes in a variety of flavours and contains probiotics. Plus, I’m seeing more and more companies like Seedlip who are revolutionizing mocktails with a fantastic array of non-alcoholic spirits. There’s also Canadian brewers such as Parktake Brewing who are creating tasty alcohol-free IPA, blonde and pale ales.

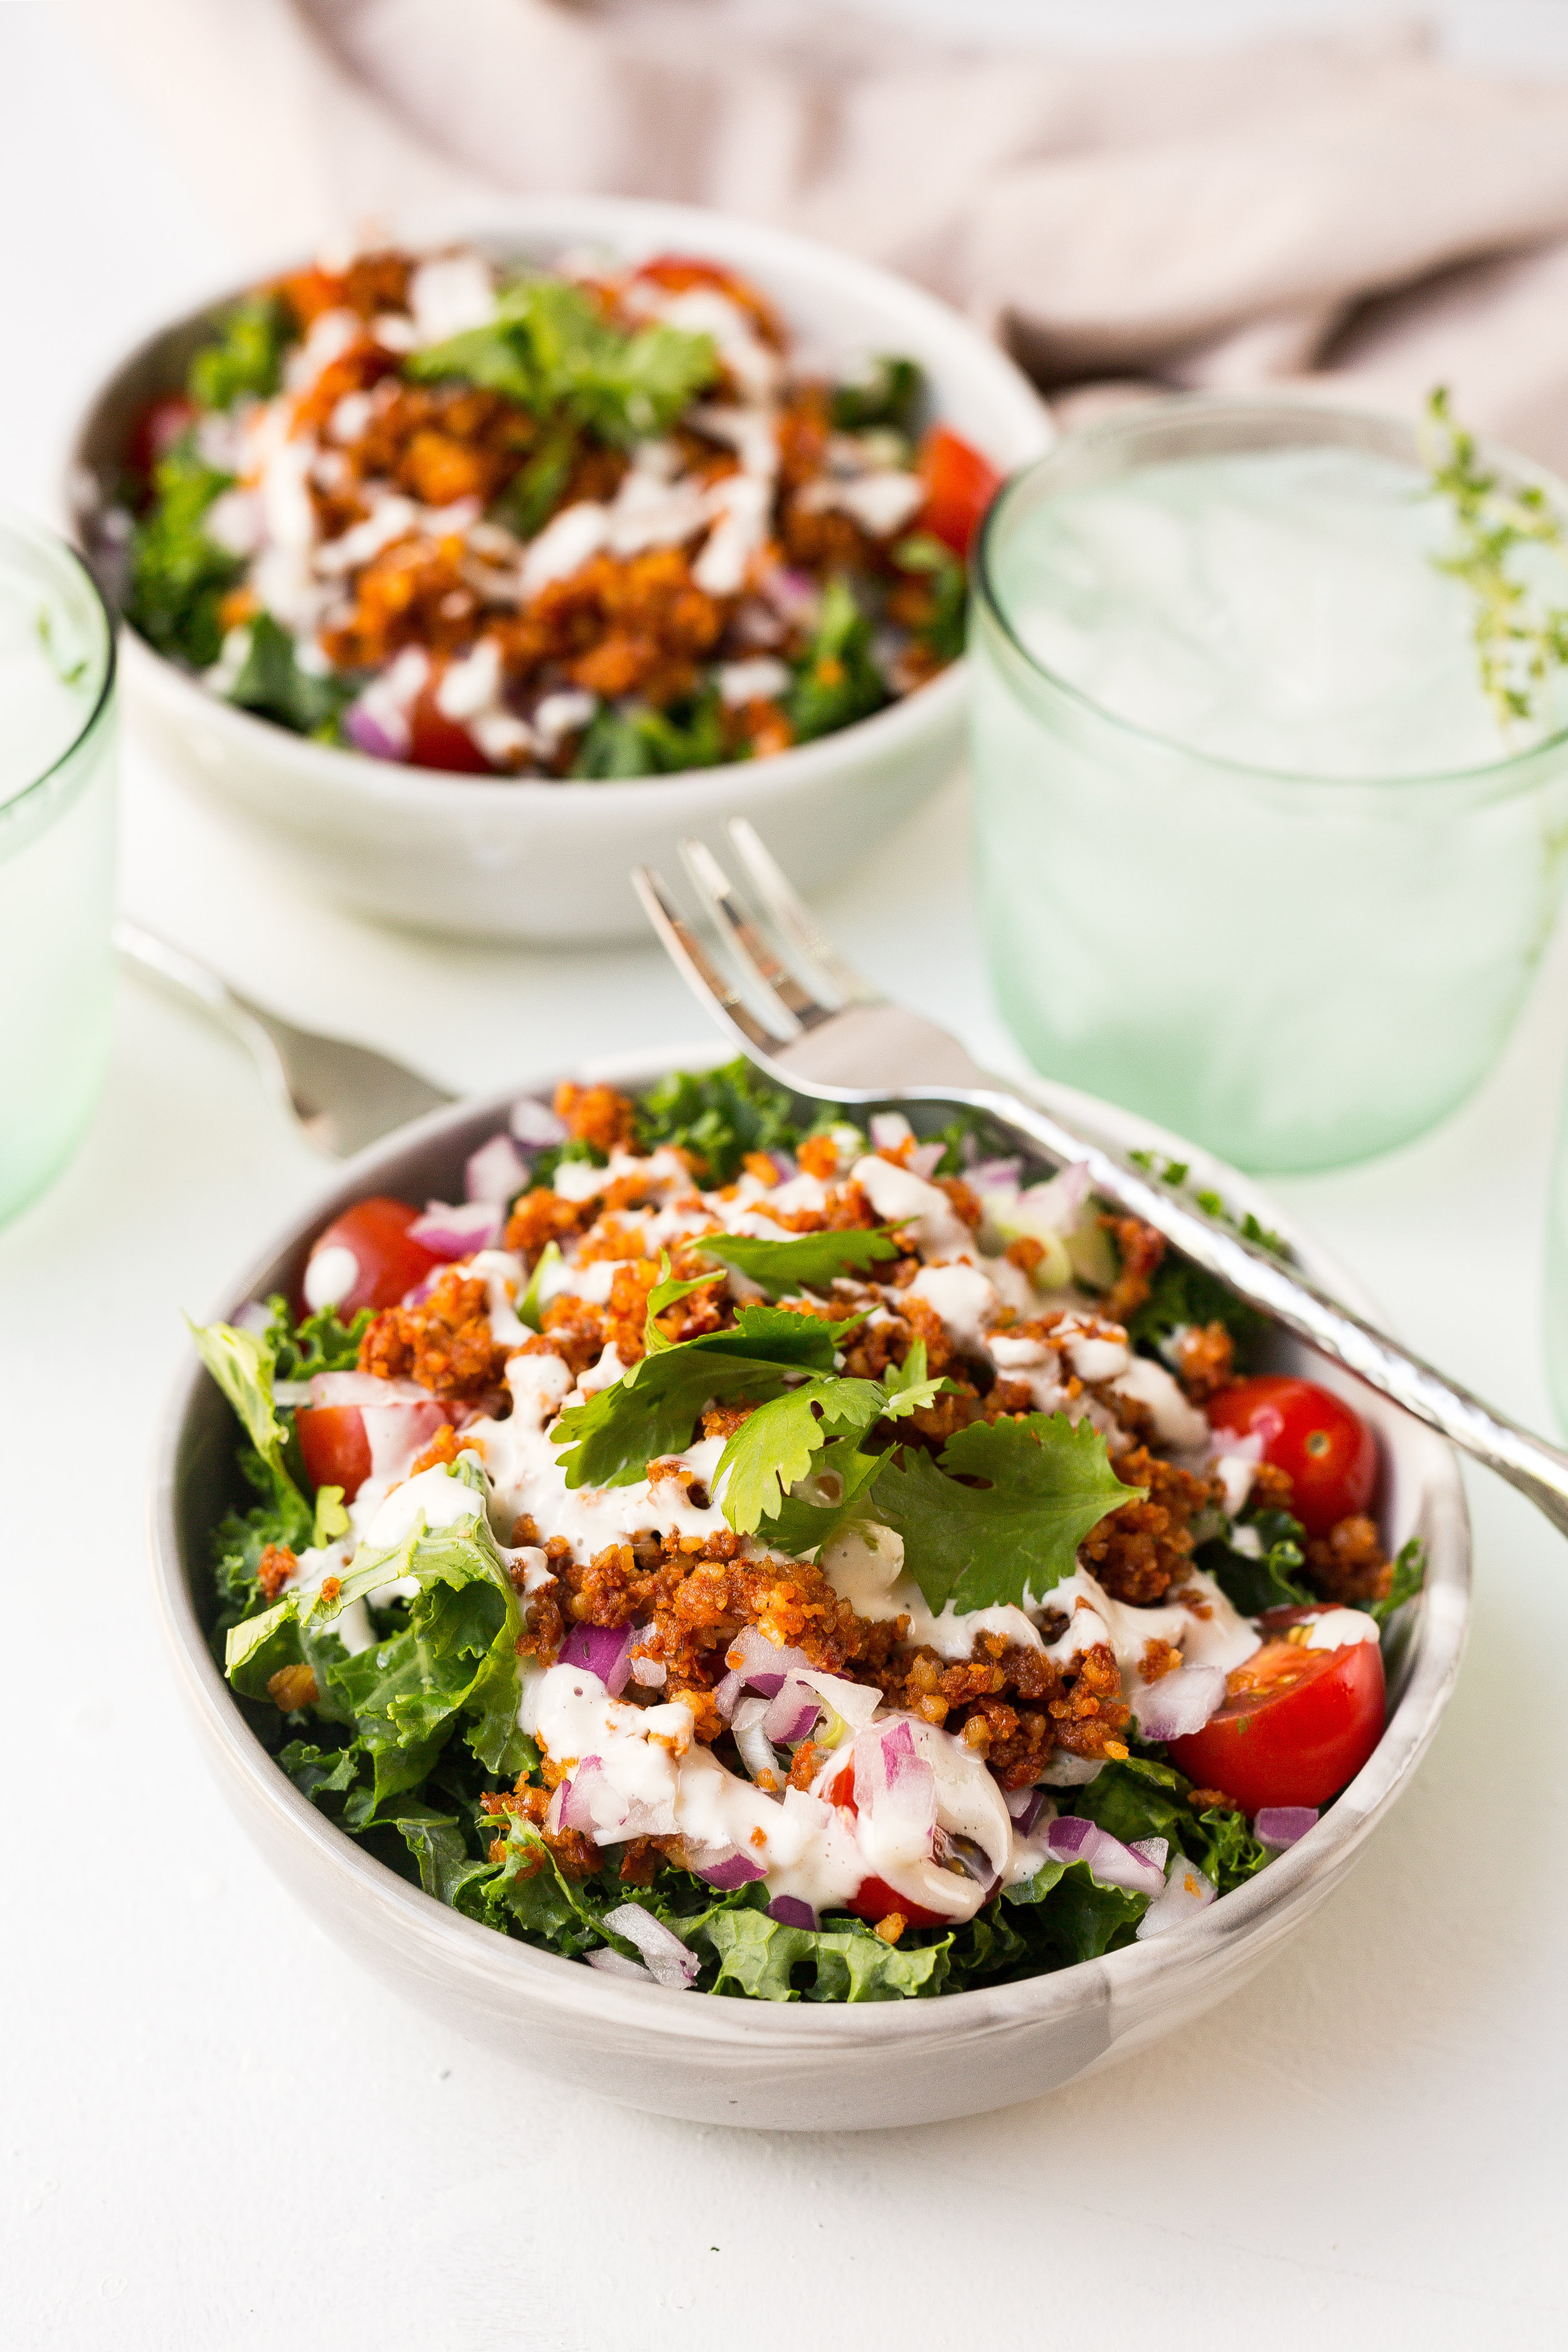
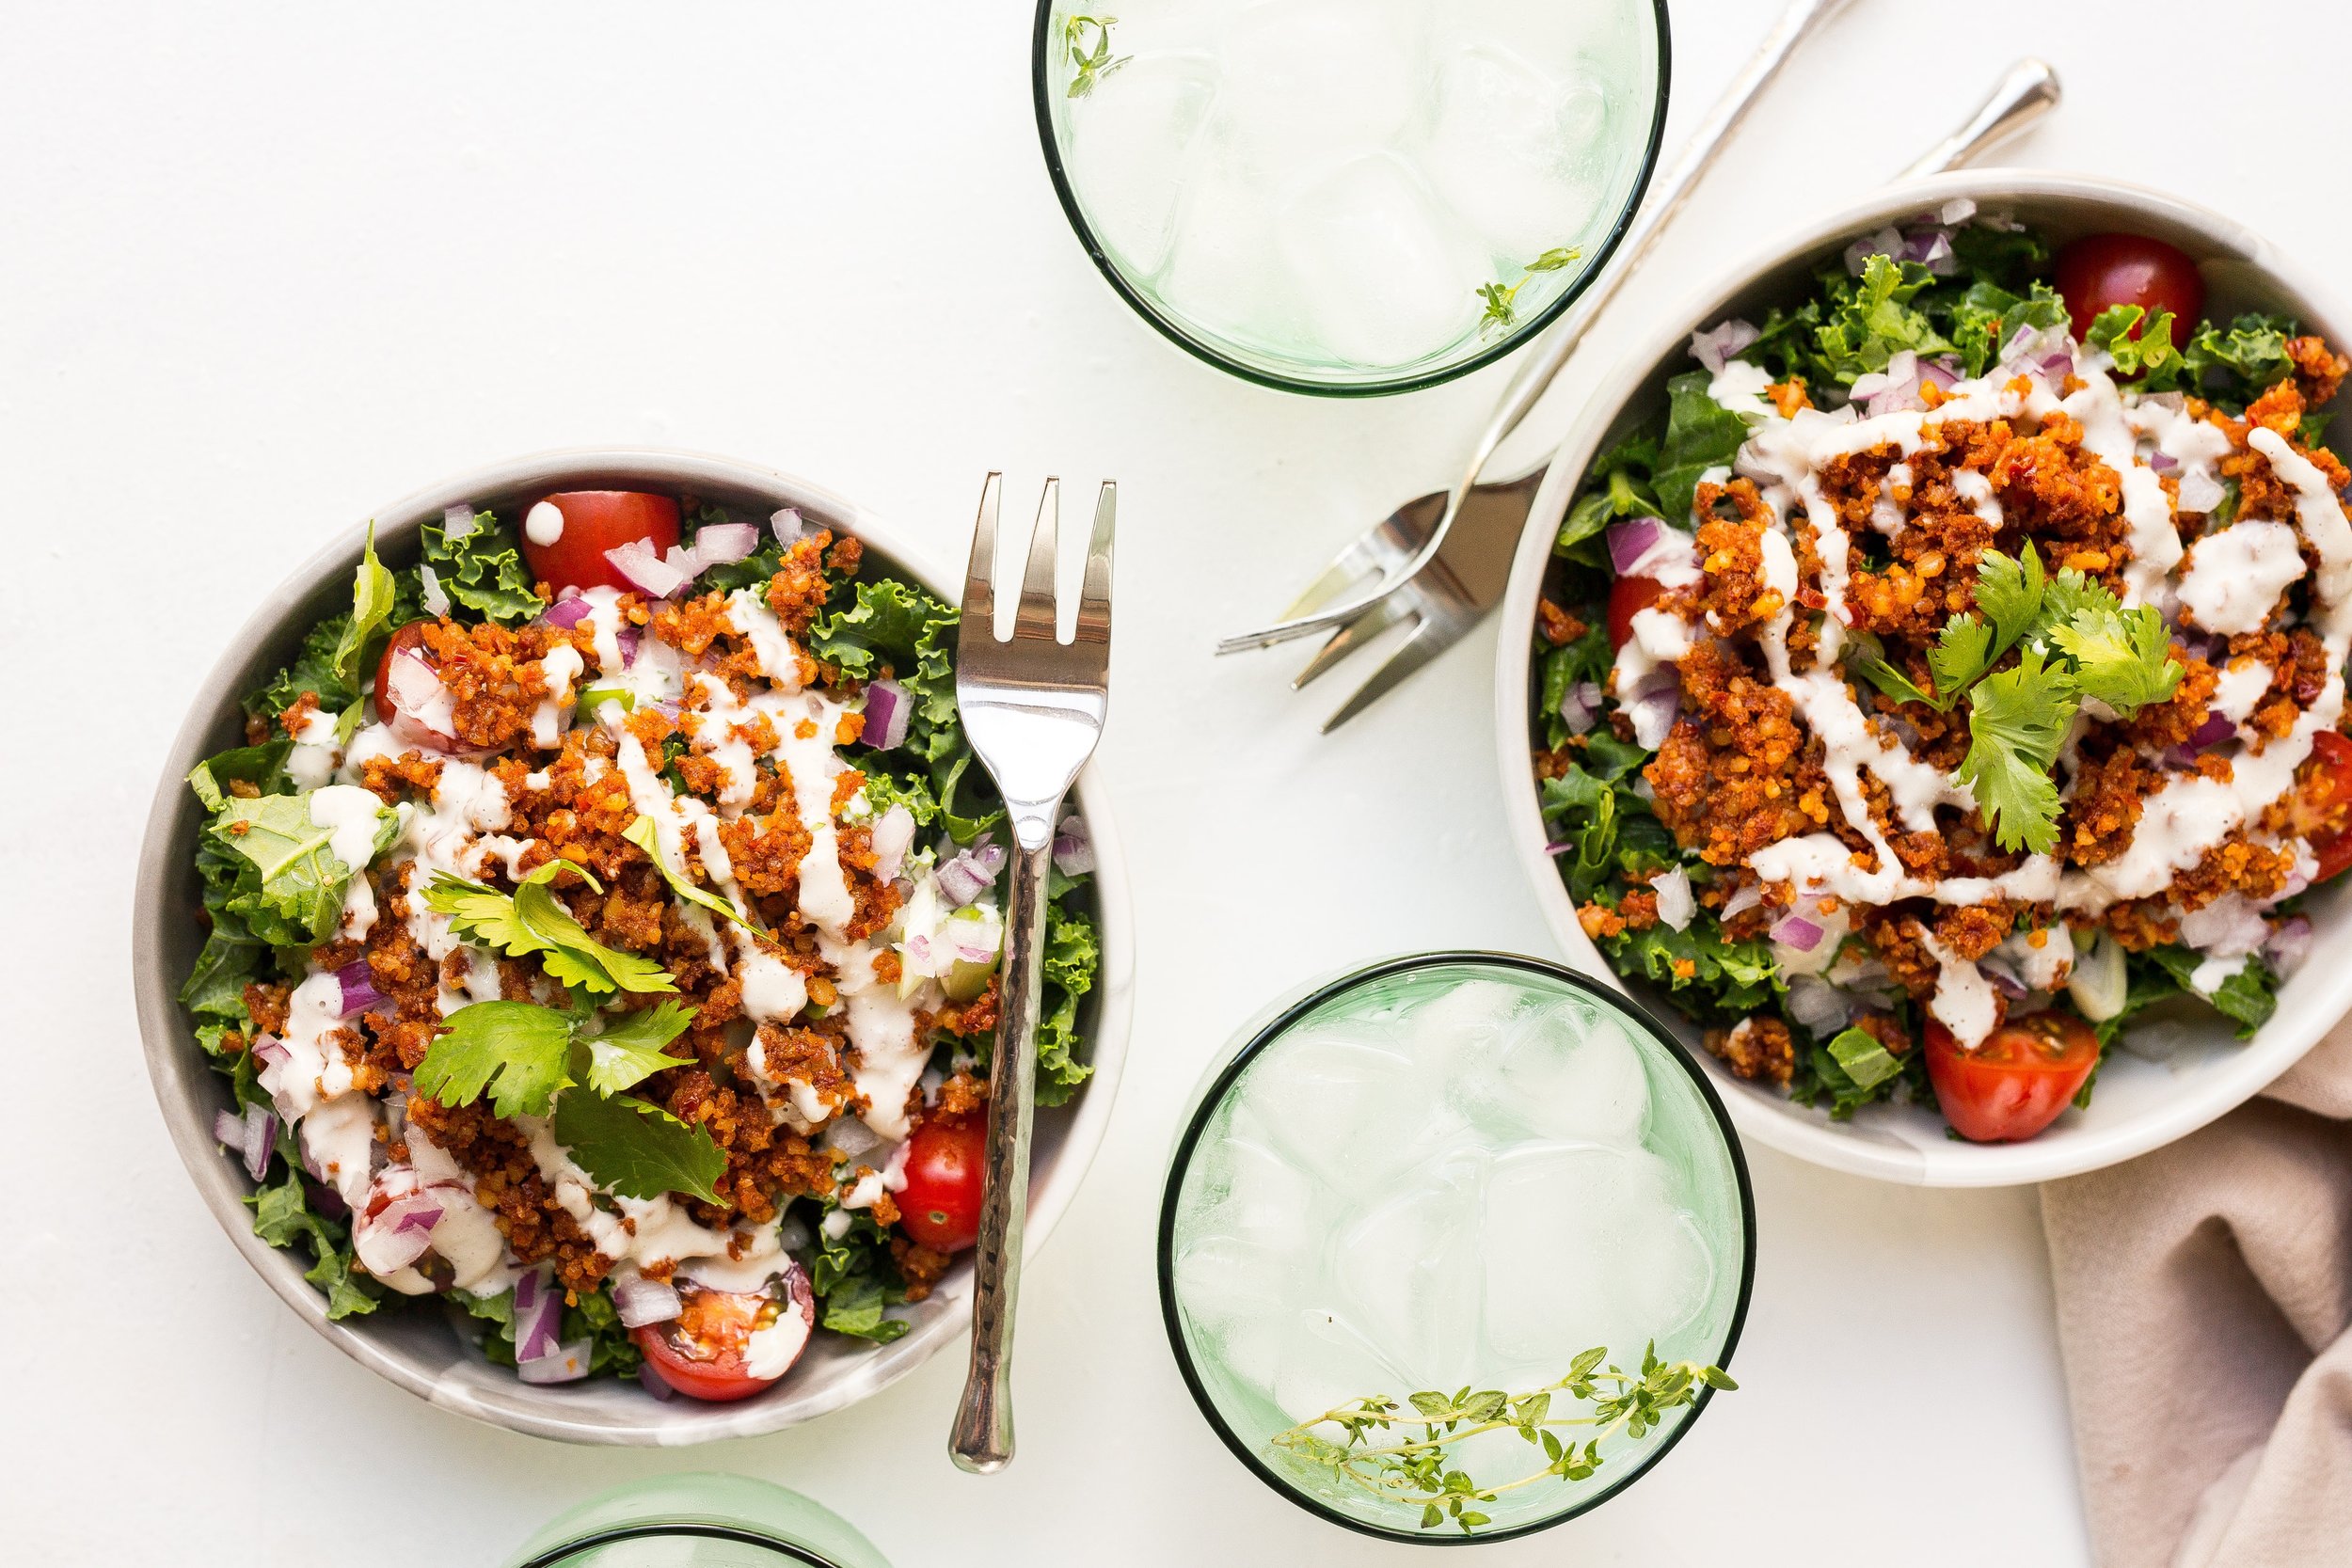
Another great alternative to drinking alcohol is instead ordering sparkling soda/water. Add a squeeze of lemon or lime and a pinch of salt. With this DIY electrolyte drink you’ll be well hydrated for your patio adventures.

As for the alcoholic beverages, you may already know that many beers and wines are processed using animal products such as isinglass, egg whites, lactose, or gelatin. Ciders are usually (but not always) vegan and other than liquors and mixed drinks that have honey (some plant-based eaters omit honey and others don’t), cream or egg whites, you’re pretty safe with these! Servers at restaurants or bars won’t always know whether or not a beer, wine or liquor is vegan, so you might have to do the research yourself.

For a comprehensive list of vegan alcohol options available in Canada and the US visit Barnivore.  It’s an online database that’s easy to search and explore. They don’t guarantee having every beer, wine and liquor on the market but they stay pretty up to date and have an easy submission process if you want to add your favourites.

Fortunately many of my favourite Ontario wines like Karlo Estates (the first certified vegan winery in the world!), Sandbanks and Waupoos Estate Winery are vegan. As for beers, most tend to be vegan  - including my fave beer Mill Street Organic - but I’ve come across milk stouts, milkshake IPA’s, caramel truffle beer, etc that contain milk or milk chocolate so keep an eye out for those.

Nutritionist tip: If you do plan on drinking alcohol, remember to follow each drink with a glass of water and never drink on an empty stomach.  And on that note, let’s talk about food…

Patio Eats  

The plant-based patio hopper can survive quite easily if they’re willing to be resourceful. I’ve found that a large number of places will serve one or all of these options:

Pita Plate/Veggie Plate – most places nowadays serve an appetizer made up of cut up veggies, some crackers or pita, olives, and hummus. A perfect compliment to that glass of white wine. 

Cauliflower Wings – a plant-based sensation, these little guys are super yummy and popping up more and more as an alternative to chicken wings. Often made in BBQ and sesame flavours these can really hit the spot for that typical patio fare taste.

Nachos (hold the cheese, extra guacamole) – nachos can quickly become a veggie-head’s perfect snack when you hold off on the meat and cheese. Just be sure to ask for extra guac and salsa.

Veggie Burger – it’s rare not to find a decent veggie burger on the menu these days especially with the spike in popularity of meat-substitute brands like Beyond Meat, which is popping up in more and more restaurants, pubs and bars.

Vegan limited offers – sometimes restaurants will only want to dip in their toes and run limited-time plant-based menu items as a way of testing out their consumer demand. Be sure to check not only the menu, but also the little postcards and specials signs on the table and in the restaurant, or simply ask your server if there are any vegan options as part of the daily special.

Lastly, a great resource for finding plant-based friendly spots is Happy Cow (both the website and the app). You can customize your search by location and filter by vegan, vegetarian or by restaurants that have vegan options. You can also use Google Maps and search “vegan” to find updated info on restaurants in your area that offer vegan options. Google Maps has been a handy resource for me both locally and on my travels.

Happy patio season friends! I’ll be sharing a number of tips over the summer on my website and on social media. If you want to share other suggestions for patio season or tips and tricks for plant-based eating at restaurants, pubs, and bars please leave them in the comments below.

cheers+.jpg

Veggie Quinoa "Fried Rice"

One of the best parts of my job is the opportunity to collaborate with others. I work with a variety of brands, health food products, and business owners quite regularly. Although I am self-employed the collaborative nature of my work really fills me up and I rarely feel like I’m working alone.

This blog post was a collaborative effort with Debra Cowie, who is somebody I greatly admire. Debra is a leading Canadian food stylist and photographer known for her gorgeous flat lays and clean aesthetic. She just so happens to live in Ottawa and we have naturally crossed paths over the past few years. Mostly recently Debra expressed an interest in cooking more plant-based foods. She enthusiastically joined Plant-Based Breakthrough, my online nutrition and meal makeover program, and took part in both the winter and spring sessions in 2019. Having her part of the program was a bit intimidating for me because she’s a true foodie, a great cook, and really knows her stuff when it come to all things culinary. I couldn’t have been more thrilled when she said she really enjoyed the recipes and has started incorporating many of them into her rotation. Coming from her, that was one of the highest compliments. She also kindly snapped several beautiful photos of the recipes featured in the program and I’m pleased to share the first (of many!) on my blog this week.

One of Debra’s favourite recipes from the program was my Veggie Quinoa “Fried Rice”. It’s a healthy spin on the classic take-out dish fried rice and features protein-rich quinoa, hearty kale, aromatic spices, and lots of other veggies. Debra served up her Veggie Quinoa “Fried Rice” with a side of smoked tofu and roasted broccoli. See her beautiful photo below and then keep scrolling for the full recipe.

Quinoa Fried Rice.jpg

VEGGIE QUINOA “FRIED RICE”

Yields 4 - 6 servings 

Ingredients: 

1 cup dry quinoa, rinsed under cold water 
1.5 cups low-sodium organic vegetable broth
1 tablespoon toasted sesame oil or coconut oil
1 bunch kale, stems roughly chopped, leaves ripped or chopped into bite-sized pieces
1 onion, small dice
1 carrot, small dice
1 rib of celery, small dice
3 cloves garlic, minced
1 tablespoon fresh ginger, minced
1 bunch of green onions, thinly sliced
2 cups green peas
1/4 cup regular or low sodium tamari or soy sauce
Sriracha or hot sauce of your choice, optional
Sea salt

Directions:

In a medium pot, add the quinoa and the vegetable broth. Bring to a boil, then reduce heat to low and simmer uncovered for 12 - 15 minutes, or until the liquid is absorbed and the quinoa is light and fluffy. Then transfer the quinoa to a bowl.

In a large skillet or wok, warm the oil over over medium heat. Add the onion, carrots, celery, kale stems and a pinch of sea salt and sauté for about 5 minutes, stirring frequently until it becomes fragrant and the veggies start to soften. Add the garlic, ginger and green onions, and sauté for a minute or two. Add the kale leaves and sauté until it begins to wilt (about 2 minutes).

Add the quinoa and peas to the skillet. Then pour in the tamari or soy sauce and stir until everything is evenly combined. Serve warm and enjoy on its own or with a side dish of your choice.

Will keep in the fridge for about 5 days.

If you enjoyed the recipe I shared above be sure to check out my Plant-Based Breakthrough program, which is a 4 week online crash course in health, nutrition, and meal planning.  For details on when the next program starts click here. You can also join the Plant-Based Breakthrough Community on Facebook where I share recipes, inspiration, and information on plant-based nutrition.

Quick & Easy Banana Oat Pancakes

My husband Jeremy has been making me pancakes for breakfast quite regularly on the weekend for years. On Saturday mornings when I get home from the gym he’ll have pancakes waiting for me. His recipe is not necessarily complicated, but it’s not super fast to make which is why pancakes were reserved exclusively for weekends or when we have more time to prep, cook and clean up.

I was recently in Alabama visiting my my sister and her family. One morning my 3 year-old-niece Marley wanted me to make her pancakes. I was tempted to make Jeremy’s recipe, but time was tight and there was lots of commotion as we hurried to get Marley ready for daycare. It dawned on me that I could probably simplify things a bit and create a quick, easy recipe that my niece would like and that my sister could recreate on busy mornings. I took to google as I usually do and came across this stellar recipe from Ambitious Kitchen. I ultimately ended up modifying the recipe but it provided the inspiration I needed. I’ve changed the quantities a bit, made some omissions and additions, but from the get-go these pancakes were a huge hit with my niece. My sister and my mom have both started making this recipe regularly. Jeremy also loves the simplicity of this recipe and he’s been making pancakes more often… even on weekdays!

This super simple recipe is vegan and gluten free. It contains ingredients most of us are likely to have in our kitchens. Bananas, oats, plant-based milk, vanilla, cinnamon, baking powder & salt. That’s it! The bananas give the pancakes some sweetness and the oats take the place of flour. Although you could use quick oats, I recommend using rolled oats as they are higher in protein and fibre. Jeremy and I have played around with different variations of this recipe and have added flax and protein powder with great success.

Just a little disclaimer: these will not be your typical white, fluffy diner style pancakes. They are a bit more dense and not-so-fluffy, but if you are looking for a healthy, yet delicious, and quick alternative, give these a try! Scroll down for the full recipe and be sure to let me know how it goes or if you make any of your own modifications.

unnamed-1.jpg

BANANA OAT PANCAKES

Makes 6 - 8 small pancakes

Ingredients:

2 ripe bananas, peeled and roughly chopped
1 cup of unsweetened plant-based milk
1 cup of rolled oats (not quick oats)
1/2 teaspoon of vanilla extract
1 teaspoon of cinnamon
1 heaping teaspoon of baking powder
A big pinch of sea salt

Directions:

Add the bananas and plant-based milk to a blender and process on high for a minute (or until the bananas are thoroughly blended into the milk). Then add the rest of the ingredients and blend on high speed for a minute or two until the oats are fully processed and you have a nice, even batter consistency. If the batter is too thick you might need to loosen it by adding a bit more plant-based milk.

Warm a non-stick frying pan or griddle on medium-high heat. Lightly coat the surface with a bit of oil. Once the pan is hot pour the batter (in 1/4 - 1/3 cup batches) onto the hot surface directly from the blender or scoop out some batter using a ladle or measuring cup. Make sure the pancakes are relatively thin or they may not cook all the way through. Cook the first side until bubbles form on top (about 4 minutes). Gently lift the edges around the pancake with a spatula and then you should easily be able to flip it. Cook on the other side for 2 - 3 minutes. The pancake should be golden brown on both sides. Clean off the surface of your pan or griddle, if needed. Repeat this process until you’ve used up all the batter.

Enjoy your freshly made pancakes topped with hemp hearts, blueberries, extra banana, maple syrup, nut or seed butter, or other toppings of your choice. We usually eat all our pancakes in one sitting, but they can be refrigerated for 3 - 4 days, or frozen for a month or so.

Notes from the kitchen:
- I’ve never had any trouble with this recipe, however if you your pancakes are too thick or too runny, you may need to increase the plant-based milk or the amount of oats.
- If the pancakes are still “raw” on the inside after cooking them, it could mean that your batter is to thick, or that your pancakes were too thick. Sometimes flattening down the pancakes when they are on the skillet or in the pan can help with this.
-A hot non-stick surface is the key to perfect pancakes. You’ll want to warm the pan/skillet for a few minutes before adding your batter.

If you enjoyed the recipe I shared above be sure to check out my Plant-Based Breakthrough program, which is a crash course in plant-based health, nutrition, and meal planning. For details about the program click here. You can also join the Plant-Based Breakthrough Community on Facebook where I share recipes, inspiration, and information on plant-based nutrition.

Chili Roasted Sweet Potatoes

If you’ve ever been to one of my events, cooking lessons, or yoga retreats where you’ve had the opportunity to eat or make one of my Buddha Bowls, you’d be familiar with my chili roasted sweet potatoes. As you’ll see in the photo below, they look like sweet potatoes that are slightly overcooked. I didn’t burn them, I swear, they are simply coated with lots of tasty chili spice which plays nicely into the sweetness of the sweet potatoes.

This is a really simple recipe that can be enjoyed as a part of my Buddha Bowls or used as a side dish for any meal. You don’t necessarily need to cut them into cubes as I suggest below. You could turn them into chili fries by cutting them into long strips or even try spiralized chili roasted curly fries. Just note that cooking times will vary depending on how big or small (or curly) your sweet potatoes are. By the way, I’ve made this recipe using peeled and unpeeled potatoes. I tend to like the texture of roasted sweet potatoes with the skin. That said, if I have organic sweet potatoes I'll leave the skin on, and if I end up with conventionally grown, I’ll peel them.

Scroll down for the full recipes! If you try it out, please let me know how it goes. Tag me on Instagram and I’ll be sure to share your photos.

CHILI ROASTED SWEET POTATOES 

Makes 4 to 6 servings.

Ingredients:

2 pounds of sweet potatoes (~3 small sweet potatoes) 
1 -2 tablespoons chili powder, to taste
2 tablespoons olive oil or melted coconut oil
1 teaspoon garlic powder, optional
1/4 - 1/2 teaspoon salt, to taste
Freshly ground black pepper, to taste

Directions: 

Preheat your oven to 375ºF. Line a baking sheet with parchment paper or a silicon liner.

Thoroughly wash the sweet potatoes, then cut them into dice sized pieces. Place the sweet potatoes in a large bowl and drizzle over the oil and sprinkle on chili powder, garlic powder, salt & black pepper. Toss the potatoes until evenly coated in oil and spices.

Spread the seasoned sweet potatoes evenly over the baking sheet in a single layer. Transfer the baking sheet to the preheated oven and bake for 25 minutes, stirring once half way through. By 25 minutes the sweet potatoes should have softened and slightly browned on the edges. However, total cooking time will ultimately depend on the size of your cubes. If they are not softened to your linking, cook them for 5 - 10 minutes more.

These will keep in the fridge for 5 days.

If you enjoyed the recipe I shared above be sure to check out my Plant-Based Breakthrough program, which is a crash course in plant-based health, nutrition, and meal planning. For details about the program click here. You can also join the Plant-Based Breakthrough Community on Facebook where I share recipes, inspiration, and information on plant-based nutrition.

Swiss Chard, Quinoa & Red Lentil Soup

Three words I would use to describe this soup: simple, nutritious and satisfying. It’s a recipe I’ve been sharing with clients and making at cooking lessons for ages. Most recently I made a batch and shared a photo in my Instagram stories and I received so many requests for this recipe! So here we are! It’s officially live on the blog.

Just a few notes before diving in! Firstly, I used swiss chard this time around, but I’ve also used kale and collards with great success. I also strategically included turmeric and ginger as I’m always trying to find ways to incorporate these anti-inflammatory superstars into my cooking. I must mention that while this is a soup, it really does hold up as a meal on its own. Between the red lentils and quinoa, you’re getting a really nice portion of plant-based protein. The complex carbohydrates from the potatoes will keep you full longer. Plus, it’s a one-pot wonder and it freezes well. Wins all around with this soup!

Scroll down to get the full recipe! If you try it out, please let me know. I truly appreciate getting your feedback on my recipes.

unnamed-2.jpg

SWISS CHARD, QUINOA & RED LENTIL SOUP

Makes 4 to 6 servings

Ingredients:

1 tablespoon olive oil or coconut oil
1 yellow onion, diced
2 medium carrots, chopped into small pieces
2 ribs of celery, finely chopped
1 bunch of swiss chard, stems roughly chopped, leaves ripped or chopped into bite-sized pieces
4 cloves garlic, minced
1½ teaspoon ground cumin
½ teaspoon ground ginger or 1 tablespoon fresh ginger finely minced
½ teaspoon ground turmeric or 1 tablespoon fresh turmeric very finely minced
1 - 2 teaspoons sea salt, or to taste
2 medium potatoes, washed and chopped into bite-sized pieces (If organic, no peeling required!)
1 cup red lentils
½ cup dry quinoa, rinsed and drained
8 cups water
Freshly ground black pepper

Directions:

Warm the oil in a large pot over medium heat. Sauté the onions, carrots, celery and chard stems until tender, about 8 minutes.

Add in the minced garlic and sauté another minute, just until fragrant (if using fresh ginger and/or turmeric add it with the garlic). Add in the cumin, dried ginger, dried turmeric, salt, potatoes, lentils, quinoa, water and bring the soup to a boil. Once boiling, lower the heat and cover the pot to let everything simmer until the lentils are tender, about 20 minutes.

Once the lentils and vegetables have softened, stir in the chopped chard leaves and cook until they are wilted, just a few minutes. Season with additional salt, if desired, and serve warm with freshly ground black pepper. If you like a little heat, try adding chili flakes or a hot sauce of your choice.

Leftovers can be stored in the fridge for up to 4 days or frozen for about 2 months.

If you enjoyed the recipe I shared above be sure to check out my Plant-Based Breakthrough program, which is a crash course in plant-based health, nutrition, and meal planning. For details about the program click here. You can also join the Plant-Based Breakthrough Community on Facebook where I share recipes, inspiration, and information on plant-based nutrition.

Tempeh Bolognese on Zucchini Noodles

Before I even dive into the recipe, I should probably tell you a little about tempeh. Maybe you’ve seen it but have been intimidated to try it, or maybe you’ve never even heard of it before. Either way, tempeh is becoming more and more popular, but I wouldn’t say that it’s a mainstream staple yet. So what exactly is it? Tempeh is a plant-based protein. Like tofu, it’s made from soy beans, but the taste and texture is very different due to the way it’s prepared. Unlike tofu, tempeh is a fermented food. It’s a staple in Indonesia and it’s slowly making headway among vegans, vegetarians and flexiarians everywhere.

I enjoy cooking tempeh in many ways. I love cutting it into small cubes, marinating it in a peanut ginger sauce, and baking it in the oven. I also make a smokey tempeh “bacon” by coating the tempeh in a maple, tamari and smoked paprika marinade. It can also easily be incorporated into stir-fry or added as the protein in pasta sauces, stews, soups, curries, tacos, and more!

In this video collaboration with my friend Lynda you’ll learn more about tempeh and find out how I use it to make a tasty bolognese sauce. I served the sauce over zucchini noodles (to up the veg!) and topped it with plant-based cheese from Lynda’s company Fauxmagerie Zengarry. Watch our video below, or scroll down for the text version of the recipe.

TEMPEH BOLOGNESE ON ZUCCHINI NOODLES WITH CASHEW CHEESE

Makes 4 - 6 servings

Ingredients:

1 package of tempeh
3 tablespoons, extra virgin olive oil
1 cup, red wine
1 onion, peeled and diced small
1 large carrot, diced small
2 ribs celery, diced small
1 teaspoon salt
2 cloves of garlic, minced
1 teaspoons dry oregano (if fresh is available use 1 tablespoon)
1 teaspoons dry basil (if fresh is available use 1 tablespoon)
1 jar (680 ml) strained tomatoes ("passata")
Black pepper to taste
Optional: sweetener such as maple syrup, to taste, if the sauce seems too acidic
1/2 round Fauxmagerie Zengarry Creamy Swiss cashew cheese, frozen & grated
2 - 4 medium zucchini, spiralized into noodles

Directions:

Grate the tempeh on the large teeth of a box grater or crumble it using your hands. Sauté the tempeh in 2 tablespoons of olive oil until browned. Add a few splashes of water if tempeh starts to stick.

Add the remaining olive oil and the onion, carrot and celery, with 1 teaspoon of salt, keep cooking until the vegetables have softened.

Add the garlic, oregano and basil, and cook for a few minutes longer (unless you are using fresh oregano and basil then add fresh ingredients near the end of the cooking time). Add 1 cup of red wine and simmer until almost dry.

Pour in the strained tomatoes and cook covered for 15-20 minutes. Taste the sauce and season with salt and pepper and sweetener (if needed). Serve the sauce over zucchini noodles (either raw or lightly warmed in a frying pan) and topped with grated Fauxmagerie Zengarry Creamy Swiss cashew cheese. Enjoy!

Notes:

-See Zengarry’s website to find retailers near you. If you cannot find Zengarry in your city or town, you can always swap in another plant-based cheese of your choice, either store bought or homemade. Alternatively you could top your dish with nutritional yeast flakes to add some cheesiness or enjoy the dish on its own!

If you enjoyed the recipe I shared above be sure to check out my Plant-Based Breakthrough program, which is a crash course in plant-based health, nutrition, and meal planning. For details about the program click here. You can also join the Plant-Based Breakthrough Community on Facebook where I share recipes, inspiration, and information on plant-based nutrition.

6647ae_2de8544a170b4cb4bbc0a257607e07f4%7Emv2_d_3024_4032_s_4_2.jpg

Green Curry Soup

Have you seen our newly revamped Canada’s food guide yet? It’s a hot topic these days and it generated a whole lot of fun discussion on my Instagram post. The new evidence based guide ditches dairy as a food group and heavily emphasizes plant-based foods. It also includes healthy habits such as choosing water as a primary beverage, eating with others, spending more time cooking at home and being aware of food marketing.

Unlike former iterations of the guide, our new one highlights plant-based proteins. Speaking of which, I recently made a green curry style soup that conveniently features three kinds of plant proteins: tofu, green peas, and soy bean sprouts. This trifecta of proteins paired with homemade green curry sauce and coconut milk resulted in one of the most delicious soup I've ever created.

When you scroll down, don't be alarmed by the list of ingredients. This recipe is soup-er easy to make (45 minutes start to finish), you'll learn how simple it is to DIY a flavourful green curry-style sauce, and you'll have leftovers for the next couple of days.  Scroll down for the full recipe!

unnamed.jpg

VEGAN GREEN CURRY SOUP 

Makes 6 - 8 servings

Ingredients: 

Green curry sauce: 

1 bunch of cilantro, stems and leaves washed and roughly chopped
1 bunch of parsley, stems and leaves washed and roughly chopped
1 thumb sized piece of ginger, sliced
1 - 2 hot peppers (I used habanero, but jalapeño or another spicy pepper would work), chopped
3 cloves of garlic
Juice of 2 limes
1 teaspoon sea salt 

Soup base: 

1 tablespoon coconut oil
1 onion, diced
1 large carrot, finely chopped
2 ribs celery, finely chopped
8 oz mushrooms of your choice, sliced
1 can (400 ml / 14oz) of full fat coconut milk 
1 block of firm tofu, large dice
1 can (199 ml) bamboo shoots (optional) 
1 cup green peas
1 bunch greens of your choice (I used dandelion), washed and finely chopped 
3 - 4 cups soy bean or mung bean sprouts (optional)
Sea salt & pepper 

Black rice ramen (I used Lotus Foods brand) or rice noodles, cooked according to package directions

Directions:

In a blender process all of the green curry ingredients to a smooth, sauce-like consistency.  You may need to add a bit of water to get things going.

Warm the coconut oil in a large soup pot over medium heat. Add onion, celery and carrots, and a big pinch of salt, and cook until the onions become translucent (about 5 minutes).  Add the mushrooms and cook them for a few minutes until they have softened and start releasing water. 

Add the green curry sauce to the pot, along with the coconut milk, tofu, bamboo shoots, and peas. You will also want to add 3 - 4 cups of water depending on how thick you want your soup to be. Bring the soup to a gentle simmer, then stir in the greens and sprouts.  Cook until the greens have wilted and the sprouts have softened. Taste the soup and season with sea salt and pepper if needed. 

Transfer a portion of your noodles to a soup bowl and pour the green curry soup over top.  Enjoy!

If you enjoyed the recipe I shared above be sure to check out my Plant-Based Breakthrough program, which is a crash course in plant-based health, nutrition, and meal planning. For details about the program click here. You can also join the Plant-Based Breakthrough Community on Facebook where I share recipes, inspiration, and information on plant-based nutrition.

My Go-To Tofu Scramble

Tofu scramble has been a staple in my diet for years and it’s definitely one of my favourite weekend breakfasts. Enjoyed on its own, or with a side of roasted veggies, a bit of salsa or guacamole, or a slice of toasted sourdough, it’s so so tasty! My friends and family love it too and I get requests for it regularly.

If you’re new to the world of tofu scramble, let me tell you, this dish is a game changer. The crumbled tofu is reminiscent of scrambled eggs, and I love jazzing it up with tons of veggies and aromatic spices. Turmeric, the anti-inflammatory superstar, gives the dish a yellowish colour and nutritional yeast adds a subtle hint of cheesiness.

When you read through the recipe you’ll notice I’ve listed an ingredient called “black salt” or “kala namak”. Although it’s called black salt it’s actually pink in colour. It’s not quite as salty as regular salt and it has a slightly sulphuric essence. It adds an eggy taste and aroma to the dish. I really enjoy adding it to the scramble, but it’s not necessary if you don’t have any on hand. If you want to try it out, you can usually find black salt at Indian or ethnic grocers, some health food stores, or you can order it online.

I hope you enjoy this dish as much as I do. If so, please share your feedback in the comment section below and/or tag me on social media with your photos. I love to see what you’re cookin’!

TOFU SCRAMBLE

Makes 4 - 6 servings

Ingredients:

1 tablespoon extra virgin olive oil or coconut oil 
1 onion, diced
1 bell pepper, diced
2 cloves of garlic, minced 
1 teaspoons turmeric
1 tablespoon chili powder, optional
1 zucchini, diced
2 - 3 cups of chopped mushrooms, roughly chopped, optional 
1 block organic firm or extra firm tofu, crumbled into small pieces
1/4 cup nutritional yeast
2 - 3 tightly packed cups of leafy greens of your choice
Sea salt or black salt (kala namak) and pepper to taste

Directions:

Warm the oil in a large skillet over medium heat. Sauté onions with a few pinches of salt, cook, stirring often, for about 5 minutes, or until they become slightly transparent. Add the peppers and sauté for a couple minutes until softened, then add the minced garlic and cook for another minute.

Stir in the chili powder and turmeric. Cook for 1 minute. Add in the mushrooms and zucchini, cook, stirring every so often, to allow them to release water (approximately 5 minutes).

Mix in the crumbled tofu. Then stir in the nutritional yeast.  Then add the leafy greens and cook them until they’ve wilted and have become bright green. Taste and season with salt and pepper. Serve immediately with a side of roasted potatoes, topped with avocado slices, and/or a few splashes of your favourite hot sauce. 

Will keep in the fridge for 5 days stored in an airtight container. 

If you enjoyed the recipe I shared above be sure to check out my Plant-Based Breakthrough program, which is a crash course in plant-based health, nutrition, and meal planning. For details about the program click here. You can also join the Plant-Based Breakthrough Community on Facebook where I share recipes, inspiration, and information on plant-based nutrition.

Photography by Ana Tavares.

Tofu+Scamble-3.jpg

Build Your Own Plant-Based Cheese & Charcuterie Board

When I made the switch to a plant-based diet many years ago, I figured my days of enjoying cheese and charcuterie boards were over. I truly assumed plant-based cheese and meat alternatives would be lacklustre. I sort of avoided these products and instead I spent a lot of time making my own cheese spreads, dips and even faux meats that were actually pretty great. However, I have to say, over time I’ve come to know and love several fantastic companies that make phenomenal plant-based cheeses and meats that not only rival traditional versions, but have made it much much easier to make the compassionate choice without having to make everything myself.  

As you know, I’m a huge proponent of spending time in the kitchen and learning how to make things from scratch, but I do realize that it’s not always possible especially during busy times (like the holiday season). It’s nice and so convenient to have store bought options that are healthy, delicious, and plant-based.

Nowadays, it’s so easy to put together a beautiful, bountiful spread combining a variety of cheese and meat alternatives along with other components of your choosing. If you’re looking for ideas or inspiration for your next holiday party, scroll down to learn how to build your own plant-based cheese and charcuterie board. Below I share some of my favourite brands and a few healthy holiday recipes too! 

I partnered up with my friends at Animal Justice to make this cheese and charcuterie board. We used Fauxmagerie Zengarry cheeses and GUSTA sausage along with an assortment of other delicious things.

I partnered up with my friends at Animal Justice to make this cheese and charcuterie board. We used Fauxmagerie Zengarry cheeses and GUSTA sausage along with an assortment of other delicious things.

Cheeses - Look for these brands: Daiya (Farmhouse Blocks), Culchered, Earth Island, Fauxmagerie Zengarry, Field Roast (CHAO Creamery), GUSTA, Miyoko's Creamery, Nuts For Cheese, VegCheese and Violife.

Meat Alternatives - Look for these brands: Beyond Meat, Field Roast, GUSTA, Real Fake Meats (available in Halifax, Nova Scotia), Tofurky, The Very Good Butchers, and Yam Chops.

Fruits - Everybody loves grapes, berries, cherries, ground cherries, pomegranate, clementines, and dried fruits like figs, raisins, cranberries or apricots.

Veggies - My favourites include olives, sliced raw vegetables, pickled or fermented vegetables (beets, onions, and gherkin pickles are always popular), roasted red pepper, roasted garlic, black garlic, etc.

Nuts & Seeds - I like walnuts, pumpkin seeds, candied pecans, tamari almonds, and pistachios.

Dips & Spreads - Enhance your board with a nice grainy mustard, hummus, bruschetta, salsa, chutney, jams, compotes and maple syrup. I also love this fig & olive tapenade and zucchini almond dip.

Dark chocolate - Can’t go wrong here!

Bread & Crackers - I like a classic french baguette and/or a mix of crackers including Mary’s Gone Crackers, Le Pain des fleurs Crispbread, and more.

Decor -  In the photo above, the decor includes pine cones, holly and ivy, pine branches and of course a few nice cutting boards and decorative bowls. Things like micro greens or delicate leafy greens look pretty. You can also use festive household items like mini-lights, ornaments, candles, or whatever you have on hand to jazz up your board.

Many of the above-mentioned cheeses and meat alternatives are available throughout Canada and the US at health food stores, Whole Foods Markets, and most major grocery stores. In Canada, you can also order a variety of plant-based products online via Vegan Supply and Yam Chops

Did I miss anything? Tell me your favourites in the comment section below!

Special thanks to Animal Justice for this fun collaboration! Click on the image below to see a fun little video on how we built our board.

Healthy Holidays eBook - Available Now!

I’m excited to announce that my eBook Healthy Holidays: A Festive Feast for Veggie Lovers is now available. In my new eBook I share the recipes for a plant-based holiday feast including a hearty lentil loaf, roasted brussels sprouts, garlicky smashed potatoes, chickpea shallot gravy, and my mom's raw cranberry sauce. It also features 3 delicious vegan dessert recipes by Ana Tavares.

If you’re looking for ideas for your plant-based holiday dinner CLICK HERE to download your digital copy!

Magic Cookie Bars

If you live in Ottawa you’ve undoubtedly heard of Strawberry Blonde Bakery. Known primarily for delicious desserts, savoury snacks, and breads, behind the scenes Strawberry Blonde has been blazing the trails in plant-based and allergy free baking. A designated nut free, dairy free, gluten free bakery, Strawberry Blonde has become a fixture for those with food allergies or dietary restrictions, but since they also produce delicious baked goods, they are a unanimous favourite throughout the city.

Jacqui Okum, outside of her bakery, Strawberry Blonde, in Ottawa.

Jacqui Okum, outside of her bakery, Strawberry Blonde, in Ottawa.

Jacqui Okum is the mastermind behind this award winning bakery. She has years of experience with baking and is a pro when it comes to swapping and substituting ingredients. She has been successful in “veganizing” pretty much every classic recipe. Since the holidays are synonymous with baking (baking, and more baking!) and many of you are likely planning to adapt classic recipes to make them plant-based, I hope to ease this process by learning from one of the best bakers around. Below Jacqui shares her story about starting a vegan bakery, gives us insider tips, tricks and swaps for plant-based baking, and also shares her recipe for Magic Cookie Bars. Yum! Scroll down to learn more.

Amy: Strawberry Blonde is one of Ottawa's most beloved bakeries. Were you always into baking?
Jacqui:
I was definitely always into eating baked goods! Haha! I originally went to University for Film Production and worked in the TV industry for a number of years. I eventually decided it wasn't the right work environment for me and around the same time I went vegan. The transition to being vegan was easy, but boy oh boy did I miss pastries and sweets. Vegan pastries were hard to find then (about 12 years ago now) so I just ended up baking all the time for myself. I found I really liked it. And although I knew I didn't want to work in Film/TV, I didn't know what else I wanted to do. I did know that I wanted to be my own boss. One day my boyfriend made an offhand comment about how I should open up my own vegan bakery since I was just baking all the time anyway, and when he said that, it was like a lightbulb went off in my head. I decided that if I was going to do it, I wanted to do it right so I enrolled in George Brown College's Baking & Pastry Arts Program, where I learned all the tips and tricks of the trade and applied them at home to vegan baking.

Amy: When did you open the bakery?  And what inspired you to offer vegan, gluten free, & nut free baked goods? 
Jacqui:
The storefront on Grange Ave opened just over 5 years ago now. But we were baking for wholesale customers (Rainbow Foods on Richmond Road and Herb & Spice on Bank street) for a number of months before that. And before that even I was selling my baked goods at the Lansdowne Farmer's Market. My treats were always vegan, but it was my experience at the market that made me decide to switch to doing everything gluten free and nut free. I really listened to my customers and the majority of them were asking for gluten free or nut free on top of it being from from dairy and eggs. For allergy concerns, I thought it would be best to just eliminate these ingredients completely, to avoid risk of cross contamination. But also, being vegan, I really sympathized with them, knowing how disappointing it can be to not be able to enjoy a pastry or a treat. I quickly became determined to create a space where vegans, or those with allergies, could go and feel normal and have the ability to get excited the way most people do when treating themselves. 

Amy: Many of my readers are interested in transitioning to a plant-based diet and looking for tips, swaps and alternatives for baked goods. Can you share a list of swaps/alternatives that you use in creating your famous desserts?
Jacqui:
Okay, here are some of the most common swaps…
Butter:
-I find Earth Balance to be the best and most consistent brand for replacing butter. It can easily be used as a 1:1 ratio when subbing in any recipe.
-There is a soy-free brand of butter replacement called Melt that is good for some things, but it is more expensive than Earth Balance and the ratio needs to be played with a little bit. But if you're looking for soy free, this is a good alternative, especially for making icings.
-Coconut oil can sometimes work, but be careful as it melts quickly so it won't cream as well as traditional butter would (especially important when making cookies!)

Milk:
-There are so many milk alternatives out there and they all work fairly well with a 1:1 ratio. I find soy milk to be the creamiest and works best in most situations. Coconut milk is also good, but the fat content is higher so it sometimes separates or makes products a little greasier.
-For butter milk, simply add 1 tsp of vinegar or lemon juice per cup of milk and whisk. Let it sit for a couple minutes then it's turned into buttermilk.

Eggs:
This really depends on what it is you're baking. There are lots of options! These are the ones we use at the bakery:
-Flax seeds
-Chia seeds
-Apple sauce
-Silken tofu
-Ener-g brand egg replacer

Cream Cheese:
-The tofutti brand is by far the best for baking!

Amy: Finally, we're getting into the holiday season. Would you mind sharing one of your favourite seasonal recipes? 
Jacqui:
Sure thing! The Strawberry Blonde Magic Cookie Bars are a serious Christmas favourite for both our customers and staff alike!

magic cookie bars2.jpg

MAGIC COOKIE BARS

Ingredients:

Base:
3 cups vegan graham cracker crumbs
3/4 cup Earth Balance Buttery Spread
3 tablespoons brown or cane sugar

Filling:
For the condensed coconut milk:
400 ml/14 0z can of full fat coconut milk
1 cup brown sugar
(See below for notes about the condensed milk)

Topping:
2 cups non-dairy chocolate chips
3 cups shredded, unsweetened coconut
3/4 cup pumpkin seeds

Directions:

Preheat oven to 350 F degrees. Line a 9"x 13" pan with parchment paper.

Base:

Melt the Earth Balance in a small saucepan over low-medium heat and combine with graham cracker crumbs and sugar.

Press this mixutre firmly and evenly into the parchment lined pan.

Filling:

To make condensed coconut milk: Combine canned coconut milk and brown sugar in a pot. Bring to a boil and then reduce to a simmer. Let simmer for 8-10 minutes, ensuring all the sugar has dissolved and mixture has thickened slightly.

Pour chocolate chips evenly over the base, making sure to cover the corners.

Pour hot coconut milk/sugar mixture evenly over the top of chocolate chips, followed by an even layer of coconut and pumpkin seeds. Press ingredients down with your hands or a spatula.

Bake for 25-30 minutes or until set and top browns slightly.

Let cool completely, then put in fridge for at least 1 hour to make cutting easier. This recipe can yield an upward of 24 cookie bars depending on how big or small you cut them. Keep them stored in an airtight container at room temperature or in the fridge or freezer. Enjoy!

Notes from the kitchen:
-To save time, you can also purchase condensed coconut milk in many well stocked grocery stores or health food stores. The last few times I’ve made this recipe I replaced the homemade condensed coconut milk with a can of Let’s Do Organic’s sweetened condensed coconut milk (7.4 oz/210 g can). Nature’s Charm makes a 11.25 oz/320 g can of sweetened condensed coconut milk, and if you’re able to find it, that would actually be the ideal size as the 7.4 oz/210 g can is not quite enough for the recipe and I ended up adding a bit of non-dairy milk to ensure I had enough liquid to cover the graham cracker base and chocolate chips. If using store-bought condensed coconut milk, you will still want to warm it on the stovetop so that it’ll melt the chocolate chips nicely.
-I have also swapped in Miyoko’s European Style Cultured Vegan Butter instead of Earth Balance in equal measure with great success. Miyoko’s is a less processed option and it’s a great butter substitute in general.

For more information about Strawberry Blonde Bakery, visit their website,  Facebook page, or Instagram account.

Butter Chickpeas & Cauliflower

I love fall! Mainly for the hearty warming meals and abundance of one-pot-wonders. You know, the kind of recipe where you literally throw a bunch of veggies, plant-based proteins, herbs, and spices into a pot and you find yourself with the most magically delicious feast. That’s what I’m talking about!

If you’ve been following me for a while you’d know I often trial my recipes at cooking lessons and with my nutrition clients. This Butter Chickpeas & Cauliflower recipe has been a unanimous hit, which means it’s destined for the blog. As I was saying above, this is one of those one-pot meals that is fairly simple to prepare and is rich in flavour and nutrients. You can eat it on its own, or pair it with a grain of your choice and you will have lunches for the week. In the photo below it’s paired with brown rice, but you could try quinoa, millet, wild rice, or whatever you fancy.

Scroll down for the full recipe and please let me know if you try it out. I love getting your feedback on my recipes!

Cauliflower Chickpea Curry-1.jpg

BUTTER CHICKPEAS & CAULIFLOWER

Yields 4-6 servings

Ingredients:

1 teaspoon coconut oil or extra virgin olive oil
1 onion, diced
1 red bell pepper, diced
3 cloves of garlic, minced
1 inch piece of ginger, finely minced
2 tablespoons curry powder (I love Cha’s Curry Masala)
1 teaspoon paprika
1/4 teaspoon cayenne, optional
1 can (14 oz/398 ml) chickpeas, drained & rinsed, or 1.5 cups cooked chickpeas
1 can (14.5 oz/411 g) of diced tomatoes
1 can (14 oz/398 ml) full fat or lite coconut milk
1 small head of cauliflower, chopped into bite sized pieces
1 bunch of cilantro, roughly chopped, for garnish
Sea salt and freshly ground pepper

Directions:

In a medium or large pot warm the oil on medium head. Add the onions and a pinch of salt, and sauté for 5 minutes, or until the onions become slightly translucent. Add the red bell pepper and sauté for a few minutes, until softened a bit.

Next add the garlic, ginger and spices and stir for a minute allowing the spice to become fragrant.  Then add the chickpeas, tomatoes, coconut milk, and cauliflower. Bring to a boil, then reduce the heat to low. Simmer, stirring every so often, until the cauliflower has softened (about 8 - 10 minutes).

Once the cauliflower has softened, taste and then season the dish with salt and pepper. Serve immediately with a hefty helping of cilantro. Option enjoy on its own or to serve with a grain of your choice. 

Will keep in the fridge for 5 days, or frozen for an upward of 2 months.

If you enjoyed the recipe I shared above be sure to check out my Plant-Based Breakthrough program, which is a crash course in plant-based health, nutrition, and meal planning. For details about the program click here. You can also join the Plant-Based Breakthrough Community on Facebook where I share recipes, inspiration, and information on plant-based nutrition.

Photography by Ana Tavares.

Cauliflower Chickpea Curry-4.jpg

Tofu Feta Salad

I’ve always been a little bit obsessed with cheese, so when I went dairy-free many years ago I had to find new ways to indulge in my favourite food. Cashews tend to be the superstar when it comes to making cheesy alternatives, but you’d be surprised how tofu can magically morph into feta if you’ve got the right ingredients.

In my version of tofu feta, I use two ingredients that help infuse a cheese-like flavour into the tofu. Firstly, there’s nutritional yeast, which is a deactivated yeast and bi-product of molasses making. Nutritional yeast or “nooch”, as it’s often called, is a staple in dairy-free cuisine because of its versatility and sharp, cheesy taste. I also used miso paste, which is fermented bean (generally soy or chickpea), that is mostly found in Japanese cuisine and offers a strong and pleasant salty fermented taste reminiscent of parmesan (but it works with perfectly with my faux feta). I use both in my recipe, however, you could get away with one or the other. That said, if you’re delving into the world of dairy-free cooking, they are handy and highly recommended pantry staples.

If you have questions about any of the ingredients in this recipe, don’t hesitate to ask in the comment section below. If you’re looking to learn more about dairy-free cuisine, I’ve written a few blogs on the topic. Find them HERE and HERE.

A final tip about tofu feta: you can definitely serve it with salad as instructed below, but it can also be crumbled onto vegan pizza or eaten as an appetizer with tomatoes and fresh basil.

This recipe has been very popular at my cooking lessons and I’m super excited to share it here on my blog for you to try as well. Without further ado, scroll down for all the details. Please do report back if you try this recipe!

TOFU FETA SALAD

Makes 4 - 6 servings

Ingredients:

Tofu Feta Ingredients:
1 package extra firm organic tofu
1 tablespoon white or chickpea miso
Juice of 1/2 lemon
2 tablespoons extra virgin olive oil
2 tablespoons water
2 tablespoons nutritional yeast
1 teaspoon oregano
1 teaspoon basil
1/4 teaspoon garlic powder
1/2 teaspoon sea salt

Dijon Dressing:
1 teaspoon dijon mustard
1 clove garlic, minced
1/4 cup fresh lemon juice
1/3 cup extra-virgin olive oil
Salt & pepper to taste

Salad Ingredients:
8 cups leafy greens of your choice, chopped to bite sized pieces
1/2 pint of grape tomatoes or two large tomatoes, chopped
1/2 red onion, thinly sliced
1 cucumber, chopped in to bite sized pieces
1 15 ounce can of white beans or chickpeas, drained and rinsed
1/2 cup kalamata olives, chopped

Directions:

For the tofu feta:

Drain and press the tofu for at least 30 minutes. You can wrap the tofu in a dish towel and place a heavy object on top (I often use a cast iron pan with a big jug of vinegar, but you can use any heave object in your kitchen) or use a tofu press.

While the tofu is pressing, whisk together the miso, extra virgin olive oil, water, nutritional yeast, oregano, garlic powder, salt and pepper.

Cut the tofu into small cubes and toss with the marinade. Place in the fridge and marinade for an hour, preferably longer. If you have time, leave it to marinate overnight.

To make the dijon dressing:

Whisk together the dijon mustard, garlic clove and lemon juice until combined.

Slowly whisk in the olive oil until combined. Season with salt and pepper.

Assemble your salad: 

Divide the salad ingredients evenly in bowls. Top with tofu feta and drizzle on dressing. Serve immediately.

If you want to prep ahead of time, wait until just before serving to add the dressing. 

Notes from the kitchen: I used a locally made navy bean miso (as seen in the photo above), but you'll be more likely to find a white miso or chickpea miso in a store near you. 

If you enjoyed the recipe I shared above be sure to check out my Plant-Based Breakthrough program, which is a crash course in plant-based health, nutrition, and meal planning. For details about the program click here. You can also join the Plant-Based Breakthrough Community on Facebook where I share recipes, inspiration, and information on plant-based nutrition.

Photography by Ana Tavares.

AmyLongardRecipes-11.jpg

Chickpea Salad Wrap

It's been a long time coming and I'm happy to finally be posting my chickpea salad recipe!  I've made it for cooking lessons, yoga retreats, and shared with many of my clients, always with such positive feedback. It's truly one of my favourites and I was so excited to learned that Ana Tavares, my friend & photographer extraordinaire (she shot the photos below),  makes this recipe often for her son's lunches.  Given that I've received so many requests for easy back-to-school/kid friendly recipes lately, the timing couldn't be more perfect! 

This recipe is nut, dairy, egg, and gluten free, and offers tons of plant-based protein and fibre. It's also a versatile recipe that can be eaten on its own, in wraps, sandwiches, with crackers or on a bed of leafy greens. For this blog post, I opted to serve it in a wrap because it made for fun food styling. 

You'll notice this recipe calls for dulse or kelp flakes. These are both varieties of dried seaweed ground into flakes, which can generally be purchased at health food stores or online. Although I've listed these ingredients as optional I highly recommended adding seaweed since it's such a nutritious food and gives the chickpea salad a nice boost of flavour (reminiscent of tuna ...but less fishy). 

Scroll down for the recipe and please let me know if you have any questions or feedback. I love hearing from you! 

CHICKPEA SALAD WRAP

Makes 6 - 8  servings

Ingredients: 

2 15 oz. cans chickpeas, drained & rinsed, or ~ 3 cups cooked
1/3 cup vegan mayonnaise  (store bought or homemade)
1/3 cup celery (about 1 or 2 ribs of celery), minced
3 green onions, chopped
3 tablespoons minced dill pickle (about 1 large dill pickle)
1 - 2 tablespoons nutritional yeast
1 tablespoon tamari
2 teaspoons kelp or dulse (seaweed) powder or flakes, optional  
Freshly ground pepper, to taste
Fresh lemon juice, to taste
1 large handful, fresh dill, roughly chopped

Directions: 

For a chunky consistency: add all of the ingredients (except dill) into a medium sized bowl.  Mix and mash everything with a fork or potato masher. 

For a smooth consistency: add all the ingredients to a medium sized bowl and process with an immersion blender. Alternatively add the ingredients to a food processor and process until smooth. 

Once desired consistency is reached, stir in the dill. Enjoy in sandwiches, wraps, on crackers, or on a bed of salad greens.

Keeps in the fridge for 5 days in an air-tight container.

If you enjoyed the recipe I shared above be sure to check out my Plant-Based Breakthrough program, which is a crash course in plant-based health, nutrition, and meal planning. For details about the program click here. You can also join the Plant-Based Breakthrough Community on Facebook where I share recipes, inspiration, and information on plant-based nutrition.

AmyLongardRecipes-6.jpg

A Decluttered Space Is Good For Your Health: Q & A with Kelsey Marion

Since starting my business I've been forced to learn (and unlearn) so many things and create new habits to help manage my ever-changing schedule.  I've never been an organized person, in fact, I was probably the opposite of organized, and starting a business was a big wake-up call for me.  

Somebody once told me that a cluttered space creates a cluttered mind. That really stuck with me.  Over the last couple years I've slowly been working towards tidying up in various aspects of my life. Like anyone on the quest for less clutter I've read Marie Kondo's book The Life- Changing Magic of Tidying Up: The Japanese Art of Decluttering and Organizing (I highly recommend it, by the way) and I've been applying her principles.  Most recently, I even won a contest which included a session with home organizer Kelsey Marion. Kelsey is an easy-going, yet professional and completely non-judgemental lover of all things organization. She runs the business Get Sorted. Organizing is a pain point for me, but for Kelsey it's a passion. Since our initial visit she's been to my house several times and whenever she leaves I feel lighter, less stressed and definitely more in comfortable in my living space. 

I truly believe that living and working in an environment that feels good is important for physical, mental,  spiritual wellbeing, not to mention creativity, productivity, and so on. That doesn't necessarily mean a tidy, decluttered space is the answer for everyone, but for me personally, I felt overwhelmed by my surroundings and that's why meeting Kelsey was so serendipidous. Kelsey and I have spoken at length about organization and tidiness, and she has also taken some time to share her insights for my blog. Read on to learn more about Kelsey, the connection between decluttering and health, dealing with clutter related stress and quick tips for organization. 

Kelsey Marion Get Sorted.jpg

Amy: What drew you to organizing and ultimately starting your business?
Kelsey: 
I used to be a disorganized person - across the spectrum; in school, financially, socially, work. I collected many items that were not serving a purpose in my life. I didn't recognize how my disorganized behaviors were negatively affecting my life until I was in University. I really became frustrated with myself and knew I needed to unlearn my behaviors/habits. After years of self reflection and research of decluttering and realistic organizing techniques that would benefit me I felt a huge weight lifted. After feeling this great I knew others would feel amazing too. Get sorted was formed out of the desire to help others reach their organizing goals and it's been a rewarding experience ever since!

Amy: Is there a connection with an organized and decluttered space and a healthy mind & body?
Kelsey: Yes!!! When we are living in clutter we cannot focus at our fullest potential. By reducing the clutter to items that actually make sense for your life we have the space to make positive changes and/or form routines in our lives. We are not wasting time digging through clutter to find items. By decluttering and being more organized we reduce feeling overwhelmed by the mess (less mess = less stress). I find when a kitchen is more organized it is more inviting to cook in. Overall, it enhances the chances to feel less stressed or guilty, and more room to function and motivated to make healthier choices.

Amy: Clutter and mess can feel overwhelming. Do you have tips for getting over the initial stress of tidying? 
Kelsey: Do not try to do everything at once! For example, "I want to organize my entire home today". This will only make you feel overwhelmed and discouraged. Take it one cabinet/ dresser/ closet at a time. Create realistic goals for yourself, especially if you are doing this on your own. If you're at the point of complete overwhelm, I highly recommend hiring a professional organizer to book a consultation to explore your options. 

Amy: Can you share a few organizing tips that my readers could practice on a daily, weekly or monthly basis that'll make it easier to keep their space organized?
Kelsey: Definitely, I recommend trying the "one-minute rule";
• instead of placing your plate in the sink - place it in dishwasher (or better yet, clean it!)
• hang your coat on the rack or hang up instead of throwing on floor. 
• empty your kid(s) lunch bag after school/ camp instead of leaving dirty containers and wrappers overnight.
Little actions like this help maintain order in your life. You don't need to have a "show-room" space 24/7; I tell my clients you want realistic goals. As long as the home feels functional to maintain that is the ultimate win! 

Want to connect with Kelsey? Visit her website or find her on Instagram and Facebook

Raw Taco Salad Bowl

This summer heat just won't quit. We've got another hot week ahead here in Ottawa, which means I'm avoiding my stove, my oven, or anything that'll heat up my house.  If you're looking for a no-cooking-required simple summer recipe, you're in luck.  

You may have seen a raw taco bowl on my blog before, but it's making a comeback. I've simplified the recipe and collaborated with my friend Ana Tavares to shot some beautiful photos.  This recipe has been on high rotation at my cooking lessons this summer and is also a favourite in my household. Ana told me her family also loved the bowls as they were the lucky recipients of the leftovers following the photoshoot.  Scroll down to get the full recipe. Please let me know if you've tried it out. I'd love your feedback! 

RAW TACO SALAD BOWL

Makes 4 servings 

Ingredients: 

Walnut Meat: 

1 cup walnuts
1/2 packed cup sun-dried tomatoes or sun-dried tomatoes in oil
1/2 teaspoon cumin
1/2 teaspoon smoked paprika
1/4 teaspoon garlic powder
1/8 - 1/4 teaspoon salt (adjust to taste)
Pinch of chili flakes or cayenne pepper, optional (for those who like it spicy!) 

Tahini Sour Cream: 

1/2 cup tahini
1/2 cup water
1/4 cup fresh lime juice (2 to 3 limes)
1/2 teaspoon sea salt
2 tablespoon olive oil or avocado oil
1 small clove garlic clove, roughly chopped

Salad Components: 

Approximately 8 cups leafy greens of your choice (arugula or finely chopped kale are my favourites)
1 pint grape tomatoes, halved
1/2 of a small red onion, small dice
3 - 4 green onions roughly chopped
1/4 bunch cilantro, roughly chopped, for garnish

Directions:

If you're using sun-dried tomatoes in oil skip this step.  If using sun-dried tomatoes (just dried tomatoes and salt, no oil), add them to a bowl and cover them in water and leave them to soak for 1 - 2 hours to soften them. Drain.

Process all of the Walnut Meat ingredients in a food processor until well combined, but still chunky and crumbly (with a meaty texture).

Combine all of the Tahini Sour Cream ingredients in the blender and process until smooth.  If it's too thick, add some water to loosen. 

To assemble your salad: place about 2 cups of leafy greens in a bowl. Top the salad with the fresh tomatoes, a sprinkling of red onions and green onions.  Then add the walnut meat and drizzle about 1/4 cup of dressing on your salad. Garnish with cilantro and enjoy! 

If you enjoyed the recipe I shared above be sure to check out my Plant-Based Breakthrough program, which is a crash course in plant-based health, nutrition, and meal planning. For details about the program click here. You can also join the Plant-Based Breakthrough Community on Facebook where I share recipes, inspiration, and information on plant-based nutrition.

Raw Taco Salad-3.jpg

Cherry Chocolate Nice-Cream

It's turning out to be a hot, hot, hot summer, and if you're looking to beat the heat, I’ve got just the recipe to cool you down.  Cherry Chocolate Nice-Cream. Need I say more? Well, perhaps I should clarify for those of you who are new to the term "nice-cream", which is a quick DIY dairy-free banana-based ice-cream.  It's essentially the easiest, tastiest and possibly healthiest way to make ice-cream at home. 

I’m super excited to share this recipe for a couple reasons. Firstly, I’ve been making this one a lot at my cooking lessons and sharing photos on my Instagram stories. Needless to say, I had lots of requests and it's about time I share this with those of you who haven't been able to attend the lessons. 

Secondly,  this is the first of many upcoming projects that I'll be doing with my friend Ana Tavares. You might remember seeing her as a guest blogger, or perhaps you’ve stumbled upon her Instagram where she posts stunning food photography. If you speak Portuguese you may have discovered her vegetarian food blog or cookbook (which has been hugely successful in Brazil).  Ana took the photos for this post and we plan to collaborate in the coming months to create more great culinary content in both English and Portuguese.

Scroll down to learn how to make Cherry Chocolate Nice-Cream and stay tuned as we’ll be sharing another recipe collab next week.

CHERRY CHOCOLATE NICE-CREAM

Makes 3 - 4 servings

Ingredients: 

4 overripe bananas
1/3 cup cocoa powder or raw cocao powder
1/4 teaspoon vanilla extract
Non-dairy milk of your choice, optional
1/4 - 1/3 cup frozen dark sweet cherries or sour cherries depending on your taste
Optional topping: unsweetened coconut flakes

Directions: 

Chop the bananas into small rounds and freeze them overnight on parchment lined baking tray.

Add all ingredients - except cherries and coconut flakes - to a food processor or high-speed blender.   Process until completely smooth (similar to a soft serve consistency). If you find your blender isn’t strong enough to handle the frozen banana you may need to let them thaw a bit and/or add a bit of non-dairy milk to get things going. 

Once you've reached a nice, smooth texture, add the cherries, then pulse for a minute or so or until the cherries are evenly distributed, but still a bit chunky. 

For the best texture you’ll want to enjoy your nice-cream immediately, but you can  freeze leftovers and thaw again before serving.  When serving, top your nice-cream with whole frozen cherries and unsweetened coconut flakes. 

If you enjoyed the recipe I shared above be sure to check out my Plant-Based Breakthrough program, which is a 4 week online crash course in health, nutrition, and meal planning.  For details on when the next program starts click here. You can also join my Plant-Based Breakthrough Community on Facebook where I share recipes, inspiration, and information on plant-based nutrition.

Chocolate Cherry Nice Cream-3.jpg

Green Power Bowls

I've been making tons of Green Power Bowls these days. These have been very well received by my private clients and at cooking lessons.  I have been posting photos of these bowls a lot in my Instagram stories and I figured it was finally time to share the recipe on my blog. 

Although it may seem elaborate, these kinds of bowls are actually quite easy to make.  It requires a little prep, chopping and sautéing of the veggies, putting together the dressing, and making the noodles.  If you are a soba noodle newbie you'll want to pay attention to a few things. Pure buckwheat noodles are gluten free, but you may come across some varieties of soba noodles that are a mix of buckwheat and wheat. The blended variety is much less expensive. If you are celiac or gluten intolerant make sure you seek out the 100% buckwheat noodles. When using buckwheat noodles of any kind, I always cook them according to the package directions (usually for about 5 - 8 minutes on a simmer). When they are fully cooked I transfer them to a colander immediately and give them a very good rinse under cold water. This will remove any excess starch.   By the way, if you don't have soba noodles on hand or if you don't want to use them, you can also swap out the soba noodles for rice noodles, quinoa, or any other grain or noodle of your choice. 

I also wanted to mention that this recipe is really a guideline.  As I said above, you don't need to use soba noodles, you can use something else. Also, feel free to swap in kale for spinach, or maybe some bok choy. You may also decide to add in chickpeas or tofu instead of the edamame.  The sauce is the pièce de résistance and no matter what you put in your bowl, it'll taste good as long as you're using the sauce. 

Scroll down to get the full recipe and if you make it, please tag me on social media. I love seeing your photos! 

unnamed-3.jpg

GREEN POWER BOWLS WITH SOBA NOODLES

Yields 4 to 6  servings

Sauce: 

1/4 cup natural peanut butter, tahini, or sunflower seed butter
2 tablespoons tamari
2 tablespoons lime juice or apple cider vinegar
1 clove garlic minced
1 teaspoon fresh ginger minced
1 - 2 teaspoons maple syrup
1/4  - 1/2 teaspoon red pepper flakes
1/2 cup water, or more, if needed to loosen the sauce

Noodles:

16 oz soba (buckwheat) noodles
1 teaspoon sesame oil

Vegetables:

1 teaspoon sesame oil
6 green onions, sliced on the diagonal
6 - 8 cups assorted vegetables: cauliflower, broccoli, & spinach
1 small bunch basil
2 cups shelled edamame, thawed

Toppings (optional): 

Hemp hearts & sliced green onions

Directions:

Wash and chop cauliflower & broccoli (approximately 6 - 8 cups in total) into bite sized pieces. Wash spinach and pat to dry or use salad spinner. Pick basil leaves off the stems (discard stems), wash leaves, and gently pat to dry.  Set aside. 

In large measuring cup or medium sized mixing bowl, combine all the sauce ingredients, except the water. Stir until well combined (you could also use a blender if you're looking for a very smooth sauce) and add enough water to thin the sauce down so that it’s pourable.  Set aside. 

Cook noodles according to the package. Drain, rinse, and toss with sesame oil. Set aside.

Warm the sesame oil in a wok or skillet over medium heat. Add the green onions and cook for a couple minutes, just until they start to soften. Add the heartier vegetables - cauliflower & broccoli - cook until tender. Add the edamame and warm for a minute or two. Add the spinach and basil towards the end of cooking and allow them to wilt (about 2 minutes). 

To create your bowls: add a portion of soba noodles and a big scoop cooked vegetables to a bowl.  Top your bowl with a drizzle the sauce. Alternatively, you can add the sauce to the pan with the vegetables to heat the sauce. Before serving, top with a sprinkling of hemp hearts and any remaining green onions. These bowls can be eaten warm or cold.  

If you enjoyed the recipe I shared above be sure to check out my Plant-Based Breakthrough Program, which is a 4 week online course focussed on health, nutrition, meal planning, and cooking.  For details on when the next program starts click here. You can also join my Plant-Based Breakthrough Community on Facebook where I share recipes, inspiration, and information on plant-based nutrition

Five Powerhouse Plant-Based Foods You Should Be Eating

As you may already know, I'm a huge proponent of plant-based foods. Plants offer a wide variety of vitamins, minerals, macronutrients and phytochemicals, all of which support a multitude functions within the body.  So eat plants, and eat lots of 'em. Your body will thank you! The list below includes my top five foods (or groups of foods) and I truly make an effort to consume all of them regularly. Not always every day, but it would be rare for a week to pass without these foods turning up in my meal planning.  I hope you’ll be inspired and add these items to your next grocery list.

HEMP HEARTS. These are, pardon the pun, very dear to my heart. I really do love them! A true Canadian super food, hemp hearts are grown and cultivated in Canada.  They are an excellent source of protein containing all 9 essential amino acids and essential fatty acids (omega-3 and -6).  Fun fact: the varieties of hemp that are grown for food purposes naturally help to suppress weeds, meaning that no pesticides or herbicides are required to grow hemp successfully. How to use them? I like to sprinkle hemp on my morning oats, on top of avocado toast and soups. I add them to smoothies and add into salads, including my Superfood Kale Salad

PULSES.  So technically pulses would be considered a grouping of foods but I just love them so much that I had to include the whole family. The term pulses refers to a category of dried edible seeds under the legume umbrella and includes chickpeas, split peas, lentils and beans.  Pulses are very high in protein and fibre, and are low in fat.  Pulses provide substantial amounts of vitamins and minerals including iron, magnesium and zinc and are abundant in B vitamins.  A great way to start playing around with pulses is to use them in my Middle Eastern Lentils & Rice with Caramelized OnionsButternut Squash & Red Lentil Soup or Beet Hummus

LEAFY GREENS.  I’m the queen of leafy greens. They are my life blood.  When I first realized I was allergic to cow’s milk and stopped eating all dairy products, I was surprised to learn that leafy greens — like kale, spinach, and collards greens — are a great source of calcium. Who woulda thought?  If you are new to eating leafy greens, I recommend trying out different varieties and cooking methods. For example, some people prefer baby kale over full grown kale which tends to be very fibrous and bitter. Also, cooking leafy greens can soften them up nicely and make them more palatable, especially if you’re not used to eating bitter foods. To get you started, I recommend trying out my Sautéed Garlicky Greens recipe

SEAWEED.  Now, I realize seaweed is not for everyone. However,  if prepared properly even biggest seaweed skeptic may grow to love 'weed! Trust me, I’ve been successful in turning seaweed haters into seaweed super fans with my recipes.  What I love about seaweed is that it's a very sustainable crop. Think about it, seaweed doesn't requires land, water or fertilizers to grow.  On top of that, seaweed is a very, very nutritious food. Seaweeds are rich in iron, vitamin C, and iodine and are also an excellent source of dietary fibre.  My personal favourite variety of seaweed is dulse, but I’m also a huge fan of kelp, nori (aka. sushi seaweed) and hana tsunomata. If you want to dive deeper into seaweed I’ve written a more detailed blog post on the topic. As for recipes, I recommend my Dulse, Sunflower Seed & Walnut Pâte.

FLAX SEEDS.   Grown here in Canada, flax seeds are an amazing source of fibre and anti-inflammatory omega 3's. They are great for weight management, heart health, reducing inflammation, and much more!  To take advantage of the anti-inflammatory benefits, you'll want to consume ground flax seeds. You can buy the flax seeds ground or whole. If you buy them whole you can grind them yourself in a high-powered blender or spice grinder.  Add ground flax to your morning oats, in smoothies, or as a topper for my Buddha Bowls. If you've never had flax before,  you should start with small amounts (about a teaspoon).  Because of its high fibre content, a little flax goes a long way! 💩 Quick storage tip for you: I recommend storing both whole and ground flax in your fridge or freezer to maintain freshness and the integrity of the omega 3 fatty acids. 

If you enjoyed the information I shared above be sure to check out my Plant-Based Breakthrough Program, which is a 4 week online course focussed on health, nutrition, meal planning, and cooking.  For details on when the next program starts click here. You can also join my Plant-Based Breakthrough Community on Facebook where I share recipes, inspiration, and information on plant-based nutrition.