City of Om Contest

City of Om is happening again this year on Saturday, June 3 at Lansdowne Park. The yoga festival will feature a full day of both indoor and outdoor yoga classes to suit all levels, workshops, live music, local artisans and food vendors. The festival will also include the a free 5k fun run along the Rideau Canal and free family friendly programming.  What I love about City of Om is that it celebrates healthy living, environmental sustainability and community, and truly offers something for everybody.

I attended last year as both a vendor and a presenter and I had such a fantastic day.  I'm so excited to be presenting again this year as part of the "Food For Thought: Workshop Series". The subject of my workshop is "demystifying super foods" and it takes place from 3:30 to 4:30 p.m. at the East side of Aberdeen Pavillion.  I'll be talking about many of my favourite super foods, doing a little foodie show-and-tell, along with a food demo.  My workshops is available to All Access Festival Pass holders AND the general public, at no cost. 

The City of Om organizers have kindly given me a few All Access Festival Passes (valued at $100 each) to give away! Scroll down for contest details.

This is me speaking last year to a great group of people on the topic of "Food and Mood".

This is me speaking last year to a great group of people on the topic of "Food and Mood".

CONTEST DETAILS

I have three sets of two City of Om All Access Festival Passes to give away to three lucky winners! Each set is worth $100. To enter the contest, please see the instructions below:

  1. In the comment section below please let me know who you would like bring with you to City of Om.
  2. Please share this blog post on Facebook or Twitter. (Bonus points for tagging me in your post!)

The contest closes on Wednesday, May 24, 2017 at Midnight EST. Three winners will be notified via email on Thursday, May 25 with instructions for picking up tickets. Please ensure you enter your email address below (you will be prompted to do so when you leave your comment) so that I can contact you.
Good luck!

I also have a special City of Om promo code. Use “amy@cityofom” at checkout to receive 10% off any City of Om passes, including After Party tickets.

If you'd like more details on my Food For Thought Workshop, please CLICK HERE. To learn more about City of Om including the yoga classes, yoga teachers, vendors, etc check out their website: www.CityofOm.com

Perfect Quinoa Pilaf

Did you know that quinoa is not technically a grain? It's a seed (or sometimes referred to as a pseudocereal) and is grouped into the same family as spinach, swiss chard and beets.  High in antioxidants and anti-inflammatory, quinoa may be protective against cardiovascular diseases and also help lower cholesterol.  Quinoa is a complete protein source and is rich in fiber. It's also a very versatile food that can be incorporated into a wide range of recipes, and can be eaten whole or ground into flour. It's become very popular in the last few years, and for good reason!

As I mentioned, there are many ways that you can incorporate quinoa into your diet. However, in this post, I'm going to share a very simple recipe that has become very popular among my clients.  This Quinoa Pilaf recipe has been a longtime favourite as it makes the perfect side-dish for stews, soups or stir-fry and can be used as the base for salads. Lately it's been on high rotation as part of my Buddha Bowls.

I'll admit that even as a trained chef, I've had my fair share of trouble with quinoa. When cooking it, I used to cross my fingers that it wouldn't end up too soggy and that it would fluff up nicely.  In this recipe, you'll lightly cook onion and garlic in oil to create a nice base of flavour, and then you'll quickly "toast" the quinoa before adding any liquid.  The process of toasting, combined with the right balance of liquid to quinoa ratio, will result in a light and airy dish with a hint of nuttiness. 

Also, you'll notice I mentioned "rinsing" the quinoa. Many chefs will suggest doing this as the outer shell of the quinoa is coated in sapponins. These bitter-tasting sapponins area actually healthful phytonutrients but they can result in a less palatable final product if they are not rinsed off. I recommend rinsing your quinoa off in a fine mesh strainer under cold water for a few minutes.  That said, the processing and cooking of quinoa often removes a great deal of the sapponins so this isn't mandatory, just a personal preference. 

Now, without further ado, please scroll down to find the full recipe!

QUINOA PILAF

Makes approximately 3 cups

Ingredients:

1 cup quinoa, rinsed and drained
2 tablespoons olive oil or coconut oil
1 small onion, minced
2 cloves garlic, minced
1.5 cups, water or low sodium organic vegetable broth
Sea salt

Directions:

Pour the olive oil into a small saucepan and warm over medium-high heat. Add the onion, garlic and a generous pinch of sea salt, and sauté for a few minutes until the vegetables become translucent.

Add the quinoa and continue cooking for a few more minutes (5 minutes or so), stirring constantly to toast quinoa a bit. You should be able to smell the nutty aroma of the quinoa at this point.

Pour in the water or vegetable broth and bring to a boil. Reduce the heat to low and allow the quinoa to simmer. Cook covered until the liquid has absorbed and the quinoa has unfurled, about 15 minutes.

Remove from heat and let stand for 5 minutes. Fluff the quinoa with a fork and serve immediately.

Store in the fridge in an airtight container for up to 1 week.

Exciting News!

I recently found out that I am a nominee for the Danielle Perrault Trail Blazer Award. I was nominated by my peers through my alumni association, the Canadian School of Natural Nutrition Alumni Association. This Canada-wide award is for recent grads (within 3 years) who have demonstrated overwhelming commitment, involvement and enthusiasm to the Canadian holistic nutrition industry.  The winner will be chosen by a panel of judges and the award will be given out next week (Saturday, May 6, 2017) at the Canadian Holistic Nutrition Conference (CHNC) in Toronto. 

Whether or not I win, this nomination means so much to me. The last few years have been both challenging and very rewarding, and I have to say that this really validates all the effort I've put into growing my little cooking and nutrition business. I definitely could not have done it without the incredible, unwavering support of my husband Jeremy, all my friends, family, peers, mentors, industry partners, and clients. Huge, heartfelt thank you to everybody who has supported me in this journey.

I'm super excited to take a little road trip to Toronto next weekend to attend the CHNC.  This will be my third year attending! I look forward to seeing many of my fellow nutritionists and nominees while I'm there. If you're an RHN and you haven't yet bought your ticket,  click on the image below to be directed to the CHNC webpage.  CHNC is taking place in both Toronto and Calgary, and if you can't make it to either location, you can tune in via livestream.

Ditching Dairy: Simple Culinary Swaps

Ditching dairy isn’t that difficult when you know how to make substitutions. In most cases, these simple swaps will go unnoticed and you won’t even realize that you’re not eating dairy.

If a recipe calls for butter as a base, usually you can substitute (in equal measure) an oil, like coconut oil or extra virgin olive oil, or Earth Balance, which is a buttery tasting spread.

When it comes to creamy soups, you can often play around with a few different things. Depending on the type of soup, you can add soaked and blended cashews, rolled oats, coconut milk, or tahini (sesame seed paste) in place of traditional milk cream. In other cases, simply adding in potatoes or a starch (such as arrowroot or organic corn starch) will thicken your soup, giving it a creamier texture.
 
If a recipe calls for milk, particularly when making baked goods, you can safely opt for any of the milk alternatives I listed in a previous blog post. If the recipes calls for buttermilk, you can easily make your own by adding an acid to a plant-based milk. For example, add 2 to 3 teaspoons lemon juice, apple cider vinegar, or cream of tartar to 1 cup of a plain or unsweetened plant-based milk. Let it stand for a few minutes and then you can add it to your recipe. It’s as easy as that!

There are also a few fantastic swaps for whipped cream.  All you need is a can of full fat coconut milk. Visit the Oh She Glow’s website for an extremely simple step-by-step tutorial. Coconut whipped cream is one of my favourite discoveries. Try it out, I guarantee you’ll love it too! If you're interested in some creative culinary magic, search for "aquafaba whipped cream" recipes.  This is whipped cream made from bean or chickpea brine (yes, the liquid you normally pour down the drain!). I've made whipped cream with bean brine on many occasions for cooking demos and people are shocked by the fantastic taste and texture.  All you need is brine (from canned or homemade beans or chickpeas), sugar, vanilla and cream of tartar, and mixer or immersion blender and you're good to go!
 
Miso paste is another pantry staple in dairy free cooking. It’s a salty condiment, often used in Japanese cuisine (miso soup), made with fermented soy beans. Miso paste has a pungent umami flavour and is a brilliant replacement for parmesan in both pesto and risotto recipes. It can also be blended in to mashed potatoes or added to salad dressings for extra creaminess and flavour. You’ll find miso paste at most Asian grocers and in health food stores. For those with aversions or allergies to soy, look for chickpea miso.

All of the guidelines above will get you started on your diary free journey. However the best advice I can give you is to play around with these ideas and get comfortable in the kitchen. From a nutrition perspective, reducing or avoiding dairy can be extremely beneficial. If you pair that with eating home cooked meals on a regular basis, you’ll do wonders for your health and wellness.

Finally, to get you started on your dairy-free journey, here's a very simple and basic almond milk recipe. Enjoy!

PLAIN ALMOND MILK

Ingredients:
4 - 5 cups water (go with less water for thick almond milk, more water for a lighter almond milk)
1 cup almonds (soaked overnight, then drained and rinsed)

Directions:
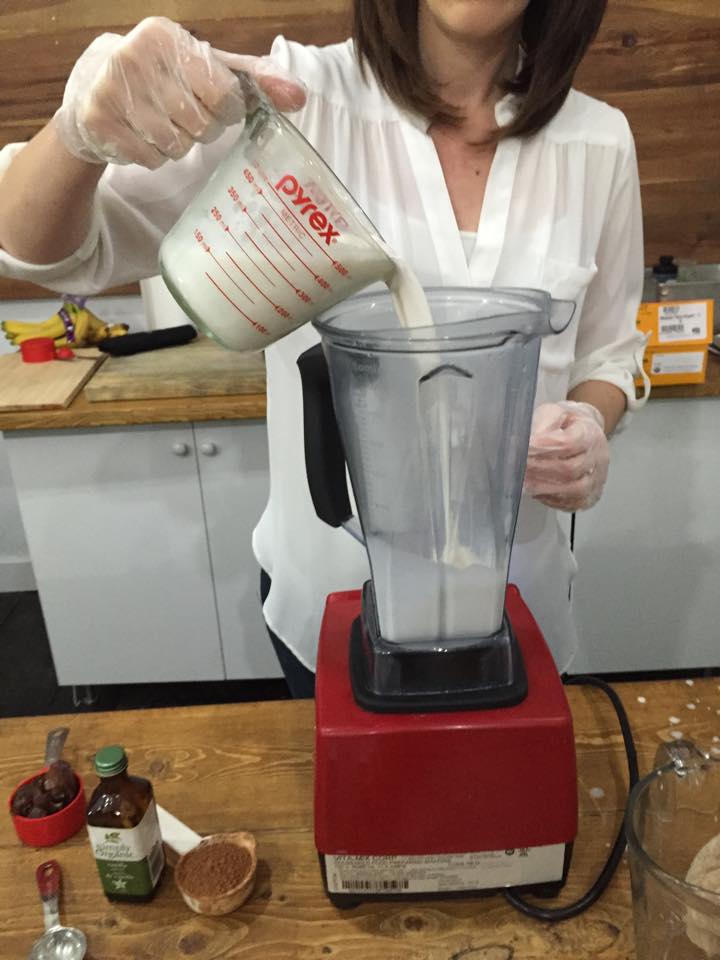
Blend all ingredients in a high-powered blender for about 1 minute, or until smooth.

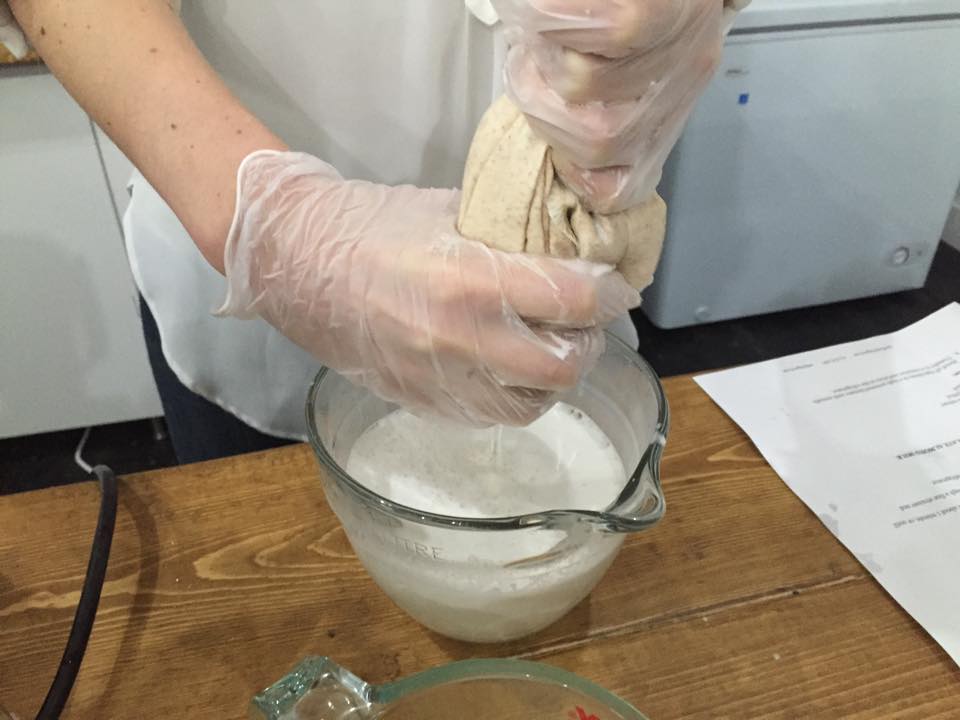
Pour contents through a nut milk bag, or through a fine strainer and cheesecloth, in to a bowl.

Transfer to a container and store in the refrigerator.

This article was featured on the Fauxmagerie Zengarry blog. To see the original post CLICK HERE.

A Nutritionist's Tips for Ditching Dairy

I’ve been dairy free for several years, but this change definitely didn’t happen overnight. I slowly weaned off by trying out milk alternatives, playing around with dairy-free recipes, and finally, I gave up cheese.
 
I stopped consuming dairy for many reasons; one of the main motivators was allergies. When I finally eliminated all dairy from my diet, many of my allergy symptoms disappeared. I was particularly happy to bid adieu to a chronic cough that had plagued me since childhood. I also found that my sleep improved, as did my energy levels.

When I first told my doctor about my decision to make the change, she was reluctant to support and urged me to supplement with calcium. At first, I followed her advice, but after doing a bit more research, I learned that there are so many plant-based sources of calcium. Not to mention that the calcium found in these foods is potentially more bioavailable (easily absorbed) than the calcium found in cow’s milk.
 
Some great sources of calcium include leafy greens (kale, collard greens, bok choy, spinach, swiss chard, beet greens, and more), sesame seeds, brussels sprouts, broccoli, cabbage, leeks, almonds, chickpeas, black turtle peas, lentils, kidney beans, figs, oranges, and much more. Recently, I went for a blood test after years of being dairy free and my calcium levels were excellent!

Making these changes in my life drastically improved my health. Because of this, I love helping others who seek to reduce or eliminate dairy from their diet. Now I’ll share my tried and true strategies that’ll help you navigate life beyond dairy!

Explore the Alternatives.

If you’re used to having milk on your cereal, creamer in your coffee, cream cheese on your bagel, mozzarella on your pizza, or yogurt with granola, don’t worry! Even without dairy, you can still have all these things without compromising taste.

There’s a wide range of milk alternatives, including almond, soy, hemp, flax, rice, oat, hazelnut and coconut. I recommend trying several of these to discover what best suits your palate. Nutrition tip: if you’re keeping an eye on your sugar intake, always look for the “unsweetened” options.  For coffee lovers, there are a variety of creamers and “barista” style non-dairy milks on the market that blend really well into hot drinks.  If you are a DIY type of person, there are tons of quick and easy non-dairy milk recipes online. Just ask google!

Given that there are many non-dairy milks, naturally there are also countless varieties of non-dairy yogurt. Some of the more popular choices include soy, coconut, and and almond yogurt. Health food stores are usually your best option for non-dairy yogurt, but lately lots of conventional grocers carry them too.
 
Over the past few years, the vegan cheese industry has grown exponentially and many delicious choices are available. Fermented nut cheeses, like Fauxmagerie Zengarry, offer a fantastic alternative to soft cheeses (like brie, gouda and Boursin). You’ll also find a range of harder cheese and cream cheeses available at most health food stores, and even some large and small grocers.  You can also buy pre-shredded cheese or, better yet, try grating your Zengarry fauxmages when they’re frozen; It makes a great topping on pizza and pasta! Try out a bunch of different vegan cheeses and you’re bound to find something that you love!

Zengarry brie - made from cashews - is an excellent addition to a cheese platter!

Zengarry brie - made from cashews - is an excellent addition to a cheese platter!

Sour cream is classically a dairy based product, but it’s very, very easy to emulate. Although you can buy dairy-free sour cream, my favourite is the one I make at home. I like to combine either 1 block of tofu (I prefer medium or firm, but you can use silken) or 2 cups of cashews (that have been soaked for a few hours and drained) with the juice of half a large lemon (or 1 small lemon), 2 tablespoons apple cider vinegar, with a bit of fresh minced garlic or garlic powder (about 1 teaspoon or 1/4 teaspoon, respectively), and sea salt (to taste) in a blender. If you’re using cashews, you may want to add anywhere form a 1/4 to 1/2 cup of water to your mixture. All you need to do is blend everything together until you’ve reached a smooth, even consistency. Voila, you have sour cream!

Rethink Your Regular Meals & Snacks. 

We often fall into routines, or patterns, when it comes eating. Sometimes simply adjusting your way of thinking about certain foods, or trying new combinations, can yield wonderful results. If you’re replacing one great food with another great food you won’t feel deprived, rather you’ll be creating a new staple that is equally enjoyable and satiating.
 
A game changer for me was hummus. For my entire life, I’ve loved having cheese on sandwiches and wraps. Nowadays, hummus is my go-to for sandwiches and wraps and I haven’t looked back. I also used to love dipping raw vegetables in ranch or french onion dressing; again, it’s hummus to the rescue! Besides being incredibly delicious and versatile, I love hummus for its health benefits.  Unlike cheese, it’s free of cholesterol and contains little to no saturated fat, and is a good source of dietary fiber. 

If you love creamy salad dressings, fear not! You absolutely do not need dairy to achieve this texture, taste or mouth feel. Tahini (sesame seed paste) has become a pantry staple for me. After ditching dairy, it became a fast favourite as a base for salad dressings. Mix it with some olive oil or sesame oil, an acid (lemon or vinegar), salt and pepper,  possibly some minced garlic, ginger or herbs, and you’ve got yourself a nice creamy dressing. Pro tip: tahini is high in calcium! Soaked and drained cashews or almonds, blended with oils, an acid, and other seasonings of your choice, will also create a lovely creamy dressing. There are lots of great recipes online that will get you started.

Have you heard of nutritional yeast (sometimes called savoury yeast flakes or nooch)? It’s a very popular condiment in vegan or dairy free cooking known for its cheesy taste and is often used to make dairy-free cheese sauces. It’s a form of yeast that has been grown on molasses and then harvested, washed, and dried using heat to “deactivate” it. While neither the name nor its description are super appealing, if you’re going dairy-free, it’s worth picking up from your local grocery store, health food store or at Bulk Barn. It can be sprinkled on pastas or steamed veggies. I also love using it to make cheesy popcorn. I make my popcorn the old-fashioned way, on the stovetop, using coconut oil (instead of butter) and I top it with nutritional yeast and sea salt. Although this is not the conventional way to season popcorn, you’ll be surprised at how good it tastes!

This article was featured on the Fauxmagerie Zengarry blog. To see the original post CLICK HERE.

Non-Toxic Skincare for Babies: Q & A with Dr. Alexis Reid

These days, so many of my close friends and family members are either pregnant or have young babies.  Coincidentally, in the last year or so, I've also worked 1-on-1 with many fantastic moms-to-be during their pregnancies. A few years ago, pregnancy and children were definitely not on my radar, but times are changing! This baby boom has definitely challenged me to learn, research and delve deeper into the topic of pre- and postnatal care for both mommas and babies. 

Doctor Photo.jpg

Through my research, I stumbled upon a local company called Eco Chic Movement. Eco Chic is a line of skincare products developed by Ottawa-based Naturopathic Doctor (ND), Alexis Reid.  Her carefully curated line includes 100% toxin free oils, shampoos and a variety of creams for babies and a few products for adults too. With so many babies, new moms, and pregnant gals in my life, I've been attending a lot of baby showers and Eco Chic has been my go-to gift.

Since I have been in such frequent correspondence with Dr. Reid in the last year or so, I really wanted to feature her and her company on my blog.  Just to give you a little background, she is not only an ND, but she is also a trained Chemical Engineer with a Master’s Degree in Pharmacology and Toxicology with a focus on breast cancer.  Given her extensive knowledge and training, I'd been dying to pick her brain and I'm so excited to share this post!

Please read on to learn more about Dr. Reid, why she started Eco Chic Movement, the importance of choosing non-toxic ingredients, some of the things you should be wary of when choosing skincare products for babies, and much much more!

Amy: Eco Chic Movement is such a great product line. What inspired you to start this company in the first place?
Dr. Reid: Thanks Amy! I had just finished my undergrad in Chemical Engineering and was starting my Master’s in Pharmacology/Toxicology, with a focus on breast cancer research. Part of starting my master’s involved doing a lot of background reading and research into all the potential causes of breast cancer. I stumbled upon a collection of research papers dating back to the 1940’s that showed a link between parabens and an increased risk for breast cancer. That night I went home from the lab and, while having a shower, starting reading all the ingredients on my shampoo, conditioner and body wash bottles. Not surprisingly, they all had parabens and phthalates as ingredients. I decided the next day that I was going to replace all my current personal care products with better “natural” options. Upon going to the health food store, I was not happy with what was available. Keep in mind that this was 2007, and at that time, most natural products were very “earthy” and not like what I was used to at all. I swapped out most of my products and got by, but I wasn’t truly happy with the new options.

Fast forward a few years to my 3rd year of Naturopathic medical school. We were learning about different herbs for and their benefits for the skin. I got the idea that I could try to make my own products and include the herbs for the beneficial properties, which would also be a great way for me to remember which herb does what! It turns out it wasn’t as easy as I thought it was going to be. I spent the next year, in the kitchen of my condo in Toronto, formulating and re-formulating products until I finally came up with recipes I was happy with. I launched Eco Chic Movement at the Ottawa Baby Show in November 2013 shortly after I graduated and moved to Ottawa to start my Naturopathic practice.

Amy: Can you talk a bit about how you formulate your products?
Dr. Reid:
Formulating products is definitely a process. I start by deciding what I want my end goal to be for the product. Is it to: protect baby’s bum for wetness, help keep mature skin hydrated, moisturize oily skin without causing an over production of oil etc. Then I research the properties of all the fatty acids I could use to make up the oil component of the product. Next comes what will be included in the water component. I often use ingredients that help to pull moisture from the air into the skin. I like to also add herbs to the products to take advantage of their natural properties. I then determine the proportions of each ingredient in the product and start making test batches. It can often take many test batches to get the product to turn out how I want it. After that, I select a group of testers who I sent the products to along with a survey for their feedback.

Amy: What are some "red flag" ingredients that are commonly found in skincare products? 
Dr. Reid: Where do I start? The 2 biggest red flag ingredients that I have patients avoiding are parabens and phthalates. I have written a series of blog posts on the Top 10 ingredients to avoid in your skin care products, to help break things down and make it easy for you as a consumer. The one insider secret I always like to let people in on is to be very careful about fragrance in products. A loophole exists when it comes to the ingredient fragrance or parfum on skincare product labels. Since the fragrance is considered a proprietary recipe of the company making the product, they do not have to disclose what makes up the fragrance. Almost 100% of the time that fragrance is going to contain either parabens or phthalates.

Amy: Are there any known adverse affects (short and/or long term) of using products with the ingredients you listed above?
Dr. Reid: This is an area that more research is currently being conducted. We do know that exposure to endocrine (hormone) disrupting chemicals, which both parabens and phthalates are, is linked to a variety of different health conditions including: infertility, breast cancer, prostate cancer, obesity, diabetes and thyroid disorders.

For babies and children the need to avoid these “red flag” ingredients is even greater.
The reason for this is three fold:

  1. Babies/Children have a higher percentage of body fat than adults. These toxin sequester (or are pulled into) the fat cells in the body as a way of getting them out of the bloodstream. As babies grow, these toxins are released causing them to be exposed over a long period of time.
  2. Babies’/Children’s enzymes that help to breakdown toxins, called the CYP enzymes, are not yet functioning to their full capacity  
  3. Many of the red flag ingredients are considered to be neurotoxins.

Like most things when it comes to health, it may not be possible to fully eliminate our exposure to endocrine disrupting hormones, but there are many easy switches that you can make to reduce your exposure. The average woman uses 16 personal care products/day. Switching out even half of them makes a big difference. I generally recommend first replacing products that you use frequently and that stay on your skin all day. Examples of these are body lotions and facial moisturizers.

Amy: One last questions! Where can we find your products?
Dr. Reid: Eco Chic Movement products can be purchased on our website and at the following retailers.

You can stay in touch with Dr. Reid by following Eco Chic Movement on Facebook and Instagram

The Eco Chic Movement "Baby Shower Gift Set" contains diaper cream, baby wash/shampoo, face cream, lotion & massage oil.

The Eco Chic Movement "Baby Shower Gift Set" contains diaper cream, baby wash/shampoo, face cream, lotion & massage oil.

The Tastiest Sweet Potato & Chickpea Curry

I recently did a lil’ catering gig for a restorative retreat at PranaShanti Yoga CentreAnne Tessier, the yogi who organized the retreat, requested that I make a comforting and warming meal for the participants. While the entire meal hit the mark and was very well received by the participants, my personal favourite recipe from that day was a sweet potato & chickpea curry that I made. The spices (particularly the ginger and red pepper flakes), combined with rich and creamy coconut milk, gives this curry a very warming and cozy feel. Not to mention that the the healthy fats, protein and fibre content keeps you full and satisfied.

This dish has been on high rotation in my house this past winter and I’m happy that I’ve finally managed to take a photo and post this recipe to my blog. I’ve served it with a mixtures of sides including sautéed garlicky green, steamed broccoli, rice and quinoa, but you can enjoy it as is.  Just a head’s up, although this dish doesn’t take take too long to prepare (besides a bit of chopping), you’ll want to allow a least 45 minutes to an hour of cooking time in the oven. The long cook time enables the sweet potatoes to soften and the flavours to merge creating a rich and flavourful dish. I personally haven’t used a slow cooker, but I’m sure it would work well too.

The full recipe is below. If you try it out, please let me know and share your feedback. I love hearing from you!

SWEET POTATO & CHICKPEA CURRY

Makes 6 to 8 servings.

Ingredients:

3 cups cooked chickpeas or 2 cans drained and rinsed
3 medium sized sweet potatoes, cut into small dice
1 red or yellow bell pepper, cut into small dice
1 Tablespoon coconut oil
2 medium sized red onions, cut into thin slices
1 Tablespoon mild curry powder
1 teaspoon mustard seed
1 teaspoon cinnamon
1 teaspoon turmeric
1 teaspoon cumin
1/2 teaspoon red chili flakes
1 Tablespoon finely grated or minced fresh ginger or 1 teaspoon dried ginger
3 tomatoes, roughly chopped
1 400 ml can full fat coconut milk
1 Tablespoon maple syrup, optional
Salt and pepper to taste
Micro greens, sprouts, chopped cilantro, or thinly sliced green onions, for garnish, optional

Instructions:

Preheat the oven to 400F.  Place the chickpeas, chopped sweet potatoes and bell pepper in a large baking dish.

Warm coconut oil in a medium sized saucepan or skillet. Add the sliced onions and a big pinch of salt. Sauté and stir the onions until they begin to soften and become translucent.  Add a little bit of water if they start to stick to the pan.

Add the spices, mix well, and cook for a minute. Stir in the coconut milk, tomatoes, maple syrup (if using), salt and pepper. Allow the mixture to simmer for about 5 minutes.

Pour the coconut milk mixture over the chickpeas, sweet potato and peppers, and then pop the baking dish in the oven. Bake for about 45 to 60 minutes, or until the sweet potatoes are nice and soft. Once you remove the baking dish from the oven, taste for salt and pepper and adjust the seasoning according to your preference.  Serve immediate with a garnish and a side dish of your choice.

This recipe is inspired by The Buddhist Chef's butternut squash curry recipe.

Chocolate Chia Pudding & Raw Brownie Bites

If you follow me on Facebook, Twitter, or Instagram, you may have noticed that I've been partnering up with Kardish Health Food Centre quite a bit lately.  Kardish is an Ottawa-based, family-run health food and natural products store with 9 locations across the city. I know many of the staff, the owners, and I've been to almost all of their stores and I couldn't have been more excited when Kardish's Director of Communications approached me to be its first nutrition ambassador. I'm so pleased to take on this role with such a fantastic local company.  This means I'll be doing lots of events and nutrition talks with Kardish in the coming year! Be sure to visit my events page regularly or sign-up for my newsletter to stay in the loop!

Recently Kardish created a Chocolate Guide (right on time for Valentine's Day!) and included a couple of my recipes. Both recipes are chocolate based, super easy to make and healthy too. The Guide also includes interesting chocolate facts, the health benefits of chocolate and also the best brands to buy.  CLICK HERE to access the guide. You can also scroll down to see the two recipe I provided. Please comment below or send me a message if you try any of the recipes. I always love getting feedback!

Kardish Chocolate Guide - Amy .png

Slow Cooker Vegetable, Farro & White Bean Stew

The photo of the stew below might look familiar to you. If you've been to my website before you've probably seen it. It's one of the beautiful photos taken by my friend Caroline of CY-iwander that now resides on my homepage. It was taken a couple of years ago when we did a little photo shoot together.  I figured it was finally time to share this fantastic recipe on my blog!

It's perfect for these cold days. It's hearty and warming, with a nice complexity of flavour. This is a slow cooker recipe and, although may seem fancy based on the ingredient list, it's quite easy to make!  I wish I could take credit for this delicious creation, but I can't. It was actual developed by restaurateur and chef, Grant Achatz. I have made a few adjustments and omissions to his original recipe to make it more "user friendly" and have also added some white beans for extra protein and satiety. 

You'll see that there are a few not-so-standard- yet readily available - ingredients that you may have seen at the grocery store, but have never incorporated into your cooking.  Farro is one of them.  It's an ancient grain that has been making a bit of a comeback in recent years. It's an excellent source of protein, fiber and nutrients like magnesium and iron.  It has a chewy texture and mild taste. While it does contain gluten, it has lower amounts than wheat.  If you've been wanting to try it out, this recipe will not disappoint!  You should be able to find farro at most larger grocery stores (among the grains or in the health food section), health food stores, or Middle Eastern grocers.  You may not have tried cooking with fennel, figs, or artichokes before either, but this recipe will give you the opportunity to do so!

VEGETABLE, FARRO & WHITE BEAN STEW

Makes 8 servings.

Ingredients:

  • 2 rosemary sprigs or 1/2 teaspoon dried rosemary

  • 5 oregano sprigs or 1 teaspoon dried oregano

  • 5 thyme sprigs or 1 teaspoon thyme

  • 1 teaspoon crushed red pepper flakes

  • 2 teaspoons sea salt, plus more for seasoning

  • 2 small artichokes or 14 oz can of water packed artichokes, drained

  • 1 cup farro

  • 1 14 oz can, white kidney beans, drained and rinsed

  • 1/4 cup extra-virgin olive oil

  • 1 1/2 cups tomato juice

  • 1/2 cup water

  • 2 heads of garlic, 1/4 inch cut off the tops

  • 1 lemon, sliced 1/8 inch thick

  • 1/2 red bell pepper, sliced 1/3 inch thick

  • 1/2 yellow bell pepper, sliced 1/3 inch thick

  • 1 medium onion, quartered

  • 1 large Japanese eggplant, cut into 6 wedges

  • 1 cup dried Black Mission figs or dried figs of your choice (5 ounces), stemmed

  • 1/2 cup golden raisins

  • 1 fennel bulb, trimmed and cut into 6 wedges

  • 1/2 pound large cherry tomatoes, halved

  • 1 large zucchini, cut into 2-inch pieces

  • 1 bunch of kale, stems removed, roughly chopped into bite-sized pieces

  • 1 bunch green onions, thinly sliced, for garnish

Directions:

If using fresh herbs: tie the rosemary, oregano and thyme sprigs into a bundle using kitchen twine. If using fresh artichoke: use a serrated knife to cut off the top third of the artichokes. Snap off the small leaves from around the artichoke stem. Cut the artichokes in half lengthwise. With a spoon, scrape out the hairy chokes and discard them.

Turn your slow cooker to high and set the timer for 6 hours. Starting at the crushed red pepper flakes, add all of the ingredient up to and including the cherry tomatoes. Then add the herb bundle or the dried herbs. Spread the ingredients in even layers. Cover the slow cooker and cook for 4 hours.

Stir the stew gently and add the zucchini ensuring to submerge them in the liquid. Cover and cook for 2 hours longer. 

About 10 minutes before serving, stir in the kale to allow it to wilt and soften.  Discard the herb bundle (if you were using it) and season the stew with salt. Serve immediately garnished with green onions.

Grant Achatz's original recipe can be found on Food & Wine.
 

Master Your Morning Routine: Q & A with Manal Nemr

Over the last few years I've been struggling to find my rhythm. Juggling cooking lessons, workshops, yoga retreats, private clients, meetings, tons of travel, and several huge life events has been a challenge for me. Don't get me wrong, I love self-employment and I'm very, very grateful for every opportunity that has come my way, but I know I can achieve more and ultimately give more to my clients, friends and family by giving more to myself.

In the last year or so, I’ve started to rearrange my life in a way to create a more peaceful start to my day. I’ve gradually started adding a bit of meditation here and there, sometimes yoga or stretching, but the mainstay has been my morning walks. Each day, without fail, I head out for a good 45 minutes to an hour to walk with my husband and the dog. This daily routine has essentially become second nature. It’s on par with brushing my teeth to the point where my daily morning walk is almost a necessity. This year I hope to actually expand upon this routine and gradually incorporate daily and consistent meditation and/or yoga upon rising, goal setting, and no social media until I’ve had my tea or breakfast.

Health, wellness, and performance gurus have been singing the praises of “morning practices”  or “morning routines” for ages.  As a person who was historically rush-rush-rush go-go-go and super frantic in the mornings, the idea of a routine with order, structure and with minimal stress use to seem very foreign, but those days are are getting further and further behind me. I'd say the gurus are really onto something!

To learn more about the importance of morning routines, I spoke with my friend Manal Nemr.  She's a Life Coach and also one of my #HappinessHabits613 co-founders. She’s a big advocate of this practice and she’s also done a lot of reading and research on the topic. Below she shares some of her knowledge, insights, and also a glimpse into how she starts her day. Read on for the full interview!

Amy: I know the concept has been around for ages, but lately morning routines or morning practices have been front and center among health and wellness experts. Can you explain why it's important to have a morning routine?
Manal: We have a specific amount of energy and willpower when we wake up in the morning.  We have to consciously decide where and how we're going to use that energy and willpower. Essentially, we have the power to decide how we want to feel going into our day and we can carve that through a consistent morning practice.

Do we want to leave the house frantically, unorganized and stressed out? Or, do we want to create space that makes us calm and at ease so that we can go about our day with a clearer, more creative mind?

Cultivating an intentional routine each morning nourishes, motivates and energizes us to start our day with an optimistic mindset. It sets the tone for the day and reminds us of what’s important.

Amy: This makes perfect sense to me.  But to give the readers some perspective, can you tell us what a typical morning would be like for you?
Manal:  Sure, but before I begin, just remember this a "practice" so it doesn’t have to be perfect. It’s better to be flexible. Maybe one day I feel like writing before reading my book, maybe the next day I need to meditate first. It really depends. But, start with a general plan that includes the things you want to incorporate into your morning, and be clear about WHY they are important to you, and go from there.   Here's how I started my day today...

Wake Up
Make my bed
Fill up my water bottle & have a drink
Approximately 10 minutes of journalling
Approximately 30 minutes /or 20 pages reading my book and have my morning coffee
Approximately 10 minutes of meditation
One hour of exercise or some sort of movement
Breakfast
Gratitude journal and top three priorities for the day
Start my work! 

Amy: Your morning sounds fantastic, but I'm sure some people are reading this and feeling like it would be quite difficult for them incorporate a practice like yours. Do you have any tips for people looking to dip their toes into a morning practice?
Manal: Start small. If you can’t do everything or if you get overwhelmed, just start with one thing in the morning. Maybe that’s only doing a 10 minute meditation and do that everyday until you’re able to incorporate something else. To make any behaviour a habit, we must do it consistently. 

Amy: I often talk to my clients about the importance of being well rested and setting a regular bedtime. I know you’re a big advocate of this too.
Manal: Yes, definitely. Sleep is very important! It helps with stress and anxiety.  I recommend shutting down all your technology at least an hour before bedtime. Maybe journal or read before going to bed. Also, make the small decisions in the evening to make your morning routine easier. Like setting up the coffee maker, or laying out your clothes for the next day. Eliminating small decisions leaves more energy and willpower for bigger decisions.

Amy: I love it! Any final words on the importance of these types of routines?
Manal: Research tell us that 40 to 45% of what we do everyday is habitual. Essentially we’ve performed a habit so many times that it’s become automatic. They’re the building blocks of our lives; so, if you want to change your life, take a closer look at what you DO want, and then cultivate the good and healthy habits that will create that life.

Once we’ve decided what we want our morning to look like and why, we can do these things consistently every day. This consistency makes it a habit. When something is automatic, it frees up space for other things. This increases our efficiency. We no longer need to think about it, we just do it. No reminders, and less need for willpower (which is limited) and motivation (which comes and goes).

If you’d like to learn more about Manal and her company Beautiful Happy Reasons, check out her website, her Facebook page, or her Instagram account.
 

Chickpea Crostini Melts with Aquafaba Aioli

This recipe was a long time in the making and I’m so happy that I waited until now to post it as series of serendipitous events has led me to create this fantastic Chickpea Melt recipe. If you if don't want to hear the story, scroll down to the bottom for the recipe (I won’t take offense, I promise). However, for those of you interested in how this recipe came to be, allow me to explain…

About 3 years ago I was at Pressed, a café here in Ottawa, and tried their chickpea salad sandwich. I don't think it's on the menu anymore, but at the time, the owner Jeff was kind enough to share the recipe with me. Since then, I’ve made the recipe countless times for myself, for friends or for yoga retreats, and over the years I’ve refined it to my liking.

Flash forward to a few weeks ago, I attended a wine and cheese party out in Alexandria, Ontario at the Zengarry HQ.  While there, I was speaking with Lynda, the owner and founder, and mentioned to her that I'd love to make a healthy appetizer for the holiday featuring chickpea salad and one of her cheeses. She happily obliged and handed over a round of her cashew-based Gruyère. 

At the Zengarry event also I met local vegan pastry chef, Kate of Kitty Kate Confections, and was super impressed by her beautiful and delicious macarons made using aquafaba. For those of you who haven't heard of aquafaba, it’s basically just chickpea brine.  Yep, the liquid from chickpeas that you usually pour down the drain! Turns out somebody came up with the genius idea of using chickpea brine as an egg replacer and it actually works. In fact, it works so well that vegan chefs and non-vegan chefs alike have begun using it as an egg substitute for making meringues, frothy egg whites on top of drinks (like pisco sour), in cakes and other baked goods, mayo and so on. I’ve observed the magic of aquafaba in the past since my mom has been experimenting with it and has had a lot of success, but I was never really interested in it (not sure why), until recently!

A few days ago at Loblaws cooking lesson, inspired by my mom and Kitty Kate Confections, I tried making aquafaba meringue (I followed this recipe). It’s almost unbelievable that chickpea brine, with a bit of cream of tartar, sugar, and vanilla could whip up so beautifully fluffy in a stand blender creating peaks (just like egg whites) and holding its shape and texture (likely better than egg whites).  Everybody in attendance was wowed by this incredible mock meringue and I was further inspired to play around with aquafaba.

A few days ago a light bulb went off. Since I was already planing to make chickpea salad melts for my blog, why not make aquafaba mayo to go along with it? I found several recipes online. I tried one, and it failed horribly. It was too runny, too yellow looking, and way too salty (it was not a lost cause though; I have since been reformatted into salad dressing). Then, I had a look at the Oh She Glows recipe, and it was a good starting point. However, I ended up altering it to make an aioli (garlic mayo) and I was so pleased with the results.

All of that to say, getting to this point was a process of sharing, learning, research, trial and error, and I hope you enjoy this yummy holiday appetizer.  If you’re reading this and it's not the Holidays, or if you aren’t in need of an appetizer, that’s okay. The Chickpea Salad recipe goes beautifully in sandwiches or wraps, on a bed of leafy greens, or even eaten as a dip with crackers. 

If you want more information on aquafaba check out the Aquafaba Hits and Misses Facebook page. It's mecca for aquafaba aficionados.  Or simply scroll down for the full step-by-step recipe. I hope you enjoy it!

CHICKPEA CROSTINI MELTS WITH ZENGARRY GRUYÈRE

Chickpea Salad:

Yields just under 5 cups.

  • 2 15 oz. cans of chickpeas or 3 cups cooked chickpeas, drained and rinsed (reserve 3 Tablespoons of the brine for Aquafaba Aioli)

  • 2/3 cup homemade Aquafaba Aioli (see below) or store bought vegan mayo

  • 2/3 cup celery (about 1 or 2 ribs of celery), minced

  • 1 bunch green onions (approximately 8), chopped

  • 1/3 cup minced dill pickle

  • 2 tablespoon nutritional yeast, optional

  • 2 tablespoon tamari, soy sauce or coconut aminos

  • 1 heaping tablespoon kelp or dulse powder

  • Freshly ground black pepper, to taste

  • 1 large handful, fresh dill, roughly chopped, divided (some for the salad + some for garnish)

Directions:

In a medium bowl, mash the chickpeas coarsely with a fork or potato masher. Mix in the remaining ingredients (except the dill). Once evenly combined, sprinkle in the dill and mix again. Transfer to a large airtight container. This may be stored in the fridge for up to 1 week.

Note: if you’re using store bought mayo and not the aquafaba aioli, you’ll want to add 1 small clove of minced garlic to the mix.

Aquafaba Aioli:

Yields approximately 1 cup

  • 3 tablespoons aquafaba (chickpea brine from canned or homemade chickpeas)

  • 1 teaspoon lemon juice

  • 1/2 teaspoon apple cider vinegar

  • 1/4 teaspoon sea salt

  • 3/4 cup grape seed oil (or other neutral oil)

  • 1 small clove of garlic, minced

Directions:

To make the aioli, you’ll need an immersion blender, or a blender with a narrow container.   If using an immersion blender, you’ll also need a large jar or a deep container/mixing jug that’s big enough to fit your immersion blender.  I personally used immersion blender and 5 cup mixing jug.

To begin, add the aquafaba, lemon juice, apple cider vinegar, and sea salt to the container or jug. Blitz these ingredients for a few seconds until you start seeing a bit of froth. Once your mixture is frothing, start pouring in the oil. Drizzle in the oil, very slowly, as you continue to blitz the mixture, allowing the oil to emulsify.

Within a minute, the mixture should begin to change colour and texture, very similar to that of mayo. Once you’ve added almost all the oil, add in the minced garlic and continue to process to ensure that the garlic mixes in nicely.  You’ll want to reserve 2/3 cups of your Chickpea Aioli for the Chickpea Salad, and transfer the rest to a container and store it refrigerator for up to 1 week.

To Assemble Your Chickpea Crostini Melts:

Ingredients: 

  • 1 baguette of your choice, cut into 1/4 inch slices (I used an organic sourdough)

  • 1 round of frozen Zengarry Gruyère

  • Chickpea Salad

Directions:

Set your oven to broil.  As it’s heating up, grab a baking sheet.  Place several baguette slices on to your baking sheet, then spread 1 heaping tablespoon of Chickpea Salad on to the sliced baguette.   Next, grate about a quarter of your frozen Zengarry Gruyère (grate more later, if needed). I prefer the larger grater setting on a box grater,  but you could also use micro-plane or small grater.  Use about 1/2 teaspoon of the grated Gruyère to top of each baguette.  Then put the baking tray in to the oven and broil for 4 to 5 minutes, watching closely to not overcook or burn your baguettes.

Once the baguettes are nicely crisp, and the Gruyère has melted and is slightly bronzed, remove the baking sheet from the oven. Garnish your Chickpea Crostini Melts with a bit of fresh dill and serve immediately.

Note: You may want to do this in small batches (about 8 to 10 baguettes at a time) so that you can serve and enjoy warm Chickpea Melts strait from the oven.   Use as much or as little of the Chickpea Salad and Gruyère as you need based on the number of people you’re serving. Any leftovers can be enjoyed later on for meals or snacks.
Roasted Acorn Squash & Apple Soup

I'm sure you've noticed that winter squash is abundant these days at both grocery stores and farmers' market. As we begin to bid farewell to Fall, I'd say it's time to start compiling warming recipes and making soups and stews. 

The soup recipe below is inspired by the Minimalist Baker's simple pumpkin soup, but I've changed things up a bit by adding roasted acorn squash, apple, onion and garlic, rather than pumpkin puree. The changes gives the soup a nice depth of flavour and also subtle natural sweetness from the roasted veggies and apples. In the Minimalist Baker's recipe, she also includes a kale "topping" for the soup. I loved this idea and have come up with a variation in my recipe as well. It's optional, but definitely recommended as it adds a nice pop of colour, flavour, and texture to the dish. 

I love cooking with winter squash. Many people write squash off because it's thought to be too starchy, but surprisingly it has a whole lot of nutritional value. In the case of acorn squash, it's a great source of beta carotene (the precursor to vitamin A) and vitamin C.  It's also rich in fiber. So yes, this is a healthy soup, but it's easy to make and delicious. The combination of roasted vegetables, apples, coconut milk and spices, paired with the bitter and garlickly kale topper, gives this soup complex and rich flavour.  Try it out and let me know what you think.

ROASTED ACORN SQUASH & APPLE SOUP + KALE & HEMP TOPPER

Makes 4 servings

Soup Ingredients:

Extra virgin olive oil
2 acorn squashes
2 small yellow onions, peeled and cut in large dice
3 cloves garlic, peeled
2 apples, peeled, cored and cut into bit sized pieces
2 cups low sodium organic vegetable broth
1 cup full fat coconut milk
1/4 teaspoon each sea salt, black pepper, cinnamon, nutmeg

Kale & Hemp Topper ingredients (optional):

1 bunch of kale, stems removed, ripped or chopped into bite sized pieces
3 cloves garlic, minced
1 tablespoon extra virgin olive oil
A few pinches of salt

Directions:

Preheat oven to 400 F and line 1 or 2 baking sheets with parchment paper. Using a sharp knife cut the acorn squashes in half. Use a spoon to scrape out all of the seeds and strings (reserve the seeds if you plan on roasting them later). 

Rub a bit of olive oil on to the flesh of the squash and place face down (skin side up) on the baking sheet. Place the onions, apples, and garlic on a baking sheet as well and drizzle them with a bit of olive oil. Bake for 40 minutes or until a fork easily pierces the skin of the acorn squash.

Remove the baking trays from the oven. Once the squash has cooled enough to handle, scrape out the flesh (it should be soft and easy to remove) and transfer it to a bowl. Discard the skin.  [*If you have a Vitamix or other high powered blender, scroll down for alternate instructions] Then add the squash, apples, onions, and garlic, along with all of the other soup ingredients to a sauce pan. Bring it to a simmer.

To puree the soup, you can either transfer it to a blender, food processor or use an immersion blender. If using a blender, place a towel over the top to avoid spilling. Once the soup has reached a nice, smooth consistency, pour the mixture back into pot. Continue cooking over medium-low heat for a few minutes to reheat and taste and adjust seasonings as needed. Serve immediately on its own or with Kale & Hemp topper.

Kale & Hemp Topper:

Warm the olive olive over medium heat in a small skillet. Add garlic and sauté for a few minutes until golden brown (be sure to watch the garlic closely as it will burn quickly). Add kale and toss, then add a few pinches of salt and cover to steam. Cook for another few minutes until kale is wilted and then add in the hemp hearts. Mix it up to ensure the kale is lightly coated with hemp and garlic, and set aside for topping soup.

*If you have a Vitamix or other high powered blender, you can skip a few of the aforementioned steps. After you're done roasting the squash, apples, onions and garlic, you can really simplify the process. Add the roasted squash puree, along with the roasted apples, onions and garlic, and all of the remaining soup ingredients to your Vitamix. Process the soup using a high setting - or the cooking setting - and you can blend and heat your soup at the same time.  This will only take about 6 minutes and save you the trouble of transferring the soup and will reduce the amount of dishes you have to clean.

Chickpeas?! Yes, Please! Q&A With Restaurant Owner Omer Abdallah.

As soon as it opened in August, there was a ton of buzz around one of Ottawa's newest restaurants, Chickpeas. Aptly named, chickpeas are featured in pretty much all of the Middle Eastern-inspired dishes at the restaurant. The menu is entirely plant-based and focuses on fresh, organic ingredients, offers many gluten free options, and practically everything is made in-house.  In fact, to avoid using canned chickpeas, the owner soaks an upward of 30,000 dry chickpeas each night in preparation for the next day's service. Knowing all this and hearing that Chickpeas has a great selection of hummus and falafel (two of my favourite things!), and I couldn't wait to try it out! 

 I went to Chickpeas a few weeks ago with a couple friends. We were all pleasantly surprised as soon as we walked in the door.  The modern décor, natural light, and friendly staff gave us a great vibe right from the get go. We ordered the hummus plate to share (which featured a small sampling of six unique varieties of hummus) and we each ordered the Fawaffle (the falafel waffle).  Our meals were colourful, flavourful and nicely plated.  We all loved the Fawaffle and appreciated that the food didn't feel too heavy or greasy. Special mention goes to the mango hummus. It was my favourite from the platter.  I would have liked to try more items off the menu, the salads and the falafel wraps looked really tempting, but I was stuffed!  I'll definitely be going back again.

Chickpeas is located in the Trainyards.  This part of town isn't exactly a foodie destination, but I have no doubt that Chickpeas will become a fixture to those of you who live, work, or shop in the area. Chickpeas could compare price-wise to some fast food restaurants (like its neighbour Subway),  but the overall experience and food quality vastly sets it apart from other establishments in the same price range.

The owner, Omer Abdallah, has clearly put a lot thought and heart into the concept, and he is definitely committed to providing his customers with fresh, whole foods. I had the opportunity to interview him and below he shares more about himself, his restaurant, the secret to great hummus, and his plans for the future.

Amy: Congrats on opening Chickpeas. I absolutely love the concept. What was your motivation or inspiration for starting a restaurant focused on chickpeas?
Omer: I’ve always been passionate about food - ever since I can remember. It started with loving to eat food at first, then I fell in love with making it. My journey with chickpeas began when I was growing up. My family and I would eat falafel and hummus in the Middle-East all the time - it was a family tradition. I guess you can say it was much more than chickpeas to me, it created a special bond between my family and I. When I decided to open a restaurant, I knew it had to be related to chickpeas! I wanted to take ancient chickpea recipes and add a modern Western twist to it. As a result, I came up with a menu that, in my opinion, you can't find anywhere else.  

Amy: I know you have very high standards when it comes to food quality and food preparation. Can you tell us a bit about that?
Omer: We are a scratch kitchen, meaning we make everything in-house. Canned food is against my policy. As a result, none of my food has any chemicals, preservatives, or additives!  There is no secret ingredient; it's just real food! The chickpeas that I make all my dishes from are organic which contributes enormously to the quality of my food.  

Amy: Your hummus is amazing.  Any tips of the trade that you can share with us?
Omer: Peel your chickpeas! It makes a world of a difference. (Amy's edit: to clarify, after soaking and boiling chickpeas, Omer peels off the outer layer, or "skin", of the chickpeas. It makes for smoother hummus.)

Amy: What have been the most poplar items off your menu?
Omer: The Fawaffle, mango hummus (since it's my own creation and no one else makes it in the world), and the falafels have been a big hit given that we cook them fresh on the spot.

Amy: I know you just opened in August, but are there any exciting plans on the horizon for Chickpeas?
Omer: We plan to focus on our first location for now. But in the near future, we would like to open a few more locations across the city and eventually  across the country. If we ever became a multinational restaurant, we will always be proud to be Canadian.

Chickpeas is located at 500 Terminal Avenue, Unit A-05, in Trainyards, across from Walmart and next to Subway. You can also find Chickpeas on Facebook, Instagram, and Twitter

Chickpea's Fawaffle topped with tahini, fresh parsley, tomatoes, and paired with pickled peppers. Pure genius!

Chickpea's Fawaffle topped with tahini, fresh parsley, tomatoes, and paired with pickled peppers. Pure genius!

Buddha Bowls with Tahini Dressing

I make Buddha Bowls a lot. Almost weekly. I make them for myself, for cooking demos and they are almost mandatory when I'm cooking at yoga retreats. They are always a hit! Everybody loves them. Plus, they are a great way to get rid of scraps of food that are still in the fridge.

The best thing about Buddha Bowls is that you can cater yours to your liking. There really is no set in stone recipe. However, the key is definitely to have a really, really great dressing. Below, I've shared the recipe for one of my favourite dressings, but you could choose to top your bowl with whichever dressing you like.

Most recently I was cooking for a yoga retreat organized by Anne Tessier near Tremblant, Quebec.  Below is a photo of the Buddha Bowl I prepared for the yogis. It had wild rice, chickpeas, grated raw beets and carrots, avocado, thinly sliced kale, roasted delicata squash, green onions, kimchi, peashoots, black sesame seeds, and my all time favourite tahini dressing.  And yes, it's as delicious as it looks! But no, it's not complicated at all. It's just a matter of chopping up a bunch of delicious things and throwing them into a bowl, and then pouring a really decadent (yet nutritious) dressing on top. Scroll down for my Buddha Bowl "recipe".

Let's get started! Here's what you'll need to make your own Buddha Bowl...

Base ingredients:

Your choice of cooked grains (quinoa, buckwheat, millet, brown rice, wild rice, sorghum, teff or amaranth)
Your choice of protein (beans, lentils, chickpeas, edamame, tofu, tempeh, etc)

Plus any combo of veggies:

steamed or roasted sweet potato, squash, or potatoes cut into bite sized pieces
broccoli or cauliflower (cut in tiny florets), steamed, roasted or raw
finely chopped greens (kale, romaine, arugula, spinach, etc)
thinly sliced cabbage
onion or scallions
grated carrot
grated raw beets or cooked/steamed beets
cucumber, cut up into small pieces
chopped celery
sliced avocados
sauerkraut or kimchi

Plus garnish options:

sprouts or pea shoots
sunflower seeds
hemp seeds
sesame seeds
dulse or kelp flakes (or any other seaweed for that matter)
ground flax seeds

Plus a dressing of your choice OR my all time favourite tahini dressing:

1/2 cups tahini (sesame paste)
1/2 cups olive oil
1/2 cups water
1/4 cup tamari
2 tablespoons apple cider vinegar
2 tablespoons lemon juice
Small piece (half thumb size) fresh ginger root, minced
2 cloves garlic, chopped
Black pepper to taste

Directions: Blend all the ingredients in a blender until smooth. Add water to loosen if it’s too thick. Dressing will keep in the fridge for 1 week.

Finally, to assemble your Buddha Bowl:

Combine 1/4 cup cooked grains and 1/4 cup protein of your choice, along with any combination of vegetables and garnishes. Drizzle about 1/4 cup of dressing on top. Serve immediately and enjoy!

You can also batch prepare your Buddha Bowls by storing single servings in containers. Reserve your dressing and add it just before you're about to eat.

If you enjoyed the recipe I shared above be sure to check out my Plant-Based Breakthrough program, which is a crash course in plant-based health, nutrition, and meal planning. For details about the program click here. You can also join the Plant-Based Breakthrough Community on Facebook where I share recipes, inspiration, and information on plant-based nutrition.

Wedding Photos: A Sneak Peek...

Jeremy and I have been married for just over a week now and we've been reminiscing and reliving our beautiful wedding day via these photos.  Our wedding was at my parents' cottage in Lower Lahave, Nova Scotia, and it was a very much a do-it-yourself style celebration that came together with a lot of hard work and effort by us and our fantastic and talented family and friends. With very little time and a whole lot of teamwork, our collective efforts paid off! Our wedding truly reflected us and our personalities, we threw a fun-filled and memorable party, and we had the most amazing day with 130 of our favourite people and pets (yes, Gimley, our dog was there, and even my parents' dog Jake!). Some of the photos below were taken at our hotel, the Spinnaker Inn, in Lunenburg. Others were taken on the Lunenburg waterfront, at my parents' cottage, and at Oxner's Beach in Lower Lahave.

Big thanks to our friend and super talented photographer Anne-Marie Bouchard of AMBphoto for capturing these magical moments and sharing a few of her favourite shots. We expect to receive the entire package of photos in the next month or so (oh, the anticipation!).  I also plan on writing a blog post with more details about how it all came to fruition. Stay tuned for more on both fronts, but in the meantime, I'm so happy to share a small glimpse into our wedding day with you. Enjoy!

Power Pasta Salad

This recipe is actually my mom's creation so I can't take full credit for its deliciousness. She originally devised this concoction because it was cheap, filling and it did not spoil easily on road trips. During my childhood, we used to travel a lot during the summer, across the Atlantic Provinces, for soccer tournaments and Power Pasta became a family favourite. Back then I believe my mom used store bought Italian salad dressing and probably didn't include as many greens, but she was definitely a pioneer when it came to utilizing pulses as an efficient, inexpensive source of protein and healthy carbohydrates. This pasta salad kept her sporty children happy and satiated (without breaking the bank).

As I mentioned, I've made some of my own modifications, but at the heart of this recipe it's simple, filling, and nutrient dense. It's a great meal for active kids, but also for us adults who are looking for easy make-ahead lunch or dinner ideas. 

I haven't had a chance to take a super high quality photo, but I wanted to share this recipe now as I've had many requests.  Power Pasta is gluten free and vegan and can be modified many ways to suit your palate. If you don't like some of the ingredients, omit them, and add in other vegetables or proteins of your choice. Read on for the recipe and be sure report back once you've tried it.

POWER PASTA SALAD

Makes 8-10 servings.

Ingredients:

16 oz/454 g bag brown rice or quinoa spiral or elbow noodles, cooked according to package directions
2 398 ml cans of chickpeas or beans of your choice, drained and rinsed
1 can of water packed artichokes, drained, rinsed and roughly chopped
5 cups leafy greens of your choice (I like baby kale, spinach, or arugula), washed and chopped
1 large cucumber, peeled (if not organic) and chopped into bite-sized pieces
1 pint of grape or cherry tomatoes, sliced in half
1/2 cup of pitted kalamata olives, roughly chopped (optional)
1 bunch of green onions, chopped

Dressing Ingredients:

1/2 cup red wine vinegar
3 Tablespoons lemon juice
1 Tablespoon of maple syrup
1 Tablespoon Dijon mustard
2 teaspoons, sea salt
Freshly ground black pepper
1 small clove of garlic (optional)
1 cup extra virgin olive oil

Directions:

Add all of the salad ingredients into a very large bowl and mix well to combine.

For the salad dressing: blend the vinegar, lemon juice, maple syrup, Dijon, salt, pepper, and garlic (if using) in a blender. With the machine running, gradually blend in the oil. Once the dressing is ready, slowly pour it over the pasta salad. Stir to ensure that the noodles are well coated.  Serve immediately and enjoy!

Keeps in the fridge for 3 to 4 days, if you don't eat it all first.

Notes from the kitchen: At my Loblaws demo I used Rizopia brown rice noodles and they were great!

Super Simple Summer Slaw

I went on a shopping spree this weekend and spent all my money... at the Farmers' Market! This is the only kind of shopping I like and I happily lugged home a massive haul of fresh vegetables thanks to the good people at Hoople Creek Farm, Roots Down Organic Farm and Waratah Downs Organic Farm. I picked up green cabbage, kohlrabi, zucchini, summer squash,  patty pan squash, cucumber, fennel, and a bunch of bell peppers. Besides having all of these veggies to work with, I also have a fridge full of kale and beet greens (thanks to my soon-to-be father-in-law).  We have lots of cooking and eating to do this week, but I think we can handle it.

Last night, I made a huge pot of red lentil marinara (in which I used many of the veggies listed above) and served it on zucchini noodles, and today I was craving something fresh and light so opted to make a slaw. The recipe below is one of my favourites and I've enjoyed many versions of it, as have my nutrition clients.  This recipe should ultimately serve as a base for you and you can tweak it to your liking.

This time around I used kohlrabi, green cabbage, fennel bulb and fronds, and carrots because that's what I had on hand. However, adding in some grated apples, and opting for dill instead of fennel, will give it a different, but equally delicious flavour profile. Even going with red cabbage, instead of green, will offer a variation in taste and nutrients.  There are so many options!

This is definitely a choose-your-own-adventure style of slaw that you can serve as an appetizer, side dish, snack, or even as filler in sandwiches or wraps. It's very versatile and very nutritious. Try it out and let me know what you think!

SUPER SIMPLE SUMMER SLAW

Ingredients:

1 medium, kohlrabi, peeled and cut into matchsticks, or grated
1/4 head, cabbage (green or red), thinly sliced or shredded
1 small fennel bulb, thinly sliced or grated, optional
1 apple, peeled and grated, optional for a sweeter slaw
1 carrot, peeled and grated
1/4 cup, fennel fronds or fresh dill, roughly chopped
3 Tablespoons, extra virgin olive oil
1/2 lemon, juiced
1 small clove, garlic, finely minced
1 teaspoon, Dijon mustard
Sea salt and freshly ground pepper

Directions:

Add the slaw ingredients to a large mixing bowl. Toss until well combined.

In a measuring cup or small mixing bowl, whisk together the rest of the ingredients (olive oil, lemon juice, garlic, Dijon mustard and a few big pinches of salt and pepper). Whisk until you have a nice, even consistency.

Pour the dressing over the slaw ingredients and then toss until the dressing is evenly distributed. Taste your slaw and season with a bit more salt and pepper, if necessary.  Once you’re happy with the flavour, serve immediately and enjoy! This slaw will keep in the fridge for up to 5 days.

Notes from the kitchen: You can use a box grater or slice up the vegetables by hand, but for the quickest and most efficient method, I recommend using a food processor. I personally use the grating blade to process carrots, apples, kohlrabi and fennel, and the slicing blade for cabbage.

Seaweed Salad + Q&A with Mermaid Fare

If you didn’t already know, I’m a huge fan of sea vegetables. Growing up in Nova Scotia, I have memories of eating dulse chips with my dad.  My family also hosted Japanese exchange students throughout my childhood. During those years, I remember trying and loving the exotic seaweed-based snacks and learning how to make sushi using nori (a variety of seaweed) with our students. Overtime seaweed salad and sushi were mainstays in my diet, but it wasn’t until I went to culinary school and took a weekend course on seaweed that I truly began appreciated its versatility and vast health benefits.

I recently had the pleasure of meeting somebody who enjoys seaweed just as much as I do (if not more!). When I was home in Nova Scotia this past March, I met Taylor Widrig. As the owner of Halifax-based company Mermaid Fare, she's made an entire career out of sourcing and selling different kinds of seaweeds and creating seaweed food products. She sells seaweed snacks, seaweed salts, and varieties of seaweeds during the summer and fall at the Halifax Seaport Farmers' Market and in select retail locations. She also sources seaweeds for local restaurants and sells many of her products via her online store at www.MermaidFare.com. She's a true sea vegetable aficionado.

Besides running Mermaid Fare, Taylor is also a chef.  She spent the last few winters in the Caribbean living and working on yachts as a private chef. When she's home in Nova Scotia, her other culinary services include seaweed-based cooking lessons and the occasional catering gig (fun fact: she'll actually be working at my wedding this summer).  When she's not selling seaweed or busy cooking, she’s been known to put on a mermaid tail and go swimming in the ocean. Yep, she also moonlights as a mermaid! Clearly, Taylor is one of the most interesting gals around and I'm really excited to share my interview with her.

Read on to learn how her company came to fruition and how she sources the products she uses in her business. She also talks about the benefits, varieties and uses of seaweed, gives us the scoop on carrageenan (which is somewhat of a controversial topic in the natural health world these days) and she even shared one of her most popular recipes.

Amy: Mermaid Fare is such an amazing and unique concept! How did it come to be?
Taylor: Mermaid Fare was created in 2013 after completing Living Light Culinary Institutes’ Raw Culinary Arts program in Northern California. Initially it began as a raw food/vegan culinary education and catering company offering private cooking classes, dinner parties and retreats while actively promoting sea vegetables for health. Six months after starting, I decided I wanted to grow a product line that would benefit others and seaweed was front and center – combining my passion for sea vegetables and healthy snacks.

Amy: Seaweed is a true super food. Can you tell us a bit about the health benefits?
Taylor: Seaweeds, also known as sea vegetables, offer a wide range of nutrients including 56 minerals and trace elements, omega-3 fatty acids, and B vitamins. There are three families of seaweed – green, brown, and red. Kelp is a brown seaweed, Dulse and Irish Moss or Hana Tsunomata belong to the red kingdom, and sea lettuce in the green family. Sea vegetables are a wonderful source of plant based protein and iron, making them a suitable option for vegans, vegetarians and anyone looking to add more nutrients to their diet.

There are many studies being done today on the correlation between seaweed and weight loss, as well as sea vegetables ability to help remove heavy metals from the body while offering immune support after exposure to radiation. Apart from the internal health benefits, seaweeds have been used throughout the ages and in modern times in beauty products for their skin softening and clarifying effects.

Amy: Where do you source your products? What kinds of seaweeds are included in your product line?
Taylor: Mermaid Fare’s sea vegetables are sourced within the Canadian Maritimes. Our wild harvested varieties including wakame, kombu, dulse, and sea lettuce are sourced from the Bay of Fundy where sea vegetables thrive in the cool water and rising tides. Our cultivated variety, Hana Tsunomata is produced by Acadian Seaplants Ltd. in Nova Scotia which uses state of the art on-land aquaculture systems to create a traceable and aesthetically beautiful product. Mermaid Fare’s mission as a company is to promote sustainability, community, and to create quality and trusted products while constantly evolving within the industry.

Taylor in Copenhagen by the "Little Mermaid" statue.

Taylor in Copenhagen by the "Little Mermaid" statue.

Amy: I know you were recently in Copenhagen for the International Seaweed Symposium. You mentioned that carrageenan was the hot topic. I've heard mixed messages and I’m so curious to hear what you’ve learned!
Taylor: Some controversy surrounds ‘carrageenan’, which is extracted from Irish Moss and used widely in the food industry for it’s thickening, gelling, and stabilizing properties. Carrageenan is commonly found in vegetarian and vegan products because it replaces the animal ingredient ‘gelatin’, providing a similar and ethical result.

Carrageenan is a safe food product but has gotten a bad rap over the years due to a negative article that told readers carrageenan contributed to intestinal inflammation. It is suggested the author of this article may have had a bias motive for their research, and once the negative story was told it was hard to sway the public’s perception of the product.  (Amy’s notes: when I was away in West Cork, Ireland, cooking for a yoga retreat, I discovered that carrageenan was used often in cooking, particularly for thickening soups.)

Amy: Can you share a recipe that might appeal to somebody who's new to seaweed? Or maybe give us some tips on how to use seaweed?
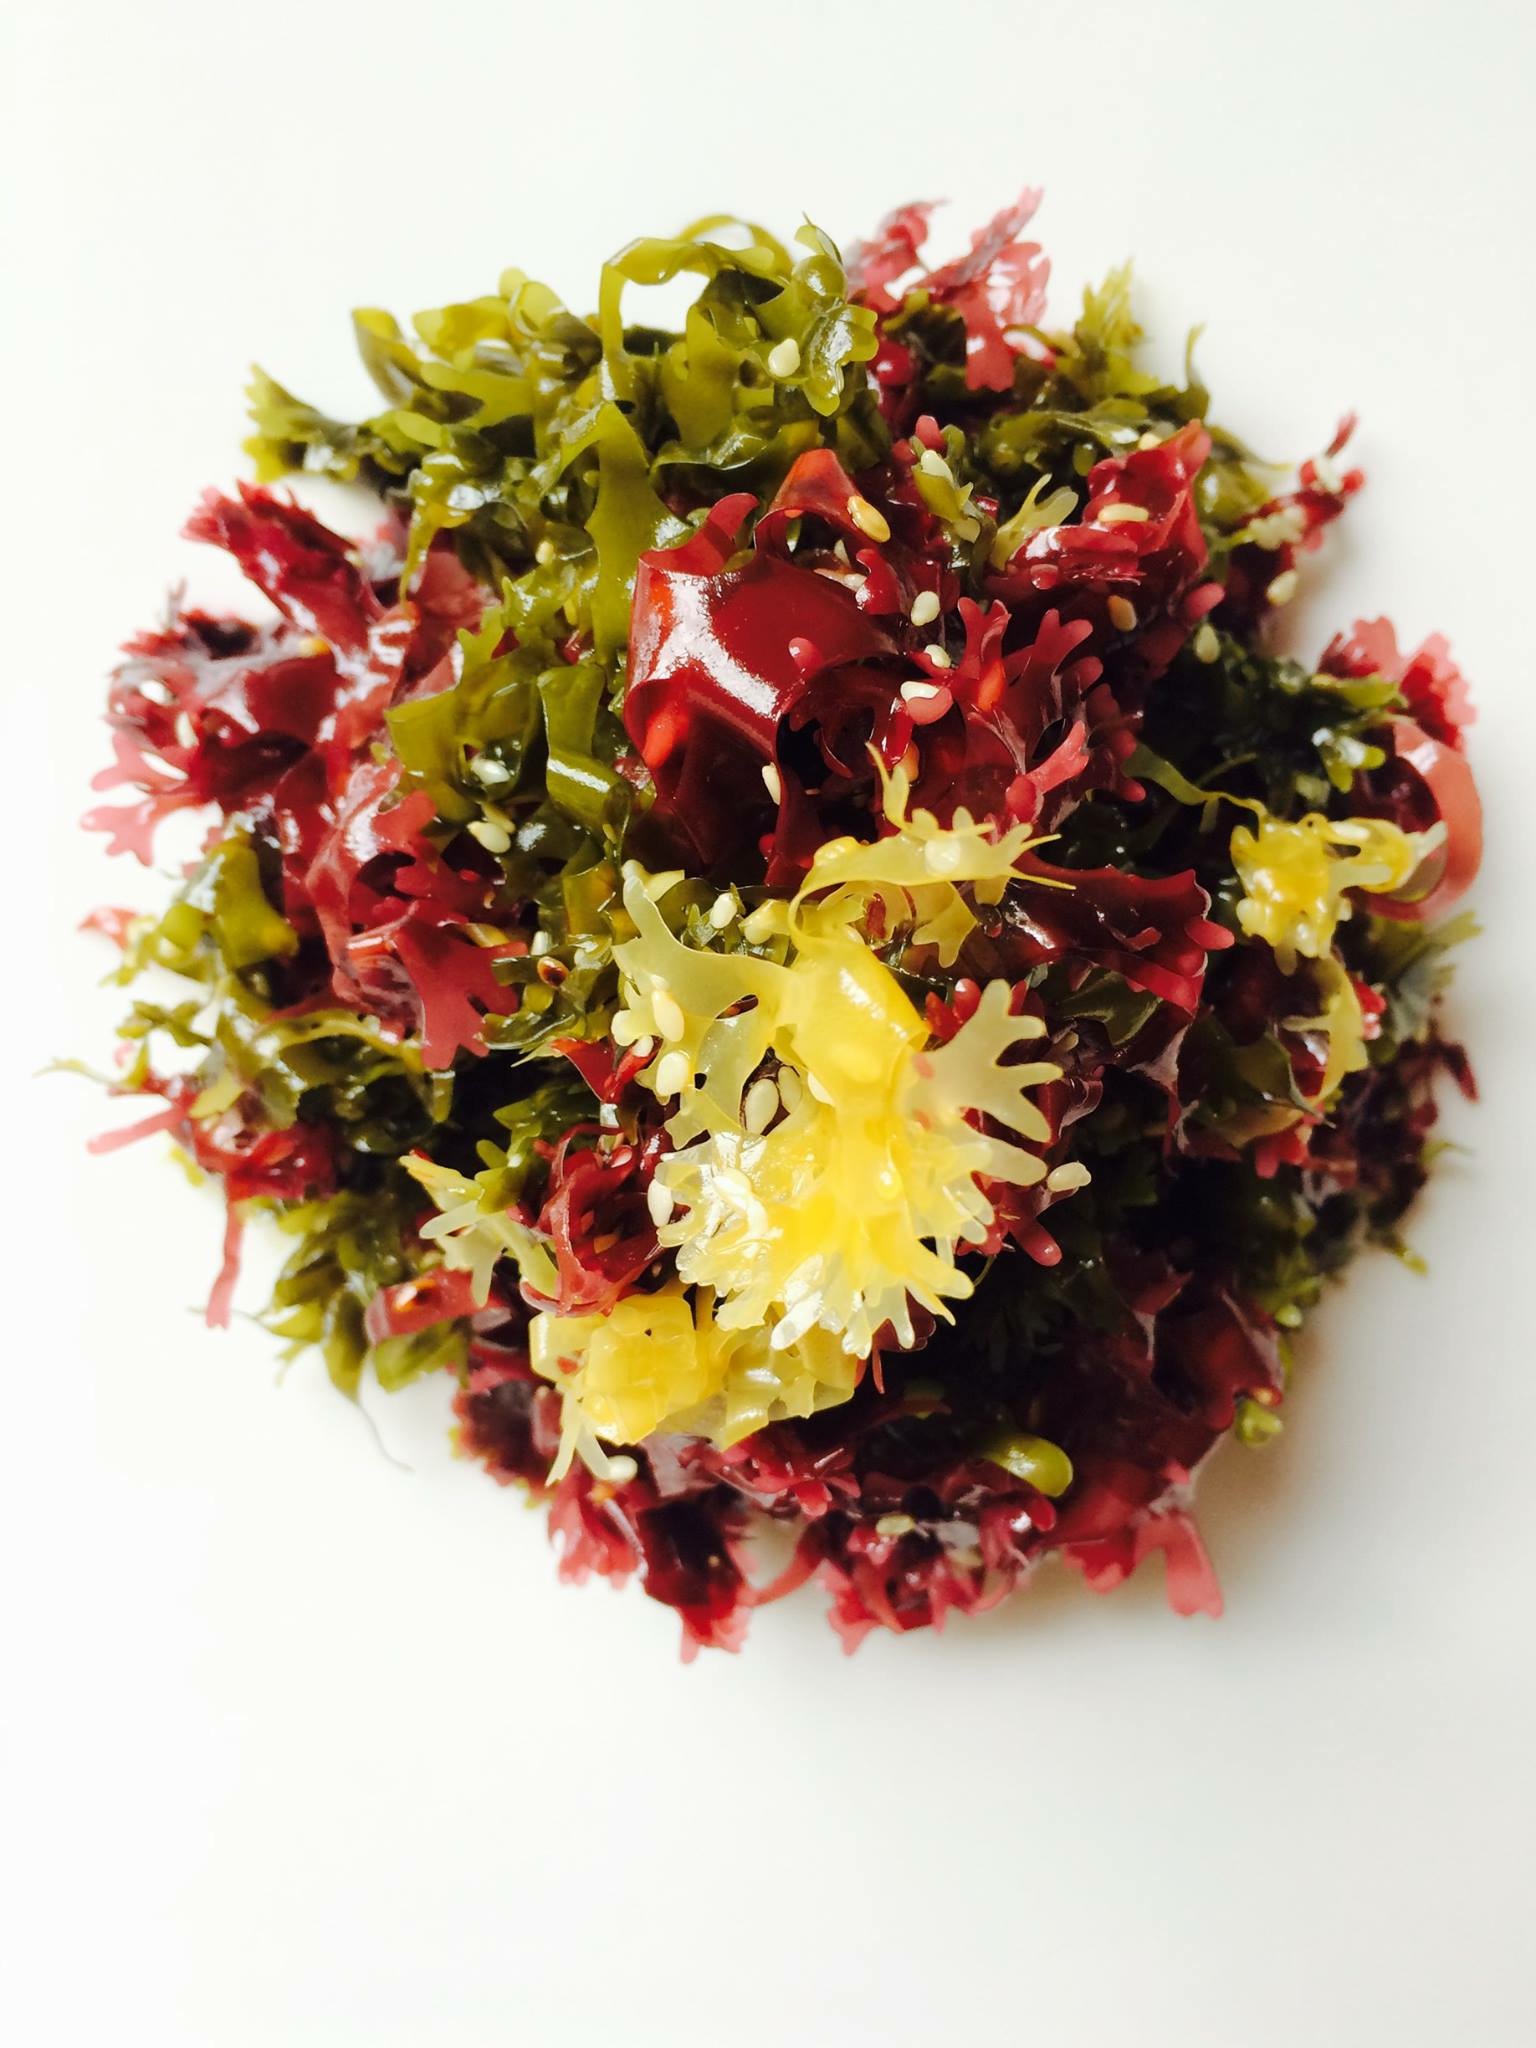
Taylor: A super simple seaweed recipe is our signature vegan and gluten free Kaiso Seaweed Salad using Hana Tsunomata (see below for the recipe). Other popular ways to include sea vegetables in the diet is to use brown seaweed like kombu in soup stocks, or to use dried dulse or sea lettuce in place of salt sprinkled on soups, salads, sandwiches, etc.


MERMAID FARE'S KAISO SEAWEED SALAD

Ingredients:

15g Hana Tsunomata (approximately 1 cup)
1 tablespoons maple syrup
1 tablespoon rice vinegar
2 tablespoons gluten free tamari
2 teaspoons sesame oil
1/4 cup toasted sesame seeds

Directions:

Rehydrate Hana Tsunomata in room temperature water for ten minutes. Drain, and shake or pat dry excess water.

Whisk together wet ingredients, pour over seaweed and mix well. Stir in toasted sesame seeds. Let the salad marinate for a minimum of 20 minutes before serving.

Stays fresh for up to one week in the refrigerator. Freezes well.

Want more Mermaid Fare? Visit Taylor's website or follow her on Facebook, Instagram and Twitter.

Watermelon Mint Salad

If you follow me on Facebook or Instagram, you might have seen some posts about the cooking lessons or food demos I've been doing at Loblaws. I've been given an amazing opportunity to work for Canada's biggest grocer to cook and teach people about healthy food. I feel very fortunate for the opportunity, particularly because I've been meeting so many interesting and health-conscious people while on the job.

I also like that this sort of cooking gig presents an element of challenge and creativity. A few days prior to my cooking demos, the manager of the cooking school sends me an email indicating which food (or foods) she'd like me to use. I love this because it gives me the opportunity to seek out or come up with new recipes each time I'm doing a demo. In the past I've been asked to feature quinoa, hemp, black-eye peas, eggplant, bell peppers, zucchini and so on.

Most recently, I was asked to use watermelon. I had lots of ideas and considered making a gazpacho, salsa or possibly a smoothie, but after skimming over a few recipes online, I decided to go with a simple and refreshing watermelon and mint salad with some lime, cayenne and sea salt. The day of my demo it was hot, hot, hot and humid. It was probably the hottest day so far this year.  Needless to say, the salad was very well received!

This weekend I'm out in Westport (about an hour from Ottawa) and enjoying a few days in the woods near the Upper Rideau Lake. It's a hot, summery day here and I made this salad again today.  Watermelon is excellent for summer because it's a very refreshing food due to its water content (~92% water). It's also highly nutritious. It's a very good source of vitamin C and contains B vitamins, potassium, copper and magnesium.

Try it out and let me know what you think. The full recipe is below!

WATERMELON MINT SALAD

Makes 8 to 10 (1 cup) servings (depending on the size of the watermelon)

Ingredients:

1 large watermelon cut into ~1 inch chunks
1 - 2 limes, juiced
Pinch or two of cayenne pepper (optional, but recommended)
1 handful of fresh mint leaves, torn into small pieces (or 1 tablespoon dry mint)
Sea Salt

Directions:

In a large bowl, toss the watermelon with the lime juice and cayenne. Fold in the mint leaves, season with salt. Taste it and adjust the flavour by adding more sea salt or cayenne if necessary, and then serve immediately.

If you plan to make this ahead, the cubed watermelon can be refrigerated overnight. Add in the other ingredients just before serving.  The salad will keep for a few days, but is best served fresh.

Inspired by Matt Neal's recipe in Food & Wine.

Ready, Set, Glow is back! Join me starting July 18.

In May, I launched my first group nutrition program, Ready, Set, Glow!, in partnership with my friends at Urban Juice Press here in Ottawa.  The 4-week program was designed to not only help people adopt healthier, more nutritious diets, but to make complimentary lifestyle changes as well.  Through emails, workshops and our private Facebook group, participants learned about meal planing and prep, how to improve digestion and the body's natural ability to detoxify, and they also received tons of new recipes and had the opportunity to try out new foods.

Launching and running Ready, Set, Glow! was a great experience for me. Particularly because I was responsible for pulling together all the recipes each week. I wanted to make sure that I offered meals and snacks that were not only tasty, nutrient dense, and macro-nutrient balanced, but also easy enough that people wouldn't feel intimidated. Since all of my meals were vegan and gluten free, many of the participants were worried that they might not feel full or satiated, but I was happy to hear that most people not only felt satisfied, but their cravings started going away, they noticed increased energy, and they felt "healthier" overall.  It was such a great experience that I'm going to offer the program again this summer!

On a related note, my wedding is fast approaching (just over two months away!) and for that reason I'm even more motivated to run the program again. Mainly because I want to make sure that I'm taking good care of myself. When I say this, I'm not talking about weight loss, but rather I'd like to make sure that I'm eating fantastic food, feeling great, stress free and as rested as possible leading up to the Big Day.  Wedding planning can be overwhelming, especially since both Jeremy and I are running our own businesses, and I want to make sure that this is a fun, memorable time! That said, having glowing skin on my wedding day may be a motivating factor in all of this too! 💁

I already cook at home regularly and eat very well for the most part, but I figured that setting up another round of Ready, Set, Glow! would keep me on track and it'll be beneficial for others as well. I'll be pulling together loads of healthy recipes for myself and focusing on sleep, hydration and stress management... and I'd love to invite others join in on this experience! Although summer can be a busy time with travel and vacations, I think it presents a great opportunity to eat well (thanks to the abundance of local produce), spend time outdoors, connect with nature, and focus on optimal health before Fall rolls around.

If you're interested in signing up for Ready, Set, Glow! you can read more about it and get all the details HERE. I hope you'll join me!