Tofu Egg Salad

I was in Alabama visiting family over the holidays when I found out I’d been invited to be on the local news. I was a little bit nervous about being on TV, but this is the second year in a row I’ve gone to CTV Morning Live at the beginning of January, so it’s becoming somewhat of a trend for me. 

On Monday of this week, I went to the studio here in Ottawa–bright and early— to do a cooking demo and talk about the benefits of plant-based eating.  January also marks the launch of Veganuary, a global campaign that encourages people to try a vegan lifestyle for the month of January, which was the reason I was asked to participate in the segment.

It was a great way to start 2025, and it’s always fun to demonstrate recipes from my cookbook The Vegan Body Builders Cookbook (the book I co-wrote with my friend Sam Shorkey). I made my Tofu “Egg” Salad recipe, a vegan spin and very close replica of the egg-based version. It’s a recipe I make often—and have shared it on my Instagram stories regularly—so I’m excited to finally share my blog.

But first, here are a few photos from the Daily Dish segment with host Melissa Lamb. If you’d like to see a little video of my early morning prep and time at the studio, visit my Instagram. If you’re just here for the recipe, I won’t leave you hanging, it’s just below the photos!

TOFU EGG SALAD

Ingredients:

1 block (350 g/13-ounce) firm tofu
1 rib of celery, finely chopped
1 tablespoon nutritional yeast
1 teaspoon turmeric
1/4 teaspoon garlic powder
1/2 teaspoon black salt or sea salt
2 tablespoons vegan mayo
2 tablespoons dill pickle relish or 1 large dill pickle, finely chopped
1 tablespoon Dijon mustard
1 tablespoon fresh lemon juice
Pepper, to taste

Directions:

Crumble the tofu into a medium-sized bowl with your hands. Add the celery, nutritional yeast, turmeric, garlic powder, dried dill (if using), and black salt. Mix well.

In a small measuring cup or bowl, combine the vegan mayo, relish or chopped dill pickle, mustard, and lemon juice to make a dressing. Pour the dressing over the tofu mixture and stir until everything is well combined. If the mixture is a bit dry, add extra mayo 1 tablespoon at a time until the desired texture is reached.

Taste and season with extra salt, if needed, and as much pepper as you’d like.

Serving Suggestions:
Serve the tofu egg salad in pita, a wrap, or on sourdough bread with toppings like tomatoes, lettuce, or sprouts. It can also be enjoyed with crackers or over a bed of fresh leafy greens.

Storage:
This sandwich filling will keep in the fridge for 3–4 days in an airtight container.

This is a stock photo I purchased. Normally I take my own photos, or use photos from my photographer friends, but I was so busy this week—and this photo is pretty nice—so it should do the trick!
Plant-Based Nicoise Salad

It’s been years since I’ve been to the South of France, but I’ll never forget the delicious meals I had in Nice, the home of the Nicoise salad. Back then I wasn’t vegan, so I’ve decided to create a version of this salad without fish and eggs. It features elements of the classic dish like a fresh herb vinaigrette, potatoes, green beans, tomatoes, artichokes and olives, but my version will showcase beans (instead of eggs) for a bit of protein. I made this salad many times this summer and it’s truly the perfect salad to bring to a summer barbecue or potluck. If you try it out, please share your feedback in the comments below or tag me on Instagram as I love to see your creations.

Vegan Nicoise Salad

Yields 4 - 6 servings 

Ingredients:

Salad components:
Approximately 1 pound fresh green beans ends trimmed and cut in half
Approximately 1 pound little/mini potatoes washed and scrubbed
1 can (14 oz/398 mL ) or 2 cups cooked white beans of your choice, drained and rinsed
1 can (14 oz/398 mL) of artichoke hearts in water, drained and rougly chopped
1 head of lettuce of your choice, washed and dried well, and rougly chopped
1 pint cherry tomatoes cut in half
½ cup Kalamata olives or Nicoise olives pitted
Handful of parsley hard stems removed and chopped finely, for garnish
Salt and pepper to taste
Optional: cucumbers, capers, blanched asparagus or other veggies of your choice

Fresh herb vinaigrette:
1/4 cup red wine vinegar or white wine vinegar
1 shallot chopped
1 small garlic clove chopped, optional
2 teaspoons Dijon mustard
1/4 teaspoon dried thyme
1/2 teaspoon salt
1/2 teaspoon pepper
3/4 cup extra-virgin olive oil
Handful of fresh basil leaves, chopped
Handful of parsley, chopped

Directions:

Blanch the green beans: Bring a pot of water to a boil and boil the green beans for 2 minutes, then immediately transfer to a bowl filled with ice water. Remove green beans from water and set aside.

Make the dressing: In a blender or small food processor, add the vinegar, shallot, garlic (if using), mustard, thyme, salt and pepper. With the blender running slowly pour in the oil and blend until emulsified, about 15 seconds. Add basil and parsley and pulse a few times until finely chopped. Pour into a jar and set aside.

Cook the potatoes: Add potatoes to a cold pot of water and bring to a boil until fork tender. Once done, remove and let cool enough to handle. Slice the potatoes in half and toss with a couple tablespoons of vinaigrette and season with salt and pepper. Set aside.

Assemble the salad: Shortly before serving, lay some of the lettuce leaves along the base of wide salad bowl or platter and drizzle over a bit of vinaigrette. Lay out the remaining salad ingredients and then drizzle about 3/4 of the vinaigrette onto salad and garnish with finely chopped parsley. Serve up your salad immediately and ensure that you get a little taste of everything in your bowl. You can use the remaining vinaigrette, if needed, when serving.
 
Salad components and the dressing can be stored in the fridge for 3 - 4 days in airtight containers. To prevent sogginess, dress the salad right before serving.

Chickpea Salad Wrap

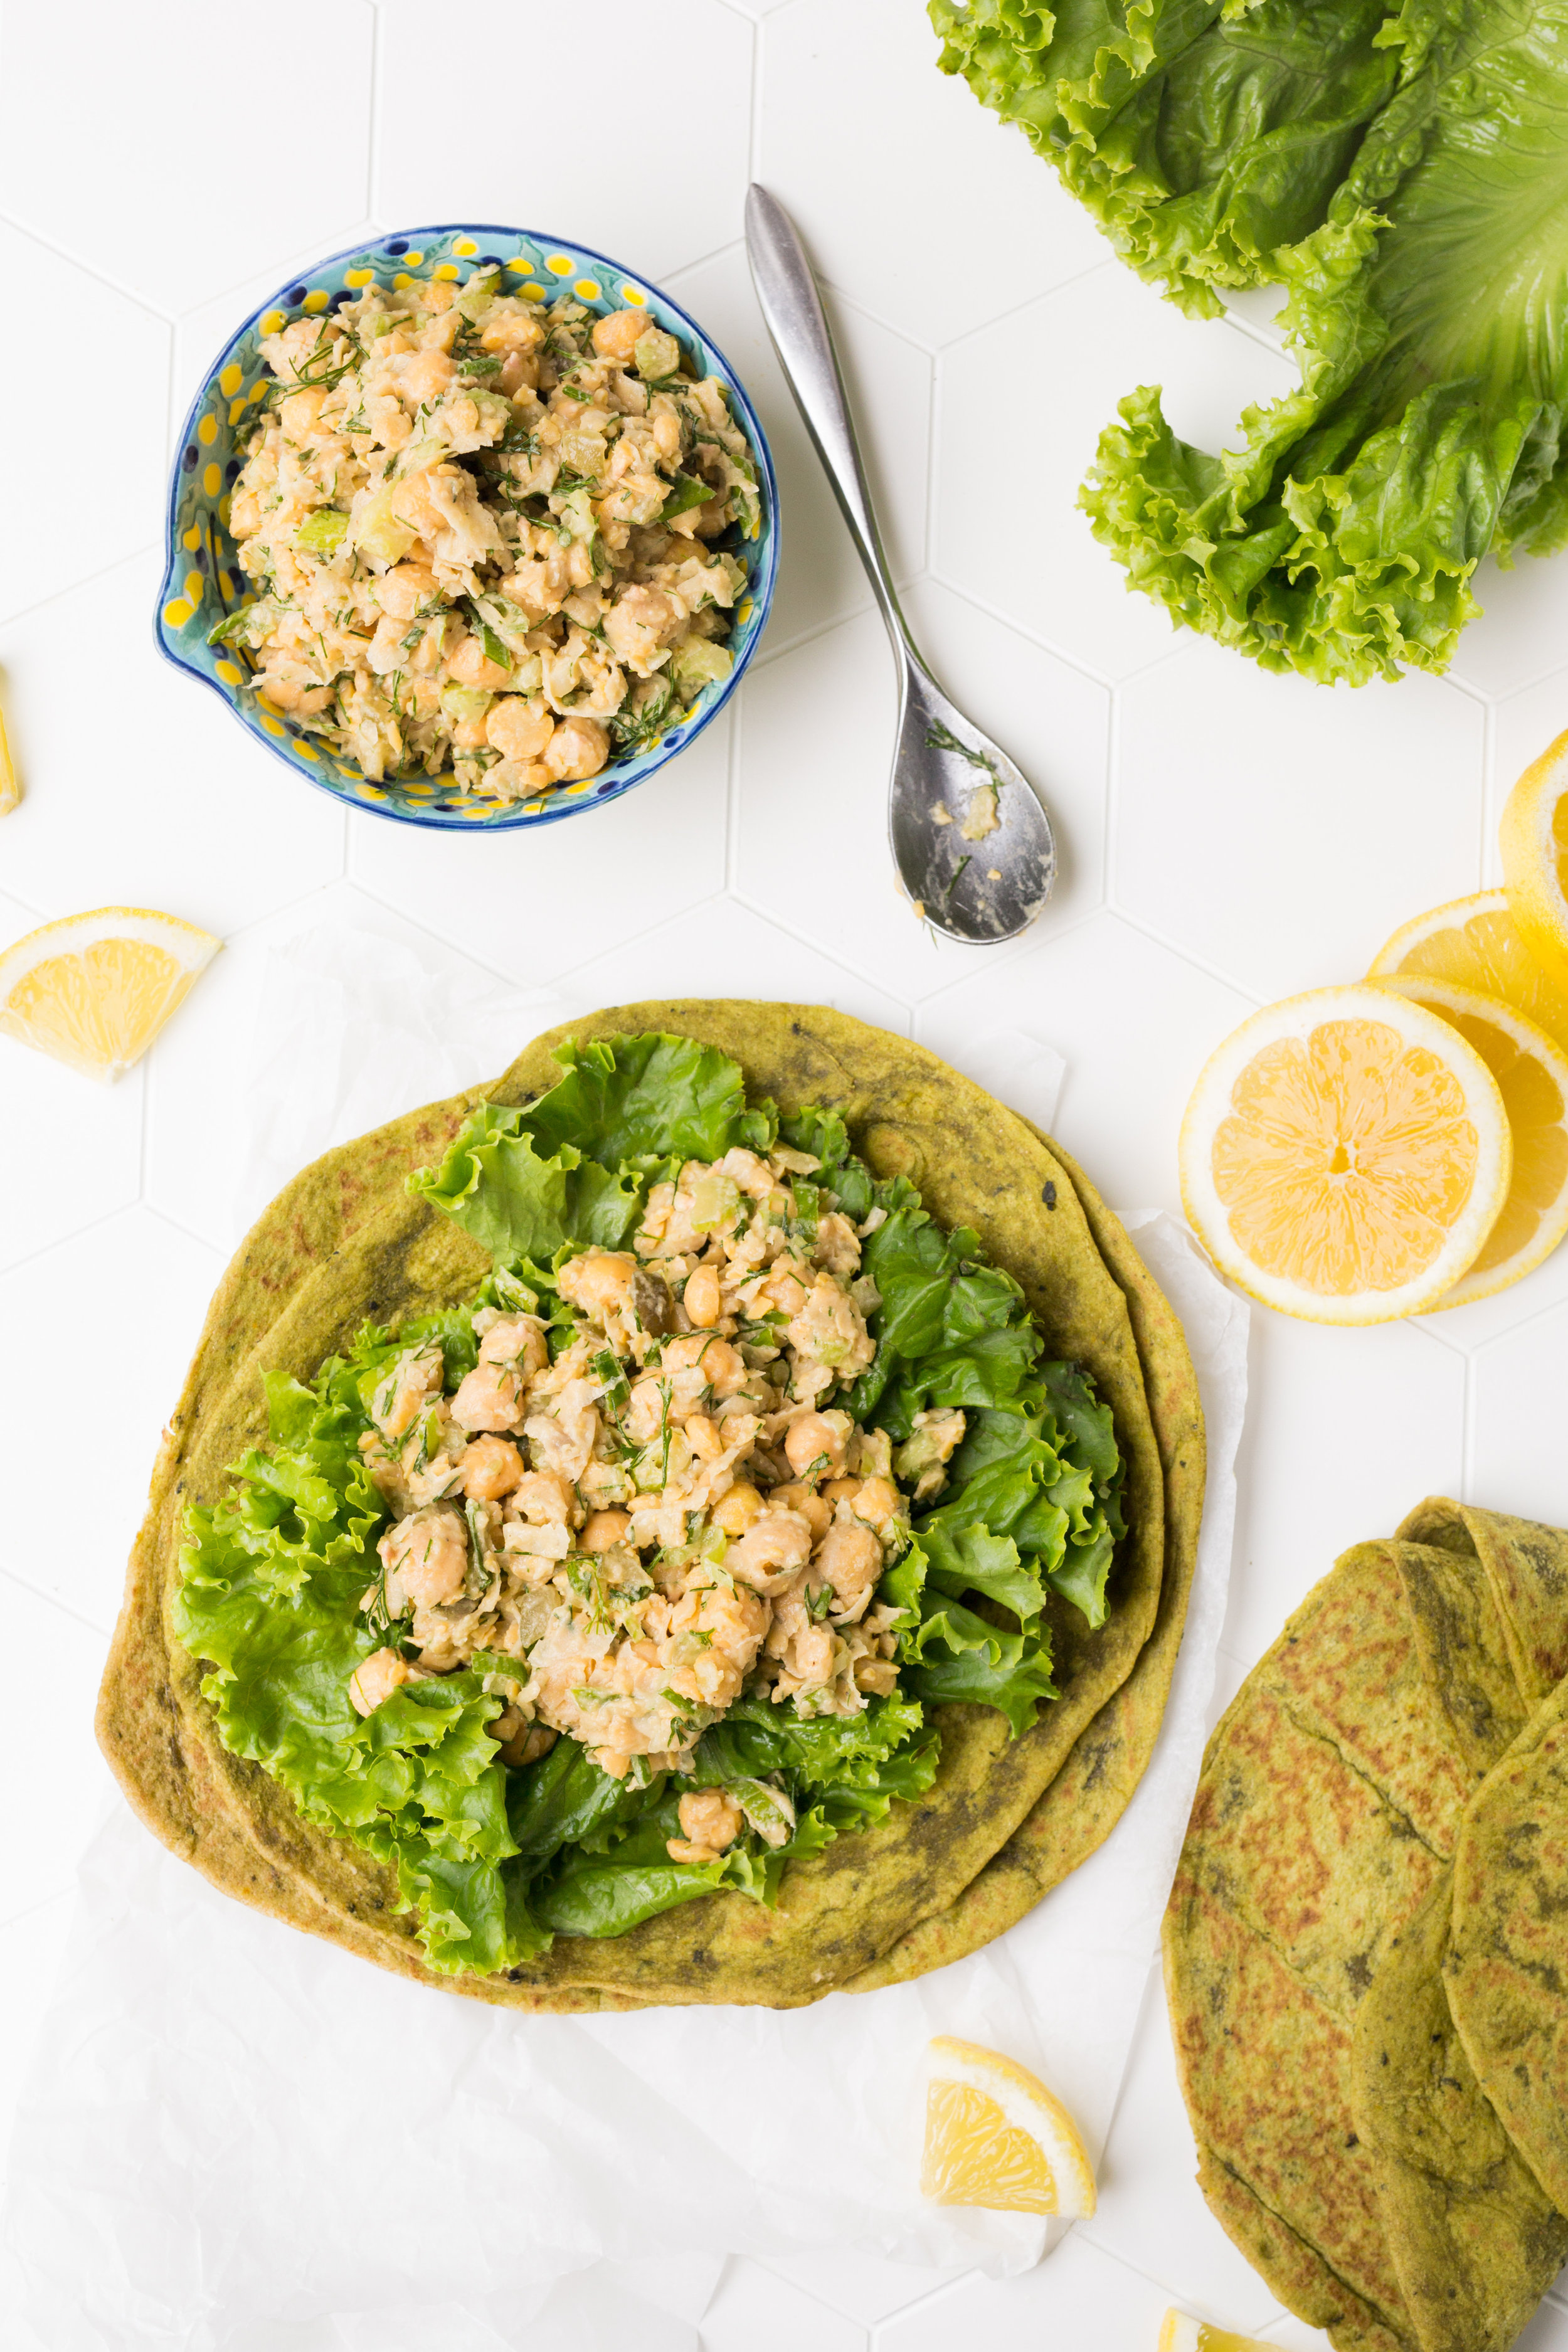
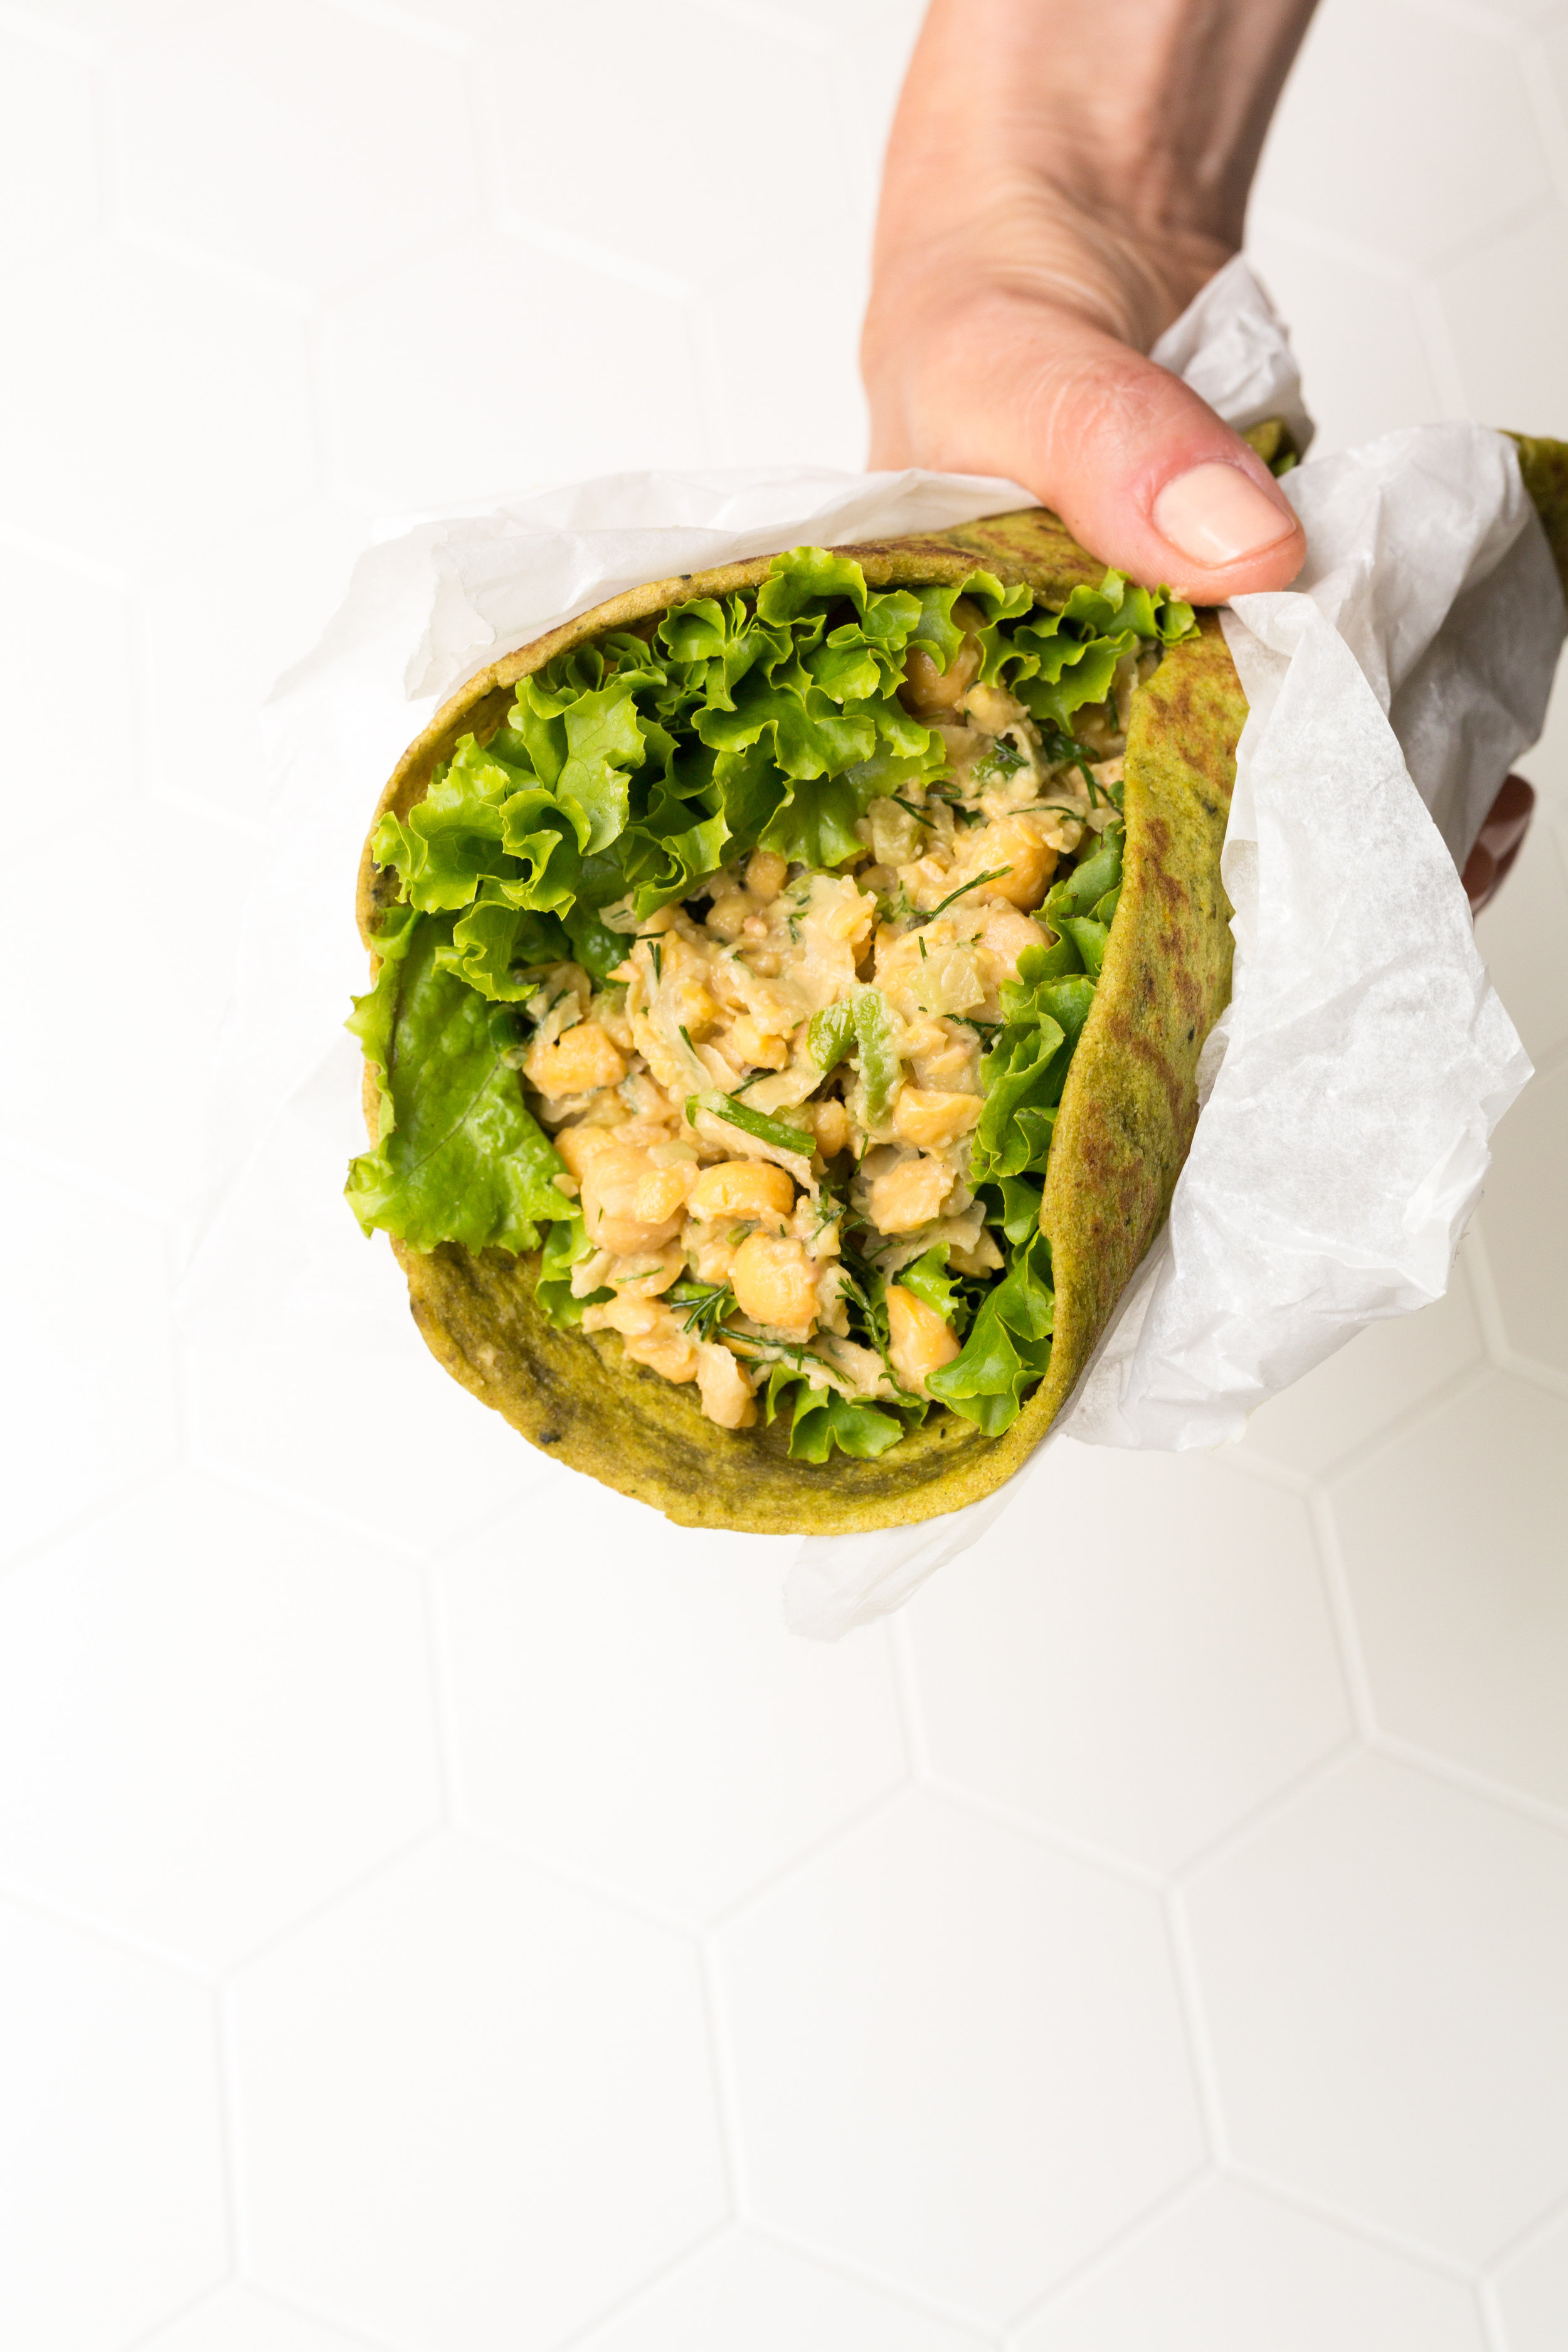
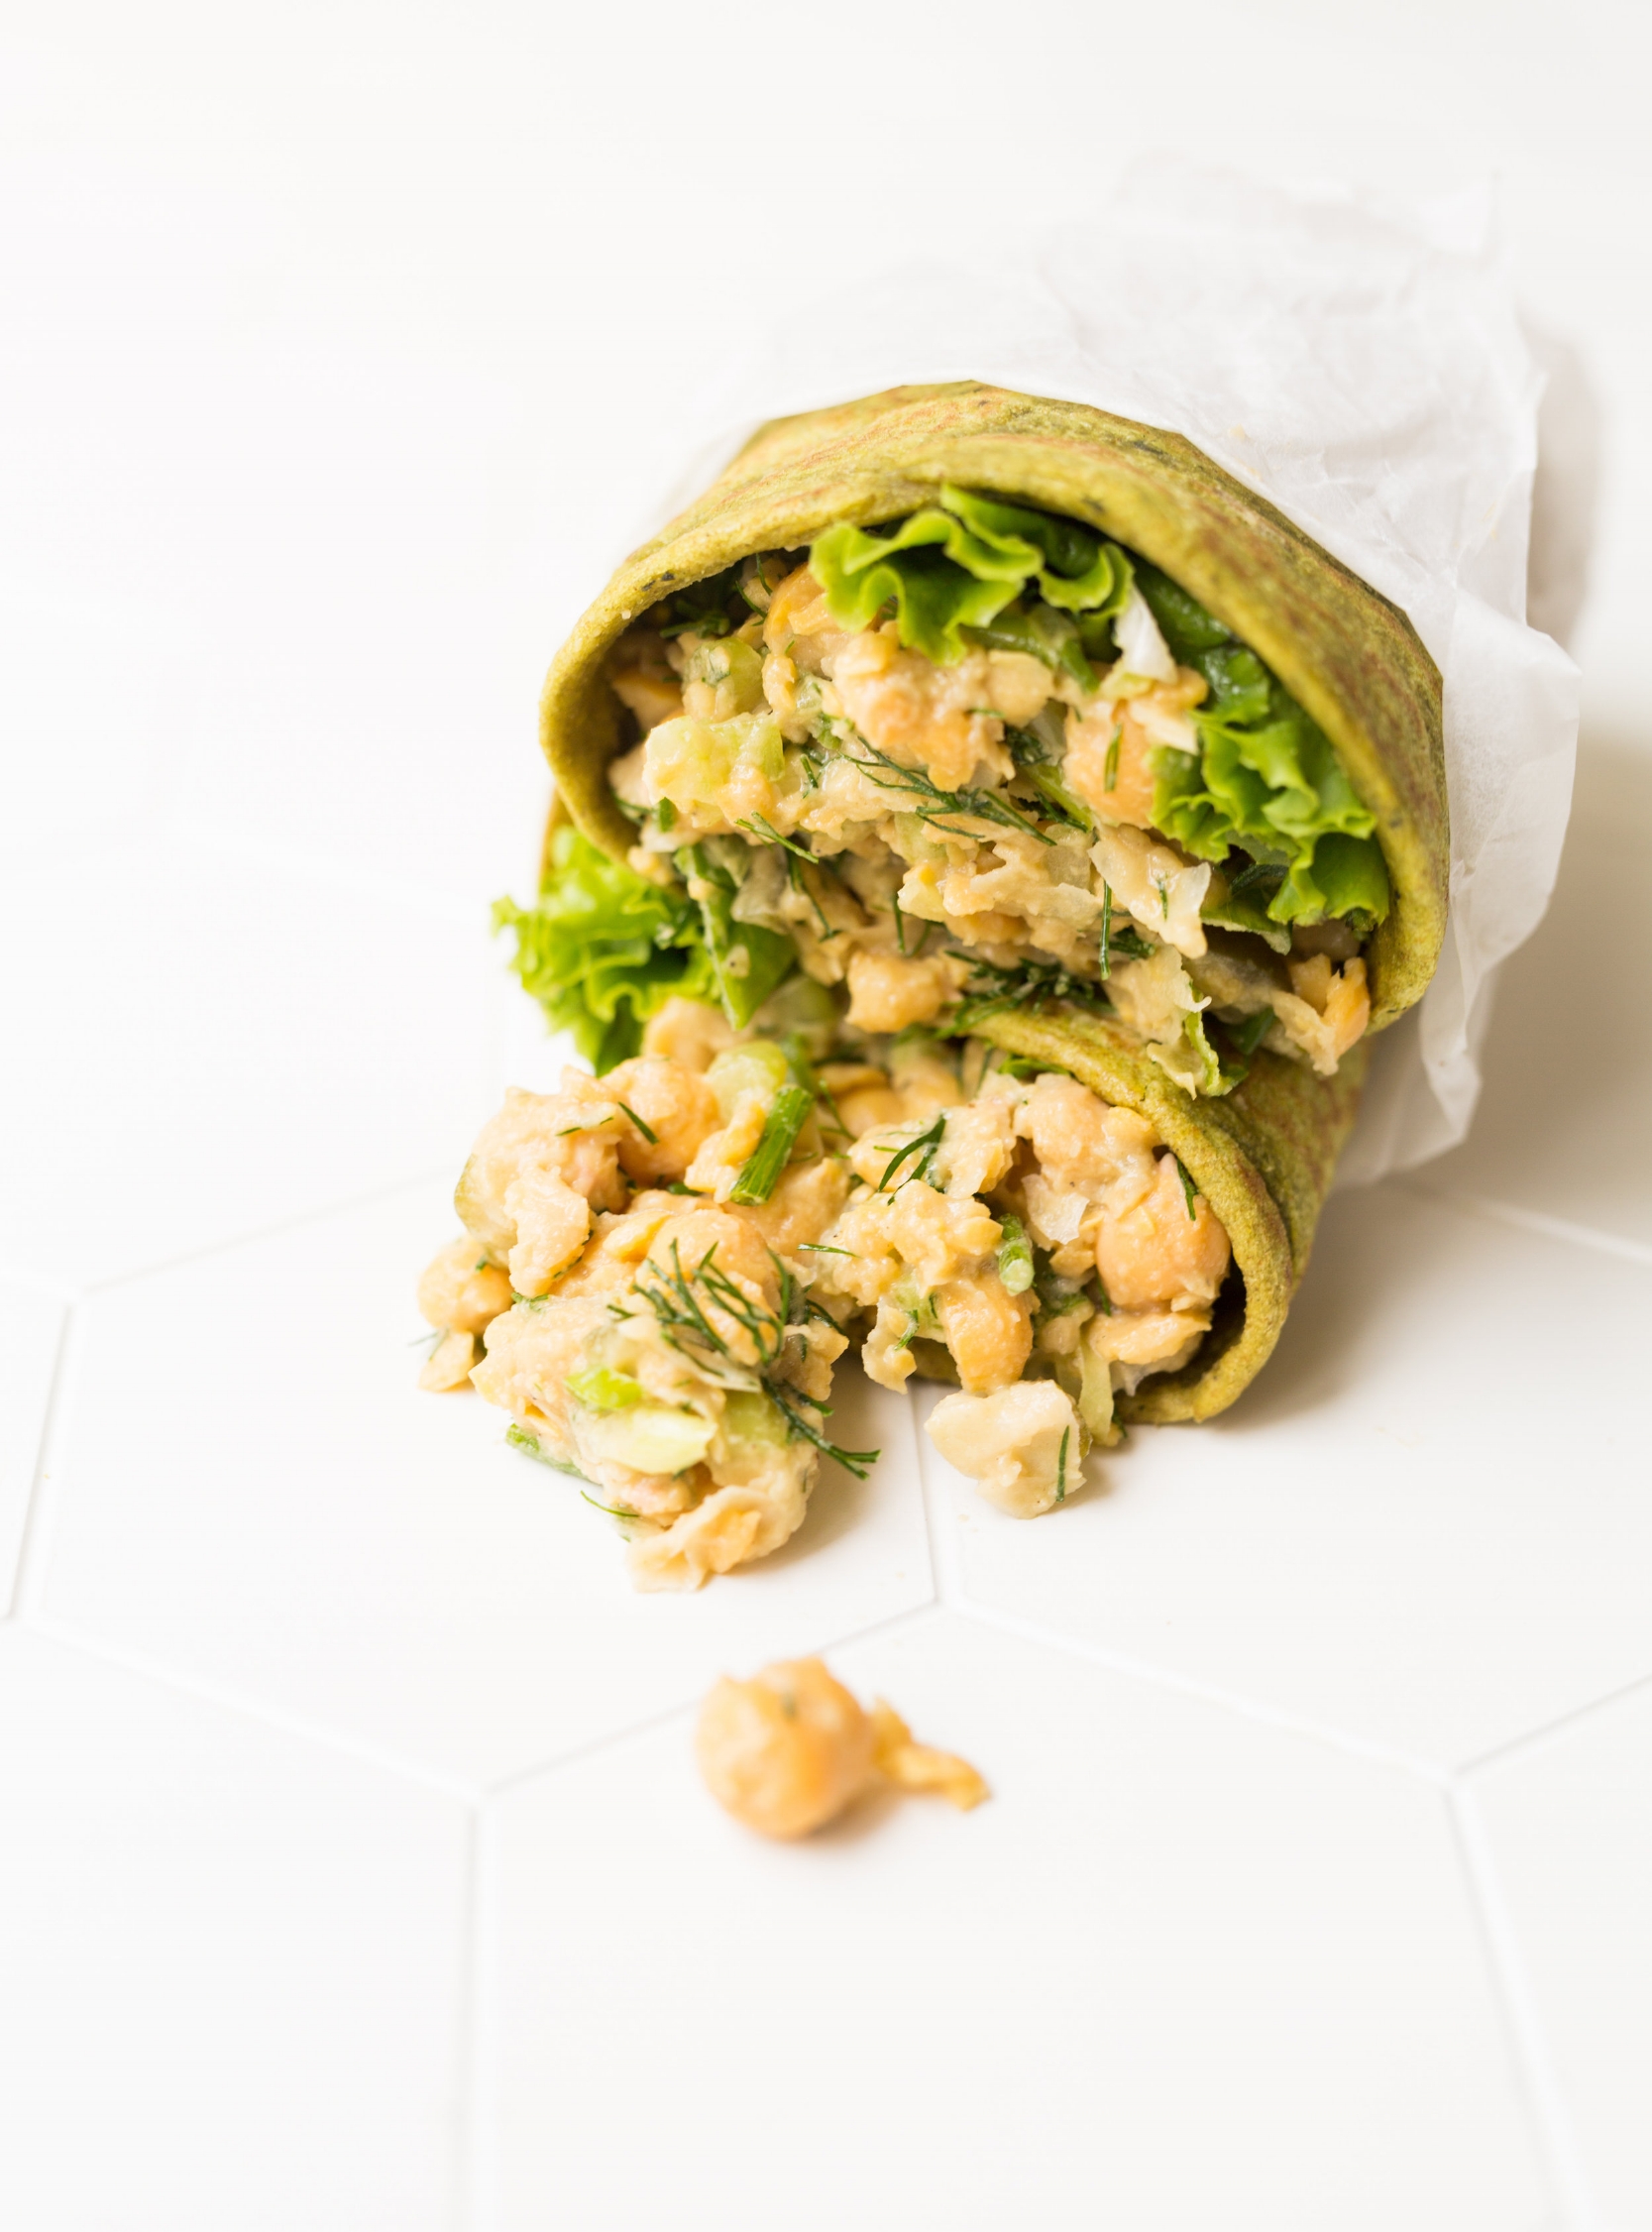
It's been a long time coming and I'm happy to finally be posting my chickpea salad recipe!  I've made it for cooking lessons, yoga retreats, and shared with many of my clients, always with such positive feedback. It's truly one of my favourites and I was so excited to learned that Ana Tavares, my friend & photographer extraordinaire (she shot the photos below),  makes this recipe often for her son's lunches.  Given that I've received so many requests for easy back-to-school/kid friendly recipes lately, the timing couldn't be more perfect! 

This recipe is nut, dairy, egg, and gluten free, and offers tons of plant-based protein and fibre. It's also a versatile recipe that can be eaten on its own, in wraps, sandwiches, with crackers or on a bed of leafy greens. For this blog post, I opted to serve it in a wrap because it made for fun food styling. 

You'll notice this recipe calls for dulse or kelp flakes. These are both varieties of dried seaweed ground into flakes, which can generally be purchased at health food stores or online. Although I've listed these ingredients as optional I highly recommended adding seaweed since it's such a nutritious food and gives the chickpea salad a nice boost of flavour (reminiscent of tuna ...but less fishy). 

Scroll down for the recipe and please let me know if you have any questions or feedback. I love hearing from you! 

CHICKPEA SALAD WRAP

Makes 6 - 8  servings

Ingredients: 

2 15 oz. cans chickpeas, drained & rinsed, or ~ 3 cups cooked
1/3 cup vegan mayonnaise  (store bought or homemade)
1/3 cup celery (about 1 or 2 ribs of celery), minced
3 green onions, chopped
3 tablespoons minced dill pickle (about 1 large dill pickle)
1 - 2 tablespoons nutritional yeast
1 tablespoon tamari
2 teaspoons kelp or dulse (seaweed) powder or flakes, optional  
Freshly ground pepper, to taste
Fresh lemon juice, to taste
1 large handful, fresh dill, roughly chopped

Directions: 

For a chunky consistency: add all of the ingredients (except dill) into a medium sized bowl.  Mix and mash everything with a fork or potato masher. 

For a smooth consistency: add all the ingredients to a medium sized bowl and process with an immersion blender. Alternatively add the ingredients to a food processor and process until smooth. 

Once desired consistency is reached, stir in the dill. Enjoy in sandwiches, wraps, on crackers, or on a bed of salad greens.

Keeps in the fridge for 5 days in an air-tight container.

If you enjoyed the recipe I shared above be sure to check out my Plant-Based Breakthrough program, which is a crash course in plant-based health, nutrition, and meal planning. For details about the program click here. You can also join the Plant-Based Breakthrough Community on Facebook where I share recipes, inspiration, and information on plant-based nutrition.

AmyLongardRecipes-6.jpg

Amy's Superfood Kale Salad

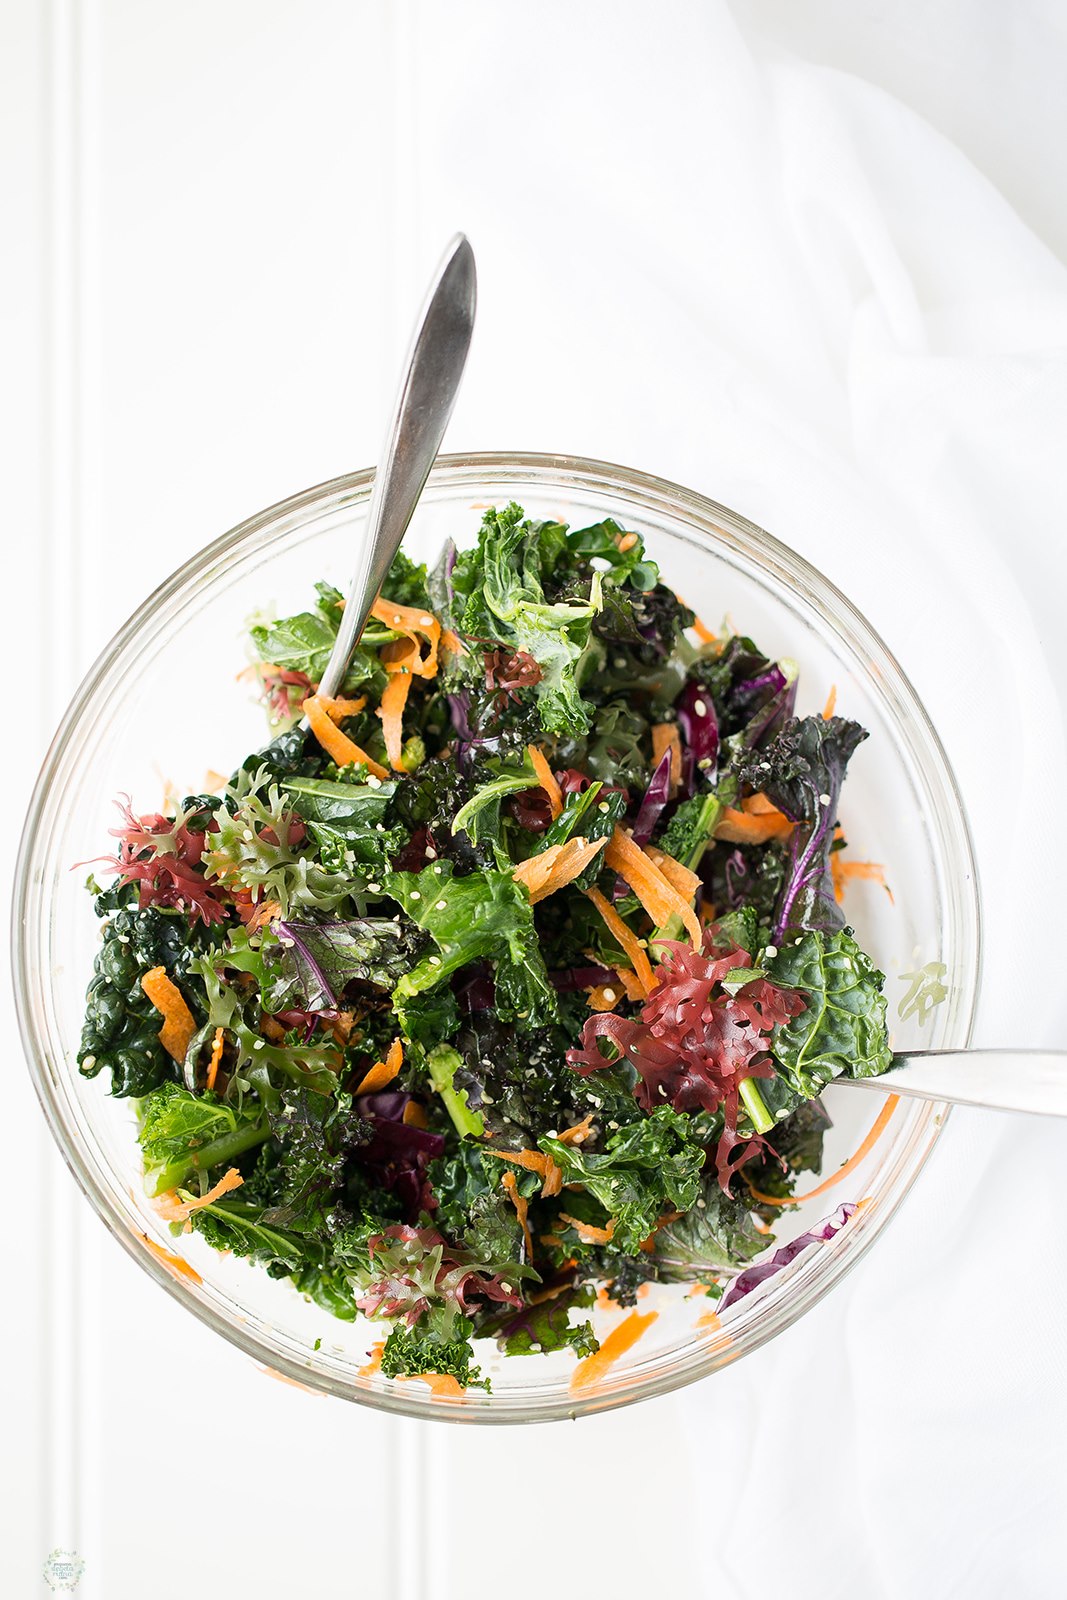
This is one of  my top salads of all time and I couldn't be more excited to share it with you. Since so many of you have tried it and have asked me for the recipe, I figured it was time to share it with the masses.  

Before we get into the recipe, I'm going to address the elephant in the room. I know there's lots of controversy around the word "superfood". Isn't it just hyperbole or marketing used to sell products? Yes, but also no.  Let's take a quick look at the definition...

superfood/ˈsuːpəfuːd/ : A nutrient-rich food considered to be especially beneficial for health and well-being.
— Oxford Dictionaries Online

Based on that definition, it's safe to say that most whole plant foods could be considered superfoods! You don't need to travel to remote plains or depths of a tropical rainforest to find the healthiest of health foods. If you're looking to find superfoods, simply head on over to your nearest grocery store and b-line it to the produce section where pretty much everything could qualify as a "nutrient-rich food considered to be especially beneficial for health and well-being"! Simply put, readily available grocery store items like vegetables, fruits, and even nuts, seeds, beans, chickpeas, lentils and so on are, by definition, "superfoods".  How exciting is that?

With that in mind, I created a salad featuring some of the most nutrient-rich foods (both land and sea) that we can find here in Canada, put them together, and topped them with a delicious dressing. If you break it down this salad is just bursting with nutritious properties like antioxidants, phytochemicals, fibre, probiotics, fatty acids, plant protein, and much much more. Plus, it's also super flavourful!

By the way, if you're a newbie to seaweeds, don't be intimidated. Hana tsunomata is a mild seaweed that can easily be added into any dish. It's not overpowering and doesn't have a strong sea taste or smell like some other varieties. If you're in Nova Scotia, Prince Edward Island, or Ottawa (Ontario), you can find hana tsnuomata in retail locations. However, if you're outside of these areas you'll need to order it online from Mermaid Fare.  If you don't have seaweed and you'd like to make this salad right away, you can either swap out the hana tsnunomata for other varieties of seaweeds (rehydrated wakame or sliced nori sheets would work), or you can simply omit it altogether and it'll still be tasty.

Ok, let's get this salad party started. Scroll down for the full recipe. 

AMY'S SUPERFOOD KALE SALAD

Makes 4 to 6 servings

Salad Ingredients: 

1 bunch of kale, leaves removed and finely sliced, stems discarded
1/2 of a small red cabbage, finely sliced (by hand or using a food processor) 
1 large carrot, grated (by hand or using a food processor) 
1/4 cup hemp hearts
5 grams dried hana tsunomata (seaweed), rehydrated & dried off (optional)
Sauerkraut (raw/unpasteurized)
+ olive oil, apple cider vinegar & sea salt to massage the kale

Dressing Ingredients: 

5 Tablespoons, extra virgin olive oil
4 Tablespoons, apple cider vinegar
2 teaspoons, dijon mustard
2 teaspoons, maple syrup
Sea salt and freshly ground pepper

Directions: 

For the salad: Add the sliced kale to a large bowl and drizzle with a little bit of olive oil, add a splash of apple cider vinegar, and a pinch of sea salt. Using your hands, squeeze and massage the kale leaves. You’ll do this for 2 or 3 minutes until the leaves start to soften. This will make the kale easier to chew and more palatable.  Once the kale is soft, add the cabbage, and carrot to the bowl. 

To make the dressing: Using a fork or a whisk, combine apple cider vinegar, dijon mustard, and maple syrup in a bowl or medium sized measuring cup.  Slowly pour in 5 tablespoons of extra virgin olive oil and whisk, or stir, until thoroughly emulsified, then mix in sea salt and cracked black pepper to taste.

To assemble the salad: Drizzle the dressing over the kale, cabbage, carrot and hana tsunomata (if using). Mix the salad well to ensure that the vegetables are evenly coated. Add the hemp hearts and toss again. Serve immediately and top with as much sauerkraut as you'd like. 

Power Pasta Salad

This recipe is actually my mom's creation so I can't take full credit for its deliciousness. She originally devised this concoction because it was cheap, filling and it did not spoil easily on road trips. During my childhood, we used to travel a lot during the summer, across the Atlantic Provinces, for soccer tournaments and Power Pasta became a family favourite. Back then I believe my mom used store bought Italian salad dressing and probably didn't include as many greens, but she was definitely a pioneer when it came to utilizing pulses as an efficient, inexpensive source of protein and healthy carbohydrates. This pasta salad kept her sporty children happy and satiated (without breaking the bank).

As I mentioned, I've made some of my own modifications, but at the heart of this recipe it's simple, filling, and nutrient dense. It's a great meal for active kids, but also for us adults who are looking for easy make-ahead lunch or dinner ideas. 

I haven't had a chance to take a super high quality photo, but I wanted to share this recipe now as I've had many requests.  Power Pasta is gluten free and vegan and can be modified many ways to suit your palate. If you don't like some of the ingredients, omit them, and add in other vegetables or proteins of your choice. Read on for the recipe and be sure report back once you've tried it.

POWER PASTA SALAD

Makes 8-10 servings.

Ingredients:

16 oz/454 g bag brown rice or quinoa spiral or elbow noodles, cooked according to package directions
2 398 ml cans of chickpeas or beans of your choice, drained and rinsed
1 can of water packed artichokes, drained, rinsed and roughly chopped
5 cups leafy greens of your choice (I like baby kale, spinach, or arugula), washed and chopped
1 large cucumber, peeled (if not organic) and chopped into bite-sized pieces
1 pint of grape or cherry tomatoes, sliced in half
1/2 cup of pitted kalamata olives, roughly chopped (optional)
1 bunch of green onions, chopped

Dressing Ingredients:

1/2 cup red wine vinegar
3 Tablespoons lemon juice
1 Tablespoon of maple syrup
1 Tablespoon Dijon mustard
2 teaspoons, sea salt
Freshly ground black pepper
1 small clove of garlic (optional)
1 cup extra virgin olive oil

Directions:

Add all of the salad ingredients into a very large bowl and mix well to combine.

For the salad dressing: blend the vinegar, lemon juice, maple syrup, Dijon, salt, pepper, and garlic (if using) in a blender. With the machine running, gradually blend in the oil. Once the dressing is ready, slowly pour it over the pasta salad. Stir to ensure that the noodles are well coated.  Serve immediately and enjoy!

Keeps in the fridge for 3 to 4 days, if you don't eat it all first.

Notes from the kitchen: At my Loblaws demo I used Rizopia brown rice noodles and they were great!

Super Simple Summer Slaw

I went on a shopping spree this weekend and spent all my money... at the Farmers' Market! This is the only kind of shopping I like and I happily lugged home a massive haul of fresh vegetables thanks to the good people at Hoople Creek Farm, Roots Down Organic Farm and Waratah Downs Organic Farm. I picked up green cabbage, kohlrabi, zucchini, summer squash,  patty pan squash, cucumber, fennel, and a bunch of bell peppers. Besides having all of these veggies to work with, I also have a fridge full of kale and beet greens (thanks to my soon-to-be father-in-law).  We have lots of cooking and eating to do this week, but I think we can handle it.

Last night, I made a huge pot of red lentil marinara (in which I used many of the veggies listed above) and served it on zucchini noodles, and today I was craving something fresh and light so opted to make a slaw. The recipe below is one of my favourites and I've enjoyed many versions of it, as have my nutrition clients.  This recipe should ultimately serve as a base for you and you can tweak it to your liking.

This time around I used kohlrabi, green cabbage, fennel bulb and fronds, and carrots because that's what I had on hand. However, adding in some grated apples, and opting for dill instead of fennel, will give it a different, but equally delicious flavour profile. Even going with red cabbage, instead of green, will offer a variation in taste and nutrients.  There are so many options!

This is definitely a choose-your-own-adventure style of slaw that you can serve as an appetizer, side dish, snack, or even as filler in sandwiches or wraps. It's very versatile and very nutritious. Try it out and let me know what you think!

SUPER SIMPLE SUMMER SLAW

Ingredients:

1 medium, kohlrabi, peeled and cut into matchsticks, or grated
1/4 head, cabbage (green or red), thinly sliced or shredded
1 small fennel bulb, thinly sliced or grated, optional
1 apple, peeled and grated, optional for a sweeter slaw
1 carrot, peeled and grated
1/4 cup, fennel fronds or fresh dill, roughly chopped
3 Tablespoons, extra virgin olive oil
1/2 lemon, juiced
1 small clove, garlic, finely minced
1 teaspoon, Dijon mustard
Sea salt and freshly ground pepper

Directions:

Add the slaw ingredients to a large mixing bowl. Toss until well combined.

In a measuring cup or small mixing bowl, whisk together the rest of the ingredients (olive oil, lemon juice, garlic, Dijon mustard and a few big pinches of salt and pepper). Whisk until you have a nice, even consistency.

Pour the dressing over the slaw ingredients and then toss until the dressing is evenly distributed. Taste your slaw and season with a bit more salt and pepper, if necessary.  Once you’re happy with the flavour, serve immediately and enjoy! This slaw will keep in the fridge for up to 5 days.

Notes from the kitchen: You can use a box grater or slice up the vegetables by hand, but for the quickest and most efficient method, I recommend using a food processor. I personally use the grating blade to process carrots, apples, kohlrabi and fennel, and the slicing blade for cabbage.

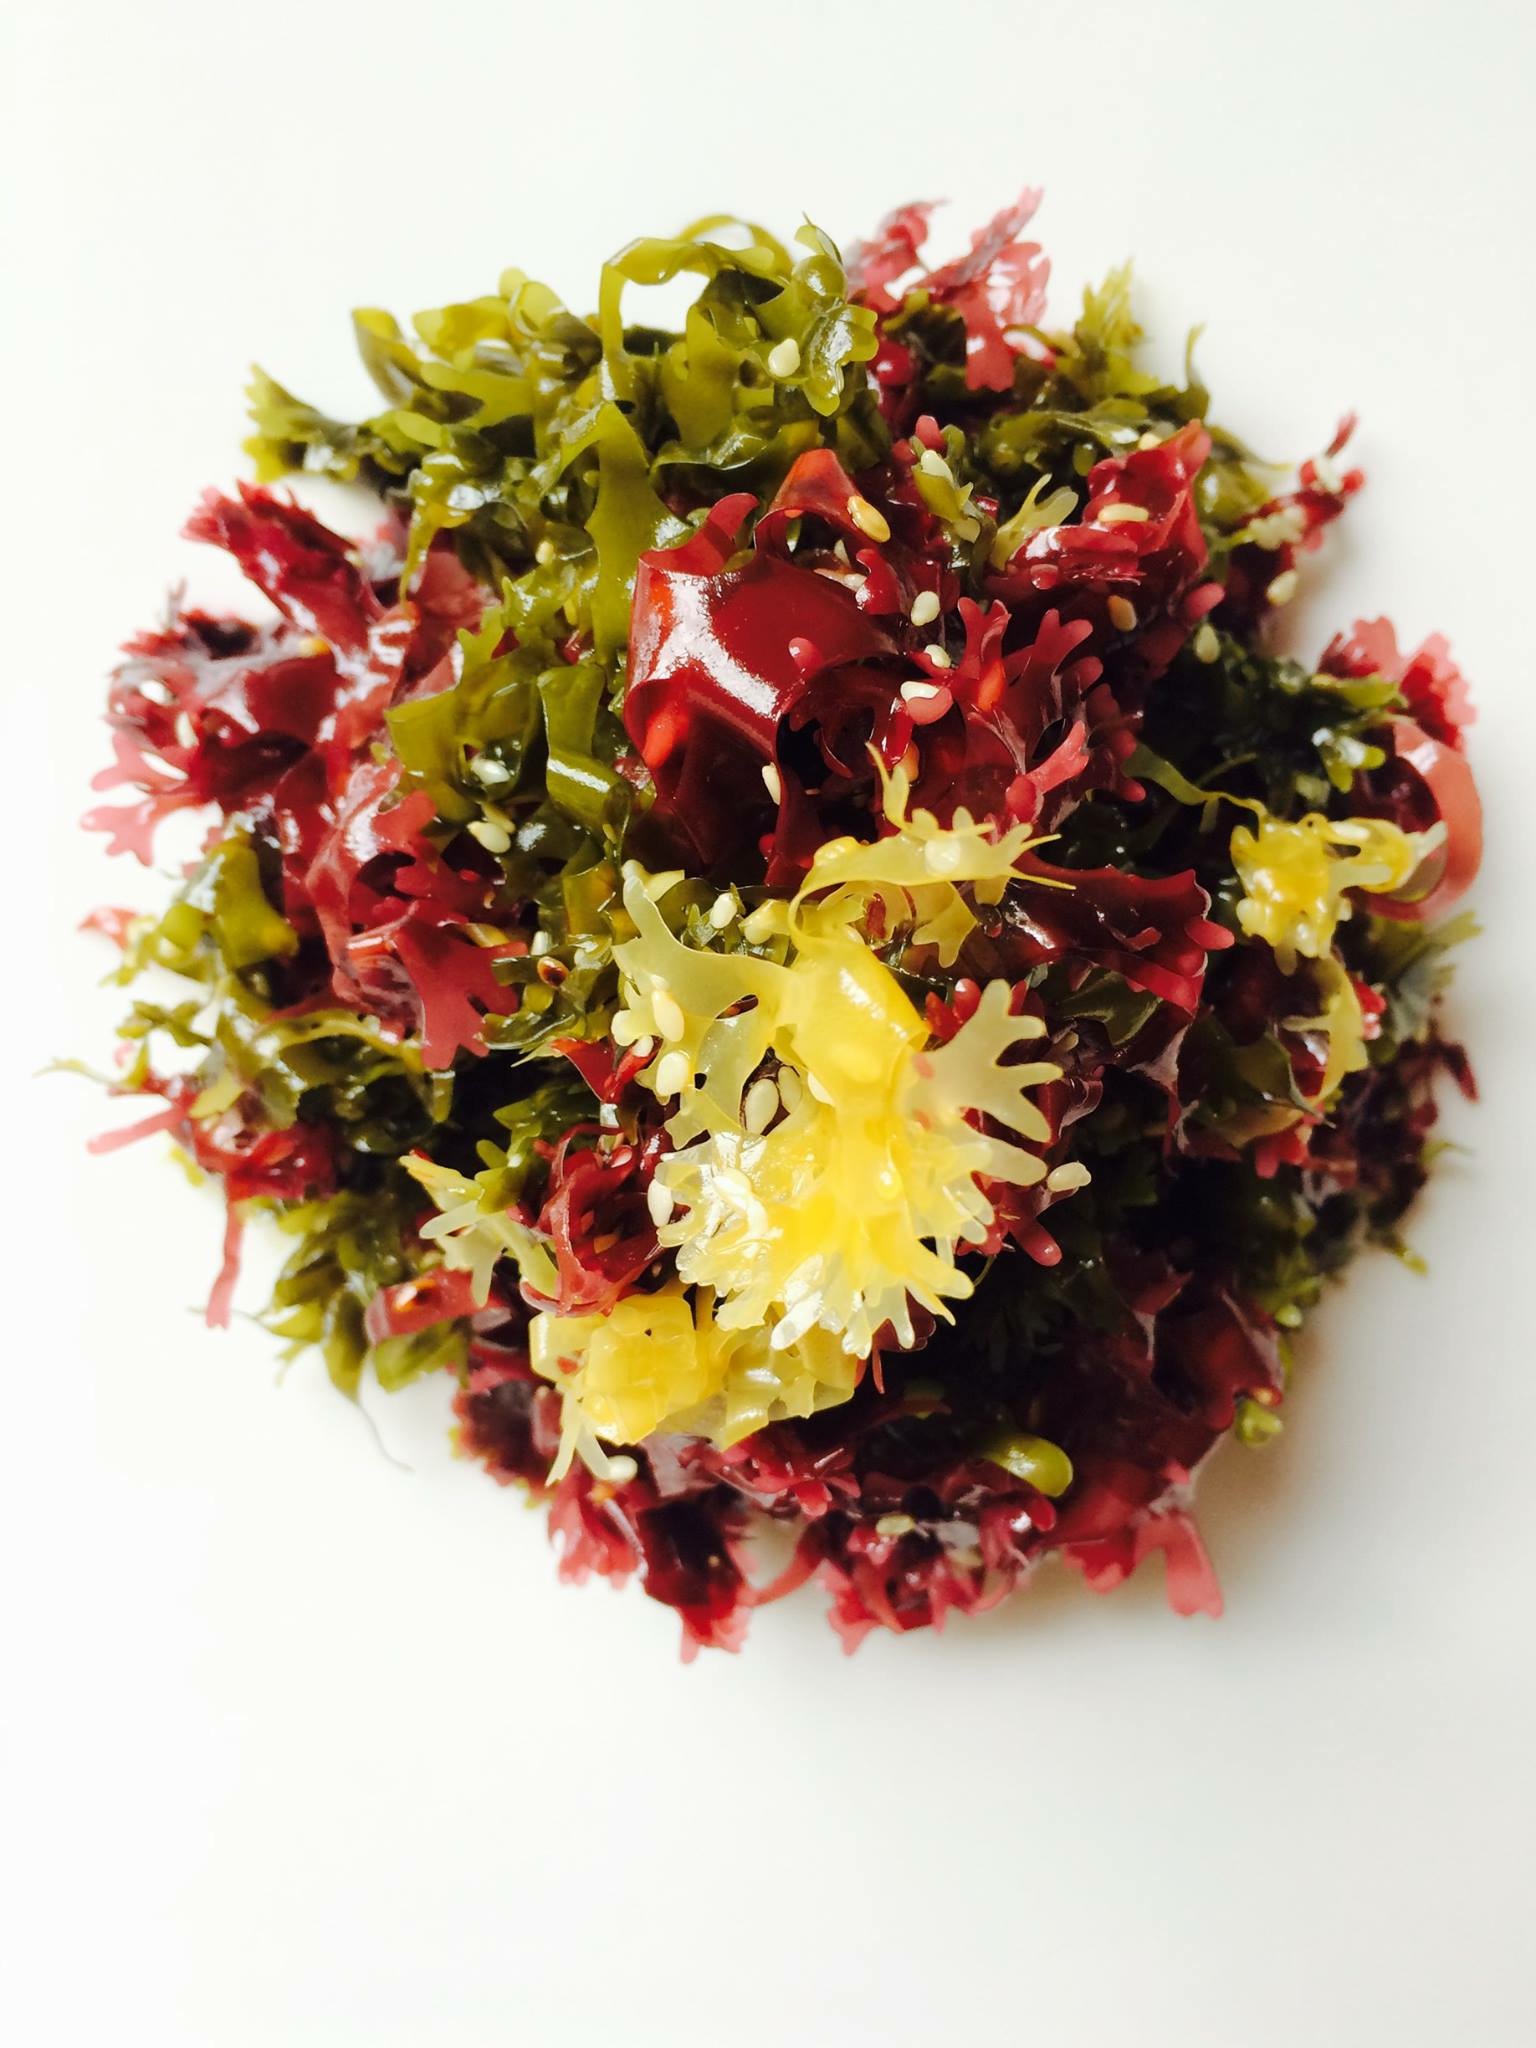
Seaweed Salad + Q&A with Mermaid Fare

If you didn’t already know, I’m a huge fan of sea vegetables. Growing up in Nova Scotia, I have memories of eating dulse chips with my dad.  My family also hosted Japanese exchange students throughout my childhood. During those years, I remember trying and loving the exotic seaweed-based snacks and learning how to make sushi using nori (a variety of seaweed) with our students. Overtime seaweed salad and sushi were mainstays in my diet, but it wasn’t until I went to culinary school and took a weekend course on seaweed that I truly began appreciated its versatility and vast health benefits.

I recently had the pleasure of meeting somebody who enjoys seaweed just as much as I do (if not more!). When I was home in Nova Scotia this past March, I met Taylor Widrig. As the owner of Halifax-based company Mermaid Fare, she's made an entire career out of sourcing and selling different kinds of seaweeds and creating seaweed food products. She sells seaweed snacks, seaweed salts, and varieties of seaweeds during the summer and fall at the Halifax Seaport Farmers' Market and in select retail locations. She also sources seaweeds for local restaurants and sells many of her products via her online store at www.MermaidFare.com. She's a true sea vegetable aficionado.

Besides running Mermaid Fare, Taylor is also a chef.  She spent the last few winters in the Caribbean living and working on yachts as a private chef. When she's home in Nova Scotia, her other culinary services include seaweed-based cooking lessons and the occasional catering gig (fun fact: she'll actually be working at my wedding this summer).  When she's not selling seaweed or busy cooking, she’s been known to put on a mermaid tail and go swimming in the ocean. Yep, she also moonlights as a mermaid! Clearly, Taylor is one of the most interesting gals around and I'm really excited to share my interview with her.

Read on to learn how her company came to fruition and how she sources the products she uses in her business. She also talks about the benefits, varieties and uses of seaweed, gives us the scoop on carrageenan (which is somewhat of a controversial topic in the natural health world these days) and she even shared one of her most popular recipes.

Amy: Mermaid Fare is such an amazing and unique concept! How did it come to be?
Taylor: Mermaid Fare was created in 2013 after completing Living Light Culinary Institutes’ Raw Culinary Arts program in Northern California. Initially it began as a raw food/vegan culinary education and catering company offering private cooking classes, dinner parties and retreats while actively promoting sea vegetables for health. Six months after starting, I decided I wanted to grow a product line that would benefit others and seaweed was front and center – combining my passion for sea vegetables and healthy snacks.

Amy: Seaweed is a true super food. Can you tell us a bit about the health benefits?
Taylor: Seaweeds, also known as sea vegetables, offer a wide range of nutrients including 56 minerals and trace elements, omega-3 fatty acids, and B vitamins. There are three families of seaweed – green, brown, and red. Kelp is a brown seaweed, Dulse and Irish Moss or Hana Tsunomata belong to the red kingdom, and sea lettuce in the green family. Sea vegetables are a wonderful source of plant based protein and iron, making them a suitable option for vegans, vegetarians and anyone looking to add more nutrients to their diet.

There are many studies being done today on the correlation between seaweed and weight loss, as well as sea vegetables ability to help remove heavy metals from the body while offering immune support after exposure to radiation. Apart from the internal health benefits, seaweeds have been used throughout the ages and in modern times in beauty products for their skin softening and clarifying effects.

Amy: Where do you source your products? What kinds of seaweeds are included in your product line?
Taylor: Mermaid Fare’s sea vegetables are sourced within the Canadian Maritimes. Our wild harvested varieties including wakame, kombu, dulse, and sea lettuce are sourced from the Bay of Fundy where sea vegetables thrive in the cool water and rising tides. Our cultivated variety, Hana Tsunomata is produced by Acadian Seaplants Ltd. in Nova Scotia which uses state of the art on-land aquaculture systems to create a traceable and aesthetically beautiful product. Mermaid Fare’s mission as a company is to promote sustainability, community, and to create quality and trusted products while constantly evolving within the industry.

Taylor in Copenhagen by the "Little Mermaid" statue.

Taylor in Copenhagen by the "Little Mermaid" statue.

Amy: I know you were recently in Copenhagen for the International Seaweed Symposium. You mentioned that carrageenan was the hot topic. I've heard mixed messages and I’m so curious to hear what you’ve learned!
Taylor: Some controversy surrounds ‘carrageenan’, which is extracted from Irish Moss and used widely in the food industry for it’s thickening, gelling, and stabilizing properties. Carrageenan is commonly found in vegetarian and vegan products because it replaces the animal ingredient ‘gelatin’, providing a similar and ethical result.

Carrageenan is a safe food product but has gotten a bad rap over the years due to a negative article that told readers carrageenan contributed to intestinal inflammation. It is suggested the author of this article may have had a bias motive for their research, and once the negative story was told it was hard to sway the public’s perception of the product.  (Amy’s notes: when I was away in West Cork, Ireland, cooking for a yoga retreat, I discovered that carrageenan was used often in cooking, particularly for thickening soups.)

Amy: Can you share a recipe that might appeal to somebody who's new to seaweed? Or maybe give us some tips on how to use seaweed?
Taylor: A super simple seaweed recipe is our signature vegan and gluten free Kaiso Seaweed Salad using Hana Tsunomata (see below for the recipe). Other popular ways to include sea vegetables in the diet is to use brown seaweed like kombu in soup stocks, or to use dried dulse or sea lettuce in place of salt sprinkled on soups, salads, sandwiches, etc.


MERMAID FARE'S KAISO SEAWEED SALAD

Ingredients:

15g Hana Tsunomata (approximately 1 cup)
1 tablespoons maple syrup
1 tablespoon rice vinegar
2 tablespoons gluten free tamari
2 teaspoons sesame oil
1/4 cup toasted sesame seeds

Directions:

Rehydrate Hana Tsunomata in room temperature water for ten minutes. Drain, and shake or pat dry excess water.

Whisk together wet ingredients, pour over seaweed and mix well. Stir in toasted sesame seeds. Let the salad marinate for a minimum of 20 minutes before serving.

Stays fresh for up to one week in the refrigerator. Freezes well.

Want more Mermaid Fare? Visit Taylor's website or follow her on Facebook, Instagram and Twitter.

Watermelon Mint Salad

If you follow me on Facebook or Instagram, you might have seen some posts about the cooking lessons or food demos I've been doing at Loblaws. I've been given an amazing opportunity to work for Canada's biggest grocer to cook and teach people about healthy food. I feel very fortunate for the opportunity, particularly because I've been meeting so many interesting and health-conscious people while on the job.

I also like that this sort of cooking gig presents an element of challenge and creativity. A few days prior to my cooking demos, the manager of the cooking school sends me an email indicating which food (or foods) she'd like me to use. I love this because it gives me the opportunity to seek out or come up with new recipes each time I'm doing a demo. In the past I've been asked to feature quinoa, hemp, black-eye peas, eggplant, bell peppers, zucchini and so on.

Most recently, I was asked to use watermelon. I had lots of ideas and considered making a gazpacho, salsa or possibly a smoothie, but after skimming over a few recipes online, I decided to go with a simple and refreshing watermelon and mint salad with some lime, cayenne and sea salt. The day of my demo it was hot, hot, hot and humid. It was probably the hottest day so far this year.  Needless to say, the salad was very well received!

This weekend I'm out in Westport (about an hour from Ottawa) and enjoying a few days in the woods near the Upper Rideau Lake. It's a hot, summery day here and I made this salad again today.  Watermelon is excellent for summer because it's a very refreshing food due to its water content (~92% water). It's also highly nutritious. It's a very good source of vitamin C and contains B vitamins, potassium, copper and magnesium.

Try it out and let me know what you think. The full recipe is below!

WATERMELON MINT SALAD

Makes 8 to 10 (1 cup) servings (depending on the size of the watermelon)

Ingredients:

1 large watermelon cut into ~1 inch chunks
1 - 2 limes, juiced
Pinch or two of cayenne pepper (optional, but recommended)
1 handful of fresh mint leaves, torn into small pieces (or 1 tablespoon dry mint)
Sea Salt

Directions:

In a large bowl, toss the watermelon with the lime juice and cayenne. Fold in the mint leaves, season with salt. Taste it and adjust the flavour by adding more sea salt or cayenne if necessary, and then serve immediately.

If you plan to make this ahead, the cubed watermelon can be refrigerated overnight. Add in the other ingredients just before serving.  The salad will keep for a few days, but is best served fresh.

Inspired by Matt Neal's recipe in Food & Wine.