Plant-Based Nicoise Salad

It’s been years since I’ve been to the South of France, but I’ll never forget the delicious meals I had in Nice, the home of the Nicoise salad. Back then I wasn’t vegan, so I’ve decided to create a version of this salad without fish and eggs. It features elements of the classic dish like a fresh herb vinaigrette, potatoes, green beans, tomatoes, artichokes and olives, but my version will showcase beans (instead of eggs) for a bit of protein. I made this salad many times this summer and it’s truly the perfect salad to bring to a summer barbecue or potluck. If you try it out, please share your feedback in the comments below or tag me on Instagram as I love to see your creations.

Vegan Nicoise Salad

Yields 4 - 6 servings 

Ingredients:

Salad components:
Approximately 1 pound fresh green beans ends trimmed and cut in half
Approximately 1 pound little/mini potatoes washed and scrubbed
1 can (14 oz/398 mL ) or 2 cups cooked white beans of your choice, drained and rinsed
1 can (14 oz/398 mL) of artichoke hearts in water, drained and rougly chopped
1 head of lettuce of your choice, washed and dried well, and rougly chopped
1 pint cherry tomatoes cut in half
½ cup Kalamata olives or Nicoise olives pitted
Handful of parsley hard stems removed and chopped finely, for garnish
Salt and pepper to taste
Optional: cucumbers, capers, blanched asparagus or other veggies of your choice

Fresh herb vinaigrette:
1/4 cup red wine vinegar or white wine vinegar
1 shallot chopped
1 small garlic clove chopped, optional
2 teaspoons Dijon mustard
1/4 teaspoon dried thyme
1/2 teaspoon salt
1/2 teaspoon pepper
3/4 cup extra-virgin olive oil
Handful of fresh basil leaves, chopped
Handful of parsley, chopped

Directions:

Blanch the green beans: Bring a pot of water to a boil and boil the green beans for 2 minutes, then immediately transfer to a bowl filled with ice water. Remove green beans from water and set aside.

Make the dressing: In a blender or small food processor, add the vinegar, shallot, garlic (if using), mustard, thyme, salt and pepper. With the blender running slowly pour in the oil and blend until emulsified, about 15 seconds. Add basil and parsley and pulse a few times until finely chopped. Pour into a jar and set aside.

Cook the potatoes: Add potatoes to a cold pot of water and bring to a boil until fork tender. Once done, remove and let cool enough to handle. Slice the potatoes in half and toss with a couple tablespoons of vinaigrette and season with salt and pepper. Set aside.

Assemble the salad: Shortly before serving, lay some of the lettuce leaves along the base of wide salad bowl or platter and drizzle over a bit of vinaigrette. Lay out the remaining salad ingredients and then drizzle about 3/4 of the vinaigrette onto salad and garnish with finely chopped parsley. Serve up your salad immediately and ensure that you get a little taste of everything in your bowl. You can use the remaining vinaigrette, if needed, when serving.
 
Salad components and the dressing can be stored in the fridge for 3 - 4 days in airtight containers. To prevent sogginess, dress the salad right before serving.

Vermicelli Noodle Bowls 

If you’ve been a regular follower of my Instagram stories over the past few years you might’ve see that Dr. Kwadwo Kyeremanteng (aka @kwadcast), an ICU doctor at the Ottawa Hospital, invited me to be on his podcast Solving Healthcare back in 2020 to speak about the benefits of plant-based diets. While we have different views on food and nutrition, we had a wonderful discussion. You can listen to the podcast here.

Following our chat Dr. K asked me to host a 30 minute virtual class for his community. I taught the participants how to make a simple vermicelli noodle bowl with homemade peanut sauce. It's a cold dish and is great for showcasing fresh produce and herbs, plus it's vegan and gluten free! His community loved it so much that I shared the recipe on my Instagram in the summer of 2021, now I’m happy to finally be sharing it here on my blog (better late than never, right?). If you try it out, please let me know by sharing your photos and tagging me on social media. Enjoy!

Vermicelli Noodle Bowls

Yields 6 servings 

Ingredients: 

Salad base:
1 lb of vermicelli noodles, cooked according to package directions & rinsed under cold water
1 block of extra firm tofu, chopped into small dice sized pieces
1 medium sized cucumber, chopped into bite sized pieces 1 - 2 tomatoes, diced 2 - 3 green onion, thinly sliced 
3 - 4 cups of chopped greens of your choice (lettuce, spinach, mixed greens, etc are great) 
1 - 2 handfuls of cilantro, roughly chopped 
1 handful of mint, thinly sliced 1 - 2 limes, cut in wedges for garnish 
Hot sauce of your choice (Sriracha is my favourite, but any will do) 
Chopped roasted peanuts for garnish 

Peanut butter sauce:
1/3 cup soy sauce or tamari
3 tablespoons smooth natural peanut butter
2 tablespoon maple syrup
1 tablespoon rice vinegar or apple cider vinegar
2 teaspoons miso paste
2 teaspoons sesame oil, optional 
1 - 2 cloves garlic, grated or finely minced 
Black pepper to taste

Directions:

To make the salad: combine the salad ingredients from the vermicelli noodles to the mint in a large bowl. 

To make the peanut butter sauce: combine all of the sauce ingredients in a bowl or jar and mix rigorously until combined. It's a thick sauce. Store in an airtight container in the fridge for up to 10 days. Note: I usually make double of the sauce because it’s so good! 

To assemble the salad: serve portions of the salad into large soup bowls and top with 2 - 3 tablespoons of the sauce per serving. Add hot sauce and squeeze over fresh lime and a sprinkling of peanuts. Mix everything together in your bowl, taste and add more sauce and toppings if needed. Enjoy immediately!

If you enjoyed this recipe, my friend Samantha Shorkey and I have opened registration to our fitness and nutrition program called “Fit & Healthy Over 40”. Because life is hectic and we know it’s hard to get (and stay) on track when it comes to fitness and food goals, we put our heads together to come up with a plan for you. During our 4 week program that starts on April, we’ll help you instil solid routines through weekly guided workouts, coaching, community, and cooking classes — all plant-based, of course. Do you need structure and accountability to actually make changes in your life? We are here to support you! To learn more visit our program page or send me an email.

Cheezy Noodles

You’ve probably seen many Instragram stories showing my daughter eating her favourite meal: “cheezy noodles”. I’ve had countless requests for the recipe, so I apologize for taking so long to share this with you!

This recipe is my healthified, dairy-free take on Kraft Dinner using sweet potato or squash, cashews (or other nuts or seeds) and turmeric to create a noodle dish that looks and tastes cheesy, without cheese. I hope you enjoy it!

Cheezy Noodles 

Yields 6 servings

Ingredients:

3 cups sweet potato or squash, cubed 
1 onion diced
2 whole cloves of garlic, optional
1 - 2 tablespoons of olive oil
½ cup raw cashews, soaked in boiling water
2 tablespoons nutritional yeast, optional
1 teaspoon turmeric
1 teaspoon onion powder 
1 ½ cups of water 
½ teaspoon salt 
Black pepper to taste
Lemon juice
400 - 500 g of you favourite spiral noodles
Optional: 1 cup of frozen or fresh peas

Directions:

Preheat your oven to 400 F. Line a baking sheet with parchment paper or a silicone baking mat. 

Add the sweet potato, onion and garlic (if using) to the baking tray and drizzle over a little bit of olive oil and add a few pinches of salt. Use your hands to stir the veggies around a bit to cover them with the oil and salt. Transfer the tray to the oven and bake for 25-30 minutes until the sweet potatoes are easily pieced by a fork and the onions are soft. 

While the veggies are in the oven cover, the cashews in boiling water to soften them. 

Cook the noodles according to package directions and, if you’d like, add frozen peas when you have about 3 mins cooking time left for the noodles. Drain and rinse the noodles (and peas, if using) and return them to the pot.

Once the veggies are cooked, drain and rinse the cashews. Then add the cashews and roasted veggies to a blender or food processor. Add the water, spices, salt and pepper, a little squeeze of lemon juice (I use about half a lemon), and process until you have a smooth, creamy sauce. If you find the sauce is too thick add more water 1/4 cup at a time. You might have to scrape down the sides a bit along the way. If you have a small blender (like a Magic Bullet) you may need to do a few batches. 

Add the sauce to your cooked noodles and mix well! Taste and season with additional salt and pepper if desired. Serve warm and enjoy. I like to add hot sauce or chili flakes. You could also stir frozen or fresh spinach into the noodles when they’re hot for some extra greens! 

Store in an airtight container for up to five days. You can also freeze the sauce for several months. 

To make school safe: use hemp hearts (no need to soak) or sunflower seeds (soaked like the cashews) in equal quantities.  

If you enjoyed the recipe I shared above be sure to check out my Plant-Based Breakthrough program, which is a crash course in plant-based health, nutrition, and meal planning. For details about the program click here. You can also join the Plant-Based Breakthrough Community on Facebook where I share recipes, inspiration, and information on plant-based nutrition.

Flourless Choose-Your-Own-Adventure Chocolate Chip Cookies

I’ve been a huge slacker on blogging lately, but if you’ve been following on social media or if you’re on my mailing list you’d know that I’ve had some big changes in the past few months. In November I had a baby and l’m currently on maternity leave. So far baby Gwenyth is healthy and happy and, although I’m a bit more tired than before, I can’t complain too much as she’s a decent sleeper too! I plan on coming back to work sometime in the springtime or summer to host my online classes again and I’ll be sure to keep you posted about my return via my newsletter.

In the meantime, I’ll be hanging out with Gweny, getting to know her better, and also cooking and baking a lot. Since she was born I’ve made a lot of muffins, loaves and cookies. I like to make something sweet each week. The recipes change, but they always tend to be made with more nutritious ingredients and I try to keep them lower sugar as I’m not a huge fan of super sweet sweets.

The recipe I’ve shared below is one of my go-to’s. I’ve made these cookies a lot! When I shared the recipe on social media I received so much positive feedback that I felt they were worthy of the blog. Please use the recipe below as a guideline and add or subtract whatever you’d like as this recipe can easily handle substitutions.

Snapseed 2.jpg

Ingredients:

3 mashed bananas
2 cups of oats (I used rolled oats, but quick oats would work)
1 cup of natural smooth or crunchy peanut butter (1/2 cup PB and 1/2 cup tahini or 1 cup other nut or seed butter of your choice)
1 teaspoon vanilla
1/2 cup shredded coconut
3 tablespoons maple syrup
Dairy-free dark chocolate chips (as much or as little as you’d like)
Sea salt (just a couple pinches to add into the recipe or to sprinkle on top)

Directions:

Preheat your oven to 350 F and line a baking sheet with parchment paper or a silicone liner.

Mix all of the ingredients together. You may choose to add or omit ingredients and/or swap the peanut butter for other nut or seed butters, or any mix of your favourite nut/seed butter (please note that if you use alternate butters - like tahini - you may need to adjust the sweetness a bit with extra maple syrup or extra chocolate chips). In the photo above you can see that I added pumpkin seeds. I also included chia seeds and some cinnamon. Other times I’ve made this recipe I’ve added ground flax, hemp, walnuts, and/or raisins. Be creative! Add your favourite ingredients as this is not your traditional cookie recipe and is very forgiving.

Once you’ve thoroughly mixed your ingredients taste the batter to make sure it’s to your liking, then create evenly sized balls (I usually get about 20 - 24 cookies as I keep mine on the smaller side) and place them on your baking sheet. Flatten them a bit with a fork or your hand. Transfer the sheet to the oven. Bake for 16 - 18 minutes. These cookies don’t really expand or become fluffy, but they will crisp up a bit on the bottom.

Once cooled you can store them at room temperature in an airtight container for a week or the freezer for a few months. Enjoy!

Falafel Roasted Chickpea Bowls

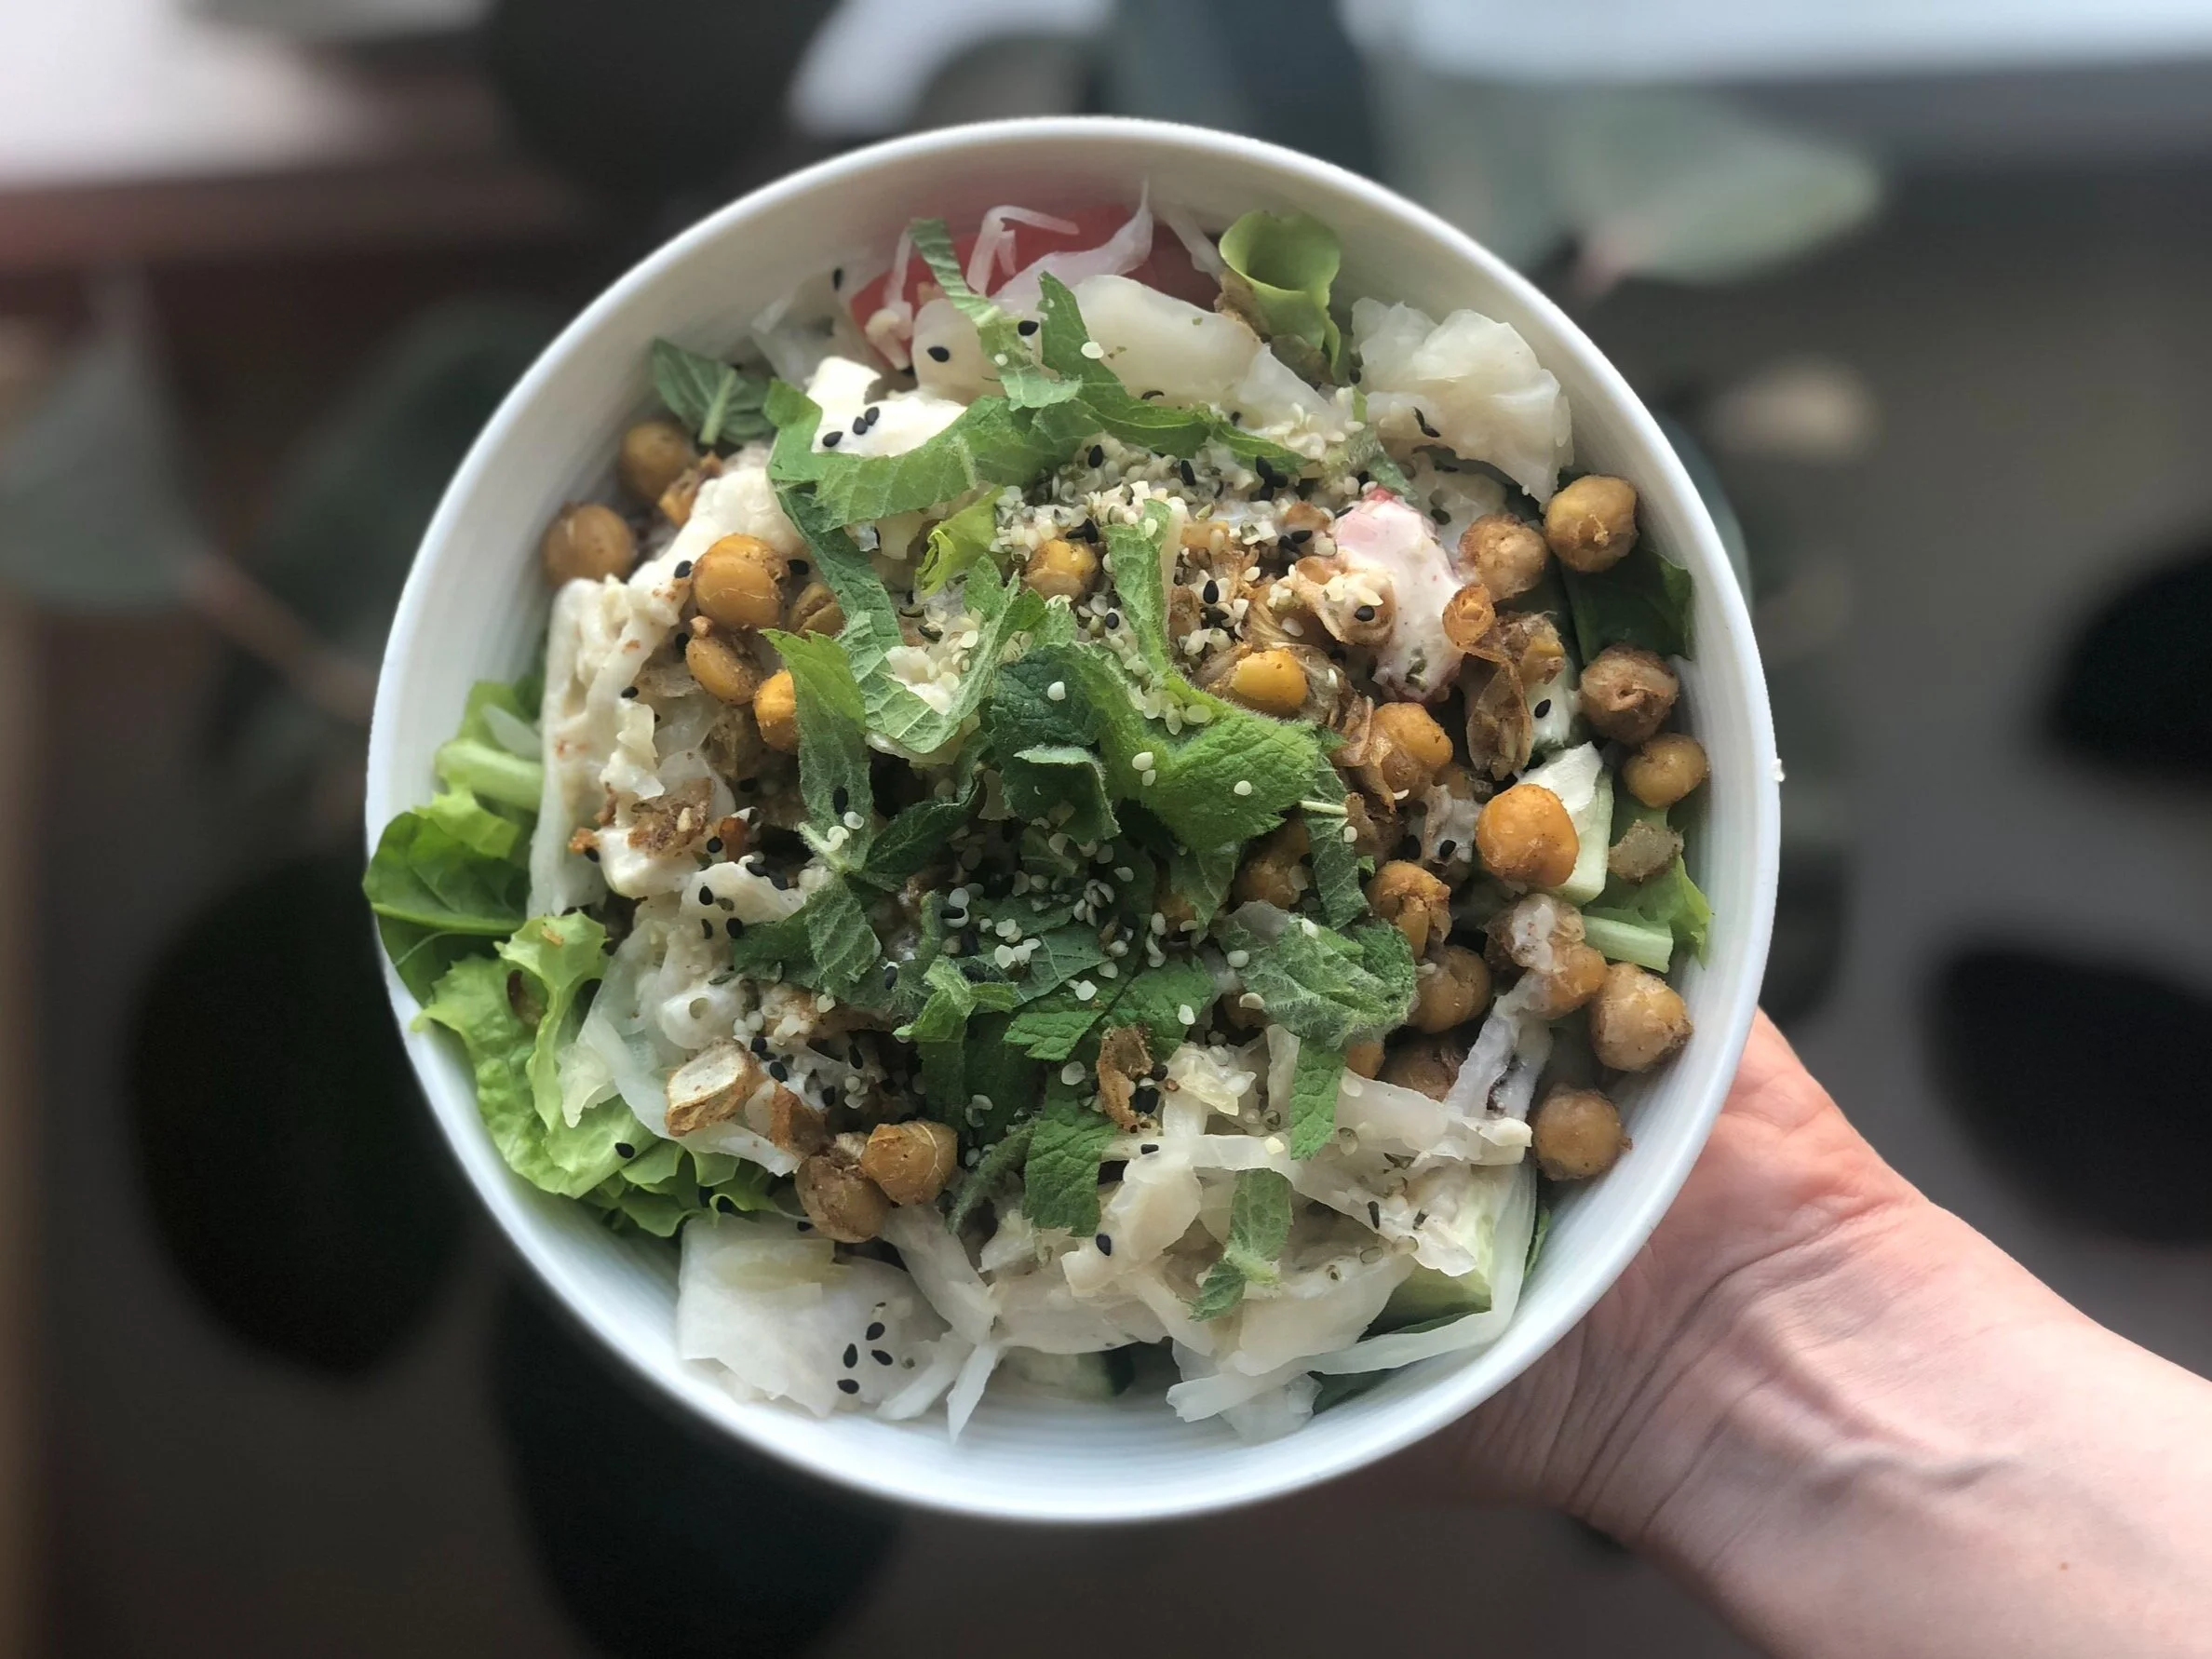
Summer is finally here and I’m very excited to be making lighter meals with more fresh local produce. I also started the summer series of my online cooking classes last weekend and we kicked off the lessons by making one of my personal favourite warm weather recipes: Falafel Roasted Chickpea Bowls!

This recipe is very flavour, colourful and, as you’ll see in the photos below, very versatile. You can use my recipes as guidelines or follow them to a tee, but because this recipe is so forgiving you can easily add your own twists or tweaks to satisfy your tastebuds.

Before we get to the recipe I wanted to show you a few photos that my cooking lessons participants shared with me on Instagram and in my private Facebook community page following last weekend’s lesson (you can click on the photos to enlarge them). It’s amazing how one recipe can yield such varied, yet delicious results. If you make this recipe be sure to take a photo and tag me on Instagram or in my Facebook group as I love seeing your creations.

Falafel Roasted Chickpea Bowls

Yields 4 - 6 servings

Ingredients:

Salad components:
Falafel Roasted Chickpeas (see recipe below)
1 - 2 cups grain of your choice, cooked
4 - 6 cups of mixed leafy greens
1 cucumber, chopped
1 pint grape tomatoes, sliced in half
Pickled beets, pickles or other pickled or fermented veggies, for garnish
Chopped mint or parsley, for garnish
Sesame seeds or hemp hearts, for garnish

Tahini dressing: 
1/3 cup tahini
Juice of half a lemon
1-2 cloves garlic minced
1/4 cup water or more 
1 tablespoon olive oil
1/4 teaspoon salt
Pinch of cayenne

Directions: 

To make the tahini dressing: Either Blend all ingredients in a blender until smooth or vigorously whisk all the ingredients together in a bowl or measuring cup. Add more water to make the dressing looser. Give it a taste and adjust the salt if needed. Transfer to a jar and store in the refrigerator until ready to serve.

To assemble your salad: Start by adding 1/4 cup grain of your choice and 1/4 cup Falafel Roasted Chickpeas to a large soup bowl (these ingredients may be eaten warm or cold). Then add approximately 1 cup of leafy greens and a handful of cucumber and tomatoes. Drizzle a generous portion of dressing overtop, and garnish your bowl with as many pickled beets and parsley as you see fit. A top with a sprinkling of sesame seeds.

****

Falafel Roasted Chickpeas

Ingredients:

2 (14 ounce/400 mL) cans of chickpeas or 3 cups cooked chickpeas
2 tablespoons olive oil
Juice of half a lemon
1/2 cup red onion, chopped
3 cloves garlic, minced
1 1/2 teaspoons cumin
1 teaspoon coriander
1 teaspoon salt
1/4 teaspoon black pepper
Pinch of cayenne

Directions: 

Preheat oven to 375 F and line a baking sheet with parchment paper or a silicon liner. If using canned chickpeas, rinse and drain the chickpeas.

Add the chickpeas, olive oil, lemon juice, onion, garlic, cumin, coriander, salt, pepper, and cayenne to a medium to large sized bowl and toss until all the chickpeas have been evenly coated.

Transfer the chickpeas to the prepared baking sheet and spread them out in to one even layer.

Bake for 35 to 40 minutes, stirring once halfway.  You may need to bake the chickpeas even longer depending on how dry and crunchy you want them to be. This depends on personal preference as well as the heat of your oven. Generally 40 minutes is sufficient, but I’ve also roasted them even longer to get a nice crunch!

Enjoy these chickpeas as part of the Falafel Bowl or on their own as a snack.  Store them in an airtight container for up to a week in the fridge.

If you enjoyed the recipe I shared above be sure to check out my Plant-Based Breakthrough program, which is a crash course in plant-based health, nutrition, and meal planning. For details about the program click here. You can also join the Plant-Based Breakthrough Community on Facebook where I share recipes, inspiration, and information on plant-based nutrition.

IMG_4240.jpg

Turmeric Quinoa Salad with Roasted Beets, Cabbage & Beans

It’s been a while since my last post and so much has changed since then. As I write this we’re currently into the third month of the COVID-19 pandemic and still very much practicing social distancing. This huge shift in our way of living was the push I needed to take the plunge into teaching online classes and workshop. While normally I teach in person here in Ottawa the last few months I’ve moved fully online and have been hosting virtual classes and corporate wellness workshop in my kitchen every week with folks from across Canada, the US and overseas. It’s been an amazing way to stay connected despite the fact that we’re physically distancing.

Since the weather’s warming up and we’re making the transition into lighter spring and summer dishes I figured it was time I shared a new recipe. This time of year I’m a big fan of hearty salads that can stand alone as a meal. In this week’s online cooking class we made a turmeric quinoa salad with roasted beets, red cabbage and beans. One of the participants, Alisha, said “It's the best quinoa salad I've ever had!” and others have been raving about it as well. I personally love that this salad contains anti-inflammatory turmeric and anti-oxidant rich beets and red cabbage. It’s full of colour and flavour, rich in protein and high in fibre so you can eat it as a meal, or serve it in small portions as a side dish. Scroll down for the full recipe and if you try it out, please let me know what you think!
Turmeric Quinoa with Roasted Beets, Cabbage, & Beans

Yields 6 - 8 servings

Ingredients:

1 large beet or 2-3 small beets (approximately 1 pound)
Olive oil
1 cup quinoa, rinsed and drained
1 1/2 cup water or low sodium vegetable broth
1/2 teaspoon turmeric
1/4 cup extra virgin olive oil
3 tablespoons apple cider vinegar
2 tablespoons maple syrup
1 - 2 tablespoons dijon mustard
1 teaspoon salt
1 can (398ml/14 oz) beans of your choice or chickpeas, drained and rinsed
1 cup loosely packed chopped parley
2 cups thinly sliced cabbage
Black pepper

Directions:

Preheat oven to 400 F and line a baking tray with parchment paper or a silicone liner. Peel and chop the beets into dice sizes pieces and add them to a medium sized bowl. Drizzle over about 1 teaspoon of olive and add a pinch of salt. Toss the beets to ensure they are evenly coated with oil. Lay the beets out on the baking tray and roast for 35 - 40 minutes (turning once half way) or until they are easily pierced with a fork.

Add the quinoa, water or broth, and turmeric to a small to medium sized sized pot. Bring the liquid to a boil, then cover and reduce to a simmer. Simmer for about 12 - 15 minutes or until quinoa is cooked, and then remove from the heat to cool for a few minutes. Then fluff the cooled quinoa with a fork.

To make the dressing, combine the olive oil, apple cider vinegar, maple syrup, dijon and 1 teaspoon of salt in a bowl, whisking well to combine.

To assemble the salad, add the cooked beets, quinoa, beans, parsley, cabbage and mix well. Pour over the dressing and mix until everything is evenly combined. Taste and season with additional salt (if needed) and a generous amount of black pepper. Enjoy this salad on its own either hot or cold as a main dish, or enjoy in smaller portions as a side dish to whatever you’re eating.

This will keep in the fridge in an airtight container for 5 days.

If you enjoyed the recipe I shared above be sure to check out my Plant-Based Breakthrough program, which is a crash course in plant-based health, nutrition, and meal planning. For details about the program click here. You can also join the Plant-Based Breakthrough Community on Facebook where I share recipes, inspiration, and information on plant-based nutrition.

FullSizeRender.jpg

Curried Pumpkin & White Bean Stew

I was invited in to the CBC Radio Ottawa studio to chat with Carmen Classen, host of All in a Day, about cooking Halloween pumpkins.  If you weren’t able to tune in live, you can catch the recording here

Snapseed.jpg

While I was in studio I gave Carmen a bowl of my Curried Pumpkin & White Bean Stew. She really liked it! I think you will too. Scroll down to get the full recipe. 

What I love about this stew is that it’s a great way to showcase a food that is often overlooked. In doing my research for the interview I learned that most pumpkins grown in Canada and the US are purchased for Halloween, only to end up in the landfill creating methane, a greenhouse gas that is much more potent than carbon dioxide. It’s a shame because pumpkins are very nutritious and can provide the base for so many different meals.

For example, I cut up my entire pumpkin, mostly into cubes. I discarded the skin, guts and stem in the compost. The cubed pumpkin yielded over 20 cups! I also kept few large slices with the skin on. (In case you’re wondering, I used combination of a large serrated bread knife and a chef’s knife to chop up my pumpkin.) With the cubed pumpkin I made red lentil and pumpkin soup, cinnamon roasted pumpkin, and the stew. I placed the large slices onto a parchment lined baking tray and roasted for an hour or so at 425 F. Roasting the pumpkin resulted in a rich, slightly sweet flavour. Very tasty! I mashed it up a bit (puree consistency) and added some to a smoothie and gave some to my dog (he is addicted!). I also roasted the seeds! I still have several cups of cubed pumpkin left and I plan on steaming or roasting these in the next day or so. I see pumpkin hummus in my future!

Here’s my challenge to those of you who are into pumpkin carving: if not this year, maybe next year make a plan to cook your pumpkin.  A carved pumpkin will only be good for a couple days, so carve it no earlier than the day before Halloween and be prepared to chop and process it as soon as possible. If you don’t have time to process it on Halloween night, pop the entire pumpkin in your fridge and store it there until the next day. Chop it up and cook your pumpkin within a couple days. Pumpkin puree, pumpkin soup and my stew freeze really well, so you can make big batches and freeze them for another time.  These are just a few of the countless ways you can cook with pumpkin. If you have any tips, ideas or suggestions for pumpkin, please share them with me in the comment section below.

unnamed-2.jpg

Curried Pumpkin & White Bean Stew 

Yields 6 - 8 servings

Ingredients:

1 tablespoon olive oil or coconut oil 
1 onion, diced 
2 carrots, chopped 
1 cayenne pepper including seeds (or other hot pepper of your choice), minced (optional)
2 cloves of garlic, minced 
1 tablespoon minced fresh ginger 
1 - 2 tablespoons of your favourite curry powder (I like Cha’s Organics Curry Masala)
6 cups of pumpkin, cubed 
540ml (19 oz) can of white beans of your choice (I used white kidney), drained and rinsed 
2 cups of vegetable broth
1 tablespoon tomato paste 
1 teaspoon of salt 
400 ml (14 oz) coconut milk (full fat or lite both work) 
3 - 4 tightly packed cups of chopped fresh spinach 
Chopped cilantro, for garnish
Lime wedges, for garnish 
Salt & Pepper 

Directions: 

Warm the oil in a large pot over medium-high heat. Add the onion and carrots and a big pinch of salt. Give it a stir and sauté for about 5 minutes or until the onions become slightly translucent.  Then add the cayenne (if using), garlic, ginger and curry spice. Give it a good stir and cook for another minute.

Add the pumpkin, white beans, vegetable broth, tomato paste and salt, give it a stir, cover and bring to a boil. Once boiling, reduce to low and simmer, stirring every so often, for about 15 minutes or until the pumpkin is easily pierced by a fork. 

Stir in the coconut milk and simmer for a few more minutes.  Then add the spinach and give it another stir.  Simmer for about 2 minutes or until the spinach has wilted.  Taste and season with extra salt and pepper as needed. If you’d like a sweeter stew, stir in a drizzle of maple syrup. 

Serve with grain of your choice or a slice of crusty bread. Top with chopped cilantro and a squeeze of fresh lime juice.

Will keep in the fridge for 5 days or frozen for 2 months. 

If you enjoyed the recipe I shared above be sure to check out my Plant-Based Breakthrough program, which is a crash course in plant-based health, nutrition, and meal planning. For details about the program click here. You can also join the Plant-Based Breakthrough Community on Facebook where I share recipes, inspiration, and information on plant-based nutrition.

Marinated Tofu & Veggie Skewers

During the springtime I taught a lot of cooking classes. The most popular class leading into the summer months was my “Veggie Grilling” class. If you follow me on social media you likely saw a few photos or videos from my classes and you definitely would’ve seen a few shots of the tofu & veggie skewers. I had a lot requests for this recipe and I’m happy to finally be sharing it with you while we’re still in the height of summer.

If you’re new to using tofu this is a great recipe to get you started. Tofu is a very neutral tasting plant-based protein which makes it perfect for marinating. Not to mention that extra firm tofu holds up very well on the grill. If you don't have a barbecue - don’t worry - you can still make this recipe. Follow the recipe exactly, but instead of using a grill, simply bake your skewers on a parchment lined baking sheet at 375 F for 30 - 40 minutes or until the tofu has firmed up and all the veggies are cooked through.

For a long time there was a misconception that if you don’t eat meat, there’s really not much worth grilling. I think these skewers will put that idea to rest. Try out this recipe and let me know if you agree!

MARINATED TOFU & VEGGIE SKEWERS

Yields anywhere from 8 - 12 skewers or 4 servings.

Ingredients:

350 g block of extra firm tofu, diced (big enough to fit on your skewers)
1/3 cup soy sauce or tamari
1/4 cup maple syrup
1/2 teaspoon smoked paprika or a few drops of liquid smoke
1/4 teaspoon chili flakes, optional 
2 garlic cloves, minced
1/2 red onion chopped into big chunks
1 bell pepper cut into large dice
1 zucchini cut into 1/2 inch thick rounds
1 pint cherry or grape tomatoes
1 pint mushrooms of your choice, cleaned off, stems removed

Directions:

Mix the soy sauce or tamari, maple syrup, smoked paprika or liquid smoke, chili flakes and garlic in a measuring cup to create the marinade. In a wide flat container or casserole dish, add the tofu and pour over the marinade. Cover and transfer the dish to the refrigerator for 1 hour to overnight, mixing occasionally to allow the tofu to absorb the marinade.

Drain the marinade into a saucepan, bring to boil and reduce to a simmer until it thickens, stirring occasionally. This could take about 20 minutes.

While you are reducing the marinade, thread the cubes of tofu and mixed veggies onto skewers.  Once the the marinade has thickened up nicely, brush it over the skewers so all the veggies have a light coating.

Preheat the grill to medium-high. Option to lightly brush the grill with some oil (unless it's nonstick).  Transfer your skewers to the grill and cook the skewers for 5 minutes on each side or until you have nice grill marks.  

Notes from the kitchen:
-For best results, be sure to drain off the excess water from the tofu when you take it out of the package. Then pat the tofu dry with a paper towel or dish cloth. This will allow the tofu to fully absorb the marinade. In case you’re wondering, you do not need to press the tofu, but if you’d like to, go ahead.
-If you’re using wooden skewers and grilling on a barbecue, make sure to soak your skewers in water for at least 30 minutes so that they don’t catch on fire.

This recipe is inspired by the Buddhist Chef’s tofu skewers.

If you enjoyed the recipe I shared above be sure to check out my Plant-Based Breakthrough program, which is a crash course in plant-based health, nutrition, and meal planning. For details about the program click here. You can also join the Plant-Based Breakthrough Community on Facebook where I share recipes, inspiration, and information on plant-based nutrition.

Veggie Quinoa "Fried Rice"

One of the best parts of my job is the opportunity to collaborate with others. I work with a variety of brands, health food products, and business owners quite regularly. Although I am self-employed the collaborative nature of my work really fills me up and I rarely feel like I’m working alone.

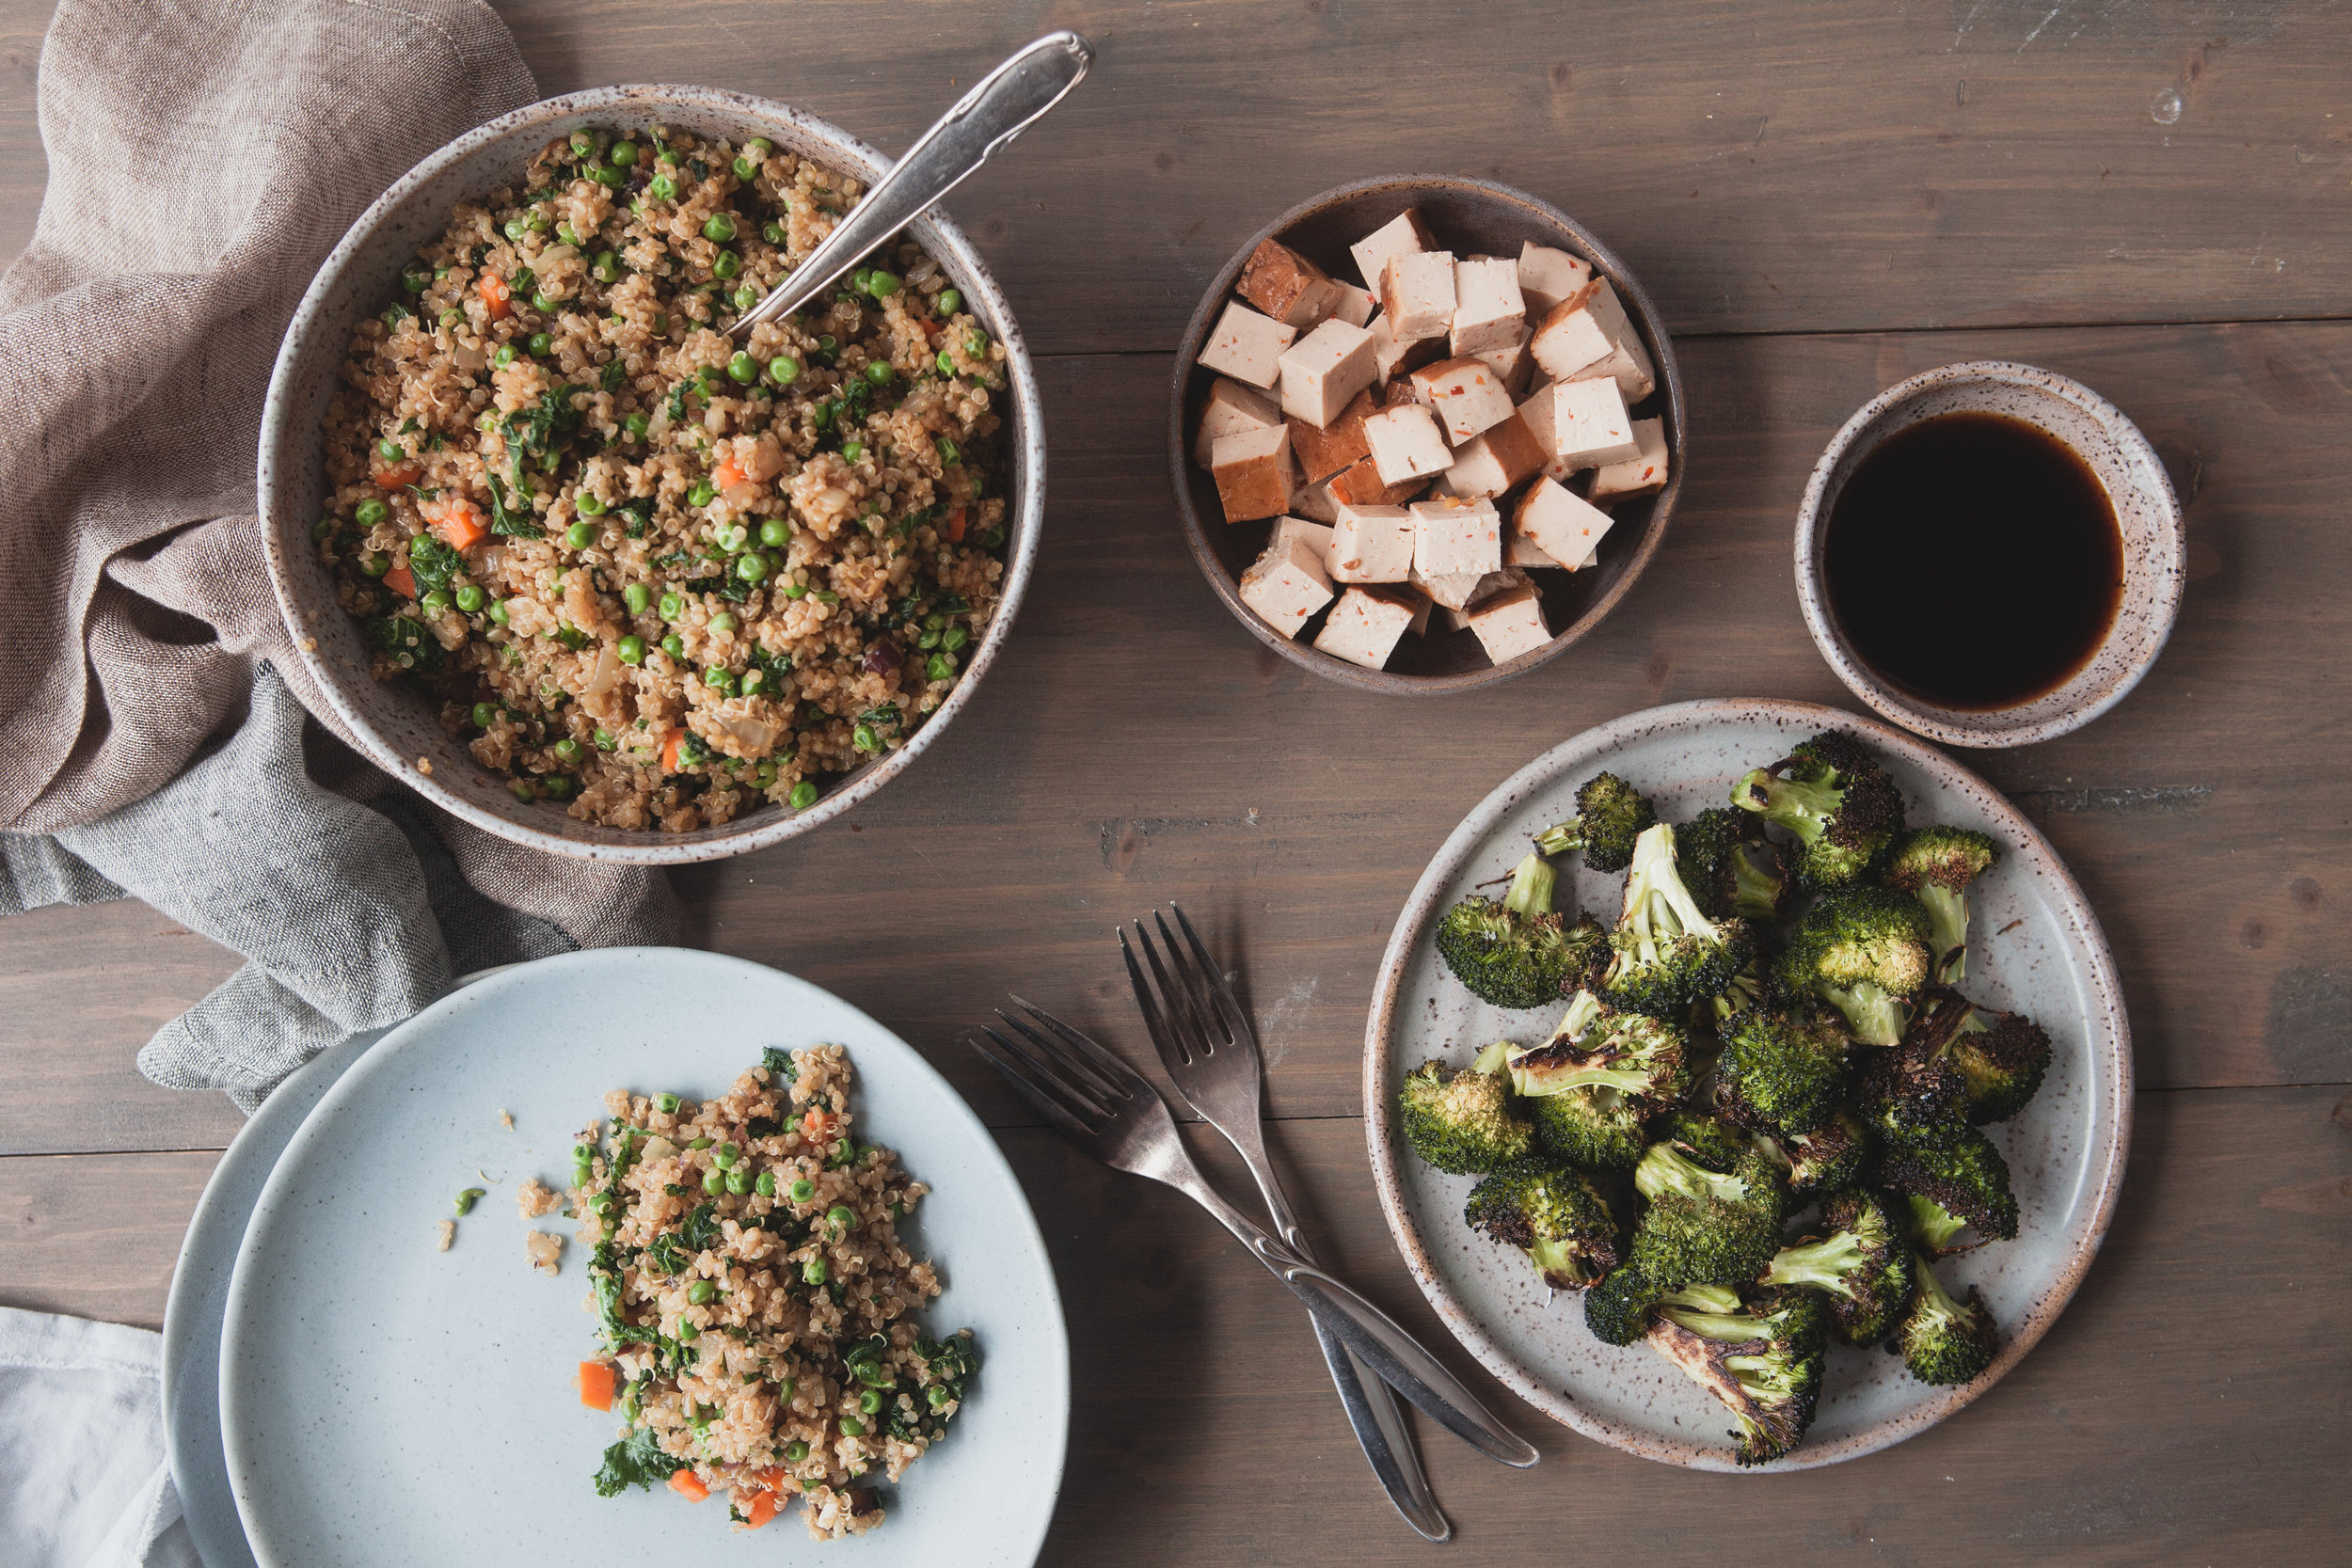
This blog post was a collaborative effort with Debra Cowie, who is somebody I greatly admire. Debra is a leading Canadian food stylist and photographer known for her gorgeous flat lays and clean aesthetic. She just so happens to live in Ottawa and we have naturally crossed paths over the past few years. Mostly recently Debra expressed an interest in cooking more plant-based foods. She enthusiastically joined Plant-Based Breakthrough, my online nutrition and meal makeover program, and took part in both the winter and spring sessions in 2019. Having her part of the program was a bit intimidating for me because she’s a true foodie, a great cook, and really knows her stuff when it come to all things culinary. I couldn’t have been more thrilled when she said she really enjoyed the recipes and has started incorporating many of them into her rotation. Coming from her, that was one of the highest compliments. She also kindly snapped several beautiful photos of the recipes featured in the program and I’m pleased to share the first (of many!) on my blog this week.

One of Debra’s favourite recipes from the program was my Veggie Quinoa “Fried Rice”. It’s a healthy spin on the classic take-out dish fried rice and features protein-rich quinoa, hearty kale, aromatic spices, and lots of other veggies. Debra served up her Veggie Quinoa “Fried Rice” with a side of smoked tofu and roasted broccoli. See her beautiful photo below and then keep scrolling for the full recipe.

Quinoa Fried Rice.jpg

VEGGIE QUINOA “FRIED RICE”

Yields 4 - 6 servings 

Ingredients: 

1 cup dry quinoa, rinsed under cold water 
1.5 cups low-sodium organic vegetable broth
1 tablespoon toasted sesame oil or coconut oil
1 bunch kale, stems roughly chopped, leaves ripped or chopped into bite-sized pieces
1 onion, small dice
1 carrot, small dice
1 rib of celery, small dice
3 cloves garlic, minced
1 tablespoon fresh ginger, minced
1 bunch of green onions, thinly sliced
2 cups green peas
1/4 cup regular or low sodium tamari or soy sauce
Sriracha or hot sauce of your choice, optional
Sea salt

Directions:

In a medium pot, add the quinoa and the vegetable broth. Bring to a boil, then reduce heat to low and simmer uncovered for 12 - 15 minutes, or until the liquid is absorbed and the quinoa is light and fluffy. Then transfer the quinoa to a bowl.

In a large skillet or wok, warm the oil over over medium heat. Add the onion, carrots, celery, kale stems and a pinch of sea salt and sauté for about 5 minutes, stirring frequently until it becomes fragrant and the veggies start to soften. Add the garlic, ginger and green onions, and sauté for a minute or two. Add the kale leaves and sauté until it begins to wilt (about 2 minutes).

Add the quinoa and peas to the skillet. Then pour in the tamari or soy sauce and stir until everything is evenly combined. Serve warm and enjoy on its own or with a side dish of your choice.

Will keep in the fridge for about 5 days.

If you enjoyed the recipe I shared above be sure to check out my Plant-Based Breakthrough program, which is a 4 week online crash course in health, nutrition, and meal planning.  For details on when the next program starts click here. You can also join the Plant-Based Breakthrough Community on Facebook where I share recipes, inspiration, and information on plant-based nutrition.

Quick & Easy Banana Oat Pancakes

My husband Jeremy has been making me pancakes for breakfast quite regularly on the weekend for years. On Saturday mornings when I get home from the gym he’ll have pancakes waiting for me. His recipe is not necessarily complicated, but it’s not super fast to make which is why pancakes were reserved exclusively for weekends or when we have more time to prep, cook and clean up.

I was recently in Alabama visiting my my sister and her family. One morning my 3 year-old-niece Marley wanted me to make her pancakes. I was tempted to make Jeremy’s recipe, but time was tight and there was lots of commotion as we hurried to get Marley ready for daycare. It dawned on me that I could probably simplify things a bit and create a quick, easy recipe that my niece would like and that my sister could recreate on busy mornings. I took to google as I usually do and came across this stellar recipe from Ambitious Kitchen. I ultimately ended up modifying the recipe but it provided the inspiration I needed. I’ve changed the quantities a bit, made some omissions and additions, but from the get-go these pancakes were a huge hit with my niece. My sister and my mom have both started making this recipe regularly. Jeremy also loves the simplicity of this recipe and he’s been making pancakes more often… even on weekdays!

This super simple recipe is vegan and gluten free. It contains ingredients most of us are likely to have in our kitchens. Bananas, oats, plant-based milk, vanilla, cinnamon, baking powder & salt. That’s it! The bananas give the pancakes some sweetness and the oats take the place of flour. Although you could use quick oats, I recommend using rolled oats as they are higher in protein and fibre. Jeremy and I have played around with different variations of this recipe and have added flax and protein powder with great success.

Just a little disclaimer: these will not be your typical white, fluffy diner style pancakes. They are a bit more dense and not-so-fluffy, but if you are looking for a healthy, yet delicious, and quick alternative, give these a try! Scroll down for the full recipe and be sure to let me know how it goes or if you make any of your own modifications.

unnamed-1.jpg

BANANA OAT PANCAKES

Makes 6 - 8 small pancakes

Ingredients:

2 ripe bananas, peeled and roughly chopped
1 cup of unsweetened plant-based milk
1 cup of rolled oats (not quick oats)
1/2 teaspoon of vanilla extract
1 teaspoon of cinnamon
1 heaping teaspoon of baking powder
A big pinch of sea salt

Directions:

Add the bananas and plant-based milk to a blender and process on high for a minute (or until the bananas are thoroughly blended into the milk). Then add the rest of the ingredients and blend on high speed for a minute or two until the oats are fully processed and you have a nice, even batter consistency. If the batter is too thick you might need to loosen it by adding a bit more plant-based milk.

Warm a non-stick frying pan or griddle on medium-high heat. Lightly coat the surface with a bit of oil. Once the pan is hot pour the batter (in 1/4 - 1/3 cup batches) onto the hot surface directly from the blender or scoop out some batter using a ladle or measuring cup. Make sure the pancakes are relatively thin or they may not cook all the way through. Cook the first side until bubbles form on top (about 4 minutes). Gently lift the edges around the pancake with a spatula and then you should easily be able to flip it. Cook on the other side for 2 - 3 minutes. The pancake should be golden brown on both sides. Clean off the surface of your pan or griddle, if needed. Repeat this process until you’ve used up all the batter.

Enjoy your freshly made pancakes topped with hemp hearts, blueberries, extra banana, maple syrup, nut or seed butter, or other toppings of your choice. We usually eat all our pancakes in one sitting, but they can be refrigerated for 3 - 4 days, or frozen for a month or so.

Notes from the kitchen:
- I’ve never had any trouble with this recipe, however if you your pancakes are too thick or too runny, you may need to increase the plant-based milk or the amount of oats.
- If the pancakes are still “raw” on the inside after cooking them, it could mean that your batter is to thick, or that your pancakes were too thick. Sometimes flattening down the pancakes when they are on the skillet or in the pan can help with this.
-A hot non-stick surface is the key to perfect pancakes. You’ll want to warm the pan/skillet for a few minutes before adding your batter.

If you enjoyed the recipe I shared above be sure to check out my Plant-Based Breakthrough program, which is a crash course in plant-based health, nutrition, and meal planning. For details about the program click here. You can also join the Plant-Based Breakthrough Community on Facebook where I share recipes, inspiration, and information on plant-based nutrition.

Chili Roasted Sweet Potatoes

If you’ve ever been to one of my events, cooking lessons, or yoga retreats where you’ve had the opportunity to eat or make one of my Buddha Bowls, you’d be familiar with my chili roasted sweet potatoes. As you’ll see in the photo below, they look like sweet potatoes that are slightly overcooked. I didn’t burn them, I swear, they are simply coated with lots of tasty chili spice which plays nicely into the sweetness of the sweet potatoes.

This is a really simple recipe that can be enjoyed as a part of my Buddha Bowls or used as a side dish for any meal. You don’t necessarily need to cut them into cubes as I suggest below. You could turn them into chili fries by cutting them into long strips or even try spiralized chili roasted curly fries. Just note that cooking times will vary depending on how big or small (or curly) your sweet potatoes are. By the way, I’ve made this recipe using peeled and unpeeled potatoes. I tend to like the texture of roasted sweet potatoes with the skin. That said, if I have organic sweet potatoes I'll leave the skin on, and if I end up with conventionally grown, I’ll peel them.

Scroll down for the full recipes! If you try it out, please let me know how it goes. Tag me on Instagram and I’ll be sure to share your photos.

CHILI ROASTED SWEET POTATOES 

Makes 4 to 6 servings.

Ingredients:

2 pounds of sweet potatoes (~3 small sweet potatoes) 
1 -2 tablespoons chili powder, to taste
2 tablespoons olive oil or melted coconut oil
1 teaspoon garlic powder, optional
1/4 - 1/2 teaspoon salt, to taste
Freshly ground black pepper, to taste

Directions: 

Preheat your oven to 375ºF. Line a baking sheet with parchment paper or a silicon liner.

Thoroughly wash the sweet potatoes, then cut them into dice sized pieces. Place the sweet potatoes in a large bowl and drizzle over the oil and sprinkle on chili powder, garlic powder, salt & black pepper. Toss the potatoes until evenly coated in oil and spices.

Spread the seasoned sweet potatoes evenly over the baking sheet in a single layer. Transfer the baking sheet to the preheated oven and bake for 25 minutes, stirring once half way through. By 25 minutes the sweet potatoes should have softened and slightly browned on the edges. However, total cooking time will ultimately depend on the size of your cubes. If they are not softened to your linking, cook them for 5 - 10 minutes more.

These will keep in the fridge for 5 days.

If you enjoyed the recipe I shared above be sure to check out my Plant-Based Breakthrough program, which is a crash course in plant-based health, nutrition, and meal planning. For details about the program click here. You can also join the Plant-Based Breakthrough Community on Facebook where I share recipes, inspiration, and information on plant-based nutrition.

Swiss Chard, Quinoa & Red Lentil Soup

Three words I would use to describe this soup: simple, nutritious and satisfying. It’s a recipe I’ve been sharing with clients and making at cooking lessons for ages. Most recently I made a batch and shared a photo in my Instagram stories and I received so many requests for this recipe! So here we are! It’s officially live on the blog.

Just a few notes before diving in! Firstly, I used swiss chard this time around, but I’ve also used kale and collards with great success. I also strategically included turmeric and ginger as I’m always trying to find ways to incorporate these anti-inflammatory superstars into my cooking. I must mention that while this is a soup, it really does hold up as a meal on its own. Between the red lentils and quinoa, you’re getting a really nice portion of plant-based protein. The complex carbohydrates from the potatoes will keep you full longer. Plus, it’s a one-pot wonder and it freezes well. Wins all around with this soup!

Scroll down to get the full recipe! If you try it out, please let me know. I truly appreciate getting your feedback on my recipes.

unnamed-2.jpg

SWISS CHARD, QUINOA & RED LENTIL SOUP

Makes 4 to 6 servings

Ingredients:

1 tablespoon olive oil or coconut oil
1 yellow onion, diced
2 medium carrots, chopped into small pieces
2 ribs of celery, finely chopped
1 bunch of swiss chard, stems roughly chopped, leaves ripped or chopped into bite-sized pieces
4 cloves garlic, minced
1½ teaspoon ground cumin
½ teaspoon ground ginger or 1 tablespoon fresh ginger finely minced
½ teaspoon ground turmeric or 1 tablespoon fresh turmeric very finely minced
1 - 2 teaspoons sea salt, or to taste
2 medium potatoes, washed and chopped into bite-sized pieces (If organic, no peeling required!)
1 cup red lentils
½ cup dry quinoa, rinsed and drained
8 cups water
Freshly ground black pepper

Directions:

Warm the oil in a large pot over medium heat. Sauté the onions, carrots, celery and chard stems until tender, about 8 minutes.

Add in the minced garlic and sauté another minute, just until fragrant (if using fresh ginger and/or turmeric add it with the garlic). Add in the cumin, dried ginger, dried turmeric, salt, potatoes, lentils, quinoa, water and bring the soup to a boil. Once boiling, lower the heat and cover the pot to let everything simmer until the lentils are tender, about 20 minutes.

Once the lentils and vegetables have softened, stir in the chopped chard leaves and cook until they are wilted, just a few minutes. Season with additional salt, if desired, and serve warm with freshly ground black pepper. If you like a little heat, try adding chili flakes or a hot sauce of your choice.

Leftovers can be stored in the fridge for up to 4 days or frozen for about 2 months.

If you enjoyed the recipe I shared above be sure to check out my Plant-Based Breakthrough program, which is a crash course in plant-based health, nutrition, and meal planning. For details about the program click here. You can also join the Plant-Based Breakthrough Community on Facebook where I share recipes, inspiration, and information on plant-based nutrition.

Tempeh Bolognese on Zucchini Noodles

Before I even dive into the recipe, I should probably tell you a little about tempeh. Maybe you’ve seen it but have been intimidated to try it, or maybe you’ve never even heard of it before. Either way, tempeh is becoming more and more popular, but I wouldn’t say that it’s a mainstream staple yet. So what exactly is it? Tempeh is a plant-based protein. Like tofu, it’s made from soy beans, but the taste and texture is very different due to the way it’s prepared. Unlike tofu, tempeh is a fermented food. It’s a staple in Indonesia and it’s slowly making headway among vegans, vegetarians and flexiarians everywhere.

I enjoy cooking tempeh in many ways. I love cutting it into small cubes, marinating it in a peanut ginger sauce, and baking it in the oven. I also make a smokey tempeh “bacon” by coating the tempeh in a maple, tamari and smoked paprika marinade. It can also easily be incorporated into stir-fry or added as the protein in pasta sauces, stews, soups, curries, tacos, and more!

In this video collaboration with my friend Lynda you’ll learn more about tempeh and find out how I use it to make a tasty bolognese sauce. I served the sauce over zucchini noodles (to up the veg!) and topped it with plant-based cheese from Lynda’s company Fauxmagerie Zengarry. Watch our video below, or scroll down for the text version of the recipe.

TEMPEH BOLOGNESE ON ZUCCHINI NOODLES WITH CASHEW CHEESE

Makes 4 - 6 servings

Ingredients:

1 package of tempeh
3 tablespoons, extra virgin olive oil
1 cup, red wine
1 onion, peeled and diced small
1 large carrot, diced small
2 ribs celery, diced small
1 teaspoon salt
2 cloves of garlic, minced
1 teaspoons dry oregano (if fresh is available use 1 tablespoon)
1 teaspoons dry basil (if fresh is available use 1 tablespoon)
1 jar (680 ml) strained tomatoes ("passata")
Black pepper to taste
Optional: sweetener such as maple syrup, to taste, if the sauce seems too acidic
1/2 round Fauxmagerie Zengarry Creamy Swiss cashew cheese, frozen & grated
2 - 4 medium zucchini, spiralized into noodles

Directions:

Grate the tempeh on the large teeth of a box grater or crumble it using your hands. Sauté the tempeh in 2 tablespoons of olive oil until browned. Add a few splashes of water if tempeh starts to stick.

Add the remaining olive oil and the onion, carrot and celery, with 1 teaspoon of salt, keep cooking until the vegetables have softened.

Add the garlic, oregano and basil, and cook for a few minutes longer (unless you are using fresh oregano and basil then add fresh ingredients near the end of the cooking time). Add 1 cup of red wine and simmer until almost dry.

Pour in the strained tomatoes and cook covered for 15-20 minutes. Taste the sauce and season with salt and pepper and sweetener (if needed). Serve the sauce over zucchini noodles (either raw or lightly warmed in a frying pan) and topped with grated Fauxmagerie Zengarry Creamy Swiss cashew cheese. Enjoy!

Notes:

-See Zengarry’s website to find retailers near you. If you cannot find Zengarry in your city or town, you can always swap in another plant-based cheese of your choice, either store bought or homemade. Alternatively you could top your dish with nutritional yeast flakes to add some cheesiness or enjoy the dish on its own!

If you enjoyed the recipe I shared above be sure to check out my Plant-Based Breakthrough program, which is a crash course in plant-based health, nutrition, and meal planning. For details about the program click here. You can also join the Plant-Based Breakthrough Community on Facebook where I share recipes, inspiration, and information on plant-based nutrition.

6647ae_2de8544a170b4cb4bbc0a257607e07f4%7Emv2_d_3024_4032_s_4_2.jpg

Green Curry Soup

Have you seen our newly revamped Canada’s food guide yet? It’s a hot topic these days and it generated a whole lot of fun discussion on my Instagram post. The new evidence based guide ditches dairy as a food group and heavily emphasizes plant-based foods. It also includes healthy habits such as choosing water as a primary beverage, eating with others, spending more time cooking at home and being aware of food marketing.

Unlike former iterations of the guide, our new one highlights plant-based proteins. Speaking of which, I recently made a green curry style soup that conveniently features three kinds of plant proteins: tofu, green peas, and soy bean sprouts. This trifecta of proteins paired with homemade green curry sauce and coconut milk resulted in one of the most delicious soup I've ever created.

When you scroll down, don't be alarmed by the list of ingredients. This recipe is soup-er easy to make (45 minutes start to finish), you'll learn how simple it is to DIY a flavourful green curry-style sauce, and you'll have leftovers for the next couple of days.  Scroll down for the full recipe!

unnamed.jpg

VEGAN GREEN CURRY SOUP 

Makes 6 - 8 servings

Ingredients: 

Green curry sauce: 

1 bunch of cilantro, stems and leaves washed and roughly chopped
1 bunch of parsley, stems and leaves washed and roughly chopped
1 thumb sized piece of ginger, sliced
1 - 2 hot peppers (I used habanero, but jalapeño or another spicy pepper would work), chopped
3 cloves of garlic
Juice of 2 limes
1 teaspoon sea salt 

Soup base: 

1 tablespoon coconut oil
1 onion, diced
1 large carrot, finely chopped
2 ribs celery, finely chopped
8 oz mushrooms of your choice, sliced
1 can (400 ml / 14oz) of full fat coconut milk 
1 block of firm tofu, large dice
1 can (199 ml) bamboo shoots (optional) 
1 cup green peas
1 bunch greens of your choice (I used dandelion), washed and finely chopped 
3 - 4 cups soy bean or mung bean sprouts (optional)
Sea salt & pepper 

Black rice ramen (I used Lotus Foods brand) or rice noodles, cooked according to package directions

Directions:

In a blender process all of the green curry ingredients to a smooth, sauce-like consistency.  You may need to add a bit of water to get things going.

Warm the coconut oil in a large soup pot over medium heat. Add onion, celery and carrots, and a big pinch of salt, and cook until the onions become translucent (about 5 minutes).  Add the mushrooms and cook them for a few minutes until they have softened and start releasing water. 

Add the green curry sauce to the pot, along with the coconut milk, tofu, bamboo shoots, and peas. You will also want to add 3 - 4 cups of water depending on how thick you want your soup to be. Bring the soup to a gentle simmer, then stir in the greens and sprouts.  Cook until the greens have wilted and the sprouts have softened. Taste the soup and season with sea salt and pepper if needed. 

Transfer a portion of your noodles to a soup bowl and pour the green curry soup over top.  Enjoy!

If you enjoyed the recipe I shared above be sure to check out my Plant-Based Breakthrough program, which is a crash course in plant-based health, nutrition, and meal planning. For details about the program click here. You can also join the Plant-Based Breakthrough Community on Facebook where I share recipes, inspiration, and information on plant-based nutrition.

My Go-To Tofu Scramble

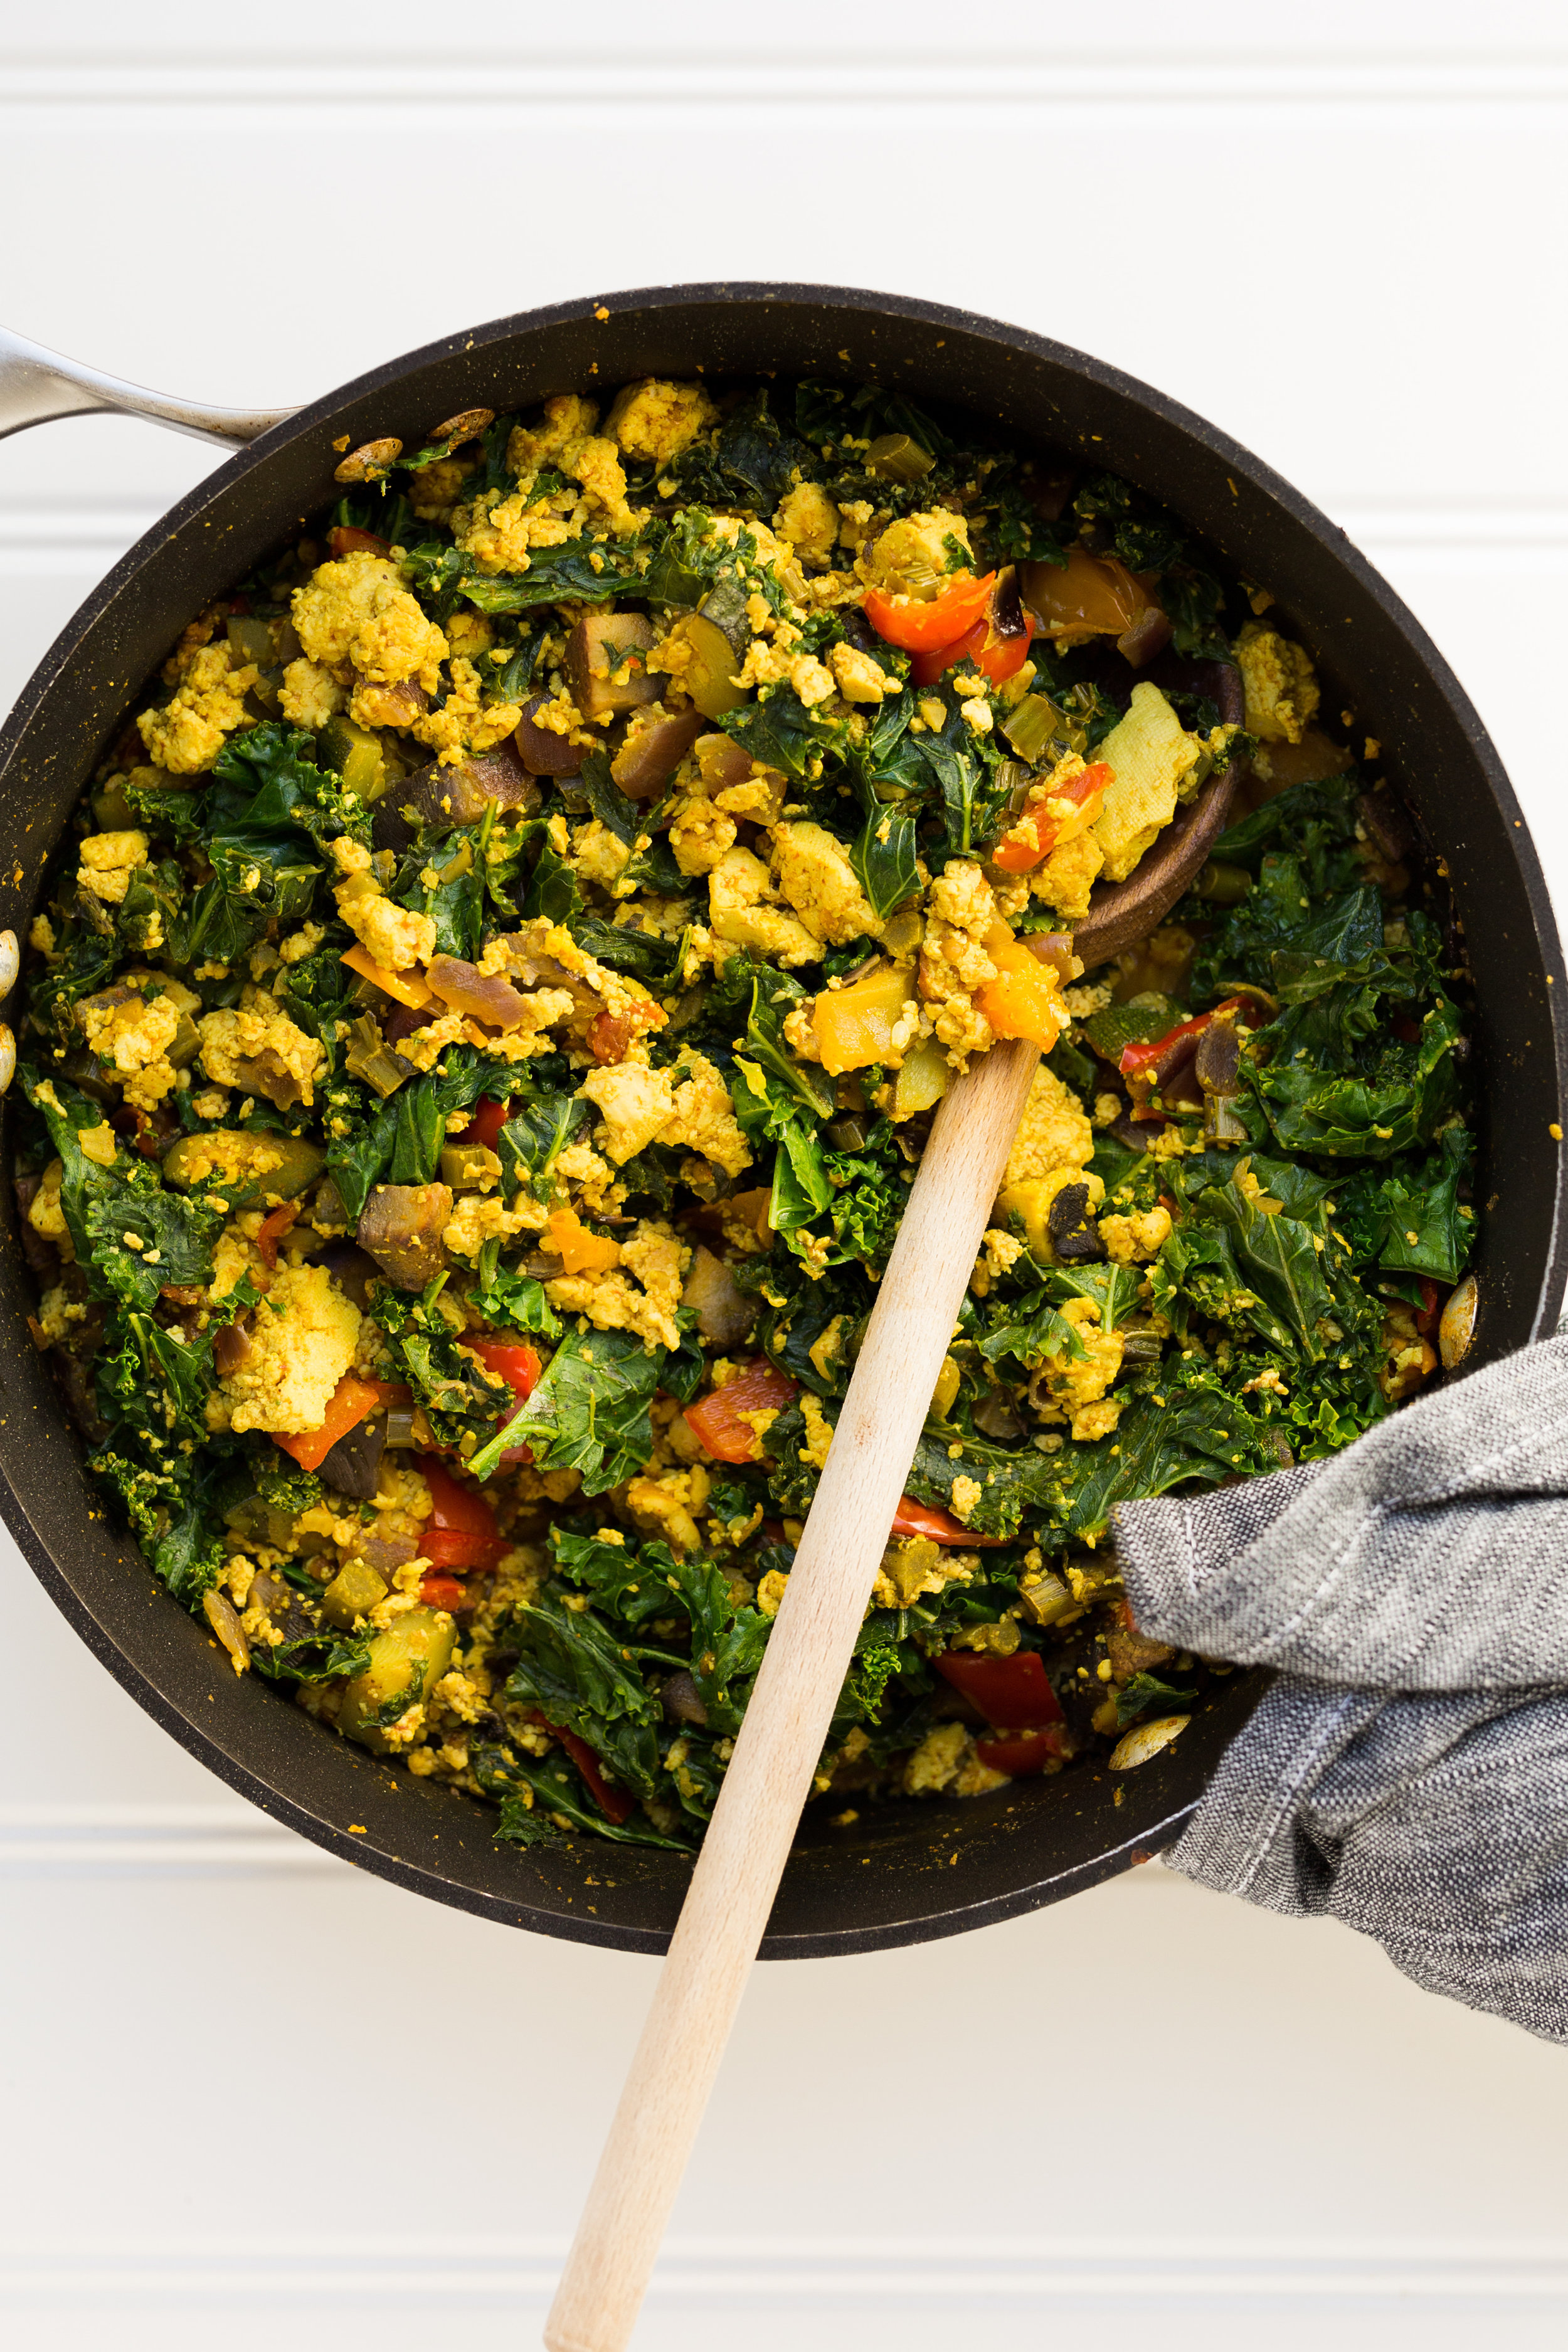
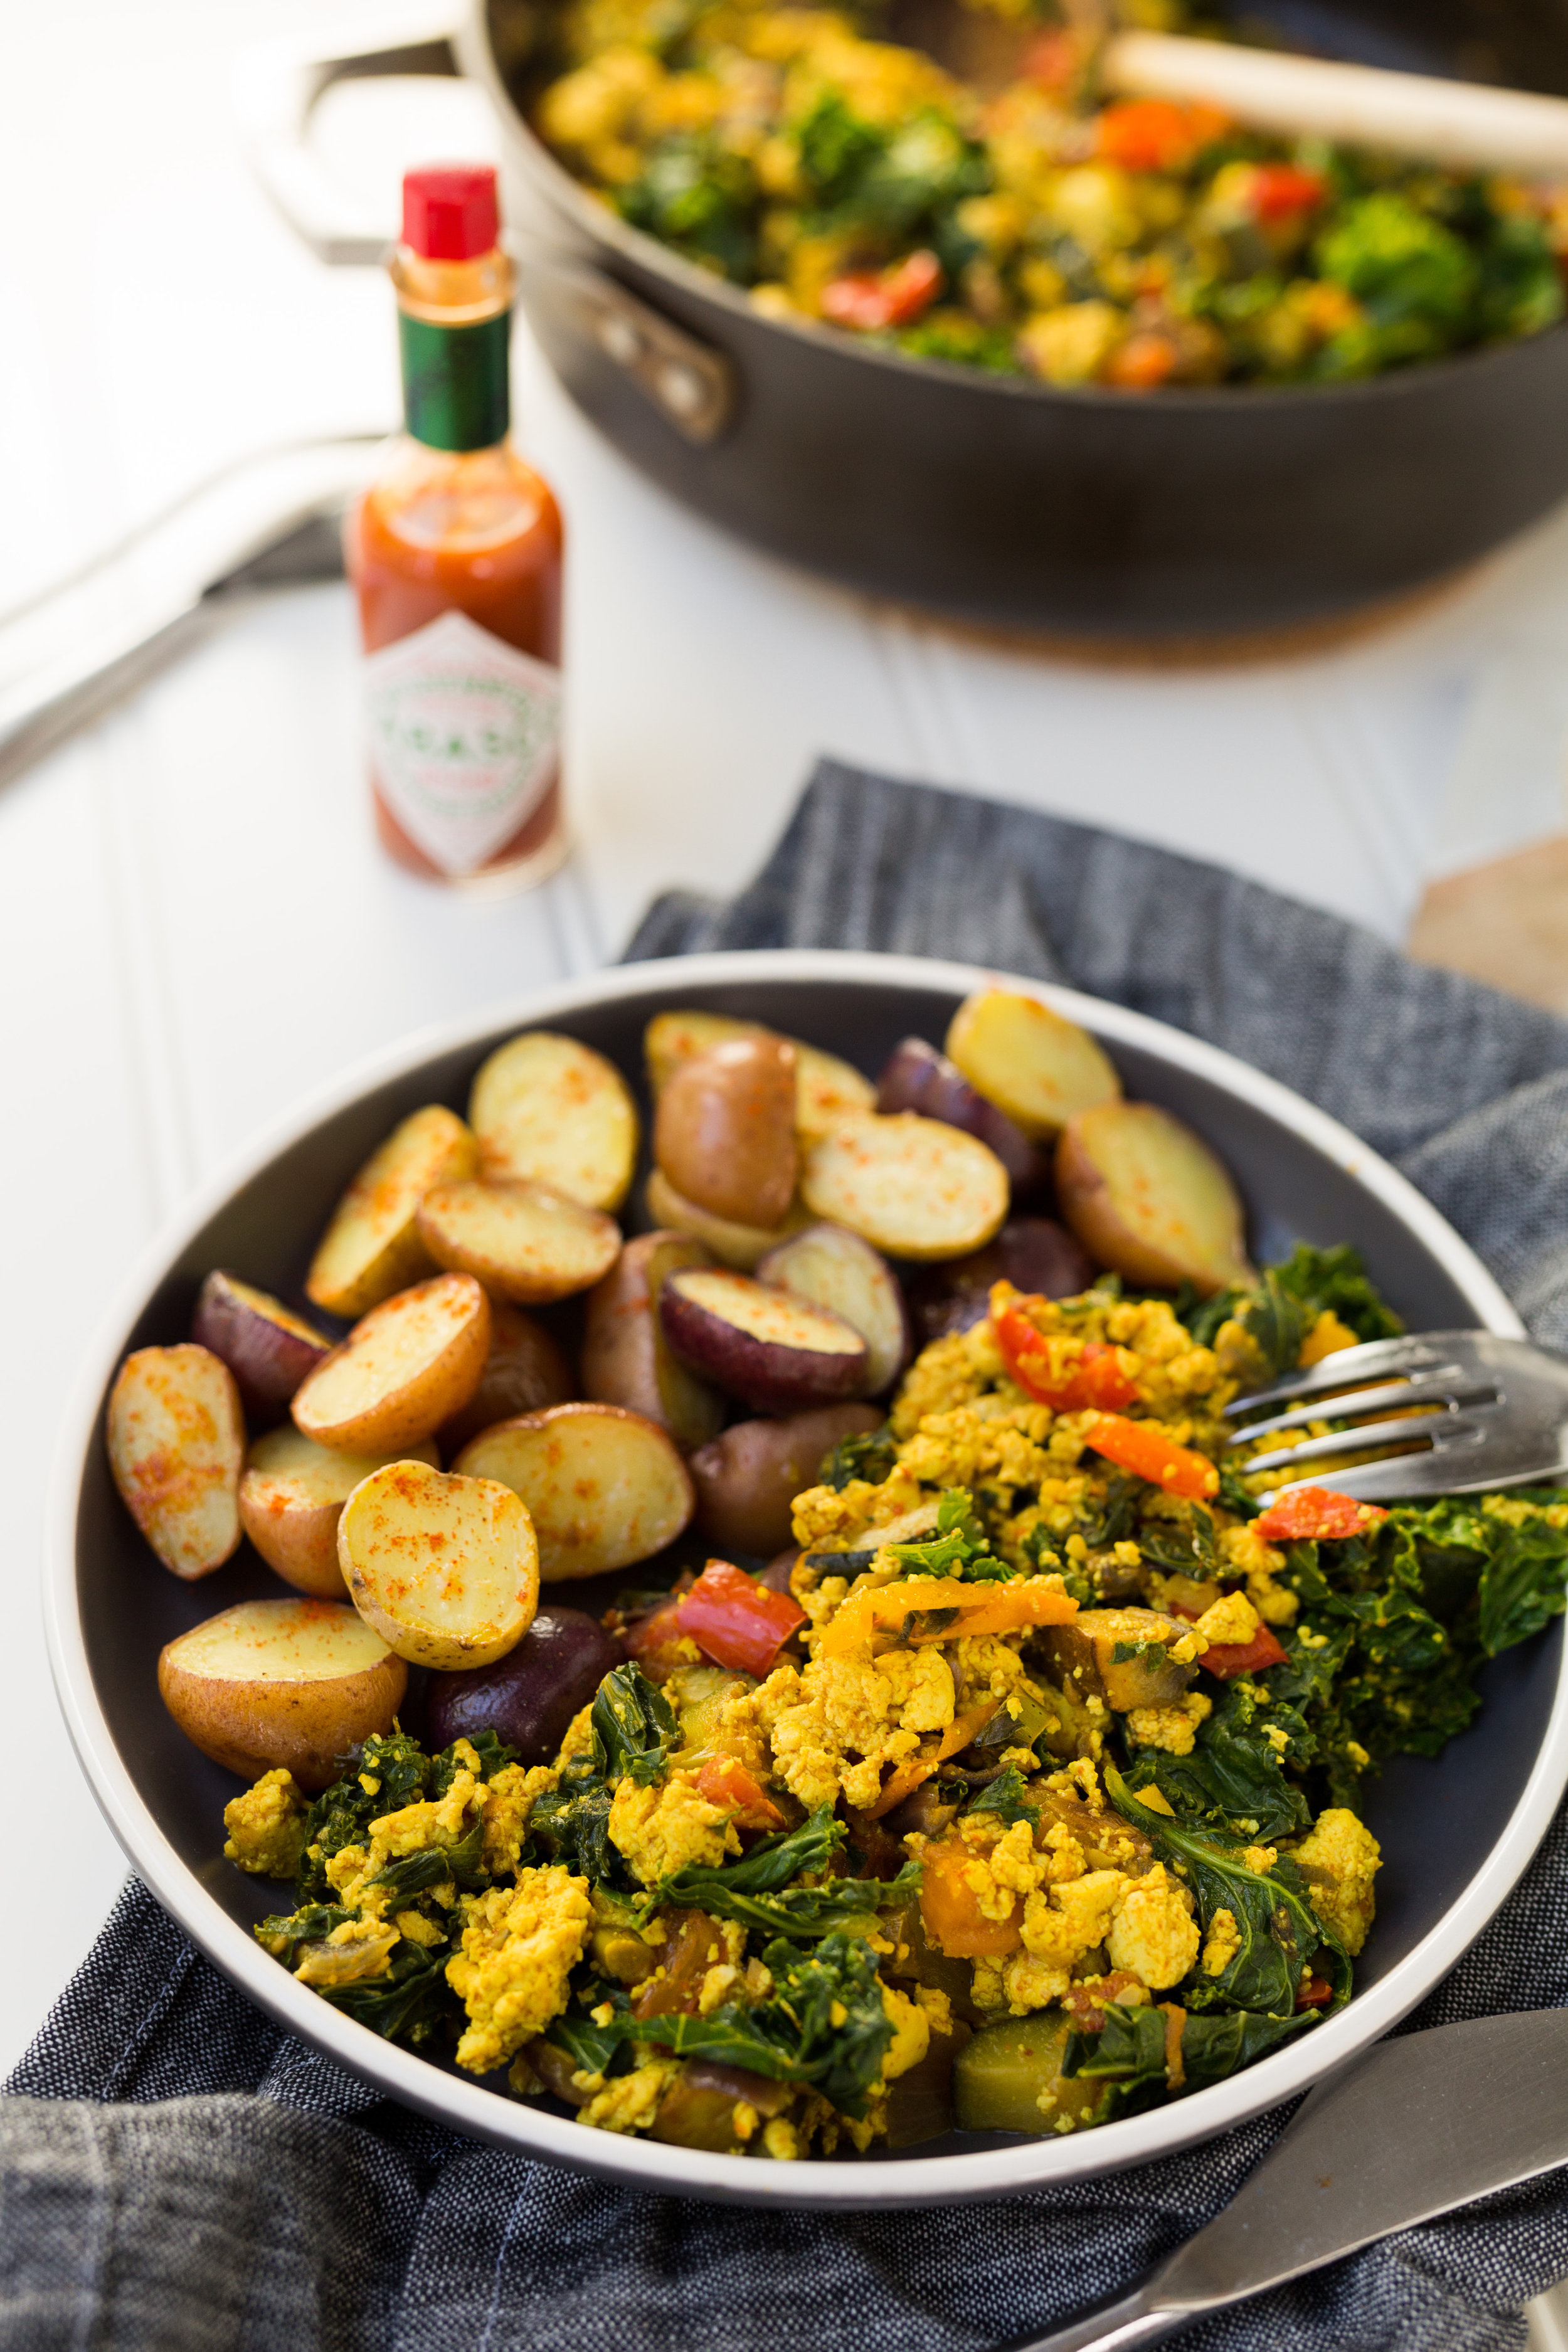
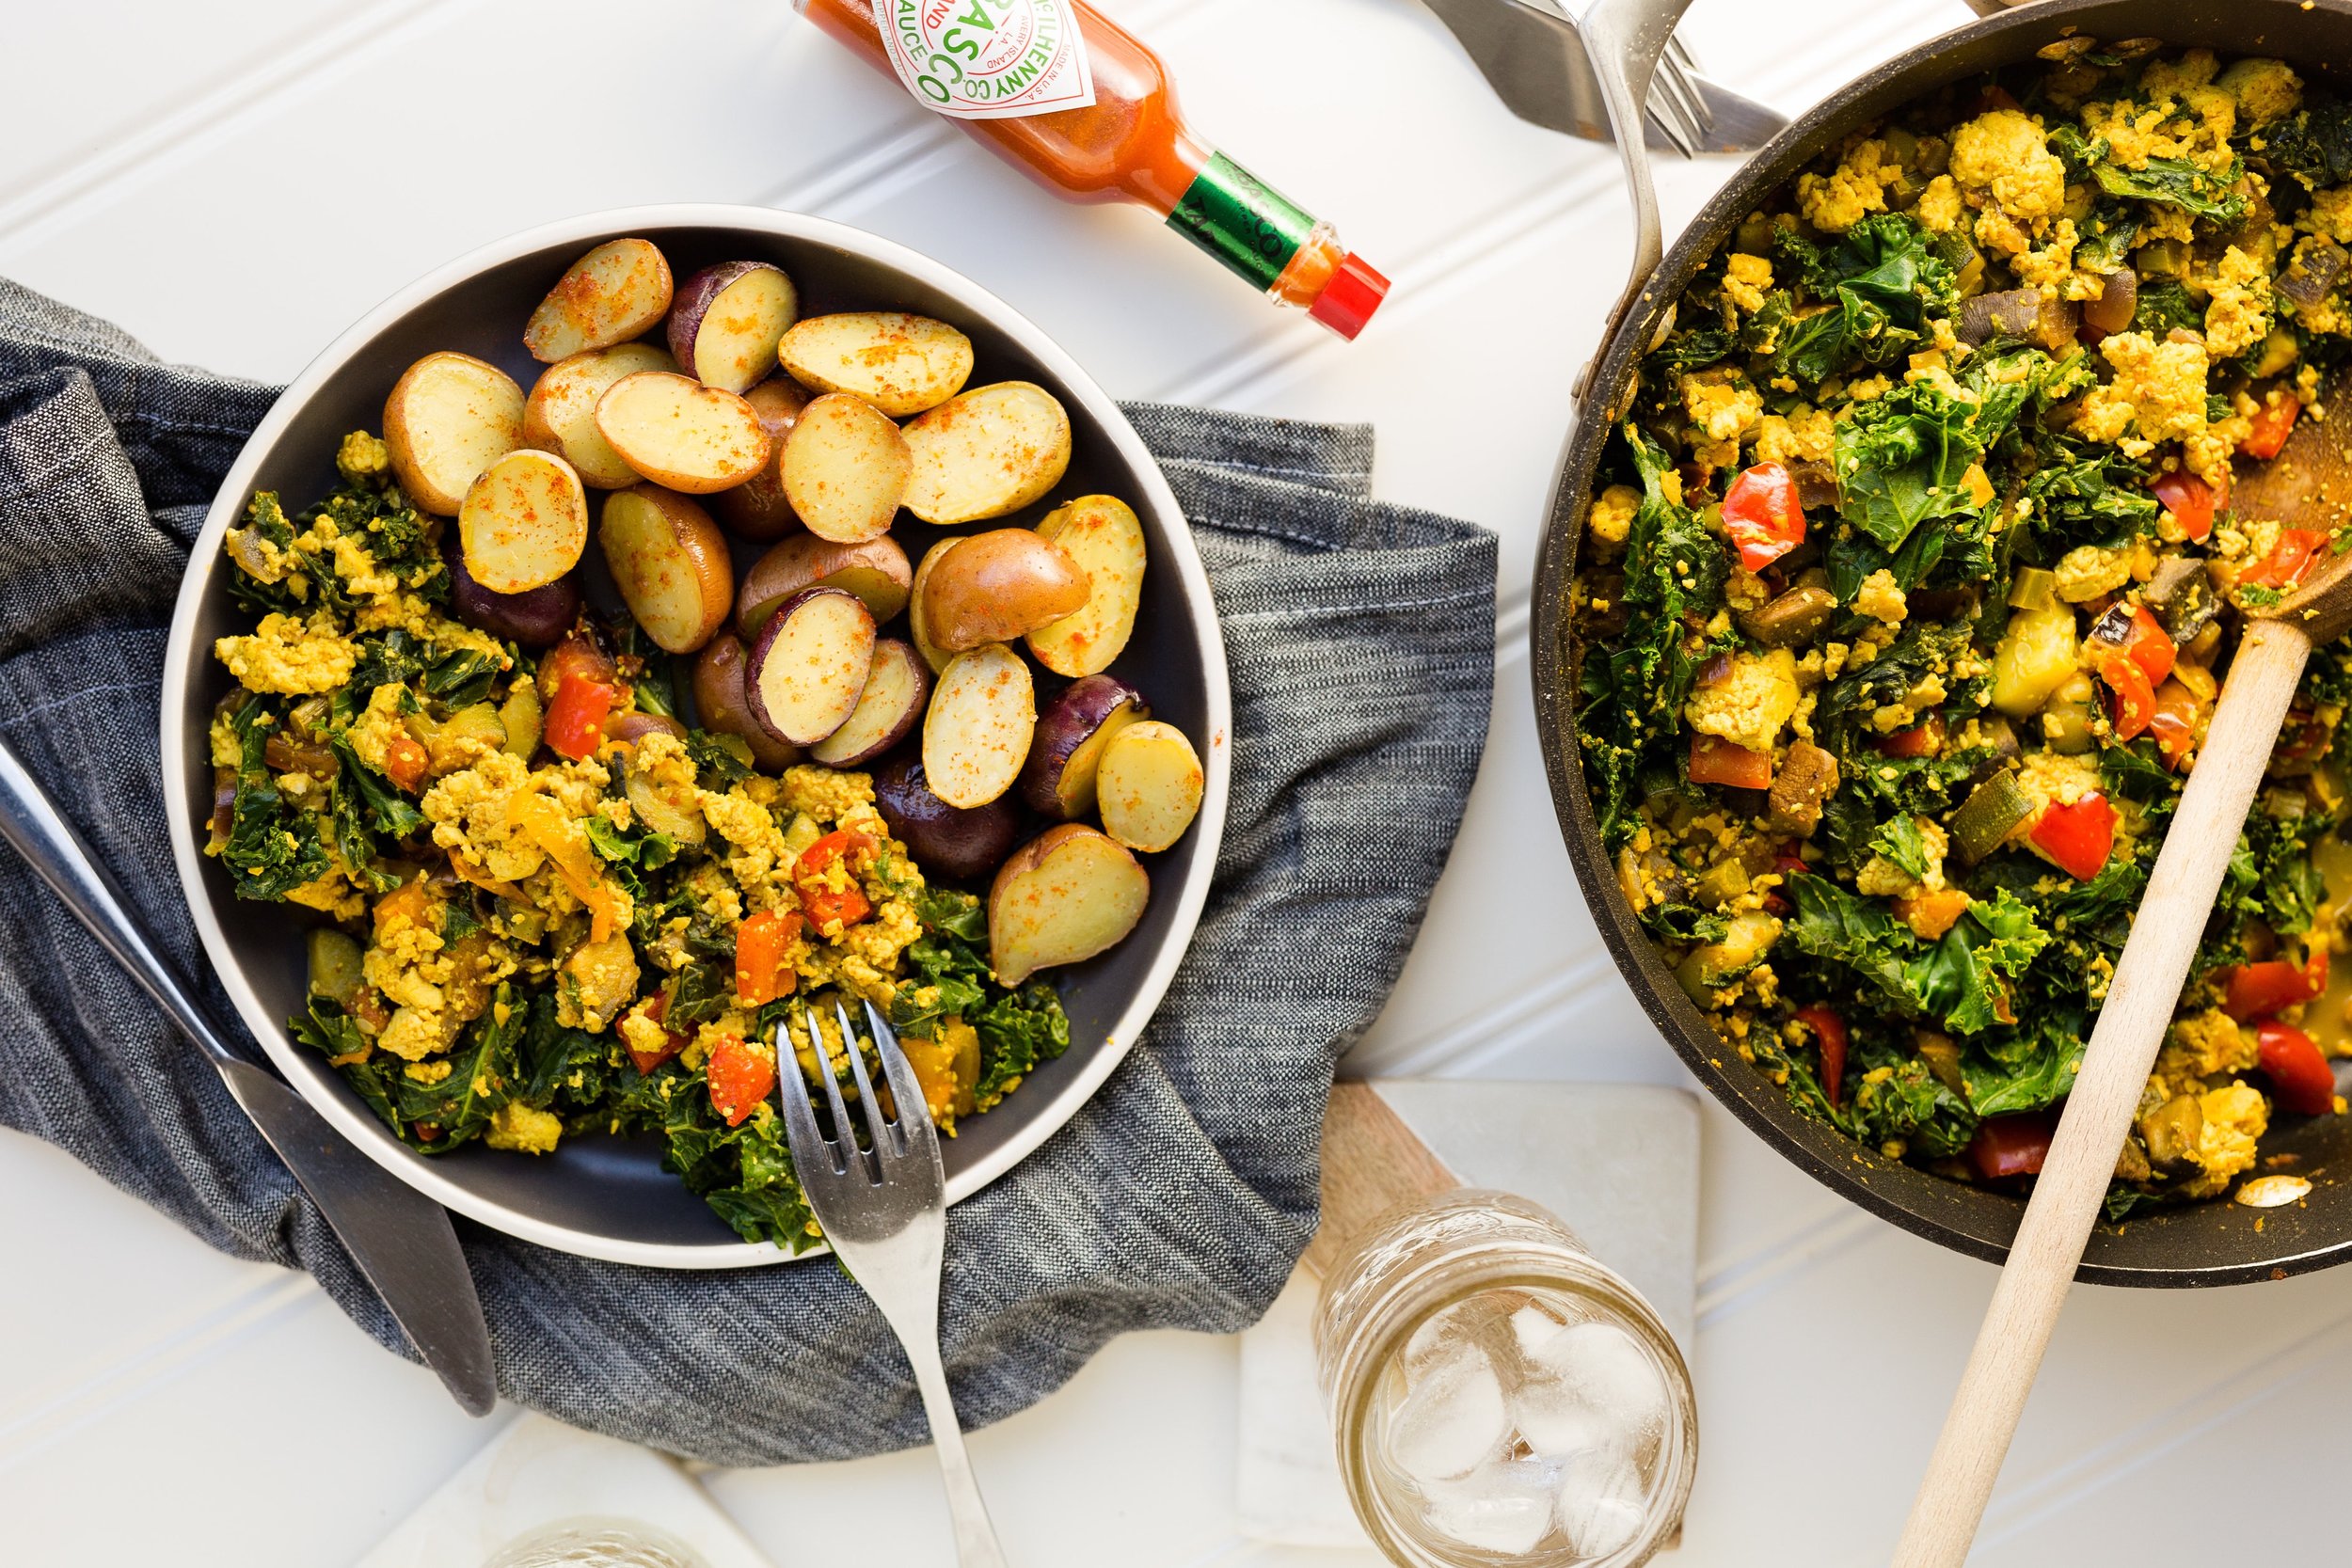
Tofu scramble has been a staple in my diet for years and it’s definitely one of my favourite weekend breakfasts. Enjoyed on its own, or with a side of roasted veggies, a bit of salsa or guacamole, or a slice of toasted sourdough, it’s so so tasty! My friends and family love it too and I get requests for it regularly.

If you’re new to the world of tofu scramble, let me tell you, this dish is a game changer. The crumbled tofu is reminiscent of scrambled eggs, and I love jazzing it up with tons of veggies and aromatic spices. Turmeric, the anti-inflammatory superstar, gives the dish a yellowish colour and nutritional yeast adds a subtle hint of cheesiness.

When you read through the recipe you’ll notice I’ve listed an ingredient called “black salt” or “kala namak”. Although it’s called black salt it’s actually pink in colour. It’s not quite as salty as regular salt and it has a slightly sulphuric essence. It adds an eggy taste and aroma to the dish. I really enjoy adding it to the scramble, but it’s not necessary if you don’t have any on hand. If you want to try it out, you can usually find black salt at Indian or ethnic grocers, some health food stores, or you can order it online.

I hope you enjoy this dish as much as I do. If so, please share your feedback in the comment section below and/or tag me on social media with your photos. I love to see what you’re cookin’!

TOFU SCRAMBLE

Makes 4 - 6 servings

Ingredients:

1 tablespoon extra virgin olive oil or coconut oil 
1 onion, diced
1 bell pepper, diced
2 cloves of garlic, minced 
1 teaspoons turmeric
1 tablespoon chili powder, optional
1 zucchini, diced
2 - 3 cups of chopped mushrooms, roughly chopped, optional 
1 block organic firm or extra firm tofu, crumbled into small pieces
1/4 cup nutritional yeast
2 - 3 tightly packed cups of leafy greens of your choice
Sea salt or black salt (kala namak) and pepper to taste

Directions:

Warm the oil in a large skillet over medium heat. Sauté onions with a few pinches of salt, cook, stirring often, for about 5 minutes, or until they become slightly transparent. Add the peppers and sauté for a couple minutes until softened, then add the minced garlic and cook for another minute.

Stir in the chili powder and turmeric. Cook for 1 minute. Add in the mushrooms and zucchini, cook, stirring every so often, to allow them to release water (approximately 5 minutes).

Mix in the crumbled tofu. Then stir in the nutritional yeast.  Then add the leafy greens and cook them until they’ve wilted and have become bright green. Taste and season with salt and pepper. Serve immediately with a side of roasted potatoes, topped with avocado slices, and/or a few splashes of your favourite hot sauce. 

Will keep in the fridge for 5 days stored in an airtight container. 

If you enjoyed the recipe I shared above be sure to check out my Plant-Based Breakthrough program, which is a crash course in plant-based health, nutrition, and meal planning. For details about the program click here. You can also join the Plant-Based Breakthrough Community on Facebook where I share recipes, inspiration, and information on plant-based nutrition.

Photography by Ana Tavares.

Tofu+Scamble-3.jpg

Build Your Own Plant-Based Cheese & Charcuterie Board

When I made the switch to a plant-based diet many years ago, I figured my days of enjoying cheese and charcuterie boards were over. I truly assumed plant-based cheese and meat alternatives would be lacklustre. I sort of avoided these products and instead I spent a lot of time making my own cheese spreads, dips and even faux meats that were actually pretty great. However, I have to say, over time I’ve come to know and love several fantastic companies that make phenomenal plant-based cheeses and meats that not only rival traditional versions, but have made it much much easier to make the compassionate choice without having to make everything myself.  

As you know, I’m a huge proponent of spending time in the kitchen and learning how to make things from scratch, but I do realize that it’s not always possible especially during busy times (like the holiday season). It’s nice and so convenient to have store bought options that are healthy, delicious, and plant-based.

Nowadays, it’s so easy to put together a beautiful, bountiful spread combining a variety of cheese and meat alternatives along with other components of your choosing. If you’re looking for ideas or inspiration for your next holiday party, scroll down to learn how to build your own plant-based cheese and charcuterie board. Below I share some of my favourite brands and a few healthy holiday recipes too! 

I partnered up with my friends at Animal Justice to make this cheese and charcuterie board. We used Fauxmagerie Zengarry cheeses and GUSTA sausage along with an assortment of other delicious things.

I partnered up with my friends at Animal Justice to make this cheese and charcuterie board. We used Fauxmagerie Zengarry cheeses and GUSTA sausage along with an assortment of other delicious things.

Cheeses - Look for these brands: Daiya (Farmhouse Blocks), Culchered, Earth Island, Fauxmagerie Zengarry, Field Roast (CHAO Creamery), GUSTA, Miyoko's Creamery, Nuts For Cheese, VegCheese and Violife.

Meat Alternatives - Look for these brands: Beyond Meat, Field Roast, GUSTA, Real Fake Meats (available in Halifax, Nova Scotia), Tofurky, The Very Good Butchers, and Yam Chops.

Fruits - Everybody loves grapes, berries, cherries, ground cherries, pomegranate, clementines, and dried fruits like figs, raisins, cranberries or apricots.

Veggies - My favourites include olives, sliced raw vegetables, pickled or fermented vegetables (beets, onions, and gherkin pickles are always popular), roasted red pepper, roasted garlic, black garlic, etc.

Nuts & Seeds - I like walnuts, pumpkin seeds, candied pecans, tamari almonds, and pistachios.

Dips & Spreads - Enhance your board with a nice grainy mustard, hummus, bruschetta, salsa, chutney, jams, compotes and maple syrup. I also love this fig & olive tapenade and zucchini almond dip.

Dark chocolate - Can’t go wrong here!

Bread & Crackers - I like a classic french baguette and/or a mix of crackers including Mary’s Gone Crackers, Le Pain des fleurs Crispbread, and more.

Decor -  In the photo above, the decor includes pine cones, holly and ivy, pine branches and of course a few nice cutting boards and decorative bowls. Things like micro greens or delicate leafy greens look pretty. You can also use festive household items like mini-lights, ornaments, candles, or whatever you have on hand to jazz up your board.

Many of the above-mentioned cheeses and meat alternatives are available throughout Canada and the US at health food stores, Whole Foods Markets, and most major grocery stores. In Canada, you can also order a variety of plant-based products online via Vegan Supply and Yam Chops

Did I miss anything? Tell me your favourites in the comment section below!

Special thanks to Animal Justice for this fun collaboration! Click on the image below to see a fun little video on how we built our board.

Magic Cookie Bars

If you live in Ottawa you’ve undoubtedly heard of Strawberry Blonde Bakery. Known primarily for delicious desserts, savoury snacks, and breads, behind the scenes Strawberry Blonde has been blazing the trails in plant-based and allergy free baking. A designated nut free, dairy free, gluten free bakery, Strawberry Blonde has become a fixture for those with food allergies or dietary restrictions, but since they also produce delicious baked goods, they are a unanimous favourite throughout the city.

Jacqui Okum, outside of her bakery, Strawberry Blonde, in Ottawa.

Jacqui Okum, outside of her bakery, Strawberry Blonde, in Ottawa.

Jacqui Okum is the mastermind behind this award winning bakery. She has years of experience with baking and is a pro when it comes to swapping and substituting ingredients. She has been successful in “veganizing” pretty much every classic recipe. Since the holidays are synonymous with baking (baking, and more baking!) and many of you are likely planning to adapt classic recipes to make them plant-based, I hope to ease this process by learning from one of the best bakers around. Below Jacqui shares her story about starting a vegan bakery, gives us insider tips, tricks and swaps for plant-based baking, and also shares her recipe for Magic Cookie Bars. Yum! Scroll down to learn more.

Amy: Strawberry Blonde is one of Ottawa's most beloved bakeries. Were you always into baking?
Jacqui:
I was definitely always into eating baked goods! Haha! I originally went to University for Film Production and worked in the TV industry for a number of years. I eventually decided it wasn't the right work environment for me and around the same time I went vegan. The transition to being vegan was easy, but boy oh boy did I miss pastries and sweets. Vegan pastries were hard to find then (about 12 years ago now) so I just ended up baking all the time for myself. I found I really liked it. And although I knew I didn't want to work in Film/TV, I didn't know what else I wanted to do. I did know that I wanted to be my own boss. One day my boyfriend made an offhand comment about how I should open up my own vegan bakery since I was just baking all the time anyway, and when he said that, it was like a lightbulb went off in my head. I decided that if I was going to do it, I wanted to do it right so I enrolled in George Brown College's Baking & Pastry Arts Program, where I learned all the tips and tricks of the trade and applied them at home to vegan baking.

Amy: When did you open the bakery?  And what inspired you to offer vegan, gluten free, & nut free baked goods? 
Jacqui:
The storefront on Grange Ave opened just over 5 years ago now. But we were baking for wholesale customers (Rainbow Foods on Richmond Road and Herb & Spice on Bank street) for a number of months before that. And before that even I was selling my baked goods at the Lansdowne Farmer's Market. My treats were always vegan, but it was my experience at the market that made me decide to switch to doing everything gluten free and nut free. I really listened to my customers and the majority of them were asking for gluten free or nut free on top of it being from from dairy and eggs. For allergy concerns, I thought it would be best to just eliminate these ingredients completely, to avoid risk of cross contamination. But also, being vegan, I really sympathized with them, knowing how disappointing it can be to not be able to enjoy a pastry or a treat. I quickly became determined to create a space where vegans, or those with allergies, could go and feel normal and have the ability to get excited the way most people do when treating themselves. 

Amy: Many of my readers are interested in transitioning to a plant-based diet and looking for tips, swaps and alternatives for baked goods. Can you share a list of swaps/alternatives that you use in creating your famous desserts?
Jacqui:
Okay, here are some of the most common swaps…
Butter:
-I find Earth Balance to be the best and most consistent brand for replacing butter. It can easily be used as a 1:1 ratio when subbing in any recipe.
-There is a soy-free brand of butter replacement called Melt that is good for some things, but it is more expensive than Earth Balance and the ratio needs to be played with a little bit. But if you're looking for soy free, this is a good alternative, especially for making icings.
-Coconut oil can sometimes work, but be careful as it melts quickly so it won't cream as well as traditional butter would (especially important when making cookies!)

Milk:
-There are so many milk alternatives out there and they all work fairly well with a 1:1 ratio. I find soy milk to be the creamiest and works best in most situations. Coconut milk is also good, but the fat content is higher so it sometimes separates or makes products a little greasier.
-For butter milk, simply add 1 tsp of vinegar or lemon juice per cup of milk and whisk. Let it sit for a couple minutes then it's turned into buttermilk.

Eggs:
This really depends on what it is you're baking. There are lots of options! These are the ones we use at the bakery:
-Flax seeds
-Chia seeds
-Apple sauce
-Silken tofu
-Ener-g brand egg replacer

Cream Cheese:
-The tofutti brand is by far the best for baking!

Amy: Finally, we're getting into the holiday season. Would you mind sharing one of your favourite seasonal recipes? 
Jacqui:
Sure thing! The Strawberry Blonde Magic Cookie Bars are a serious Christmas favourite for both our customers and staff alike!

magic cookie bars2.jpg

MAGIC COOKIE BARS

Ingredients:

Base:
3 cups vegan graham cracker crumbs
3/4 cup Earth Balance Buttery Spread
3 tablespoons brown or cane sugar

Filling:
For the condensed coconut milk:
400 ml/14 0z can of full fat coconut milk
1 cup brown sugar
(See below for notes about the condensed milk)

Topping:
2 cups non-dairy chocolate chips
3 cups shredded, unsweetened coconut
3/4 cup pumpkin seeds

Directions:

Preheat oven to 350 F degrees. Line a 9"x 13" pan with parchment paper.

Base:

Melt the Earth Balance in a small saucepan over low-medium heat and combine with graham cracker crumbs and sugar.

Press this mixutre firmly and evenly into the parchment lined pan.

Filling:

To make condensed coconut milk: Combine canned coconut milk and brown sugar in a pot. Bring to a boil and then reduce to a simmer. Let simmer for 8-10 minutes, ensuring all the sugar has dissolved and mixture has thickened slightly.

Pour chocolate chips evenly over the base, making sure to cover the corners.

Pour hot coconut milk/sugar mixture evenly over the top of chocolate chips, followed by an even layer of coconut and pumpkin seeds. Press ingredients down with your hands or a spatula.

Bake for 25-30 minutes or until set and top browns slightly.

Let cool completely, then put in fridge for at least 1 hour to make cutting easier. This recipe can yield an upward of 24 cookie bars depending on how big or small you cut them. Keep them stored in an airtight container at room temperature or in the fridge or freezer. Enjoy!

Notes from the kitchen:
-To save time, you can also purchase condensed coconut milk in many well stocked grocery stores or health food stores. The last few times I’ve made this recipe I replaced the homemade condensed coconut milk with a can of Let’s Do Organic’s sweetened condensed coconut milk (7.4 oz/210 g can). Nature’s Charm makes a 11.25 oz/320 g can of sweetened condensed coconut milk, and if you’re able to find it, that would actually be the ideal size as the 7.4 oz/210 g can is not quite enough for the recipe and I ended up adding a bit of non-dairy milk to ensure I had enough liquid to cover the graham cracker base and chocolate chips. If using store-bought condensed coconut milk, you will still want to warm it on the stovetop so that it’ll melt the chocolate chips nicely.
-I have also swapped in Miyoko’s European Style Cultured Vegan Butter instead of Earth Balance in equal measure with great success. Miyoko’s is a less processed option and it’s a great butter substitute in general.

For more information about Strawberry Blonde Bakery, visit their website,  Facebook page, or Instagram account.

Butter Chickpeas & Cauliflower

I love fall! Mainly for the hearty warming meals and abundance of one-pot-wonders. You know, the kind of recipe where you literally throw a bunch of veggies, plant-based proteins, herbs, and spices into a pot and you find yourself with the most magically delicious feast. That’s what I’m talking about!

If you’ve been following me for a while you’d know I often trial my recipes at cooking lessons and with my nutrition clients. This Butter Chickpeas & Cauliflower recipe has been a unanimous hit, which means it’s destined for the blog. As I was saying above, this is one of those one-pot meals that is fairly simple to prepare and is rich in flavour and nutrients. You can eat it on its own, or pair it with a grain of your choice and you will have lunches for the week. In the photo below it’s paired with brown rice, but you could try quinoa, millet, wild rice, or whatever you fancy.

Scroll down for the full recipe and please let me know if you try it out. I love getting your feedback on my recipes!

Cauliflower Chickpea Curry-1.jpg

BUTTER CHICKPEAS & CAULIFLOWER

Yields 4-6 servings

Ingredients:

1 teaspoon coconut oil or extra virgin olive oil
1 onion, diced
1 red bell pepper, diced
3 cloves of garlic, minced
1 inch piece of ginger, finely minced
2 tablespoons curry powder (I love Cha’s Curry Masala)
1 teaspoon paprika
1/4 teaspoon cayenne, optional
1 can (14 oz/398 ml) chickpeas, drained & rinsed, or 1.5 cups cooked chickpeas
1 can (14.5 oz/411 g) of diced tomatoes
1 can (14 oz/398 ml) full fat or lite coconut milk
1 small head of cauliflower, chopped into bite sized pieces
1 bunch of cilantro, roughly chopped, for garnish
Sea salt and freshly ground pepper

Directions:

In a medium or large pot warm the oil on medium head. Add the onions and a pinch of salt, and sauté for 5 minutes, or until the onions become slightly translucent. Add the red bell pepper and sauté for a few minutes, until softened a bit.

Next add the garlic, ginger and spices and stir for a minute allowing the spice to become fragrant.  Then add the chickpeas, tomatoes, coconut milk, and cauliflower. Bring to a boil, then reduce the heat to low. Simmer, stirring every so often, until the cauliflower has softened (about 8 - 10 minutes).

Once the cauliflower has softened, taste and then season the dish with salt and pepper. Serve immediately with a hefty helping of cilantro. Option enjoy on its own or to serve with a grain of your choice. 

Will keep in the fridge for 5 days, or frozen for an upward of 2 months.

If you enjoyed the recipe I shared above be sure to check out my Plant-Based Breakthrough program, which is a crash course in plant-based health, nutrition, and meal planning. For details about the program click here. You can also join the Plant-Based Breakthrough Community on Facebook where I share recipes, inspiration, and information on plant-based nutrition.

Photography by Ana Tavares.

Cauliflower Chickpea Curry-4.jpg

Tofu Feta Salad

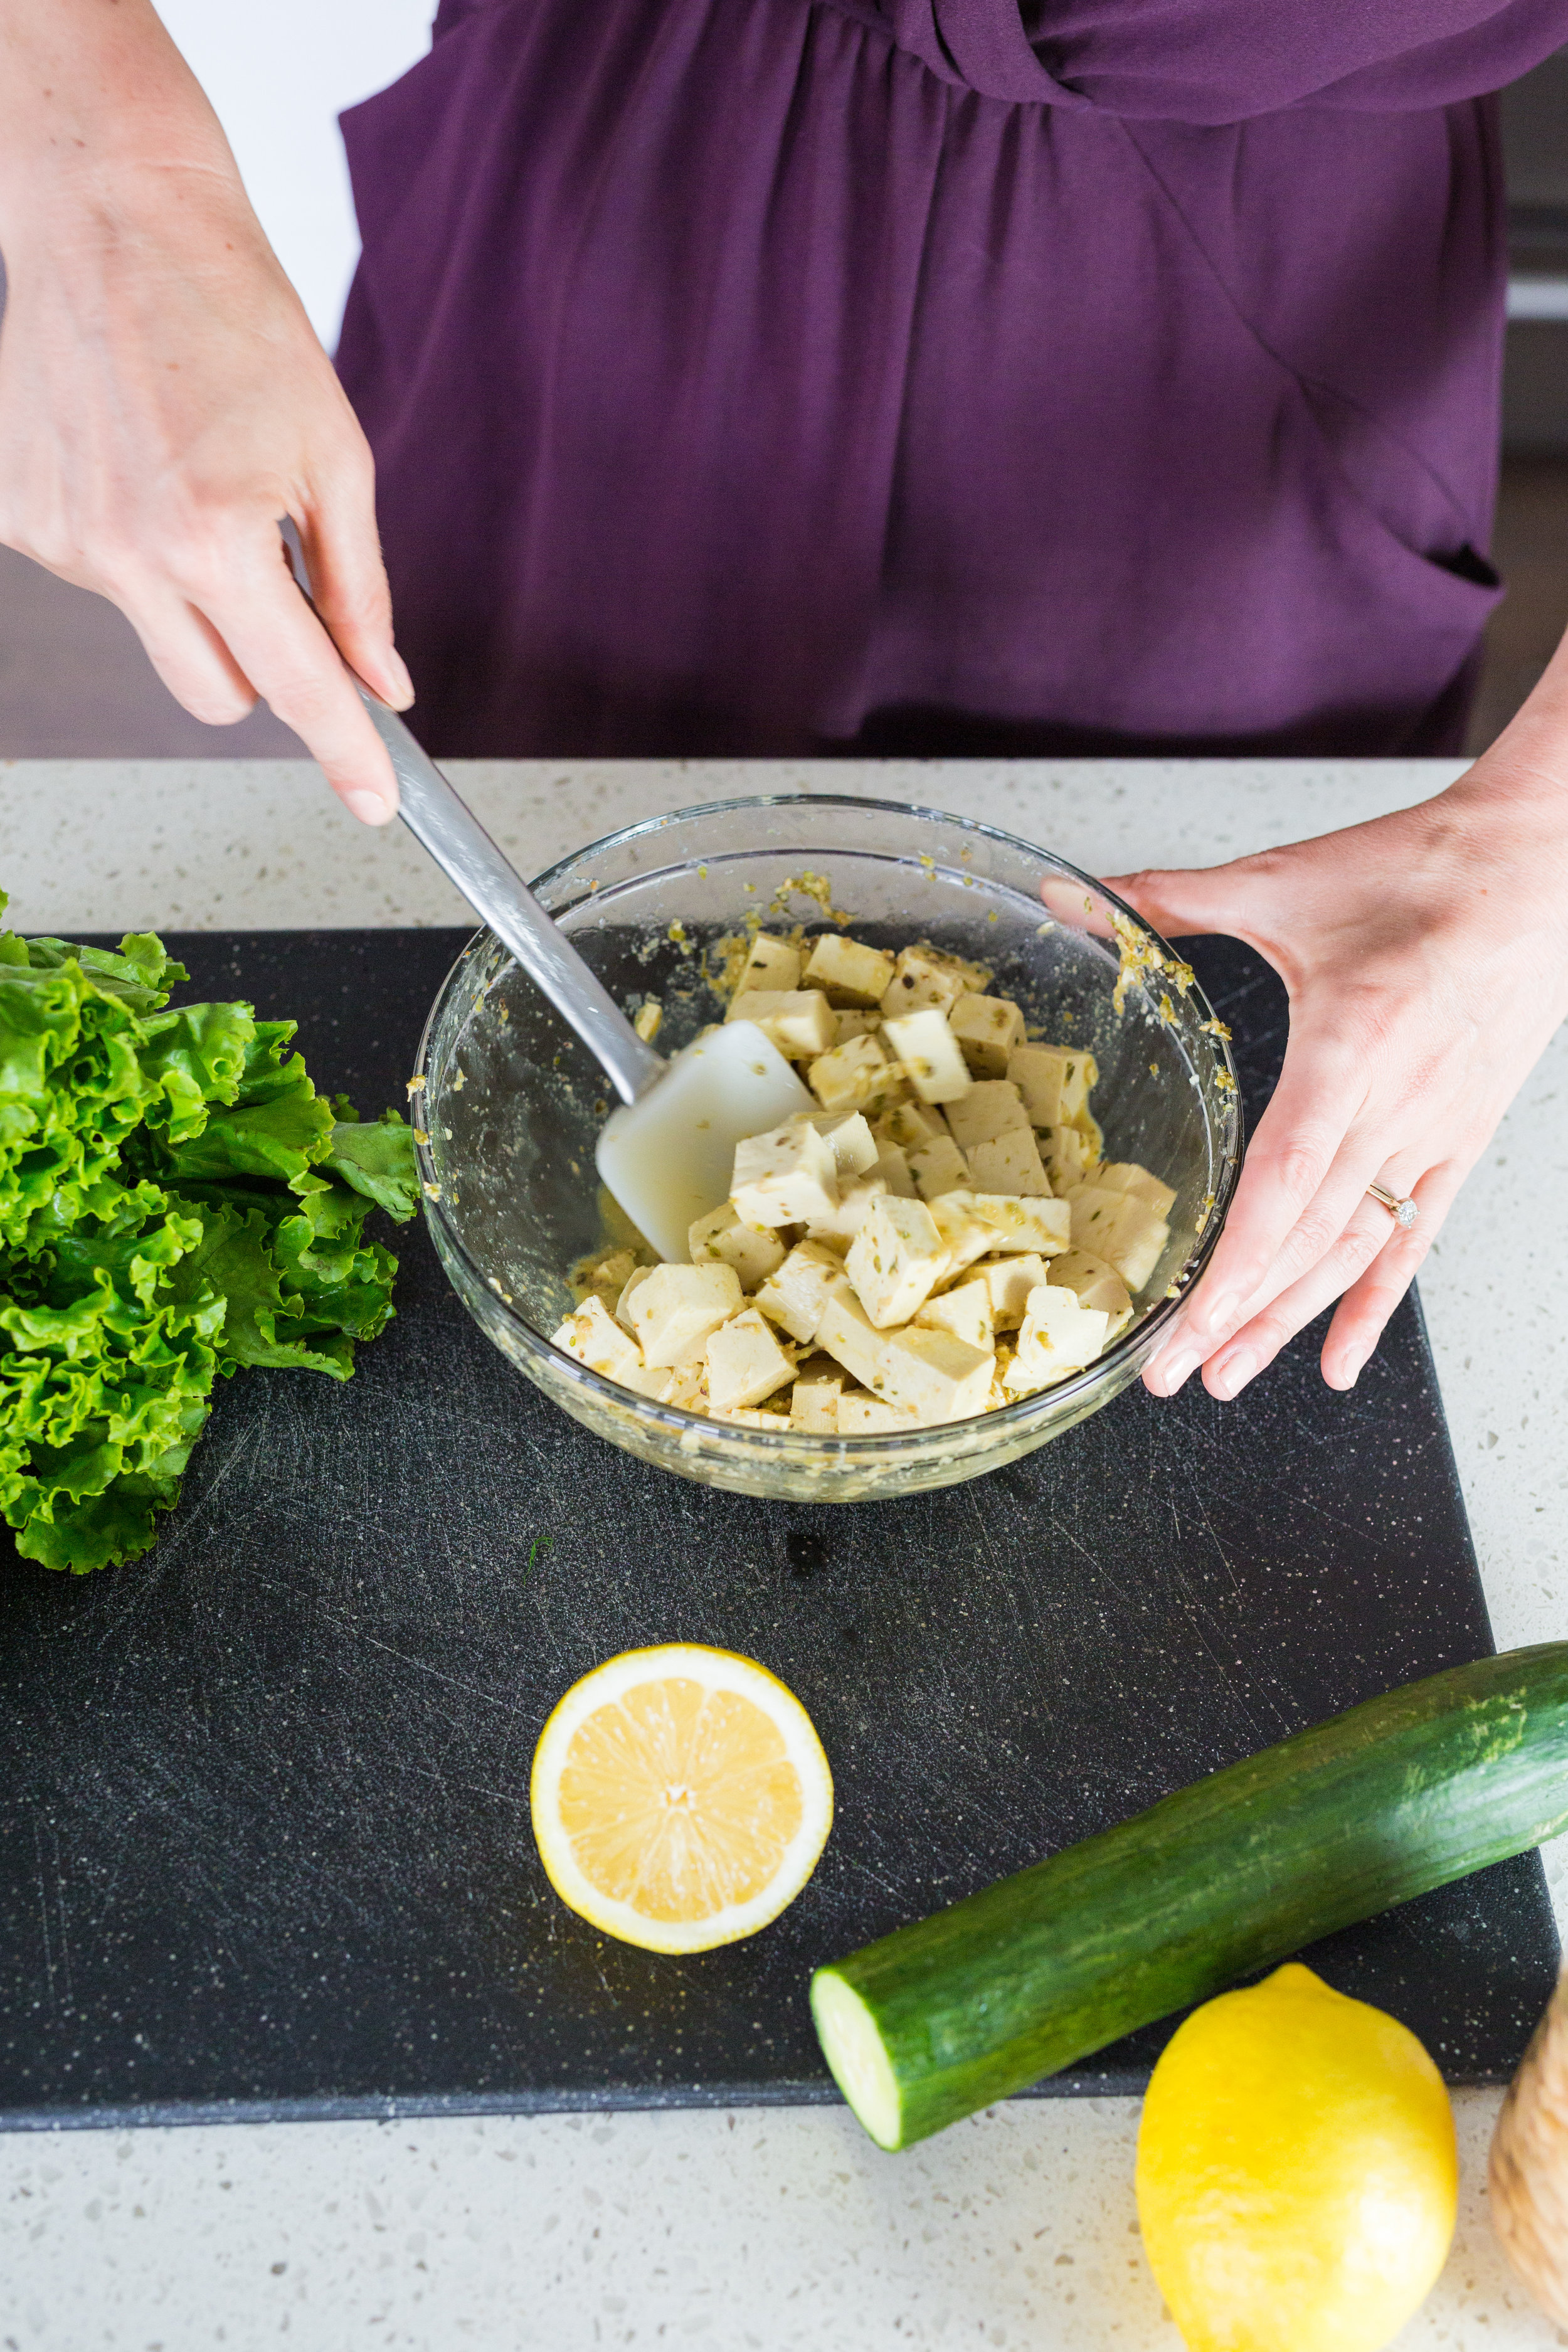
I’ve always been a little bit obsessed with cheese, so when I went dairy-free many years ago I had to find new ways to indulge in my favourite food. Cashews tend to be the superstar when it comes to making cheesy alternatives, but you’d be surprised how tofu can magically morph into feta if you’ve got the right ingredients.

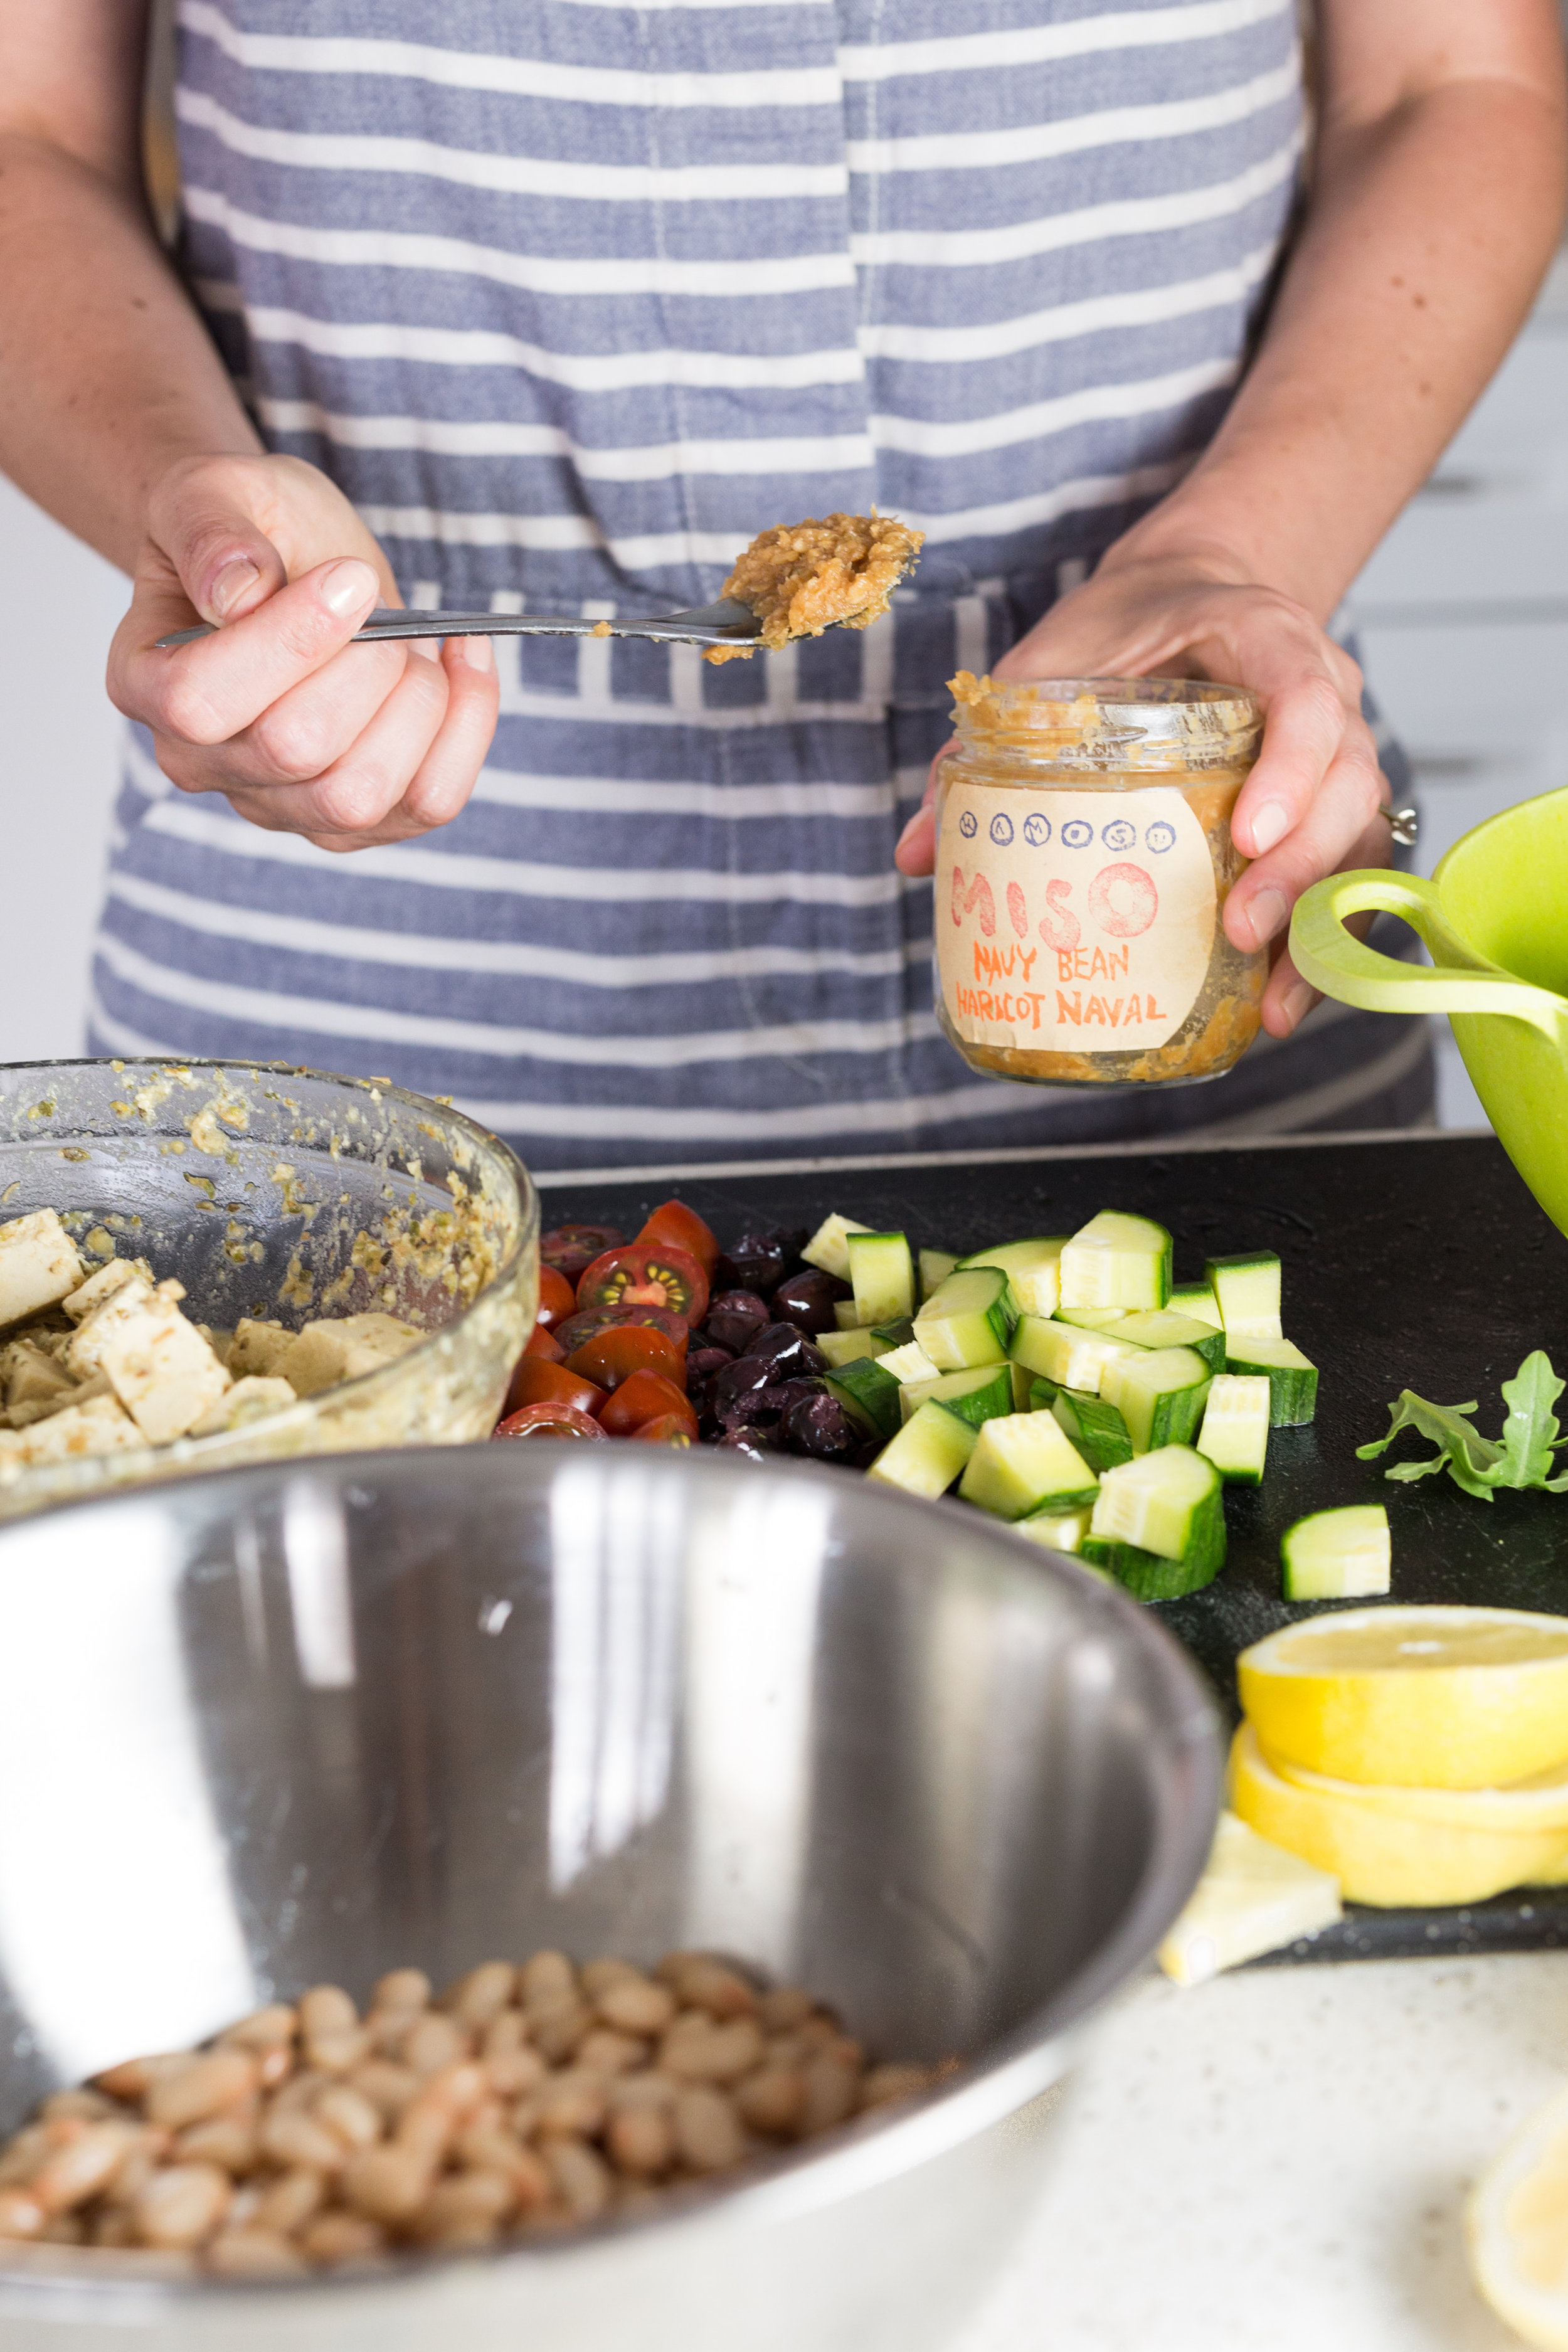
In my version of tofu feta, I use two ingredients that help infuse a cheese-like flavour into the tofu. Firstly, there’s nutritional yeast, which is a deactivated yeast and bi-product of molasses making. Nutritional yeast or “nooch”, as it’s often called, is a staple in dairy-free cuisine because of its versatility and sharp, cheesy taste. I also used miso paste, which is fermented bean (generally soy or chickpea), that is mostly found in Japanese cuisine and offers a strong and pleasant salty fermented taste reminiscent of parmesan (but it works with perfectly with my faux feta). I use both in my recipe, however, you could get away with one or the other. That said, if you’re delving into the world of dairy-free cooking, they are handy and highly recommended pantry staples.

If you have questions about any of the ingredients in this recipe, don’t hesitate to ask in the comment section below. If you’re looking to learn more about dairy-free cuisine, I’ve written a few blogs on the topic. Find them HERE and HERE.

A final tip about tofu feta: you can definitely serve it with salad as instructed below, but it can also be crumbled onto vegan pizza or eaten as an appetizer with tomatoes and fresh basil.

This recipe has been very popular at my cooking lessons and I’m super excited to share it here on my blog for you to try as well. Without further ado, scroll down for all the details. Please do report back if you try this recipe!

TOFU FETA SALAD

Makes 4 - 6 servings

Ingredients:

Tofu Feta Ingredients:
1 package extra firm organic tofu
1 tablespoon white or chickpea miso
Juice of 1/2 lemon
2 tablespoons extra virgin olive oil
2 tablespoons water
2 tablespoons nutritional yeast
1 teaspoon oregano
1 teaspoon basil
1/4 teaspoon garlic powder
1/2 teaspoon sea salt

Dijon Dressing:
1 teaspoon dijon mustard
1 clove garlic, minced
1/4 cup fresh lemon juice
1/3 cup extra-virgin olive oil
Salt & pepper to taste

Salad Ingredients:
8 cups leafy greens of your choice, chopped to bite sized pieces
1/2 pint of grape tomatoes or two large tomatoes, chopped
1/2 red onion, thinly sliced
1 cucumber, chopped in to bite sized pieces
1 15 ounce can of white beans or chickpeas, drained and rinsed
1/2 cup kalamata olives, chopped

Directions:

For the tofu feta:

Drain and press the tofu for at least 30 minutes. You can wrap the tofu in a dish towel and place a heavy object on top (I often use a cast iron pan with a big jug of vinegar, but you can use any heave object in your kitchen) or use a tofu press.

While the tofu is pressing, whisk together the miso, extra virgin olive oil, water, nutritional yeast, oregano, garlic powder, salt and pepper.

Cut the tofu into small cubes and toss with the marinade. Place in the fridge and marinade for an hour, preferably longer. If you have time, leave it to marinate overnight.

To make the dijon dressing:

Whisk together the dijon mustard, garlic clove and lemon juice until combined.

Slowly whisk in the olive oil until combined. Season with salt and pepper.

Assemble your salad: 

Divide the salad ingredients evenly in bowls. Top with tofu feta and drizzle on dressing. Serve immediately.

If you want to prep ahead of time, wait until just before serving to add the dressing. 

Notes from the kitchen: I used a locally made navy bean miso (as seen in the photo above), but you'll be more likely to find a white miso or chickpea miso in a store near you. 

If you enjoyed the recipe I shared above be sure to check out my Plant-Based Breakthrough program, which is a crash course in plant-based health, nutrition, and meal planning. For details about the program click here. You can also join the Plant-Based Breakthrough Community on Facebook where I share recipes, inspiration, and information on plant-based nutrition.

Photography by Ana Tavares.

AmyLongardRecipes-11.jpg

Chickpea Salad Wrap

It's been a long time coming and I'm happy to finally be posting my chickpea salad recipe!  I've made it for cooking lessons, yoga retreats, and shared with many of my clients, always with such positive feedback. It's truly one of my favourites and I was so excited to learned that Ana Tavares, my friend & photographer extraordinaire (she shot the photos below),  makes this recipe often for her son's lunches.  Given that I've received so many requests for easy back-to-school/kid friendly recipes lately, the timing couldn't be more perfect! 

This recipe is nut, dairy, egg, and gluten free, and offers tons of plant-based protein and fibre. It's also a versatile recipe that can be eaten on its own, in wraps, sandwiches, with crackers or on a bed of leafy greens. For this blog post, I opted to serve it in a wrap because it made for fun food styling. 

You'll notice this recipe calls for dulse or kelp flakes. These are both varieties of dried seaweed ground into flakes, which can generally be purchased at health food stores or online. Although I've listed these ingredients as optional I highly recommended adding seaweed since it's such a nutritious food and gives the chickpea salad a nice boost of flavour (reminiscent of tuna ...but less fishy). 

Scroll down for the recipe and please let me know if you have any questions or feedback. I love hearing from you! 

CHICKPEA SALAD WRAP

Makes 6 - 8  servings

Ingredients: 

2 15 oz. cans chickpeas, drained & rinsed, or ~ 3 cups cooked
1/3 cup vegan mayonnaise  (store bought or homemade)
1/3 cup celery (about 1 or 2 ribs of celery), minced
3 green onions, chopped
3 tablespoons minced dill pickle (about 1 large dill pickle)
1 - 2 tablespoons nutritional yeast
1 tablespoon tamari
2 teaspoons kelp or dulse (seaweed) powder or flakes, optional  
Freshly ground pepper, to taste
Fresh lemon juice, to taste
1 large handful, fresh dill, roughly chopped

Directions: 

For a chunky consistency: add all of the ingredients (except dill) into a medium sized bowl.  Mix and mash everything with a fork or potato masher. 

For a smooth consistency: add all the ingredients to a medium sized bowl and process with an immersion blender. Alternatively add the ingredients to a food processor and process until smooth. 

Once desired consistency is reached, stir in the dill. Enjoy in sandwiches, wraps, on crackers, or on a bed of salad greens.

Keeps in the fridge for 5 days in an air-tight container.

If you enjoyed the recipe I shared above be sure to check out my Plant-Based Breakthrough program, which is a crash course in plant-based health, nutrition, and meal planning. For details about the program click here. You can also join the Plant-Based Breakthrough Community on Facebook where I share recipes, inspiration, and information on plant-based nutrition.

AmyLongardRecipes-6.jpg