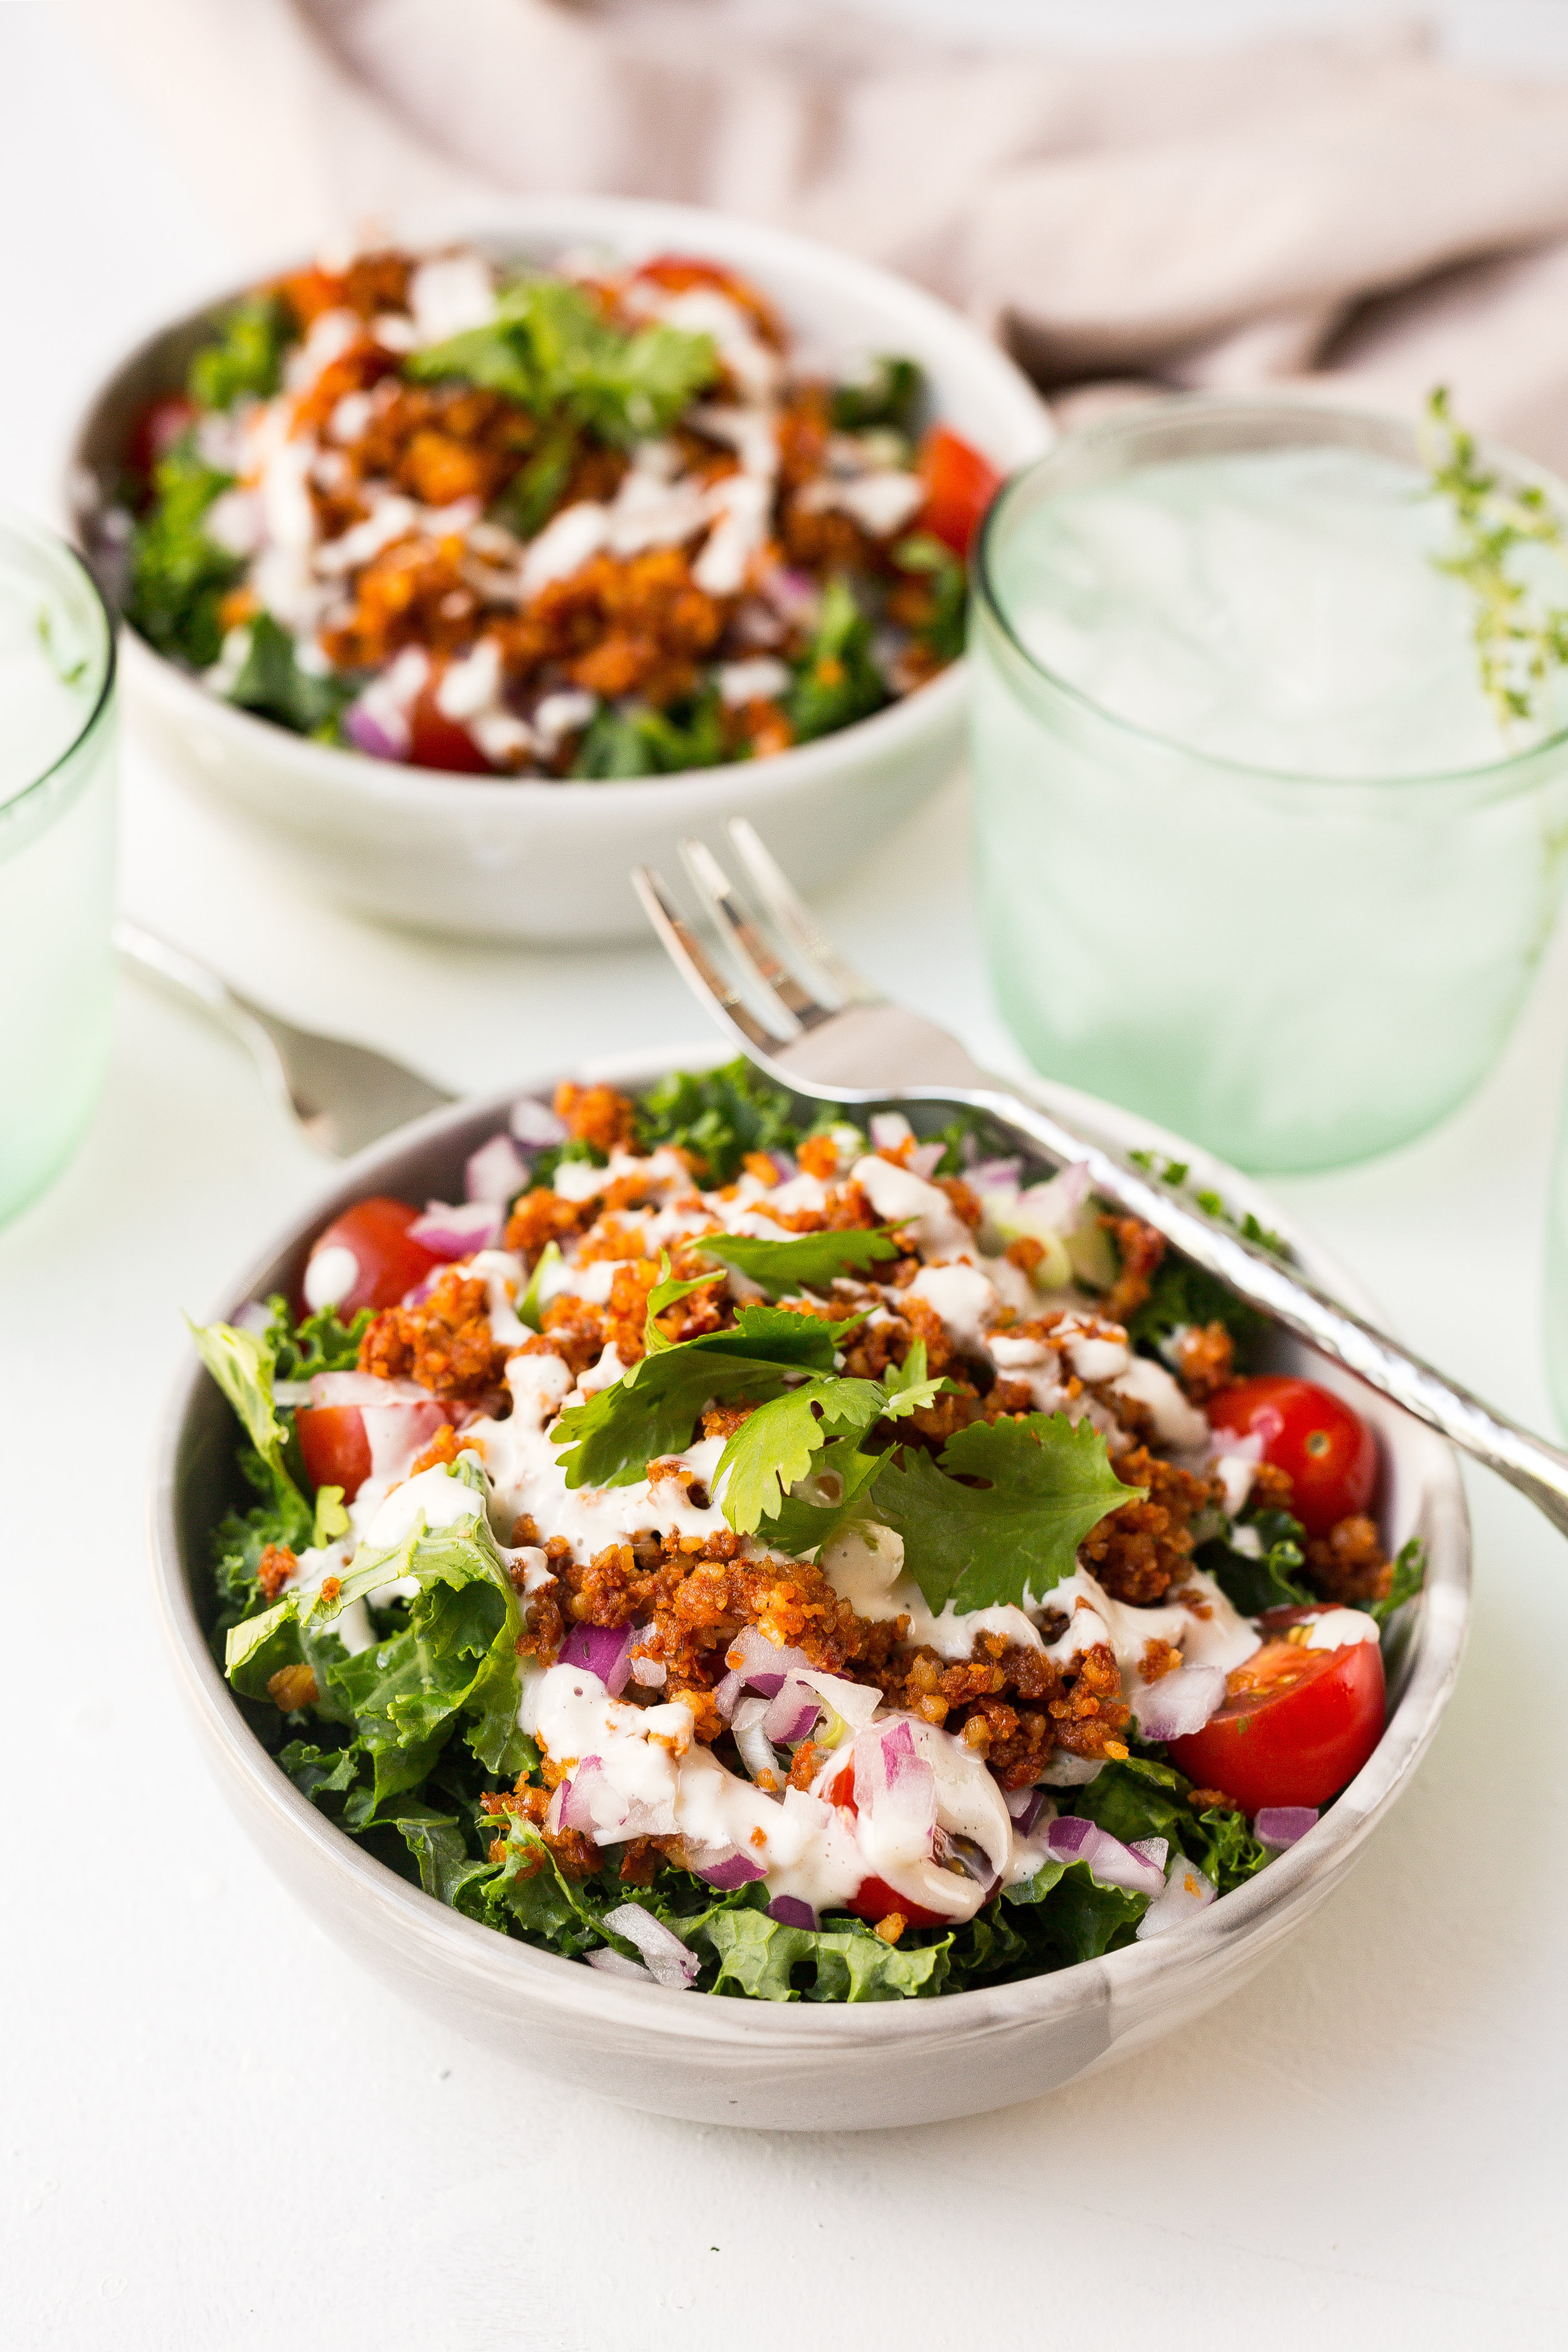
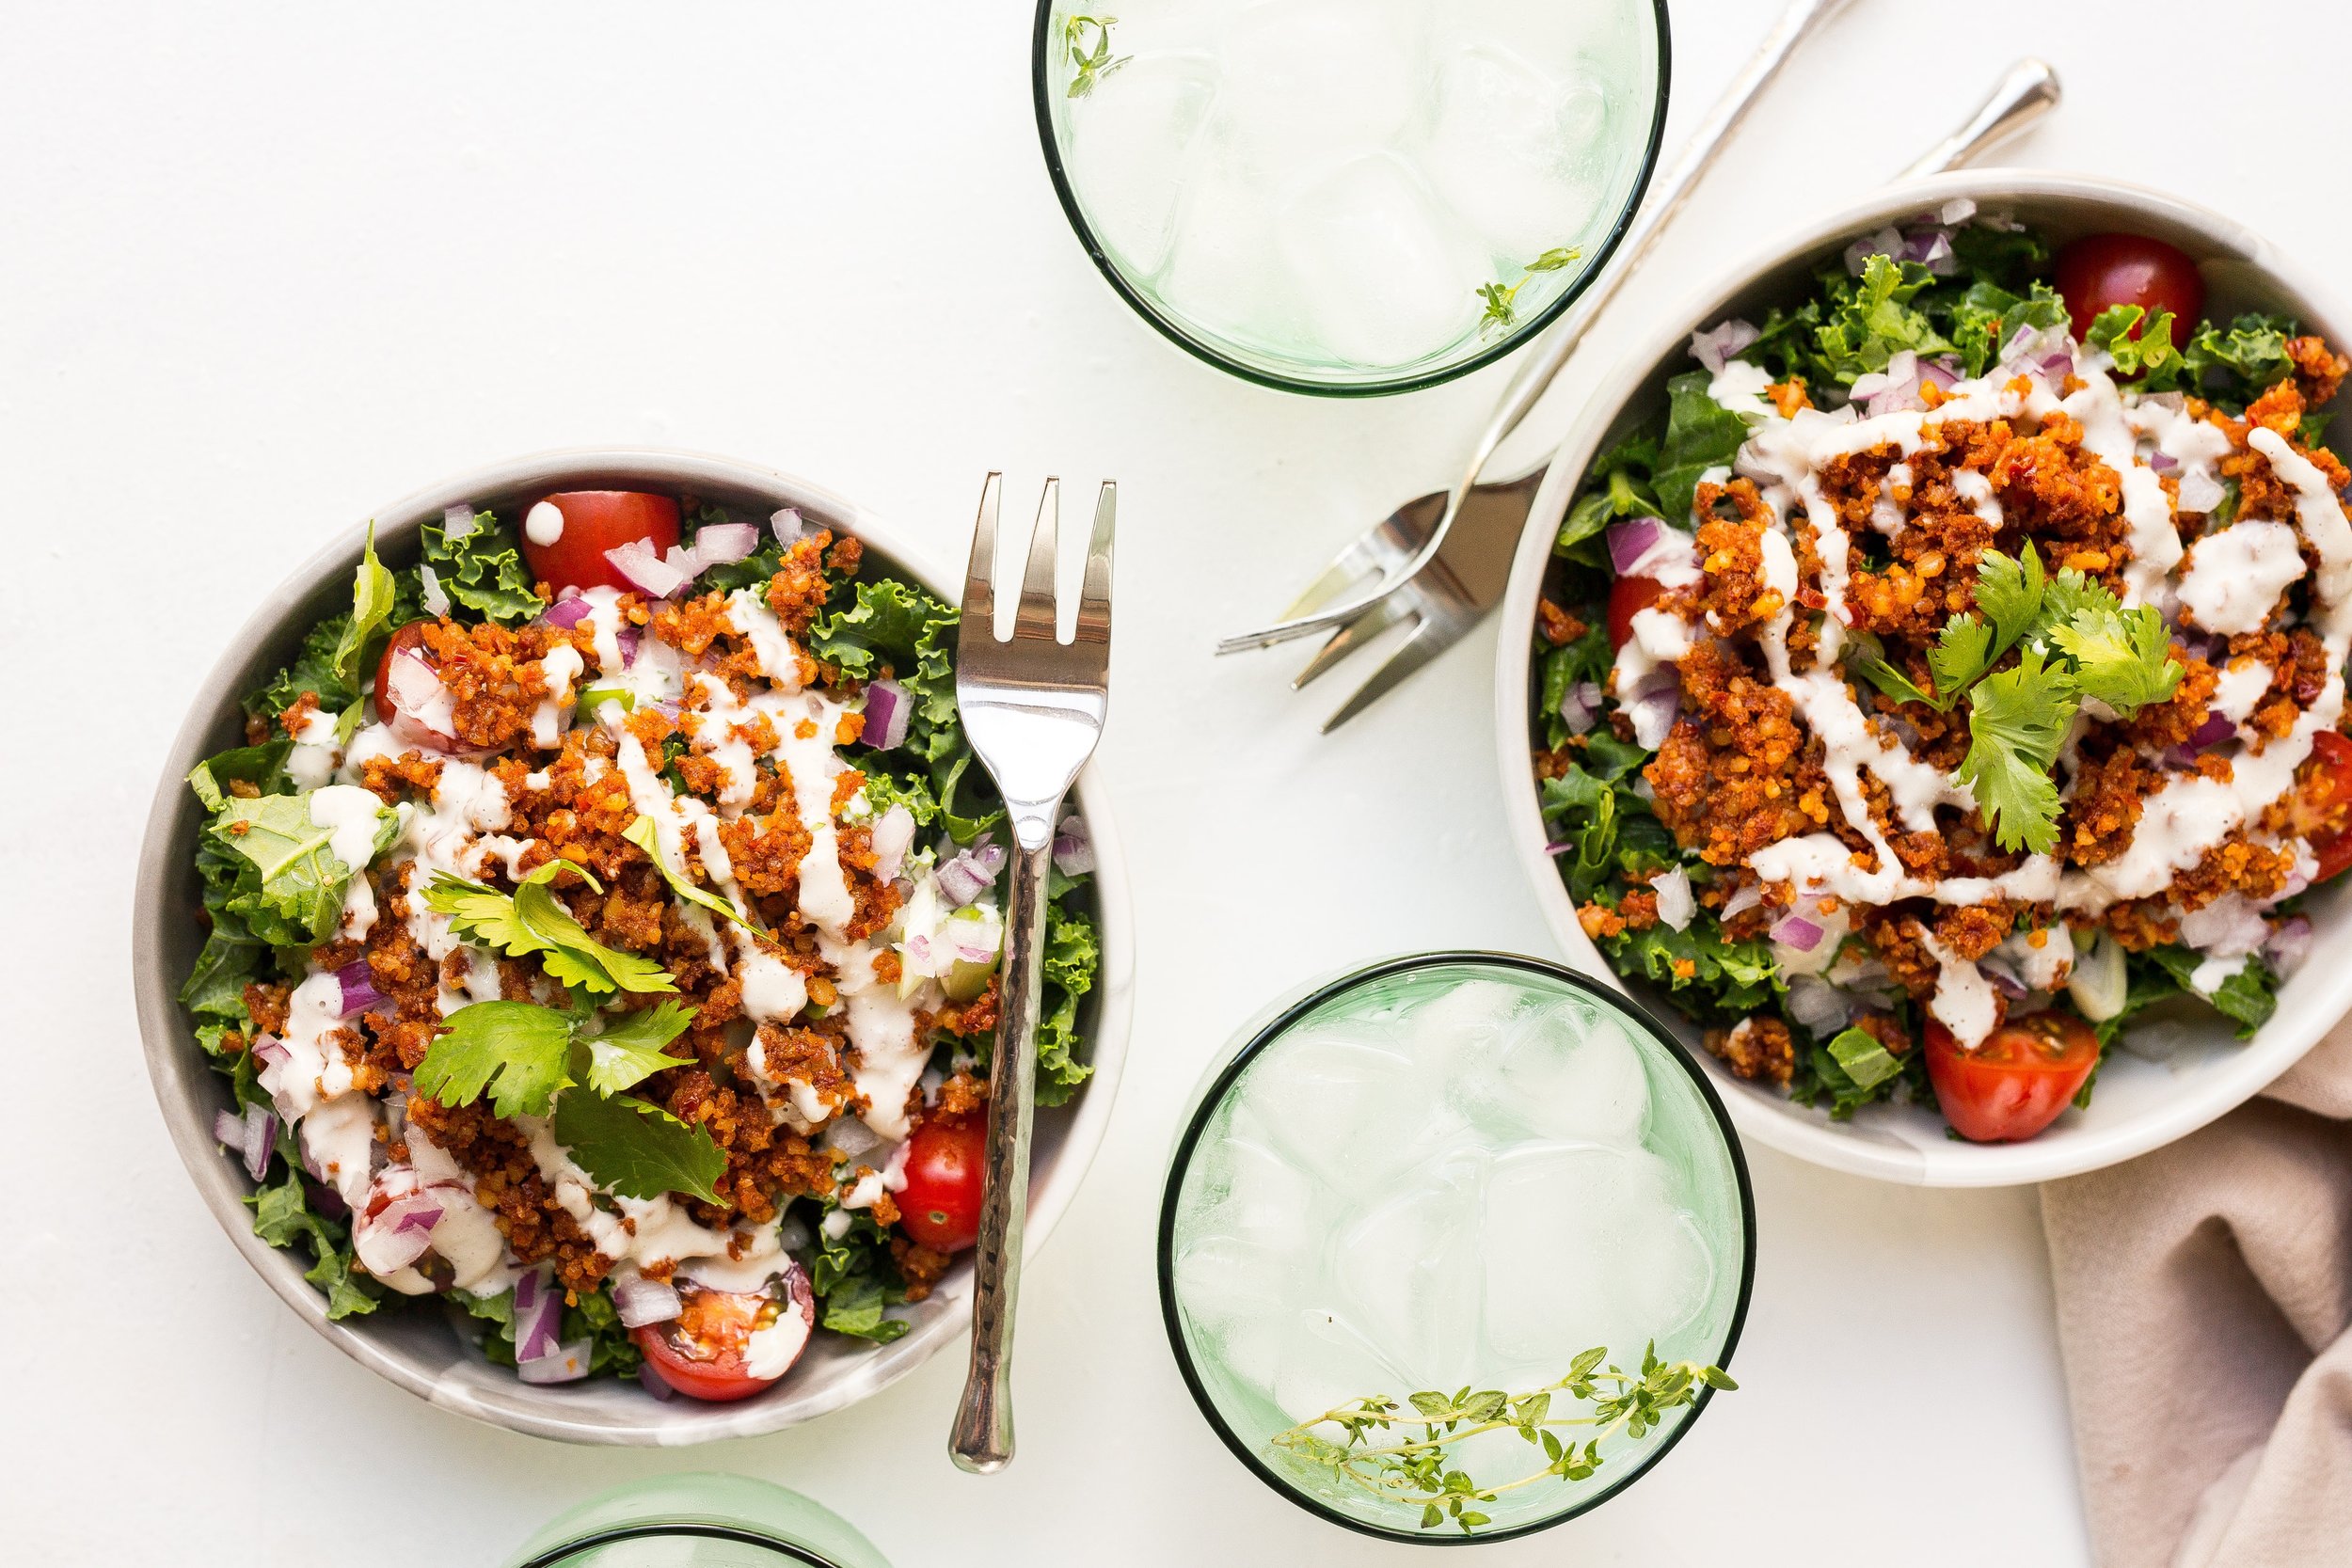
Raw Taco Salad Bowl

This summer heat just won't quit. We've got another hot week ahead here in Ottawa, which means I'm avoiding my stove, my oven, or anything that'll heat up my house.  If you're looking for a no-cooking-required simple summer recipe, you're in luck.  

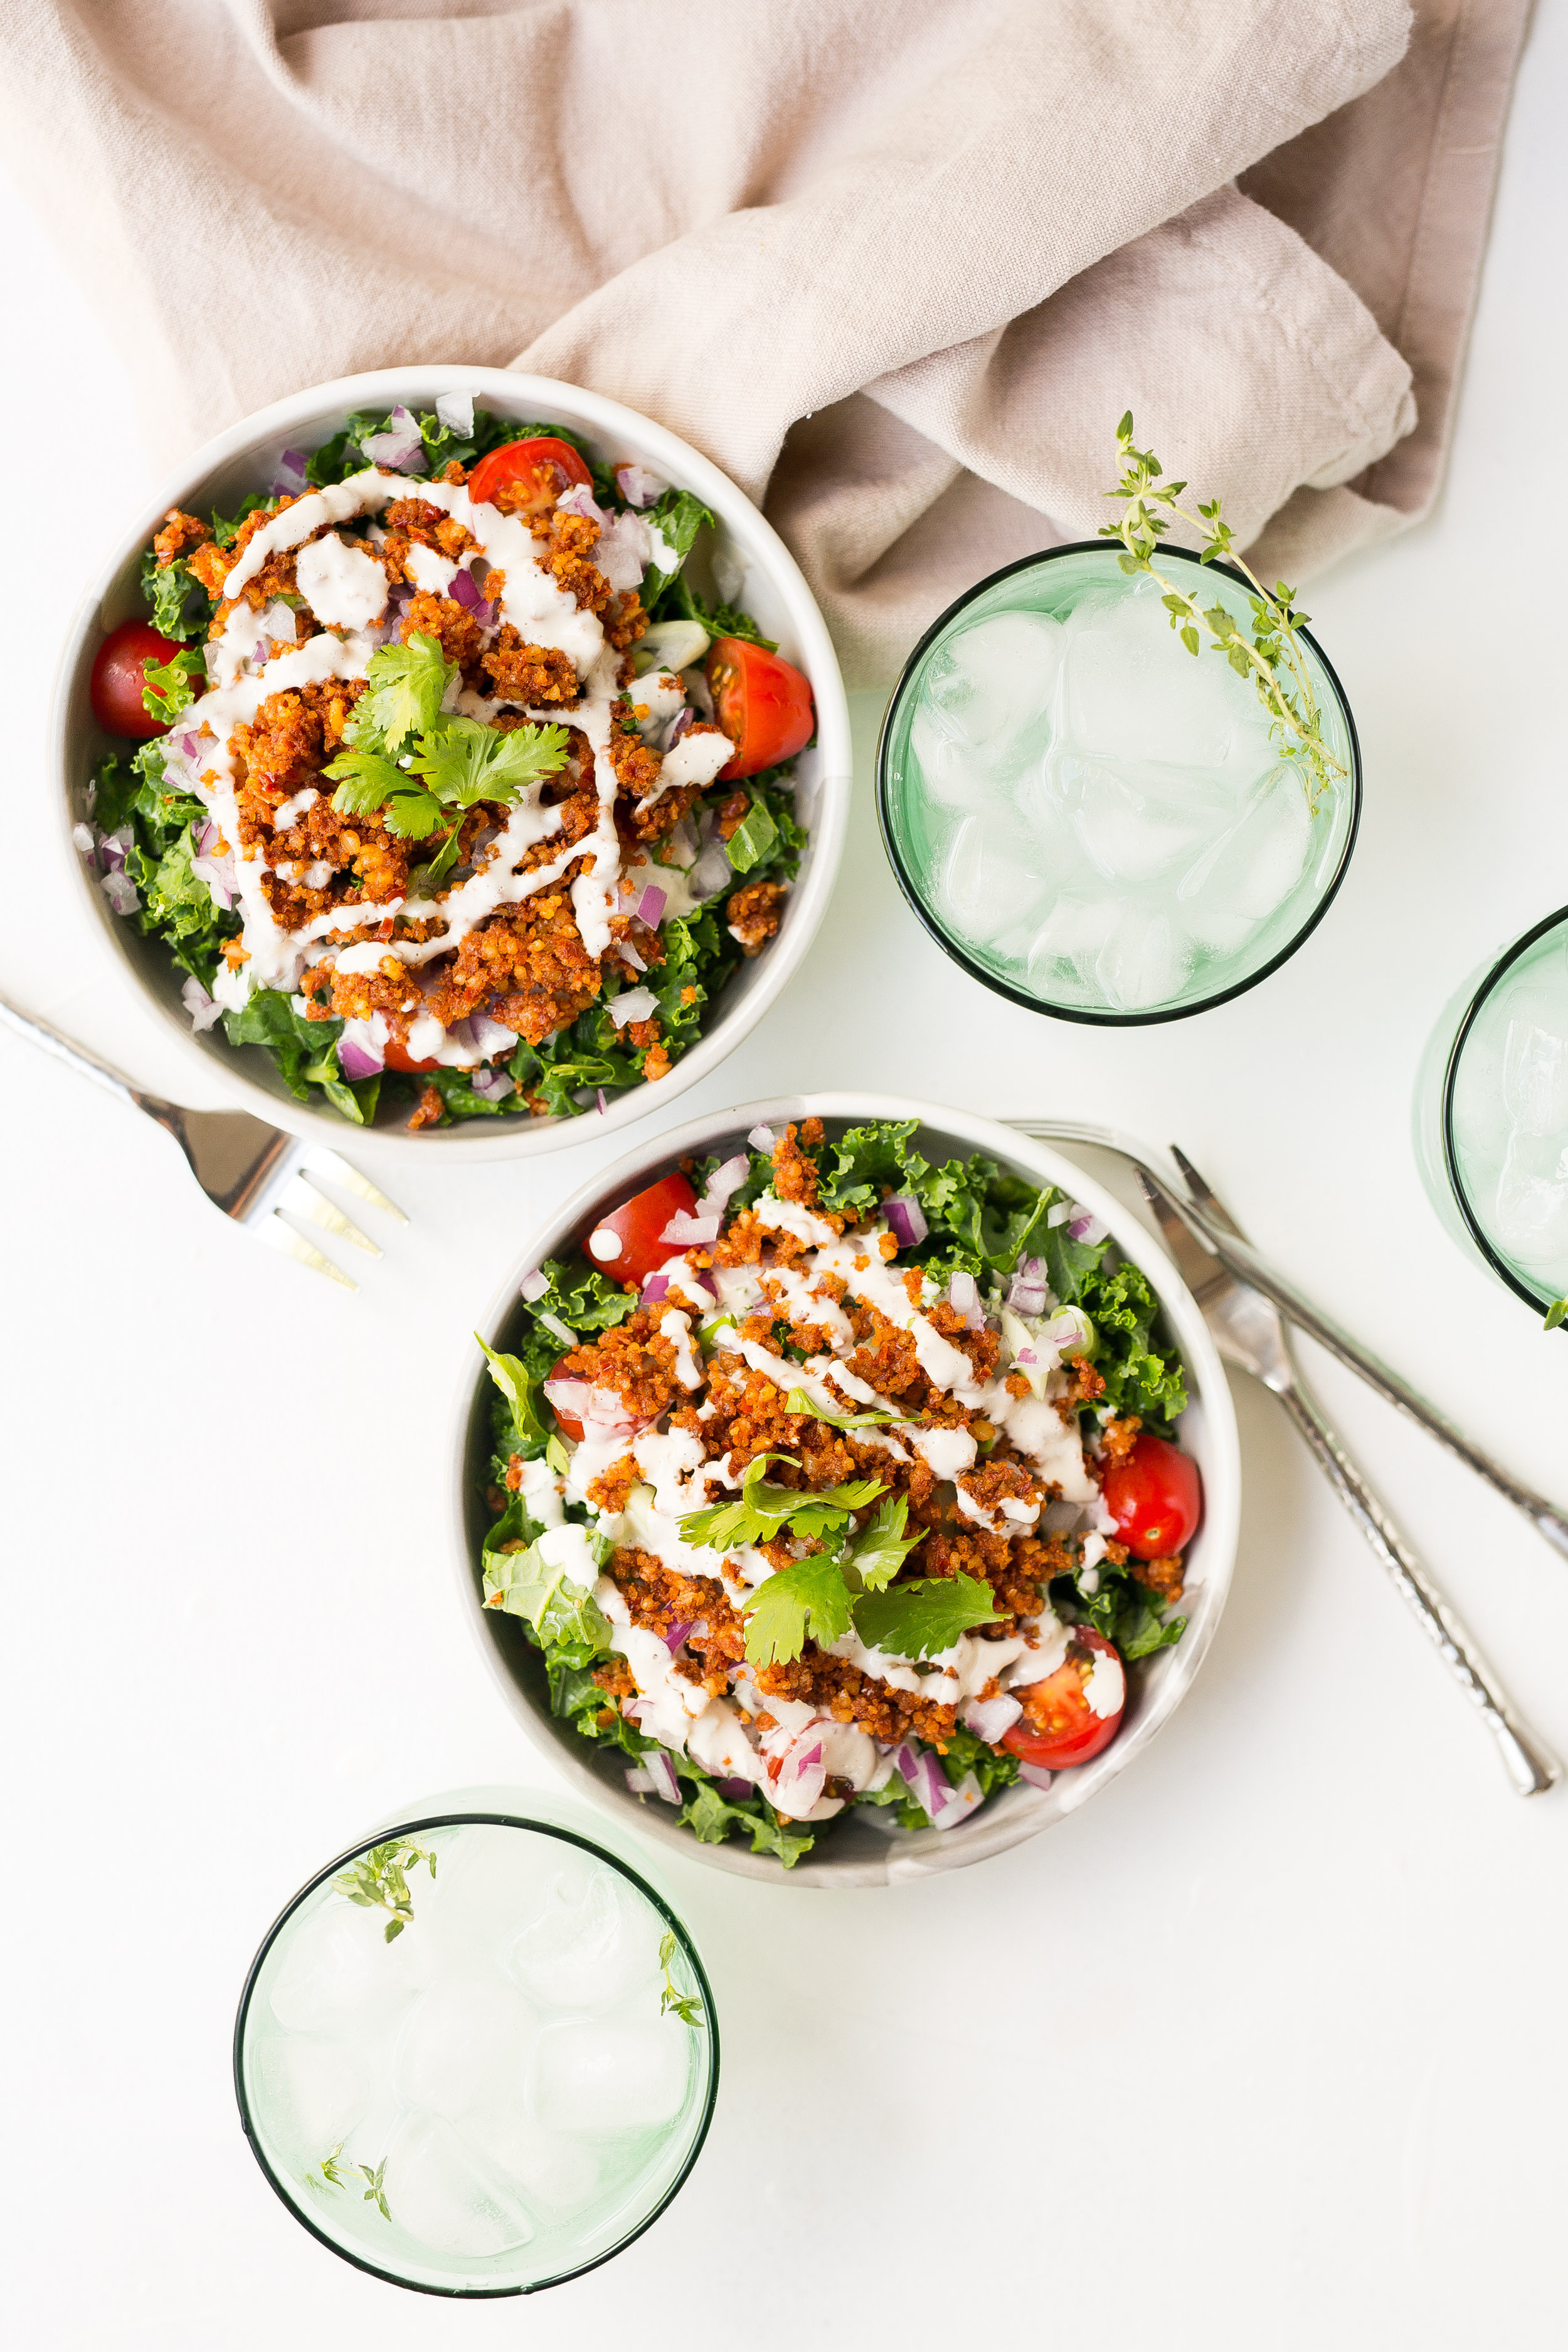
You may have seen a raw taco bowl on my blog before, but it's making a comeback. I've simplified the recipe and collaborated with my friend Ana Tavares to shot some beautiful photos.  This recipe has been on high rotation at my cooking lessons this summer and is also a favourite in my household. Ana told me her family also loved the bowls as they were the lucky recipients of the leftovers following the photoshoot.  Scroll down to get the full recipe. Please let me know if you've tried it out. I'd love your feedback! 

RAW TACO SALAD BOWL

Makes 4 servings 

Ingredients: 

Walnut Meat: 

1 cup walnuts
1/2 packed cup sun-dried tomatoes or sun-dried tomatoes in oil
1/2 teaspoon cumin
1/2 teaspoon smoked paprika
1/4 teaspoon garlic powder
1/8 - 1/4 teaspoon salt (adjust to taste)
Pinch of chili flakes or cayenne pepper, optional (for those who like it spicy!) 

Tahini Sour Cream: 

1/2 cup tahini
1/2 cup water
1/4 cup fresh lime juice (2 to 3 limes)
1/2 teaspoon sea salt
2 tablespoon olive oil or avocado oil
1 small clove garlic clove, roughly chopped

Salad Components: 

Approximately 8 cups leafy greens of your choice (arugula or finely chopped kale are my favourites)
1 pint grape tomatoes, halved
1/2 of a small red onion, small dice
3 - 4 green onions roughly chopped
1/4 bunch cilantro, roughly chopped, for garnish

Directions:

If you're using sun-dried tomatoes in oil skip this step.  If using sun-dried tomatoes (just dried tomatoes and salt, no oil), add them to a bowl and cover them in water and leave them to soak for 1 - 2 hours to soften them. Drain.

Process all of the Walnut Meat ingredients in a food processor until well combined, but still chunky and crumbly (with a meaty texture).

Combine all of the Tahini Sour Cream ingredients in the blender and process until smooth.  If it's too thick, add some water to loosen. 

To assemble your salad: place about 2 cups of leafy greens in a bowl. Top the salad with the fresh tomatoes, a sprinkling of red onions and green onions.  Then add the walnut meat and drizzle about 1/4 cup of dressing on your salad. Garnish with cilantro and enjoy! 

If you enjoyed the recipe I shared above be sure to check out my Plant-Based Breakthrough program, which is a crash course in plant-based health, nutrition, and meal planning. For details about the program click here. You can also join the Plant-Based Breakthrough Community on Facebook where I share recipes, inspiration, and information on plant-based nutrition.

Raw Taco Salad-3.jpg

Cherry Chocolate Nice-Cream

It's turning out to be a hot, hot, hot summer, and if you're looking to beat the heat, I’ve got just the recipe to cool you down.  Cherry Chocolate Nice-Cream. Need I say more? Well, perhaps I should clarify for those of you who are new to the term "nice-cream", which is a quick DIY dairy-free banana-based ice-cream.  It's essentially the easiest, tastiest and possibly healthiest way to make ice-cream at home. 

I’m super excited to share this recipe for a couple reasons. Firstly, I’ve been making this one a lot at my cooking lessons and sharing photos on my Instagram stories. Needless to say, I had lots of requests and it's about time I share this with those of you who haven't been able to attend the lessons. 

Secondly,  this is the first of many upcoming projects that I'll be doing with my friend Ana Tavares. You might remember seeing her as a guest blogger, or perhaps you’ve stumbled upon her Instagram where she posts stunning food photography. If you speak Portuguese you may have discovered her vegetarian food blog or cookbook (which has been hugely successful in Brazil).  Ana took the photos for this post and we plan to collaborate in the coming months to create more great culinary content in both English and Portuguese.

Scroll down to learn how to make Cherry Chocolate Nice-Cream and stay tuned as we’ll be sharing another recipe collab next week.

CHERRY CHOCOLATE NICE-CREAM

Makes 3 - 4 servings

Ingredients: 

4 overripe bananas
1/3 cup cocoa powder or raw cocao powder
1/4 teaspoon vanilla extract
Non-dairy milk of your choice, optional
1/4 - 1/3 cup frozen dark sweet cherries or sour cherries depending on your taste
Optional topping: unsweetened coconut flakes

Directions: 

Chop the bananas into small rounds and freeze them overnight on parchment lined baking tray.

Add all ingredients - except cherries and coconut flakes - to a food processor or high-speed blender.   Process until completely smooth (similar to a soft serve consistency). If you find your blender isn’t strong enough to handle the frozen banana you may need to let them thaw a bit and/or add a bit of non-dairy milk to get things going. 

Once you've reached a nice, smooth texture, add the cherries, then pulse for a minute or so or until the cherries are evenly distributed, but still a bit chunky. 

For the best texture you’ll want to enjoy your nice-cream immediately, but you can  freeze leftovers and thaw again before serving.  When serving, top your nice-cream with whole frozen cherries and unsweetened coconut flakes. 

If you enjoyed the recipe I shared above be sure to check out my Plant-Based Breakthrough program, which is a 4 week online crash course in health, nutrition, and meal planning.  For details on when the next program starts click here. You can also join my Plant-Based Breakthrough Community on Facebook where I share recipes, inspiration, and information on plant-based nutrition.

Chocolate Cherry Nice Cream-3.jpg

Green Power Bowls

I've been making tons of Green Power Bowls these days. These have been very well received by my private clients and at cooking lessons.  I have been posting photos of these bowls a lot in my Instagram stories and I figured it was finally time to share the recipe on my blog. 

Although it may seem elaborate, these kinds of bowls are actually quite easy to make.  It requires a little prep, chopping and sautéing of the veggies, putting together the dressing, and making the noodles.  If you are a soba noodle newbie you'll want to pay attention to a few things. Pure buckwheat noodles are gluten free, but you may come across some varieties of soba noodles that are a mix of buckwheat and wheat. The blended variety is much less expensive. If you are celiac or gluten intolerant make sure you seek out the 100% buckwheat noodles. When using buckwheat noodles of any kind, I always cook them according to the package directions (usually for about 5 - 8 minutes on a simmer). When they are fully cooked I transfer them to a colander immediately and give them a very good rinse under cold water. This will remove any excess starch.   By the way, if you don't have soba noodles on hand or if you don't want to use them, you can also swap out the soba noodles for rice noodles, quinoa, or any other grain or noodle of your choice. 

I also wanted to mention that this recipe is really a guideline.  As I said above, you don't need to use soba noodles, you can use something else. Also, feel free to swap in kale for spinach, or maybe some bok choy. You may also decide to add in chickpeas or tofu instead of the edamame.  The sauce is the pièce de résistance and no matter what you put in your bowl, it'll taste good as long as you're using the sauce. 

Scroll down to get the full recipe and if you make it, please tag me on social media. I love seeing your photos! 

unnamed-3.jpg

GREEN POWER BOWLS WITH SOBA NOODLES

Yields 4 to 6  servings

Sauce: 

1/4 cup natural peanut butter, tahini, or sunflower seed butter
2 tablespoons tamari
2 tablespoons lime juice or apple cider vinegar
1 clove garlic minced
1 teaspoon fresh ginger minced
1 - 2 teaspoons maple syrup
1/4  - 1/2 teaspoon red pepper flakes
1/2 cup water, or more, if needed to loosen the sauce

Noodles:

16 oz soba (buckwheat) noodles
1 teaspoon sesame oil

Vegetables:

1 teaspoon sesame oil
6 green onions, sliced on the diagonal
6 - 8 cups assorted vegetables: cauliflower, broccoli, & spinach
1 small bunch basil
2 cups shelled edamame, thawed

Toppings (optional): 

Hemp hearts & sliced green onions

Directions:

Wash and chop cauliflower & broccoli (approximately 6 - 8 cups in total) into bite sized pieces. Wash spinach and pat to dry or use salad spinner. Pick basil leaves off the stems (discard stems), wash leaves, and gently pat to dry.  Set aside. 

In large measuring cup or medium sized mixing bowl, combine all the sauce ingredients, except the water. Stir until well combined (you could also use a blender if you're looking for a very smooth sauce) and add enough water to thin the sauce down so that it’s pourable.  Set aside. 

Cook noodles according to the package. Drain, rinse, and toss with sesame oil. Set aside.

Warm the sesame oil in a wok or skillet over medium heat. Add the green onions and cook for a couple minutes, just until they start to soften. Add the heartier vegetables - cauliflower & broccoli - cook until tender. Add the edamame and warm for a minute or two. Add the spinach and basil towards the end of cooking and allow them to wilt (about 2 minutes). 

To create your bowls: add a portion of soba noodles and a big scoop cooked vegetables to a bowl.  Top your bowl with a drizzle the sauce. Alternatively, you can add the sauce to the pan with the vegetables to heat the sauce. Before serving, top with a sprinkling of hemp hearts and any remaining green onions. These bowls can be eaten warm or cold.  

If you enjoyed the recipe I shared above be sure to check out my Plant-Based Breakthrough Program, which is a 4 week online course focussed on health, nutrition, meal planning, and cooking.  For details on when the next program starts click here. You can also join my Plant-Based Breakthrough Community on Facebook where I share recipes, inspiration, and information on plant-based nutrition

Seaweed: A Sustainable Superfood + Miso Mugs

Following my interview on CBC Radio I wanted to share more information about seaweed and its benefits. In case you haven’t noticed, seaweed has become more and more popular these days. It has been featured in prominent and well respected blogs, magazines, and media outlets as a top food trend, and chefs around the world are finding new and exciting ways to incorporate seaweed into their menus. It's also been touted for its many health benefits and is a rising star in the world of sustainable foods. 

What exactly is seaweed?   

Seaweed is an umbrella term for an entire group of macroalgae and microalgae that live in salt water, brackish water, or fresh water.

There are three main varieties of seaweed: Green algae, such sea lettuce. Brown algae which includes kombu/kelp, wakame, and arame. Red algae includes well-known varieties such as nori, dulse, and hana tusnomata just to name a few. 

Cultivation

Depending on the variety of seaweed, it may be harvested wild or using various cultivation systems (seaweed farming). Cultivation can occur onshore using large tanks, inshore (close to land), or offshore (in deeper waters). In some cases it may be handpicked, collected using nets, or harvested mechanically.  

When it's harvested seaweed is processed immediately to avoid spoilage. Generally seaweed is rinsed with clean salt water (fresh water is damaging to seaweed) and dried in the sun or using drying equipment or facilities. Once dried, seaweed is vacuum sealed to prolong freshness and quality. 

Cultivating sea vegetables in the ocean may offer the environment benefits through reducing ocean acidification and purifying the water around them. Cultivation is also sustainable as it reduces the risk of over-harvesting wild species, and it is a food source that does not require feed, fertilizer, or land to grow.

Taylor Widrig, owner of Mermaid Fare, harvesting kombu in Nova Scotia.

Taylor Widrig, owner of Mermaid Fare, harvesting kombu in Nova Scotia.

Nutrient Profile

Seaweed is an extremely nutritious food. It's rich in vitamins and minerals that are easily absorbed by the body. It also contains antioxidants, is anti-inflammatory and contains essential fatty acids and essential amino acids.

Macronutrients:
Depending on the variety, seaweed can contain anywhere from 5 to 45 % protein.  It also contains a significant amount of dietary fibre (anywhere from 30 to 60 % when dry) and omega 3 and omega 6 fatty acids.

Micronutrients:
Seaweed contains vitamins including A, B1, B3, B6, C, and E. It also contains minerals and trace elements including calcium, phosphorous, magnesium, sodium, potassium, iron, zinc, copper, manganese, selenium, molybdenum, chromium, fluoride, and iodine. 

Health Benefits

Potential health benefits of seaweed: maintaining healthy cholesterol levels; may reduce risk of cardiovascular disease; weight management; supporting thyroid function;  may be protective against some forms of cancer; and more!

How much should you eat to maximize the health benefits? Since seaweed is extremely nutrient dense, you only need to consume small quantities to reap the benefits.  For the average adult the recommended daily intake is 0.2 to 0.35 oz or 5 to 10 g of dried seaweed. If you plan on using seaweed therapeutically, please consult with a medical professional. 

Choosing & Sourcing Seaweed

Although it may be tempting, do not harvest wild seaweed yourself. Proper harvesting techniques are essential in maintaining the health of the plant and its surrounding environment.  

You can purchase seaweed in most natural food stores, Asian grocers, and sometimes even in well stocked grocery chains. If possible, choose sustainably sourced and traceable seaweed. 

Culinary Uses

Seaweeds are know for their salty, briny and distinctive umami flavour.  Depending on the variety, it can be enjoyed dried or fresh, roasted, cooked, stir-fried, marinated, used in teas, soup stocks or bouillons,  dips and spreads, used as garnish or salt replacement, and as a thickening agent. It's highly uncommon to find fresh seaweed in North America. Depending on the type of seaweed you're cooking with you may need to rehydrate it by submerging it in water before use. 

Although the options are endless, here are a few ways you can incorporate seaweed into your diet: wakame in miso soup; kombu in dashi or when cooking beans or grains (to increase digestibility & add nutrients); nori for sushi or toasted to make a crispy snack; agar agar (a gelatinous substance derived from algae) to make jams and jellies; or dulse sprinkled in salads soups, stews or pan fried to create a plant-based alternative to bacon; etc.

Note: dried seaweed expands significantly when rehydrated, with an increase of 8 - 10 times in weight depending on the variety.

If you're looking to add more seaweed to your diet, I have a few recipes on my blog that may be of interest to you. Check out my Dulse Sunflower Seed & Walnut PâtéSuperfood Kale Salad, and Kaiso Seaweed Salad (featuring hana tsunomata).  You can also scroll down for my quick and easy miso mug recipe. This is one of my favourite snacks and I hope you'll enjoy it too!  

MISO MUG WITH DULSE

29433177_577597629279777_5938423260365455360_n.jpg

Makes 1 serving. 

Ingredients:

1.5 cups of water
1 - 2 teaspoons miso paste, to taste
Mermaid Fare dulse
Optional add-ins: sliced green onions, grated carrot, sesame seeds, little cubes of tofu or shelled edamame, dried or fresh mushrooms, or tiny pieces of a delicate leafy green (like spinach or arugula)

Directions:

Bring water to a boil in a pot or a kettle. Transfer hot water, plus miso paste, to a mug or small bowl. Stir until the miso is dissolved. Then add in crumbled or small pieces of dulse and choose any of the add-ins listed above. Enjoy immediately!  It makes a great mid-afternoon pick-me-up, or even a light meal with the addition of tofu. 

In the photo, I've added dulse, green onions, tofu, and mushrooms, and served the soup with a side of pretzel bites from Ottawa's zero waste grocery store Nu Grocery.

References:
Ocean Greens: Explore the World of Edible Seaweed & Sea Vegetables, by Lisette Kreisher & Marcel Schuttelaar

Twice Baked Sweet Potatoes

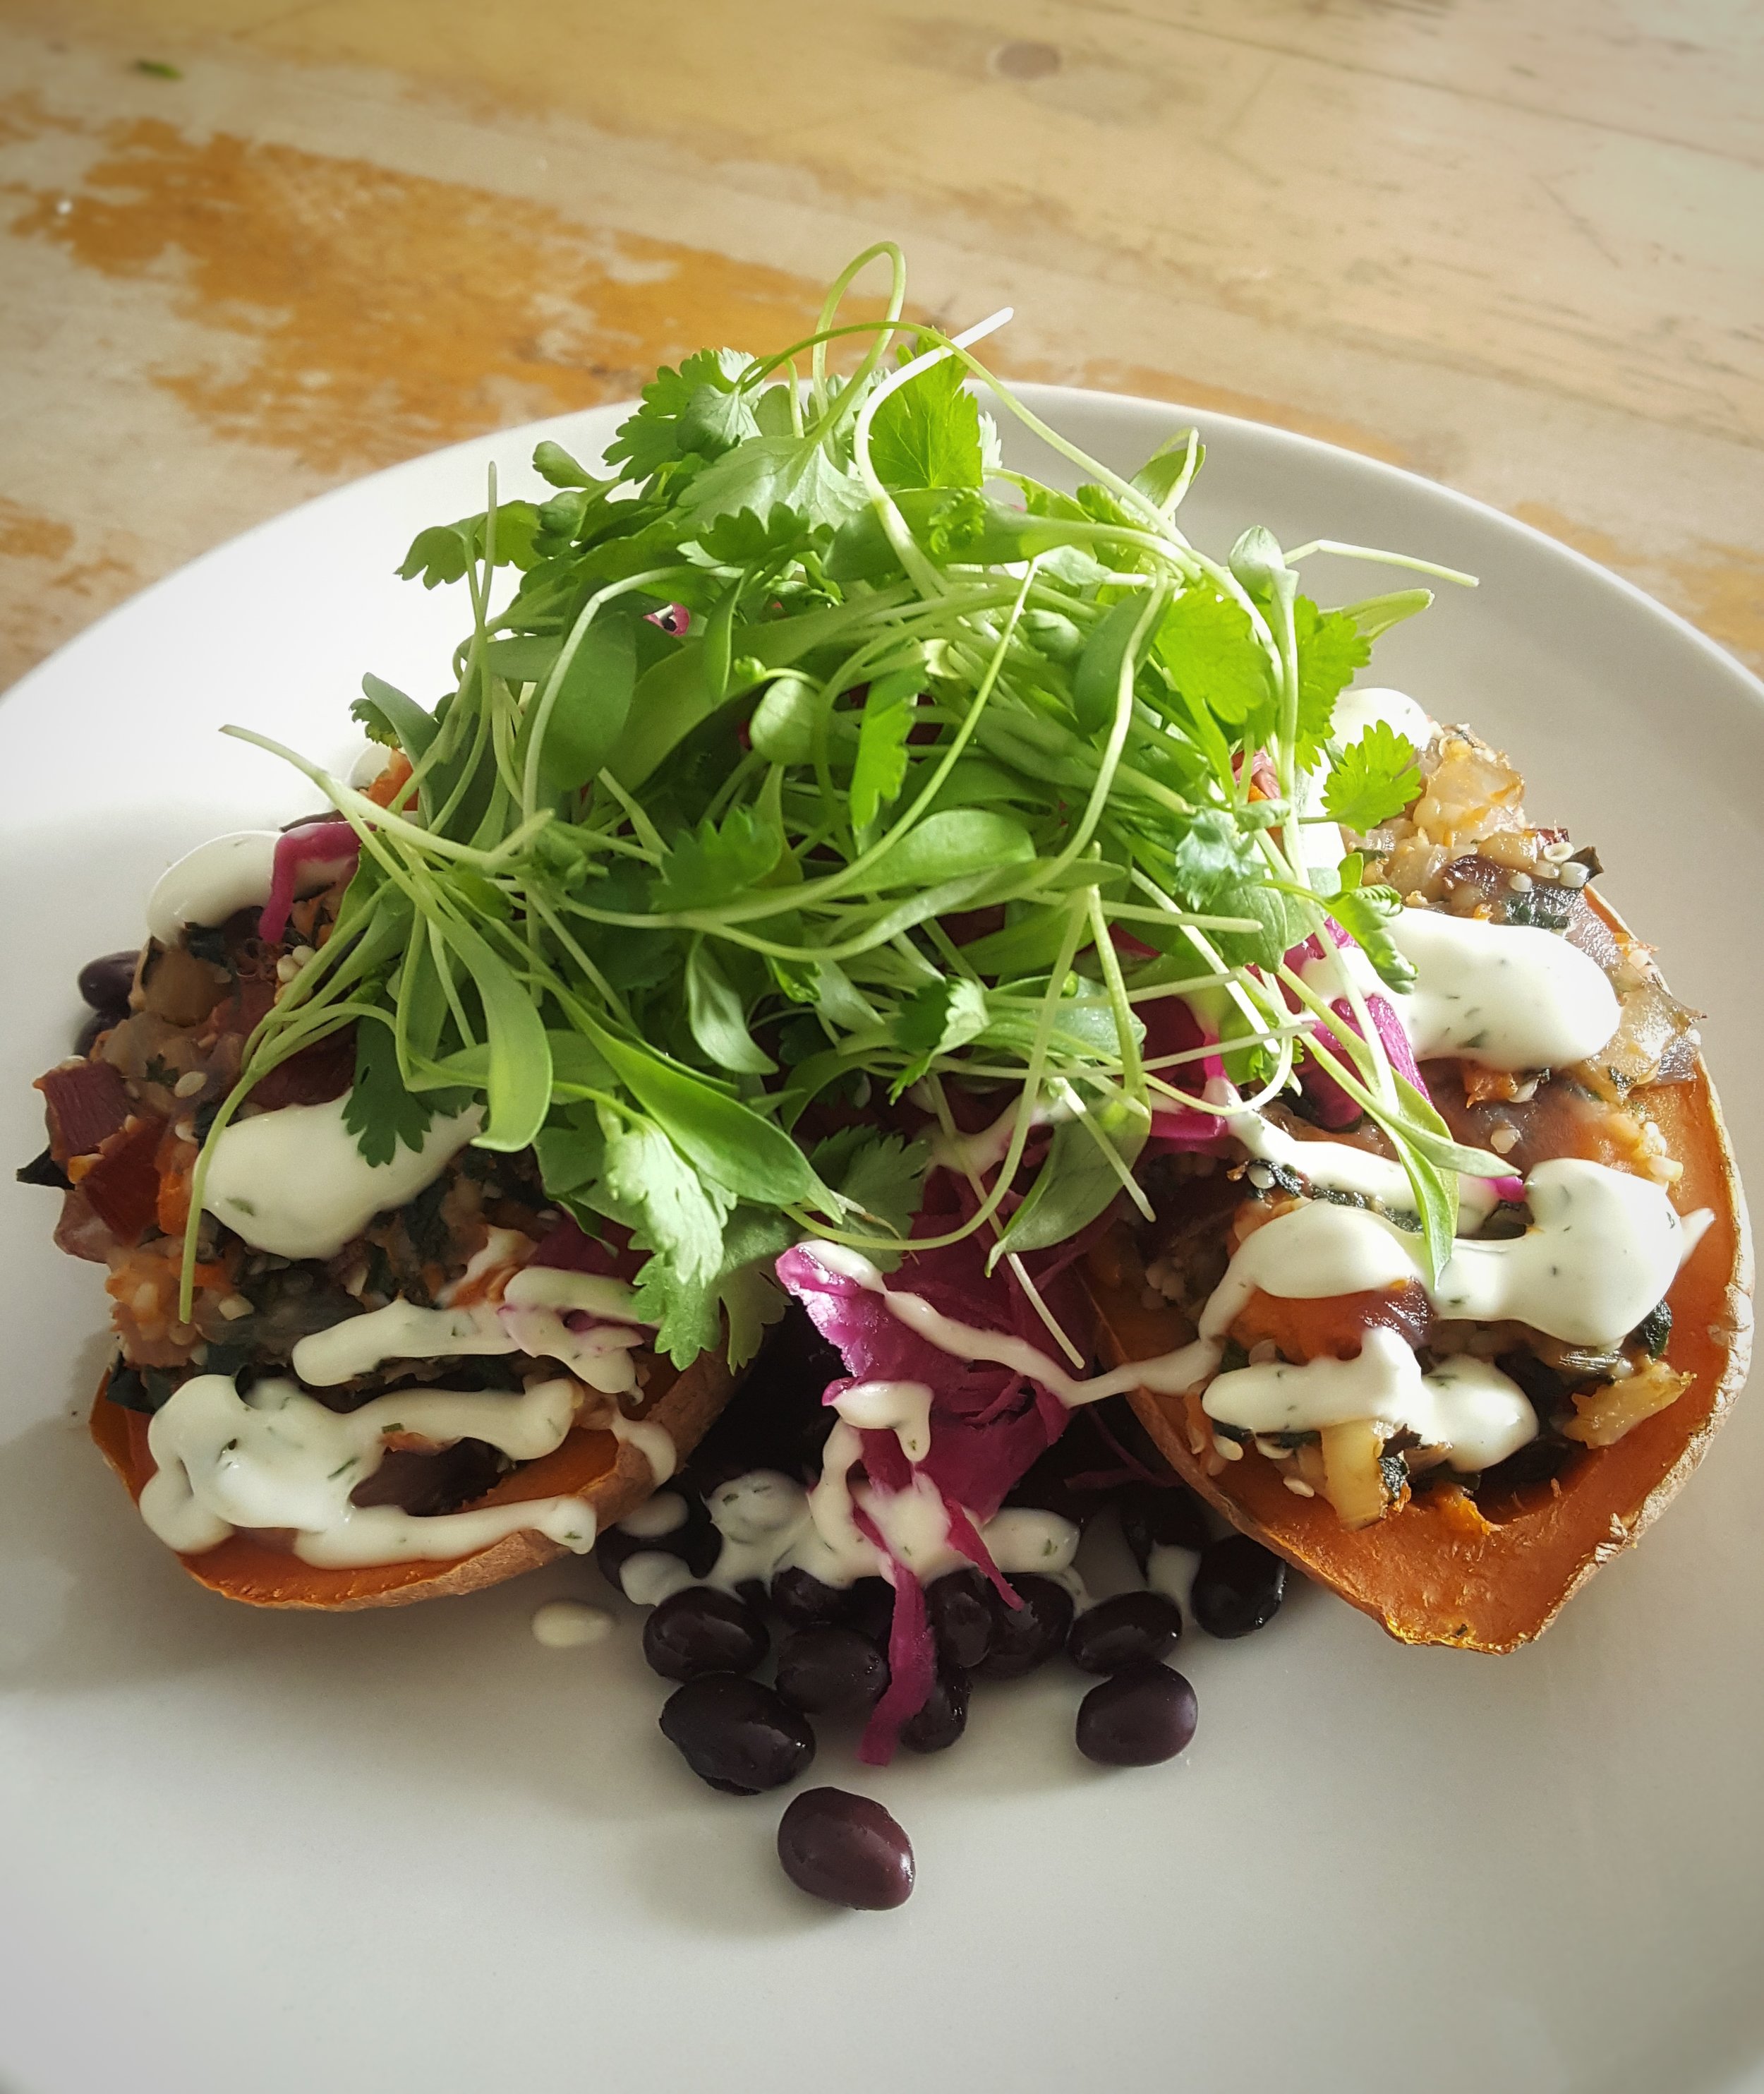
Last month I joined forces with my pals at Pure Kitchen, a vegan and vegetarian restaurant here in Ottawa, to create a delicious dish that would showcase their grab-n-go ranch dressing. I received tons of great feedback from people who've tried the recipe and I'm excited to share it with you! Scroll down to get the full scoop. 

Twice baked sweet taters .jpeg

TWICE BAKED SWEET POTATOES

Yields 3 - 4 servings

Ingredients: 

3 small to medium sized sweet potatoes
1 Tablespoon olive oil
1 bunch swiss chard (red, green, or rainbow), stems & leaves remove, finely chopped
1 red onion, small dice
3 cloves of garlic, minced
1/3 cup hemp hearts
1 cup black beans (or other canned/cooked bean of choice)
Sea salt & black pepper
Lacto-fermented sauerkraut, for garnish
Micro greens of your choice, for garnish
Pure Kitchen's Ranch Dressing or store bought or homemade dressing of your choice  (if you will be DIY'ing, I recommend my Buddha Bowl tahini dressing)

Directions:

Preheat your oven to 400 F. On a baking sheet, bake the sweet potatoes, whole, for about 30 minutes, or until soft enough to easily pierce the flesh with a fork. Cut the potatoes in half, length-wise, and let  them cool slightly. 

Warm the olive oil over medium heat in a large skillet.  Add the onions, chard stems and a big pinch of sea salt and sauté for a few minutes. When the onions are translucent, stir in the garlic and cook for a minute, then add the chard leaves. Cook for a minute or two, stirring frequently, until the chard is just softened, but not browned. Set aside in a bowl.

Using a spoon, scoop the flesh of the potatoes, leaving enough for the skin to hold its boat shape. Put the scooped flesh into the bowl with the chard. Add the hemp hearts and mix thoroughly, and add salt and pepper to taste.

Refill the sweet potato skins with the chard mixture. Bake for another 20 minutes, or until lightly browned on top.

To serve: Add two sweet potato halves to a plate, sprinkle with approximately 1/3 cup beans, and garnish with sauerkraut and micro greens.  Add a big drizzle of either the Pure Kitchen ranch dressing or a dressing of your choice. Enjoy! 

If you enjoyed the recipe I shared above be sure to check out my Plant-Based Breakthrough program, which is a crash course in plant-based health, nutrition, and meal planning. For details about the program click here. You can also join the Plant-Based Breakthrough Community on Facebook where I share recipes, inspiration, and information on plant-based nutrition.

Dulse, Sunflower Seed, & Wanut Pâté

Yesterday I was invited to be part of CBC Radio show "D is for Dinner" here in Ottawa. I was asked to talk about seaweed, the health benefits, and bring along recipe.   During the show, the host Alan Neal tried dulse (seaweed) on its own and he also tried a Dulse, Sunflower Seed & Walnut Pâté that I made — and he loved both! CLICK HERE to listen to the full recording of the show, or scroll down for the Pâté recipe.  CBC also shared article following the interview. You can find it here.

By the way, if you're in Ottawa, you can buy Mermaid Fare dulse at all Kardish Health Food Centre locations, The Table Vegetarian Restaurant, and NU Grocery. If you're outside of Ottawa, please visit the Mermaid Fare website to order online or find a retail location near you! 

29216824_1662553520499176_2100375338595909632_o.jpg

DULSE, SUNFLOWER SEED, WALNUT PÂTÉ

Ingredients: 

1 cup walnuts
1.5 cups cup raw sunflower seeds
1 teaspoon red wine vinegar
1/3 cup red onion, minced
1/3 cup whole leaf dulse
1/3 cup celery, minced
1/2 cup fresh parsley, chopped
1/3 cup lemon juice
3 tablespoon freshly chopped dill or 2 tbsp dried dill
Salt and pepper to taste
Water, if needed, during processing

Directions: 

Start off by soaking the walnuts and sunflower seeds together in warm water for at least 30 minutes.

Dice the red onion very small, about ¼ inch dice, and add to small bowl. Then pour over the red wine vinegar. Set aside.

To prepare the dulse, quickly warm it in a cast iron pan for about 1 minute – do not let it burn! Remove from the heat, let it cool, and crush it into flakes. 

Dice the celery the same size as the onion, and roughly chop parsley, dill, and mix together with the onions, lemon juice,  and dulse flakes in a medium sized bowl. 

Drain and rinse the walnuts and sunflower seeds. Using a food processor or high powered blender, blend the walnuts and sunflower seeds together until the oil starts to show on the bowl and it becomes similar to nut butter consistency; about 2-3 minutes. If the mixture is too dry, add a bit of water, and mix again. 

Combine the walnut and sunflower seed mixture with the rest of the ingredients and season with salt and pepper to taste.  Enjoy immediately in lettuce wraps or tortillas, with crackers, in sandwiches, or in a salad with vegetables and a dressing of your choice.

unnamed-1.jpg

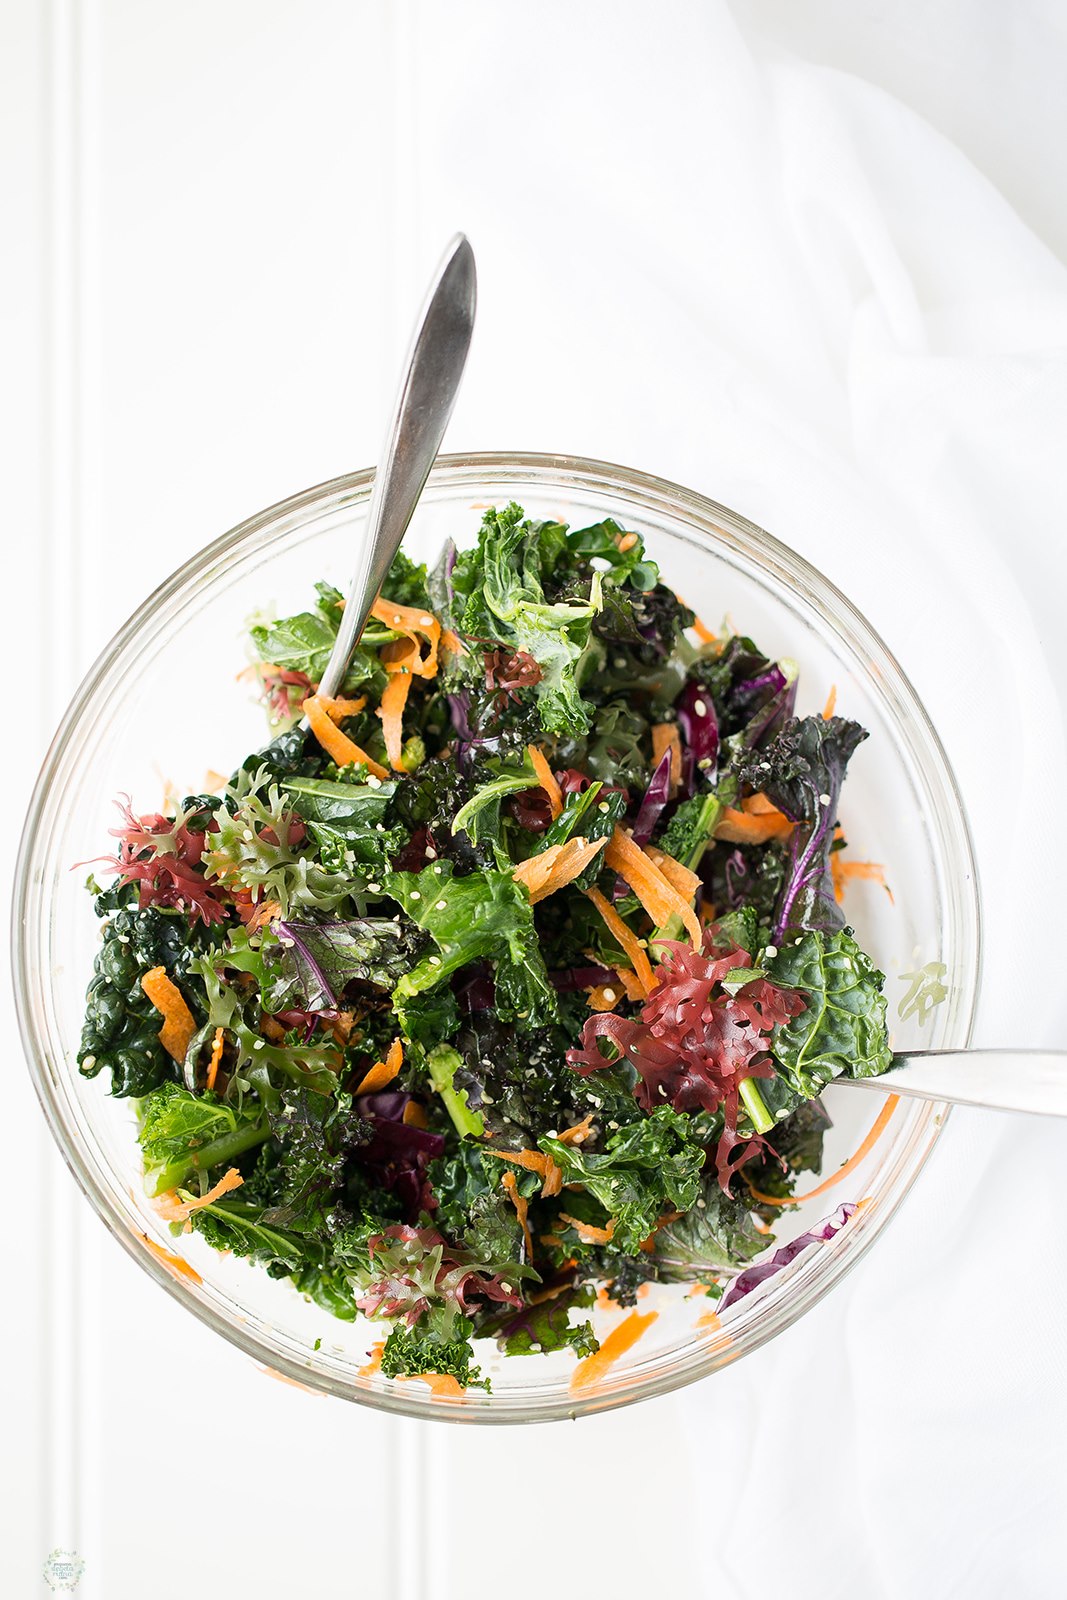
Amy's Superfood Kale Salad

This is one of  my top salads of all time and I couldn't be more excited to share it with you. Since so many of you have tried it and have asked me for the recipe, I figured it was time to share it with the masses.  

Before we get into the recipe, I'm going to address the elephant in the room. I know there's lots of controversy around the word "superfood". Isn't it just hyperbole or marketing used to sell products? Yes, but also no.  Let's take a quick look at the definition...

superfood/ˈsuːpəfuːd/ : A nutrient-rich food considered to be especially beneficial for health and well-being.
— Oxford Dictionaries Online

Based on that definition, it's safe to say that most whole plant foods could be considered superfoods! You don't need to travel to remote plains or depths of a tropical rainforest to find the healthiest of health foods. If you're looking to find superfoods, simply head on over to your nearest grocery store and b-line it to the produce section where pretty much everything could qualify as a "nutrient-rich food considered to be especially beneficial for health and well-being"! Simply put, readily available grocery store items like vegetables, fruits, and even nuts, seeds, beans, chickpeas, lentils and so on are, by definition, "superfoods".  How exciting is that?

With that in mind, I created a salad featuring some of the most nutrient-rich foods (both land and sea) that we can find here in Canada, put them together, and topped them with a delicious dressing. If you break it down this salad is just bursting with nutritious properties like antioxidants, phytochemicals, fibre, probiotics, fatty acids, plant protein, and much much more. Plus, it's also super flavourful!

By the way, if you're a newbie to seaweeds, don't be intimidated. Hana tsunomata is a mild seaweed that can easily be added into any dish. It's not overpowering and doesn't have a strong sea taste or smell like some other varieties. If you're in Nova Scotia, Prince Edward Island, or Ottawa (Ontario), you can find hana tsnuomata in retail locations. However, if you're outside of these areas you'll need to order it online from Mermaid Fare.  If you don't have seaweed and you'd like to make this salad right away, you can either swap out the hana tsnunomata for other varieties of seaweeds (rehydrated wakame or sliced nori sheets would work), or you can simply omit it altogether and it'll still be tasty.

Ok, let's get this salad party started. Scroll down for the full recipe. 

AMY'S SUPERFOOD KALE SALAD

Makes 4 to 6 servings

Salad Ingredients: 

1 bunch of kale, leaves removed and finely sliced, stems discarded
1/2 of a small red cabbage, finely sliced (by hand or using a food processor) 
1 large carrot, grated (by hand or using a food processor) 
1/4 cup hemp hearts
5 grams dried hana tsunomata (seaweed), rehydrated & dried off (optional)
Sauerkraut (raw/unpasteurized)
+ olive oil, apple cider vinegar & sea salt to massage the kale

Dressing Ingredients: 

5 Tablespoons, extra virgin olive oil
4 Tablespoons, apple cider vinegar
2 teaspoons, dijon mustard
2 teaspoons, maple syrup
Sea salt and freshly ground pepper

Directions: 

For the salad: Add the sliced kale to a large bowl and drizzle with a little bit of olive oil, add a splash of apple cider vinegar, and a pinch of sea salt. Using your hands, squeeze and massage the kale leaves. You’ll do this for 2 or 3 minutes until the leaves start to soften. This will make the kale easier to chew and more palatable.  Once the kale is soft, add the cabbage, and carrot to the bowl. 

To make the dressing: Using a fork or a whisk, combine apple cider vinegar, dijon mustard, and maple syrup in a bowl or medium sized measuring cup.  Slowly pour in 5 tablespoons of extra virgin olive oil and whisk, or stir, until thoroughly emulsified, then mix in sea salt and cracked black pepper to taste.

To assemble the salad: Drizzle the dressing over the kale, cabbage, carrot and hana tsunomata (if using). Mix the salad well to ensure that the vegetables are evenly coated. Add the hemp hearts and toss again. Serve immediately and top with as much sauerkraut as you'd like. 

Middle Eastern Lentils & Rice with Caramelized Onions

It's been my intention for ages and I'm finally getting around to sharing one of my favourite Middle Eastern recipes with you. For the uninitiated, Mujadara is a hearty, protein rich plant-based meal that is known for its humble and simple ingredients, yet is bold and rich in flavours. As the title of this blog post suggests, the base ingredients are lentils, rice, caramelized onions and spices. It's well known throughout the Middle East, and many families have their own version or special family recipe. If you search the web, you'll come across countless versions. 

It was my husband that first introduced me to this dish many years ago. He used to order Mujadara from the Lebanese restaurant in the cafeteria at his office. It became one of his favourite meals at work. Eventually he learned how to make it himself, and then I started making it too. For us, it's become a wintertime staple and below is our take on the recipe. I hope you enjoy it!

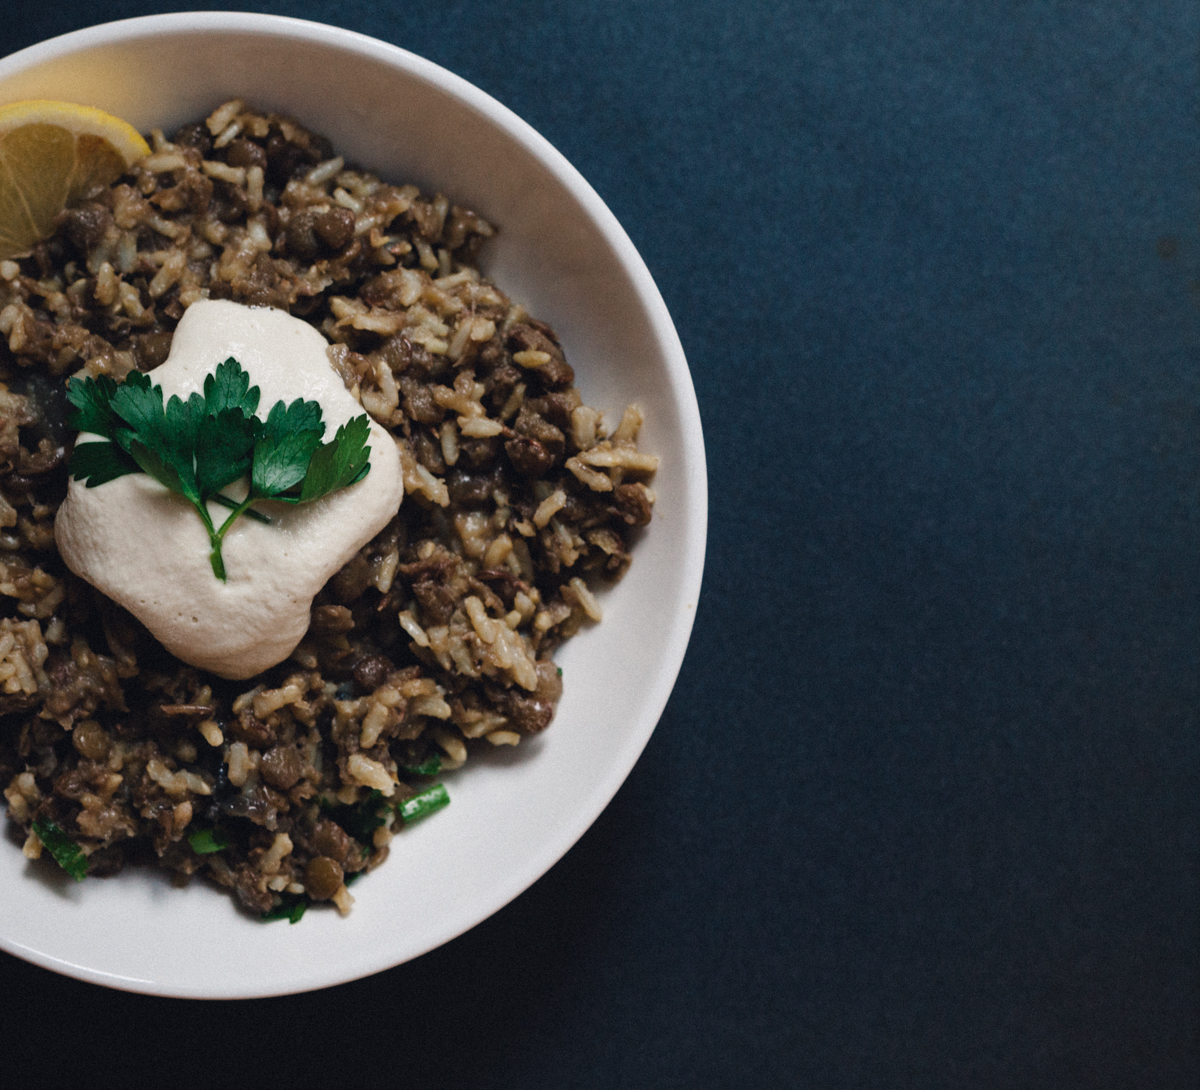
Photo by Caroline Yung.

Photo by Caroline Yung.

MUJADARA with CASHEW CREAM

Makes 6 servings. 

Ingredients: 

1 cup brown or green lentils (not red lentils), sorted and picked through for little rocks or other debris
1/4 cup extra virgin olive oil
1 teaspoon whole cumin seeds
1/2 teaspoon freshly cracked black pepper
3 medium red onions, thinly sliced
Sea salt
3/4 cup brown rice or brown basmati rice
3 1/4 cups of water
1/2 teaspoon ground cumin
1/2 teaspoon cinnamon or 1 (1-inch) cinnamon stick
1/4 teaspoon cayenne pepper (add more if you want it to be spicy) 
Lemon wedges
Pine nuts or hemp seeds, optional, for garnish
Cashew Cream  (from my 4-Layer Dip recipe)

Directions:

Add the lentils to  medium saucepan and cover them by about an inch with cold water, and bring it to a boil over high heat. Once boiling, reduce the heat to low and allow the lentils to cook until they are tender, but not mushy (about 20 minutes).  Drain and set aside.

While the lentils are cooking, warm the oil in a large skillet over medium-high heat. Once the skill has warmed up, add the whole cumin seeds and cracked peppercorns . Cook the spices and stir them a bit until you start to smell the aromas as the spices "bloom" and start to darken a bit.

Then, add the onions and a few big pinches of salt and cook until they begin to caramelize . Over time the onions will begin to caramelize and they'll start tasting sweeter. If the onions start sticking to the bottom of the pan,  add a little water.  Once the onions are sweet and a bit crispy you'll know they are done.  This will take an upward of 15 minutes. 

Remove about half of the onions to a dish and set them aside to be used later as a garnish. Then mix in the ground cumin, the cinnamon or cinnamon stick and cayenne.

Next up, mix in the rice and toast the rice in the pan for a few minutes. Add the cooked lentils, 3 1/4 cups of water and 1 teaspoons of salt and bring to a boil. Reduce heat to low and simmer. Then cover the saucepan and cook 30 minutes. You’ll know it’s done cooking once the water is completely evaporated and the rice is tender.

Turn off the heat, keep the lid on, and allow the rice to steam undisturbed for about 5 minutes.

Taste the rice for seasoning and adjust the flavour with extra salt, pepper or spices if needed. Serve with the reserved caramelized onions, pine nuts or hemp, cashew cream, and a little squeeze of fresh lemon and a side of roasted or sautéed vegetables or salad.  

This recipe is modified from the original recipe by Aarti Sequeira featured on the Food Network blog.

Sautéed Garlicky Greens

I love leafy greens! If you've been reading my blog, or attending any of my cooking lessons, you probably know this by now. Usually I talk about incorporating greens into soups, smoothies, stews and stir fry, but to be honest, most days I keep it really simple and I'm happy to eat a big ol' bowl of sautéed kale or collards. Is that weird? Maybe. Either way, I've been meaning to share this "recipe" with you for a while. It's very simple and can be used with whatever greens you have on hand. 

Just so you know, the term "greens" generally refers to a broad category of leafy vegetables, including collard greens, mustard greens, swiss chard, beet greens, arugula, kale, spinach, etc.  Although most of these are readily available and packed with nutrients, they tend to be overlooked. Given the excellent nutritional profile of leafy greens, I encourage you to seek them out and try different varieties.  You can use the recipe below as a starting point. 

I  enjoy sautéed greens as a snack topped with hemp hearts, as a side dish, in a Buddha Bowl, or served with Quinoa Pilaf and chickpeas or beans. My personal favourite is to make open faced sandwiches topped with Hummus  and sautéed greens. It does get a bit messy, so a fork and knife are necessary.

Scroll past the photo of sautéed beet greens and you'll find my simple formula for Sautéed Garlicky Greens. Enjoy! 

unnamed.png

SAUTÉED GARLICKY GREENS  

Ingredients:

  • 1 large bunch greens of your choice (kale, spinach, collards, arugula, chard, beet greens, mustard greens, etc.)

  • 1 to 2 tablespoons, extra virgin olive oil or coconut oil

  • 3 to 4 cloves, garlic, minced

  • Fresh lemon juice or vinegar of your choice, to taste

  • Sea salt and freshly ground pepper


Directions: 

To prepare the greens, give them a thorough wash, and then chop or rip the leaves into bite sized pieces.  If you are using kale, collards or chard, cut away the stems first. You can use the stems in your sauté as well, just be sure to slice them into small pieces. For less hearty greens like arugula or spinach, there’s no need to separate the stems. 

Heat the oil in a large skillet or stir-fry pan on medium. Add garlic and sauté for a few minutes, until slightly golden. (If you’re using the stems, add them to the pan at the same time as the garlic.)

Add the greens and continue to cook over medium heat, stirring frequently. Add a splash of water or vegetable broth, if needed, to keep the pan moist. 

For hearty greens, like kale or collards, cook them until they are tender, but still green in colour — this can take about 5 to 7 minutes.  For softer, more delicate greens, like spinach or arugula, cook until they are wilted — this may only take a minute or two. 

Finally, add a big squeeze of lemon juice or a few splashes of vinegar to your greens. I personally love apple cider vinegar, but use whatever you like!  Season with salt and pepper and then serve immediately. 

Gingerbread Cookie Dough Bites

unnamed-4.jpg

Just over a year ago I stumbled upon the eye-catching Instagram account of an Ottawa-based blogger called "Pequena Vegetariana". The Instagram account and blog focusses on colourful, vibrant vegetarian recipes in Portuguese and English. A few months later, I had the chance to meet the blogger behind the blog when Ana Tavares attended one of my cooking classes.   Ana has been such a positive influence and has always been so supportive. I've gotten to know her better over the last year as she has since attended many of my cooking lessons and even participated in my group nutrition program.

Ana was born in Brazil and now lives and works here in Ottawa.  Although she works full time as a public servant, she also has several exciting endeavours underway that she showcases on her new website.  While Ana has lived in Canada since her teens, she still has strong ties to Brazil.  This past summer she worked with Brazilian publishing houses Belas Letras and Imaginarium to create her first cookbook, "Comidinhas do bem", which launched in November 2017 in 235 stores across the country.  It features 45 exclusive recipes created by Ana, daily positive living tips, beautiful photographs and graphics. I also played a very small role in the creation of this cookbook as I provided nutritional content for foods based on their colour.  It was truly a full circle moment to be able to offer my support to Ana in creating this gorgeous cookbook.  The cookbook is only available in Portuguese at the moment, but it has opened the door for some fun future collaborations between Ana and me. Stay tuned! 

Recently Ana shared one of her new recipe with me and I'm thrilled to be able to pass it along to all of you. She's come up with simple and delicious Gingerbread Cookie Dough Bites that are sure to satisfy your sweet tooth this holiday season.  

I’ve made this recipe a few times myself. I’ve followed the instructions exactly with great success and also made a few changes including swapping out the coconut oil and omitting the almond flour. See the notes below for details.

If you try them out, let us know what you think in the comments section below! 

GINGERBREAD COOKIE DOUGH BITES

Ingredients: 

1 1/2 cup rolled oats
1 teaspoon ground ginger or finely grated fresh ginger
1 teaspoon cinnamon
Pinch of ground cloves
2 tablespoons coconut oil
2 tablespoons almond butter
2 tablespoons maple syrup
2 tablespoons molasses
1 tablespoon vanilla extract
1/2 cup almond flour

Directions: 

Line a baking pan with parchment paper.

In a blender mix together the oats, ginger, cinnamon and ground cloves until it resembles a flour like texture.

In a large bowl, whisk together the coconut oil, almond butter, maple syrup, molasses and vanilla extract until well combined. 

Slowly add in the blender mixture and finally, add in the almond flour. By the end, you may need to use your hands cause it’ll get a little sticky.

Generously fill a tablespoon sized measuring spoon with the cookie dough mixture, roll into balls and place in the freezer. You should be able to make between 18 to 24 balls.

Freeze for about an hour, and serve cold directly from the freezer. Once frozen, you can also move them over into an enclosed container and keep them in the fridge for all your holiday cookie cravings!

Notes from the kitchen:
-If you don't want to use coconut oil, simply add extra almond butter. Rather than 2 tablespoons of coconut oil and 2 tablespoons of almond butter, go with 1/4 cup of almond butter. In making this swap, I found the recipe was dry enough that I didn’t need to add the almond flour at the end.
-Depending on the moisture or dryness of the recipe (it can vary depending on the oiliness of the almond butter, whether or not you use coconut oil, or the dryness of the oat flour), I haven’t always needed to add the almond flour. Generally near the end of the recipe I found that the mixture was dry enough that I could easily roll it into balls without the almond flour. If you find it is too moist but don't have almond flour, you could simply make a bit more oat flour and add it as needed. Oat flour is much cheaper than almond flour so this is a great cost cutting swap!

unnamed-6.jpg

Raw Taco Salad Bowl: The Fully Loaded Version

If you follow me on Instagram, you may have seen my recent adventures to Notre-Dame-de-la-Merci in rural Quebec for a weekend at Kabania.  I was there working - for the second year in a row - as the chef for Anne Tessier's restorative yoga retreat.  

Although I was there for work, I truly benefited from being in nature, connecting with the yogis, hiking, doing a few yoga classes, foraging in the woods, and disconnecting from the outside world. I also did a lot of cooking along with my excellent karma helpers who assisted me in the kitchen. 

One of my favourite meals from the weekend was the Raw Taco Bowl. I'm still dreaming about it, and people keep asking for the recipe, so I figured it was time I shared it here. Because this dish is raw, it's great in the summers months when we have access to tons of fresh local veggies. Plus, on a hot day, the last thing you want to do is turn on the stove.  The only "cooking" equipment required is a good food processor, but otherwise, it's basically just chopping and little bit of planning ahead. 

Besides being the perfect dish to load up on fresh, seasonal vegetables, my favourite part is the  walnut "meat".  The fattiness of the walnuts, combined with a few choice spices and the umami flavour of sun-dried tomatoes, makes it the perfect replacement for spicy ground beef.  Like my Buddha Bowls, you can really customize this dish to your liking. The salad components are merely a suggestion, feel free to add or subtract to your liking. When I made these bowls for the retreat,  I added black beans from a can, store-bought salsa and organic corn chips, which are not raw. If you want to keep this dish entirely raw, omit the beans and corn chips, and add fresh pico de gallo. 

Scroll down to learn how to make your own Raw Taco Salad Bowl, and please leave me a comment if you try the recipe. I love hearing from you! 

unnamed.jpg

RAW TACO SALAD BOWL

Makes 4 - 6 servings

Ingredients:

Walnut Meat:

1 cup raw walnuts
1/2 packed cup sun-dried tomatoes
1/2 teaspoon cumin
1/2 teaspoon smoked paprika
1/4 teaspoon garlic powder
1/8-1/4 teaspoon salt (adjust to taste)
Pinch of chili flakes or cayenne pepper, optional (for those who like it spicy!) 

Creamy Cashew Lime Dressing: 

1/2 cup cashews, soaked overnight and drained
3/4 cup water
1/4 cup fresh lime juice (2 to 3 limes)
1/2 teaspoon sea salt
2 tablespoon olive oil or avocado oil
1 small clove garlic, roughly chopped

Salad Components:

Approximately 8 cups leafy greens of your choice (I like arugula or baby kale mixed with romaine) 
1 pint grape tomatoes, halved
1/2 of a small red onion, small dice or thinly sliced
1 cucumber, chopped into bite sized pieces
5 - 6 radishes, thinly sliced  
1 avocado, cut lengthwise into thin strips
1 (14 oz) can of black beans, optional
1/4 to 1/2 cup salsa (homemade or store-bought), optional
3 - 4 green onions roughly chopped
1/4 bunch cilantro, roughly chopped, for garnish
Organic corn chips, for garnish

Directions: 

Process all of the Walnut Taco Meat ingredients in a food processor until well combined, but still chunky and crumbly. 

Combine all of the Creamy Cashew Lime Dressing ingredients in the blender and process until smooth. If your dressing is too thick, you may need to add more water until you reach your desired consistency.  You may also need adjust the seasoning by adding a little bit more salt. 

To assemble your salad place about 2 cups of leafy greens in a bowl.  Add the salad components of your choosing.  Then add the walnut meat and drizzle about 1/4 cup of dressing on your salad. Garnish with cilantro, green onion, and corn chips, and enjoy immediately! 

Fig and Olive Tapenade

The one year anniversary of my wedding is fast approaching.  For those of you who are new to the blog, Jeremy and I got hitched on September 3, 2016. You can see some photos of the big day here.  It was a crazy, amazing, world-wind day that I'll definitely never forget. Our wedding had some traditional elements, but it was very progressive in many ways.  Leading up to the wedding I jokingly described it as a "feminist, non-secular, vegan wedding".  It was all of those things, but it was also so much more. It was literally the best party ever (I'm sure most of the attendees would agree) with the best people ever, and we can't thank friends and family members enough for their massive help and support in making our dream wedding possible. 

I'm often asked what we served for food at a vegan wedding. Given that most people have never attended a vegan event I completely emphasize with their curiosity. There were very few vegetarians, let alone vegans, at the wedding and it was a huge privilege to introduce everybody to this style of cuisine. Jeremy and I are fairly healthy eaters. If I were to give it a label, I'd say we eat mostly plant-based whole foods. Basically, we eat LOTS of vegetables and we go to great efforts to eat seasonally and locally. It was very important to me that our wedding menu was reflective of that. Of course, since we were feeding a lot of non-vegans, I also wanted to make sure it tasted really, really good! 

In the last many months, I've been dreaming of publishing an eBook featuring all the recipes from the wedding. If you follow me you'd know that I've had a really busy year full of travel, events, and a lot of business growth, and because of all that I've been pushing this off for ages. I honestly don't have a lot of time to work on an eBook, but I'm committing to it.  I hope to have it out within the next few months and I'm working with a few others to make it happen. I don't have a set-in-stone release date just yet, but I'm putting it out there so that I can't renege on my promise. 

As a token of my gratitude to those of you who've been following and rooting for me, the eBook will be FREE to newsletter subscribers. (If you haven't yet subscribed to my newsletter, you can do so HERE.) As I continue to work on the eBook, I'll be releasing a few of the recipes on my blog prior to the launch date.  Most of the recipes were developed by our wedding chef, Nancy Leclerc, or me, and some are inspired by other recipes we found online or in cookbooks (of course the latter will be credited). 

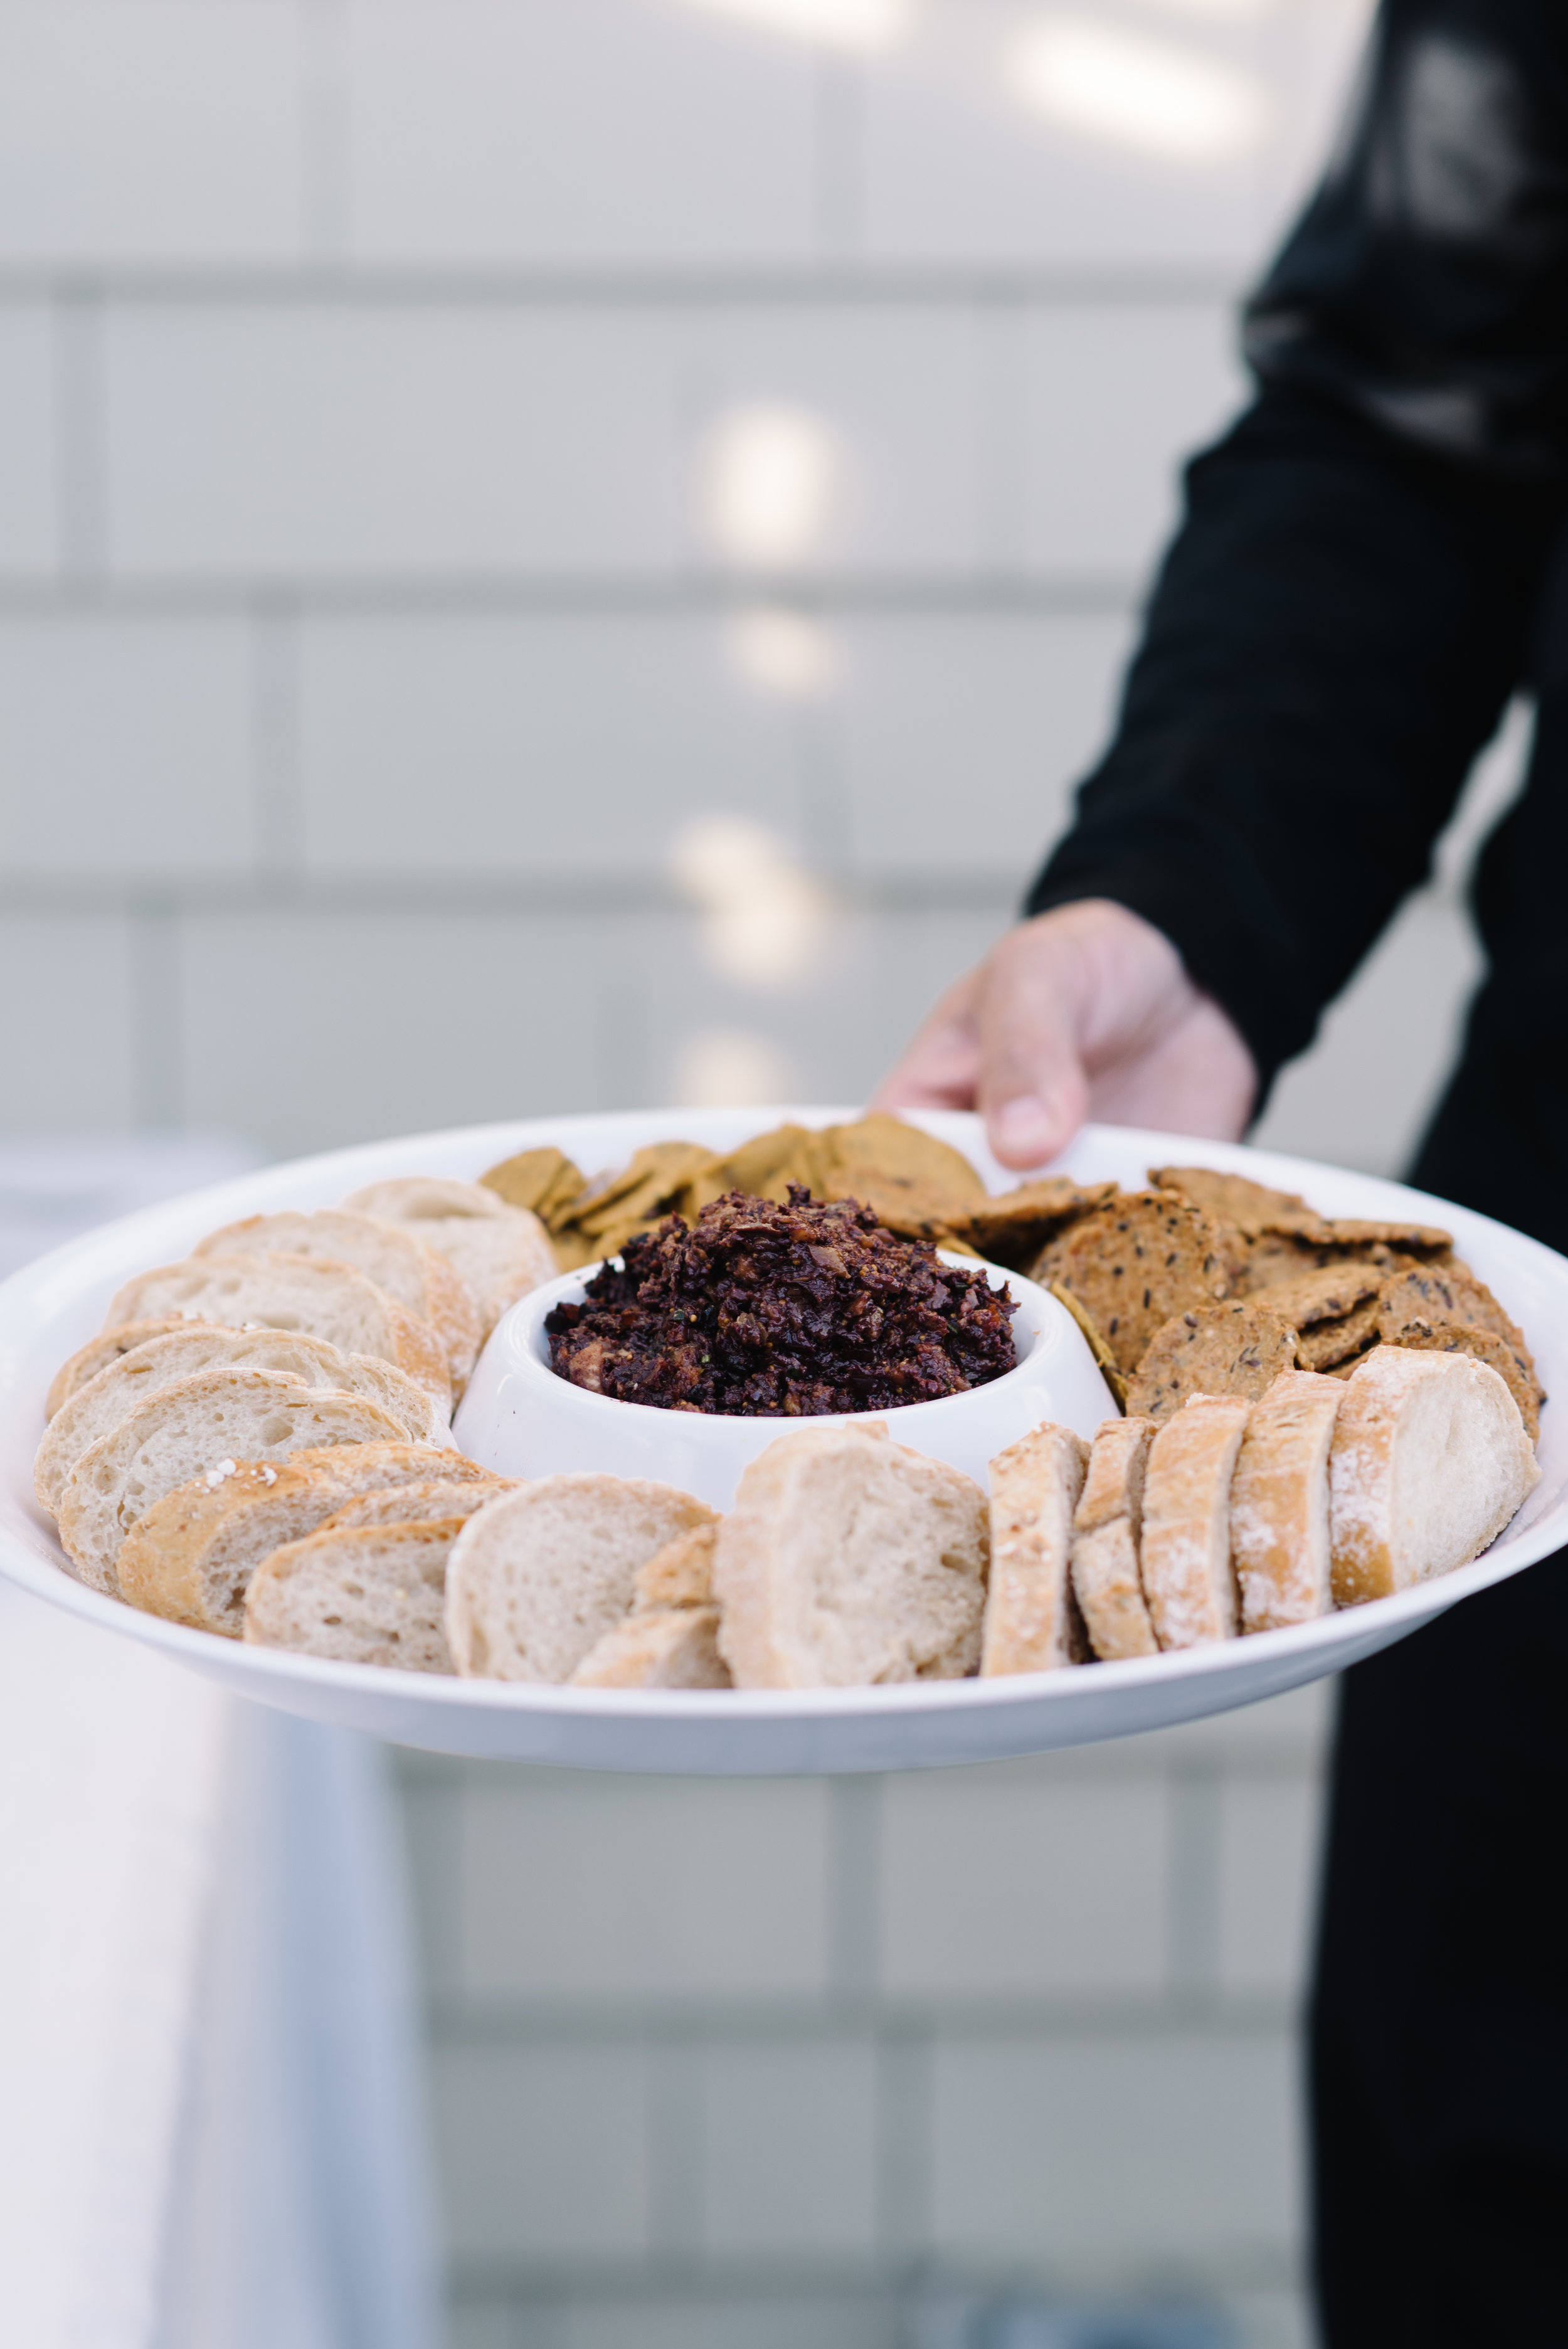
In this blog post, I'm sharing one of my absolute favourite appetizers. This fig and olive tapenade is truly a go-to for parties and pairs perfectly with cashew cheeses. Everybody (except the odd olive hater) loves it.   It's not the prettiest thing to photograph, but Anne Bouchard, our wedding photographer, managed to get a few nice snaps as you can see below. For the full recipe, please scroll down. 

FIG AND OLIVE TAPENADE

Yields about 1 1/4 cups

Ingredients:

1/2 cup dried figs (I've used either Mission Figs or Turkish Figs)
1/2 cup pitted Kalamata olives
1/2 cup pimiento-stuffed green olives
1 teaspoon fresh rosemary, minced
1 tablespoon balsamic vinegar

Directions:

Roughly chop the figs and olives. Add to food processor and pulse a few times.

Add rosemary and balsamic vinegar. Then pulse several more times, frequently scraping down the sides with a spatula, until you have a nice chunky consistency. 

Serve with crackers or a sliced sourdough baguette.  Enjoy immediately, or store in an airtight container in the refrigerator for up to 2 weeks. 

Note: if you don’t have a food processor you can chop everything by hand. 

Modified from the original recipe by Kayb featured on Food52

Perfect Quinoa Pilaf

Did you know that quinoa is not technically a grain? It's a seed (or sometimes referred to as a pseudocereal) and is grouped into the same family as spinach, swiss chard and beets.  High in antioxidants and anti-inflammatory, quinoa may be protective against cardiovascular diseases and also help lower cholesterol.  Quinoa is a complete protein source and is rich in fiber. It's also a very versatile food that can be incorporated into a wide range of recipes, and can be eaten whole or ground into flour. It's become very popular in the last few years, and for good reason!

As I mentioned, there are many ways that you can incorporate quinoa into your diet. However, in this post, I'm going to share a very simple recipe that has become very popular among my clients.  This Quinoa Pilaf recipe has been a longtime favourite as it makes the perfect side-dish for stews, soups or stir-fry and can be used as the base for salads. Lately it's been on high rotation as part of my Buddha Bowls.

I'll admit that even as a trained chef, I've had my fair share of trouble with quinoa. When cooking it, I used to cross my fingers that it wouldn't end up too soggy and that it would fluff up nicely.  In this recipe, you'll lightly cook onion and garlic in oil to create a nice base of flavour, and then you'll quickly "toast" the quinoa before adding any liquid.  The process of toasting, combined with the right balance of liquid to quinoa ratio, will result in a light and airy dish with a hint of nuttiness. 

Also, you'll notice I mentioned "rinsing" the quinoa. Many chefs will suggest doing this as the outer shell of the quinoa is coated in sapponins. These bitter-tasting sapponins area actually healthful phytonutrients but they can result in a less palatable final product if they are not rinsed off. I recommend rinsing your quinoa off in a fine mesh strainer under cold water for a few minutes.  That said, the processing and cooking of quinoa often removes a great deal of the sapponins so this isn't mandatory, just a personal preference. 

Now, without further ado, please scroll down to find the full recipe!

QUINOA PILAF

Makes approximately 3 cups

Ingredients:

1 cup quinoa, rinsed and drained
2 tablespoons olive oil or coconut oil
1 small onion, minced
2 cloves garlic, minced
1.5 cups, water or low sodium organic vegetable broth
Sea salt

Directions:

Pour the olive oil into a small saucepan and warm over medium-high heat. Add the onion, garlic and a generous pinch of sea salt, and sauté for a few minutes until the vegetables become translucent.

Add the quinoa and continue cooking for a few more minutes (5 minutes or so), stirring constantly to toast quinoa a bit. You should be able to smell the nutty aroma of the quinoa at this point.

Pour in the water or vegetable broth and bring to a boil. Reduce the heat to low and allow the quinoa to simmer. Cook covered until the liquid has absorbed and the quinoa has unfurled, about 15 minutes.

Remove from heat and let stand for 5 minutes. Fluff the quinoa with a fork and serve immediately.

Store in the fridge in an airtight container for up to 1 week.

The Tastiest Sweet Potato & Chickpea Curry

I recently did a lil’ catering gig for a restorative retreat at PranaShanti Yoga CentreAnne Tessier, the yogi who organized the retreat, requested that I make a comforting and warming meal for the participants. While the entire meal hit the mark and was very well received by the participants, my personal favourite recipe from that day was a sweet potato & chickpea curry that I made. The spices (particularly the ginger and red pepper flakes), combined with rich and creamy coconut milk, gives this curry a very warming and cozy feel. Not to mention that the the healthy fats, protein and fibre content keeps you full and satisfied.

This dish has been on high rotation in my house this past winter and I’m happy that I’ve finally managed to take a photo and post this recipe to my blog. I’ve served it with a mixtures of sides including sautéed garlicky green, steamed broccoli, rice and quinoa, but you can enjoy it as is.  Just a head’s up, although this dish doesn’t take take too long to prepare (besides a bit of chopping), you’ll want to allow a least 45 minutes to an hour of cooking time in the oven. The long cook time enables the sweet potatoes to soften and the flavours to merge creating a rich and flavourful dish. I personally haven’t used a slow cooker, but I’m sure it would work well too.

The full recipe is below. If you try it out, please let me know and share your feedback. I love hearing from you!

SWEET POTATO & CHICKPEA CURRY

Makes 6 to 8 servings.

Ingredients:

3 cups cooked chickpeas or 2 cans drained and rinsed
3 medium sized sweet potatoes, cut into small dice
1 red or yellow bell pepper, cut into small dice
1 Tablespoon coconut oil
2 medium sized red onions, cut into thin slices
1 Tablespoon mild curry powder
1 teaspoon mustard seed
1 teaspoon cinnamon
1 teaspoon turmeric
1 teaspoon cumin
1/2 teaspoon red chili flakes
1 Tablespoon finely grated or minced fresh ginger or 1 teaspoon dried ginger
3 tomatoes, roughly chopped
1 400 ml can full fat coconut milk
1 Tablespoon maple syrup, optional
Salt and pepper to taste
Micro greens, sprouts, chopped cilantro, or thinly sliced green onions, for garnish, optional

Instructions:

Preheat the oven to 400F.  Place the chickpeas, chopped sweet potatoes and bell pepper in a large baking dish.

Warm coconut oil in a medium sized saucepan or skillet. Add the sliced onions and a big pinch of salt. Sauté and stir the onions until they begin to soften and become translucent.  Add a little bit of water if they start to stick to the pan.

Add the spices, mix well, and cook for a minute. Stir in the coconut milk, tomatoes, maple syrup (if using), salt and pepper. Allow the mixture to simmer for about 5 minutes.

Pour the coconut milk mixture over the chickpeas, sweet potato and peppers, and then pop the baking dish in the oven. Bake for about 45 to 60 minutes, or until the sweet potatoes are nice and soft. Once you remove the baking dish from the oven, taste for salt and pepper and adjust the seasoning according to your preference.  Serve immediate with a garnish and a side dish of your choice.

This recipe is inspired by The Buddhist Chef's butternut squash curry recipe.

Chocolate Chia Pudding & Raw Brownie Bites

If you follow me on Facebook, Twitter, or Instagram, you may have noticed that I've been partnering up with Kardish Health Food Centre quite a bit lately.  Kardish is an Ottawa-based, family-run health food and natural products store with 9 locations across the city. I know many of the staff, the owners, and I've been to almost all of their stores and I couldn't have been more excited when Kardish's Director of Communications approached me to be its first nutrition ambassador. I'm so pleased to take on this role with such a fantastic local company.  This means I'll be doing lots of events and nutrition talks with Kardish in the coming year! Be sure to visit my events page regularly or sign-up for my newsletter to stay in the loop!

Recently Kardish created a Chocolate Guide (right on time for Valentine's Day!) and included a couple of my recipes. Both recipes are chocolate based, super easy to make and healthy too. The Guide also includes interesting chocolate facts, the health benefits of chocolate and also the best brands to buy.  CLICK HERE to access the guide. You can also scroll down to see the two recipe I provided. Please comment below or send me a message if you try any of the recipes. I always love getting feedback!

Kardish Chocolate Guide - Amy .png

Slow Cooker Vegetable, Farro & White Bean Stew

The photo of the stew below might look familiar to you. If you've been to my website before you've probably seen it. It's one of the beautiful photos taken by my friend Caroline of CY-iwander that now resides on my homepage. It was taken a couple of years ago when we did a little photo shoot together.  I figured it was finally time to share this fantastic recipe on my blog!

It's perfect for these cold days. It's hearty and warming, with a nice complexity of flavour. This is a slow cooker recipe and, although may seem fancy based on the ingredient list, it's quite easy to make!  I wish I could take credit for this delicious creation, but I can't. It was actual developed by restaurateur and chef, Grant Achatz. I have made a few adjustments and omissions to his original recipe to make it more "user friendly" and have also added some white beans for extra protein and satiety. 

You'll see that there are a few not-so-standard- yet readily available - ingredients that you may have seen at the grocery store, but have never incorporated into your cooking.  Farro is one of them.  It's an ancient grain that has been making a bit of a comeback in recent years. It's an excellent source of protein, fiber and nutrients like magnesium and iron.  It has a chewy texture and mild taste. While it does contain gluten, it has lower amounts than wheat.  If you've been wanting to try it out, this recipe will not disappoint!  You should be able to find farro at most larger grocery stores (among the grains or in the health food section), health food stores, or Middle Eastern grocers.  You may not have tried cooking with fennel, figs, or artichokes before either, but this recipe will give you the opportunity to do so!

VEGETABLE, FARRO & WHITE BEAN STEW

Makes 8 servings.

Ingredients:

  • 2 rosemary sprigs or 1/2 teaspoon dried rosemary

  • 5 oregano sprigs or 1 teaspoon dried oregano

  • 5 thyme sprigs or 1 teaspoon thyme

  • 1 teaspoon crushed red pepper flakes

  • 2 teaspoons sea salt, plus more for seasoning

  • 2 small artichokes or 14 oz can of water packed artichokes, drained

  • 1 cup farro

  • 1 14 oz can, white kidney beans, drained and rinsed

  • 1/4 cup extra-virgin olive oil

  • 1 1/2 cups tomato juice

  • 1/2 cup water

  • 2 heads of garlic, 1/4 inch cut off the tops

  • 1 lemon, sliced 1/8 inch thick

  • 1/2 red bell pepper, sliced 1/3 inch thick

  • 1/2 yellow bell pepper, sliced 1/3 inch thick

  • 1 medium onion, quartered

  • 1 large Japanese eggplant, cut into 6 wedges

  • 1 cup dried Black Mission figs or dried figs of your choice (5 ounces), stemmed

  • 1/2 cup golden raisins

  • 1 fennel bulb, trimmed and cut into 6 wedges

  • 1/2 pound large cherry tomatoes, halved

  • 1 large zucchini, cut into 2-inch pieces

  • 1 bunch of kale, stems removed, roughly chopped into bite-sized pieces

  • 1 bunch green onions, thinly sliced, for garnish

Directions:

If using fresh herbs: tie the rosemary, oregano and thyme sprigs into a bundle using kitchen twine. If using fresh artichoke: use a serrated knife to cut off the top third of the artichokes. Snap off the small leaves from around the artichoke stem. Cut the artichokes in half lengthwise. With a spoon, scrape out the hairy chokes and discard them.

Turn your slow cooker to high and set the timer for 6 hours. Starting at the crushed red pepper flakes, add all of the ingredient up to and including the cherry tomatoes. Then add the herb bundle or the dried herbs. Spread the ingredients in even layers. Cover the slow cooker and cook for 4 hours.

Stir the stew gently and add the zucchini ensuring to submerge them in the liquid. Cover and cook for 2 hours longer. 

About 10 minutes before serving, stir in the kale to allow it to wilt and soften.  Discard the herb bundle (if you were using it) and season the stew with salt. Serve immediately garnished with green onions.

Grant Achatz's original recipe can be found on Food & Wine.
 

Chickpea Crostini Melts with Aquafaba Aioli

This recipe was a long time in the making and I’m so happy that I waited until now to post it as series of serendipitous events has led me to create this fantastic Chickpea Melt recipe. If you if don't want to hear the story, scroll down to the bottom for the recipe (I won’t take offense, I promise). However, for those of you interested in how this recipe came to be, allow me to explain…

About 3 years ago I was at Pressed, a café here in Ottawa, and tried their chickpea salad sandwich. I don't think it's on the menu anymore, but at the time, the owner Jeff was kind enough to share the recipe with me. Since then, I’ve made the recipe countless times for myself, for friends or for yoga retreats, and over the years I’ve refined it to my liking.

Flash forward to a few weeks ago, I attended a wine and cheese party out in Alexandria, Ontario at the Zengarry HQ.  While there, I was speaking with Lynda, the owner and founder, and mentioned to her that I'd love to make a healthy appetizer for the holiday featuring chickpea salad and one of her cheeses. She happily obliged and handed over a round of her cashew-based Gruyère. 

At the Zengarry event also I met local vegan pastry chef, Kate of Kitty Kate Confections, and was super impressed by her beautiful and delicious macarons made using aquafaba. For those of you who haven't heard of aquafaba, it’s basically just chickpea brine.  Yep, the liquid from chickpeas that you usually pour down the drain! Turns out somebody came up with the genius idea of using chickpea brine as an egg replacer and it actually works. In fact, it works so well that vegan chefs and non-vegan chefs alike have begun using it as an egg substitute for making meringues, frothy egg whites on top of drinks (like pisco sour), in cakes and other baked goods, mayo and so on. I’ve observed the magic of aquafaba in the past since my mom has been experimenting with it and has had a lot of success, but I was never really interested in it (not sure why), until recently!

A few days ago at Loblaws cooking lesson, inspired by my mom and Kitty Kate Confections, I tried making aquafaba meringue (I followed this recipe). It’s almost unbelievable that chickpea brine, with a bit of cream of tartar, sugar, and vanilla could whip up so beautifully fluffy in a stand blender creating peaks (just like egg whites) and holding its shape and texture (likely better than egg whites).  Everybody in attendance was wowed by this incredible mock meringue and I was further inspired to play around with aquafaba.

A few days ago a light bulb went off. Since I was already planing to make chickpea salad melts for my blog, why not make aquafaba mayo to go along with it? I found several recipes online. I tried one, and it failed horribly. It was too runny, too yellow looking, and way too salty (it was not a lost cause though; I have since been reformatted into salad dressing). Then, I had a look at the Oh She Glows recipe, and it was a good starting point. However, I ended up altering it to make an aioli (garlic mayo) and I was so pleased with the results.

All of that to say, getting to this point was a process of sharing, learning, research, trial and error, and I hope you enjoy this yummy holiday appetizer.  If you’re reading this and it's not the Holidays, or if you aren’t in need of an appetizer, that’s okay. The Chickpea Salad recipe goes beautifully in sandwiches or wraps, on a bed of leafy greens, or even eaten as a dip with crackers. 

If you want more information on aquafaba check out the Aquafaba Hits and Misses Facebook page. It's mecca for aquafaba aficionados.  Or simply scroll down for the full step-by-step recipe. I hope you enjoy it!

CHICKPEA CROSTINI MELTS WITH ZENGARRY GRUYÈRE

Chickpea Salad:

Yields just under 5 cups.

  • 2 15 oz. cans of chickpeas or 3 cups cooked chickpeas, drained and rinsed (reserve 3 Tablespoons of the brine for Aquafaba Aioli)

  • 2/3 cup homemade Aquafaba Aioli (see below) or store bought vegan mayo

  • 2/3 cup celery (about 1 or 2 ribs of celery), minced

  • 1 bunch green onions (approximately 8), chopped

  • 1/3 cup minced dill pickle

  • 2 tablespoon nutritional yeast, optional

  • 2 tablespoon tamari, soy sauce or coconut aminos

  • 1 heaping tablespoon kelp or dulse powder

  • Freshly ground black pepper, to taste

  • 1 large handful, fresh dill, roughly chopped, divided (some for the salad + some for garnish)

Directions:

In a medium bowl, mash the chickpeas coarsely with a fork or potato masher. Mix in the remaining ingredients (except the dill). Once evenly combined, sprinkle in the dill and mix again. Transfer to a large airtight container. This may be stored in the fridge for up to 1 week.

Note: if you’re using store bought mayo and not the aquafaba aioli, you’ll want to add 1 small clove of minced garlic to the mix.

Aquafaba Aioli:

Yields approximately 1 cup

  • 3 tablespoons aquafaba (chickpea brine from canned or homemade chickpeas)

  • 1 teaspoon lemon juice

  • 1/2 teaspoon apple cider vinegar

  • 1/4 teaspoon sea salt

  • 3/4 cup grape seed oil (or other neutral oil)

  • 1 small clove of garlic, minced

Directions:

To make the aioli, you’ll need an immersion blender, or a blender with a narrow container.   If using an immersion blender, you’ll also need a large jar or a deep container/mixing jug that’s big enough to fit your immersion blender.  I personally used immersion blender and 5 cup mixing jug.

To begin, add the aquafaba, lemon juice, apple cider vinegar, and sea salt to the container or jug. Blitz these ingredients for a few seconds until you start seeing a bit of froth. Once your mixture is frothing, start pouring in the oil. Drizzle in the oil, very slowly, as you continue to blitz the mixture, allowing the oil to emulsify.

Within a minute, the mixture should begin to change colour and texture, very similar to that of mayo. Once you’ve added almost all the oil, add in the minced garlic and continue to process to ensure that the garlic mixes in nicely.  You’ll want to reserve 2/3 cups of your Chickpea Aioli for the Chickpea Salad, and transfer the rest to a container and store it refrigerator for up to 1 week.

To Assemble Your Chickpea Crostini Melts:

Ingredients: 

  • 1 baguette of your choice, cut into 1/4 inch slices (I used an organic sourdough)

  • 1 round of frozen Zengarry Gruyère

  • Chickpea Salad

Directions:

Set your oven to broil.  As it’s heating up, grab a baking sheet.  Place several baguette slices on to your baking sheet, then spread 1 heaping tablespoon of Chickpea Salad on to the sliced baguette.   Next, grate about a quarter of your frozen Zengarry Gruyère (grate more later, if needed). I prefer the larger grater setting on a box grater,  but you could also use micro-plane or small grater.  Use about 1/2 teaspoon of the grated Gruyère to top of each baguette.  Then put the baking tray in to the oven and broil for 4 to 5 minutes, watching closely to not overcook or burn your baguettes.

Once the baguettes are nicely crisp, and the Gruyère has melted and is slightly bronzed, remove the baking sheet from the oven. Garnish your Chickpea Crostini Melts with a bit of fresh dill and serve immediately.

Note: You may want to do this in small batches (about 8 to 10 baguettes at a time) so that you can serve and enjoy warm Chickpea Melts strait from the oven.   Use as much or as little of the Chickpea Salad and Gruyère as you need based on the number of people you’re serving. Any leftovers can be enjoyed later on for meals or snacks.
Roasted Acorn Squash & Apple Soup

I'm sure you've noticed that winter squash is abundant these days at both grocery stores and farmers' market. As we begin to bid farewell to Fall, I'd say it's time to start compiling warming recipes and making soups and stews. 

The soup recipe below is inspired by the Minimalist Baker's simple pumpkin soup, but I've changed things up a bit by adding roasted acorn squash, apple, onion and garlic, rather than pumpkin puree. The changes gives the soup a nice depth of flavour and also subtle natural sweetness from the roasted veggies and apples. In the Minimalist Baker's recipe, she also includes a kale "topping" for the soup. I loved this idea and have come up with a variation in my recipe as well. It's optional, but definitely recommended as it adds a nice pop of colour, flavour, and texture to the dish. 

I love cooking with winter squash. Many people write squash off because it's thought to be too starchy, but surprisingly it has a whole lot of nutritional value. In the case of acorn squash, it's a great source of beta carotene (the precursor to vitamin A) and vitamin C.  It's also rich in fiber. So yes, this is a healthy soup, but it's easy to make and delicious. The combination of roasted vegetables, apples, coconut milk and spices, paired with the bitter and garlickly kale topper, gives this soup complex and rich flavour.  Try it out and let me know what you think.

ROASTED ACORN SQUASH & APPLE SOUP + KALE & HEMP TOPPER

Makes 4 servings

Soup Ingredients:

Extra virgin olive oil
2 acorn squashes
2 small yellow onions, peeled and cut in large dice
3 cloves garlic, peeled
2 apples, peeled, cored and cut into bit sized pieces
2 cups low sodium organic vegetable broth
1 cup full fat coconut milk
1/4 teaspoon each sea salt, black pepper, cinnamon, nutmeg

Kale & Hemp Topper ingredients (optional):

1 bunch of kale, stems removed, ripped or chopped into bite sized pieces
3 cloves garlic, minced
1 tablespoon extra virgin olive oil
A few pinches of salt

Directions:

Preheat oven to 400 F and line 1 or 2 baking sheets with parchment paper. Using a sharp knife cut the acorn squashes in half. Use a spoon to scrape out all of the seeds and strings (reserve the seeds if you plan on roasting them later). 

Rub a bit of olive oil on to the flesh of the squash and place face down (skin side up) on the baking sheet. Place the onions, apples, and garlic on a baking sheet as well and drizzle them with a bit of olive oil. Bake for 40 minutes or until a fork easily pierces the skin of the acorn squash.

Remove the baking trays from the oven. Once the squash has cooled enough to handle, scrape out the flesh (it should be soft and easy to remove) and transfer it to a bowl. Discard the skin.  [*If you have a Vitamix or other high powered blender, scroll down for alternate instructions] Then add the squash, apples, onions, and garlic, along with all of the other soup ingredients to a sauce pan. Bring it to a simmer.

To puree the soup, you can either transfer it to a blender, food processor or use an immersion blender. If using a blender, place a towel over the top to avoid spilling. Once the soup has reached a nice, smooth consistency, pour the mixture back into pot. Continue cooking over medium-low heat for a few minutes to reheat and taste and adjust seasonings as needed. Serve immediately on its own or with Kale & Hemp topper.

Kale & Hemp Topper:

Warm the olive olive over medium heat in a small skillet. Add garlic and sauté for a few minutes until golden brown (be sure to watch the garlic closely as it will burn quickly). Add kale and toss, then add a few pinches of salt and cover to steam. Cook for another few minutes until kale is wilted and then add in the hemp hearts. Mix it up to ensure the kale is lightly coated with hemp and garlic, and set aside for topping soup.

*If you have a Vitamix or other high powered blender, you can skip a few of the aforementioned steps. After you're done roasting the squash, apples, onions and garlic, you can really simplify the process. Add the roasted squash puree, along with the roasted apples, onions and garlic, and all of the remaining soup ingredients to your Vitamix. Process the soup using a high setting - or the cooking setting - and you can blend and heat your soup at the same time.  This will only take about 6 minutes and save you the trouble of transferring the soup and will reduce the amount of dishes you have to clean.

Buddha Bowls with Tahini Dressing

I make Buddha Bowls a lot. Almost weekly. I make them for myself, for cooking demos and they are almost mandatory when I'm cooking at yoga retreats. They are always a hit! Everybody loves them. Plus, they are a great way to get rid of scraps of food that are still in the fridge.

The best thing about Buddha Bowls is that you can cater yours to your liking. There really is no set in stone recipe. However, the key is definitely to have a really, really great dressing. Below, I've shared the recipe for one of my favourite dressings, but you could choose to top your bowl with whichever dressing you like.

Most recently I was cooking for a yoga retreat organized by Anne Tessier near Tremblant, Quebec.  Below is a photo of the Buddha Bowl I prepared for the yogis. It had wild rice, chickpeas, grated raw beets and carrots, avocado, thinly sliced kale, roasted delicata squash, green onions, kimchi, peashoots, black sesame seeds, and my all time favourite tahini dressing.  And yes, it's as delicious as it looks! But no, it's not complicated at all. It's just a matter of chopping up a bunch of delicious things and throwing them into a bowl, and then pouring a really decadent (yet nutritious) dressing on top. Scroll down for my Buddha Bowl "recipe".

Let's get started! Here's what you'll need to make your own Buddha Bowl...

Base ingredients:

Your choice of cooked grains (quinoa, buckwheat, millet, brown rice, wild rice, sorghum, teff or amaranth)
Your choice of protein (beans, lentils, chickpeas, edamame, tofu, tempeh, etc)

Plus any combo of veggies:

steamed or roasted sweet potato, squash, or potatoes cut into bite sized pieces
broccoli or cauliflower (cut in tiny florets), steamed, roasted or raw
finely chopped greens (kale, romaine, arugula, spinach, etc)
thinly sliced cabbage
onion or scallions
grated carrot
grated raw beets or cooked/steamed beets
cucumber, cut up into small pieces
chopped celery
sliced avocados
sauerkraut or kimchi

Plus garnish options:

sprouts or pea shoots
sunflower seeds
hemp seeds
sesame seeds
dulse or kelp flakes (or any other seaweed for that matter)
ground flax seeds

Plus a dressing of your choice OR my all time favourite tahini dressing:

1/2 cups tahini (sesame paste)
1/2 cups olive oil
1/2 cups water
1/4 cup tamari
2 tablespoons apple cider vinegar
2 tablespoons lemon juice
Small piece (half thumb size) fresh ginger root, minced
2 cloves garlic, chopped
Black pepper to taste

Directions: Blend all the ingredients in a blender until smooth. Add water to loosen if it’s too thick. Dressing will keep in the fridge for 1 week.

Finally, to assemble your Buddha Bowl:

Combine 1/4 cup cooked grains and 1/4 cup protein of your choice, along with any combination of vegetables and garnishes. Drizzle about 1/4 cup of dressing on top. Serve immediately and enjoy!

You can also batch prepare your Buddha Bowls by storing single servings in containers. Reserve your dressing and add it just before you're about to eat.

If you enjoyed the recipe I shared above be sure to check out my Plant-Based Breakthrough program, which is a crash course in plant-based health, nutrition, and meal planning. For details about the program click here. You can also join the Plant-Based Breakthrough Community on Facebook where I share recipes, inspiration, and information on plant-based nutrition.

Power Pasta Salad

This recipe is actually my mom's creation so I can't take full credit for its deliciousness. She originally devised this concoction because it was cheap, filling and it did not spoil easily on road trips. During my childhood, we used to travel a lot during the summer, across the Atlantic Provinces, for soccer tournaments and Power Pasta became a family favourite. Back then I believe my mom used store bought Italian salad dressing and probably didn't include as many greens, but she was definitely a pioneer when it came to utilizing pulses as an efficient, inexpensive source of protein and healthy carbohydrates. This pasta salad kept her sporty children happy and satiated (without breaking the bank).

As I mentioned, I've made some of my own modifications, but at the heart of this recipe it's simple, filling, and nutrient dense. It's a great meal for active kids, but also for us adults who are looking for easy make-ahead lunch or dinner ideas. 

I haven't had a chance to take a super high quality photo, but I wanted to share this recipe now as I've had many requests.  Power Pasta is gluten free and vegan and can be modified many ways to suit your palate. If you don't like some of the ingredients, omit them, and add in other vegetables or proteins of your choice. Read on for the recipe and be sure report back once you've tried it.

POWER PASTA SALAD

Makes 8-10 servings.

Ingredients:

16 oz/454 g bag brown rice or quinoa spiral or elbow noodles, cooked according to package directions
2 398 ml cans of chickpeas or beans of your choice, drained and rinsed
1 can of water packed artichokes, drained, rinsed and roughly chopped
5 cups leafy greens of your choice (I like baby kale, spinach, or arugula), washed and chopped
1 large cucumber, peeled (if not organic) and chopped into bite-sized pieces
1 pint of grape or cherry tomatoes, sliced in half
1/2 cup of pitted kalamata olives, roughly chopped (optional)
1 bunch of green onions, chopped

Dressing Ingredients:

1/2 cup red wine vinegar
3 Tablespoons lemon juice
1 Tablespoon of maple syrup
1 Tablespoon Dijon mustard
2 teaspoons, sea salt
Freshly ground black pepper
1 small clove of garlic (optional)
1 cup extra virgin olive oil

Directions:

Add all of the salad ingredients into a very large bowl and mix well to combine.

For the salad dressing: blend the vinegar, lemon juice, maple syrup, Dijon, salt, pepper, and garlic (if using) in a blender. With the machine running, gradually blend in the oil. Once the dressing is ready, slowly pour it over the pasta salad. Stir to ensure that the noodles are well coated.  Serve immediately and enjoy!

Keeps in the fridge for 3 to 4 days, if you don't eat it all first.

Notes from the kitchen: At my Loblaws demo I used Rizopia brown rice noodles and they were great!